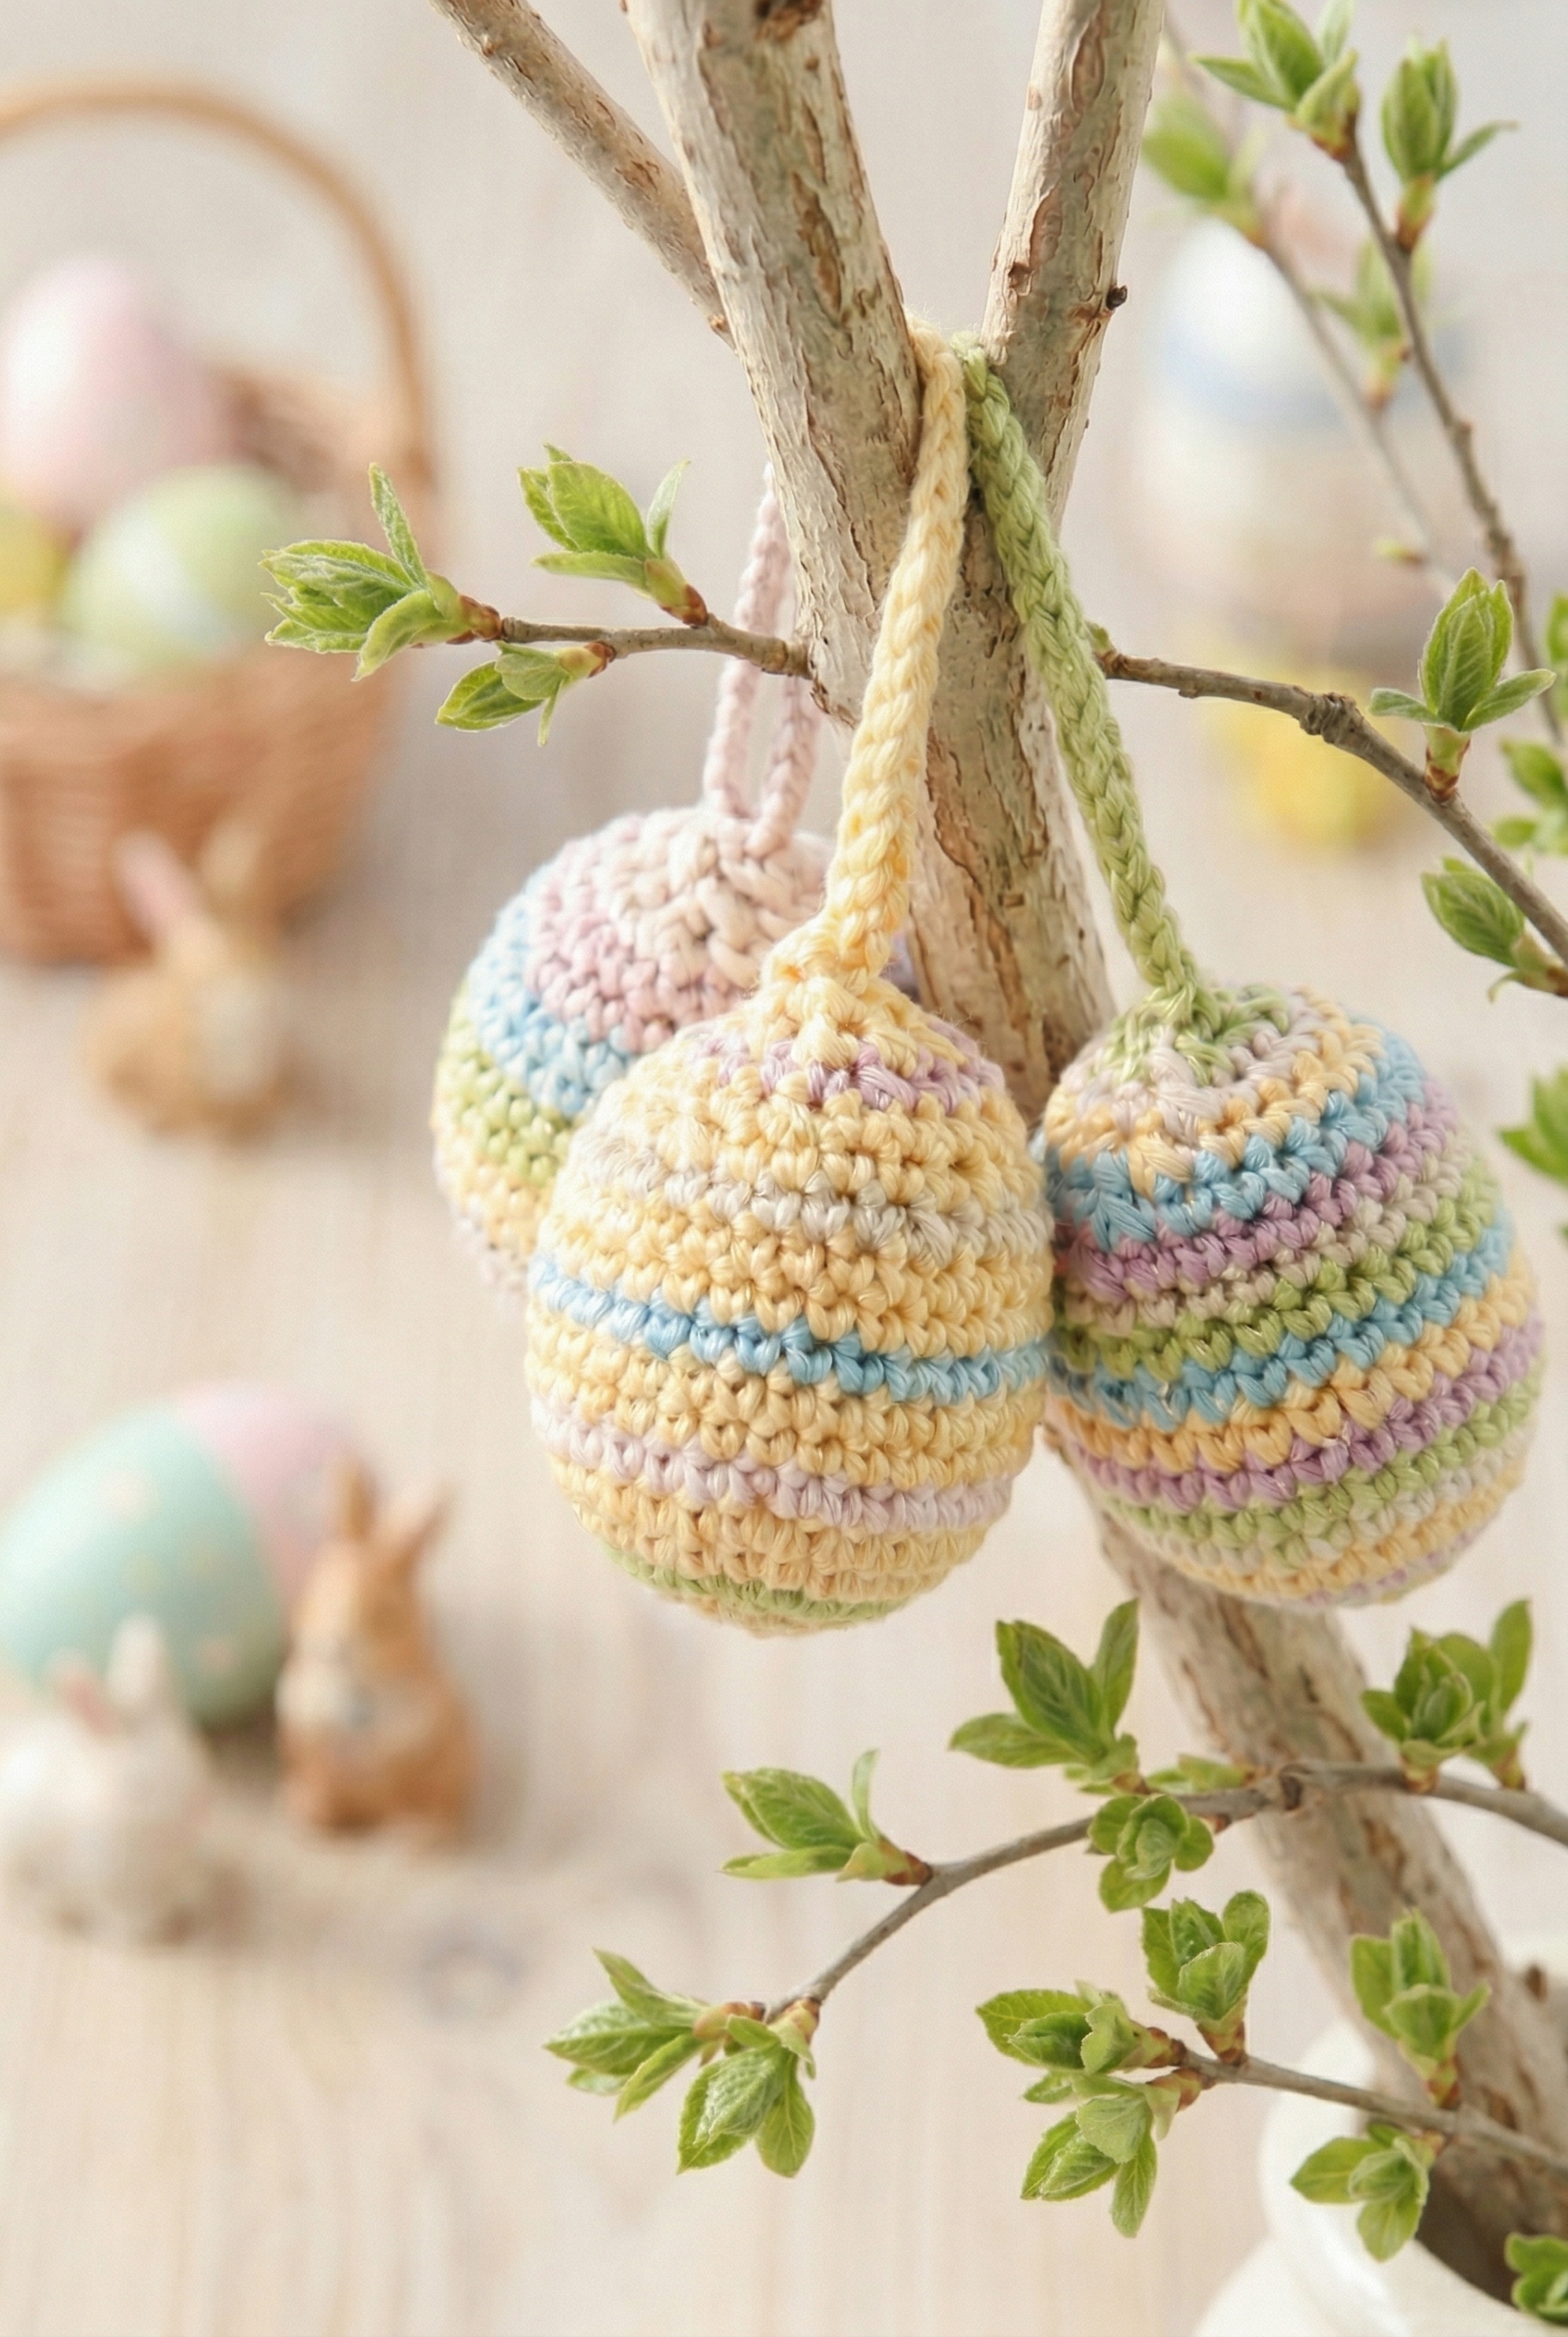
This Easter Egg Crochet Pattern gives you a sweet, striped egg ornament with a looped handle, perfect for hanging on an Easter tree, tucking into a basket display, or just adding a little handmade touch to your spring decor.

Jump to:
The Inspiration
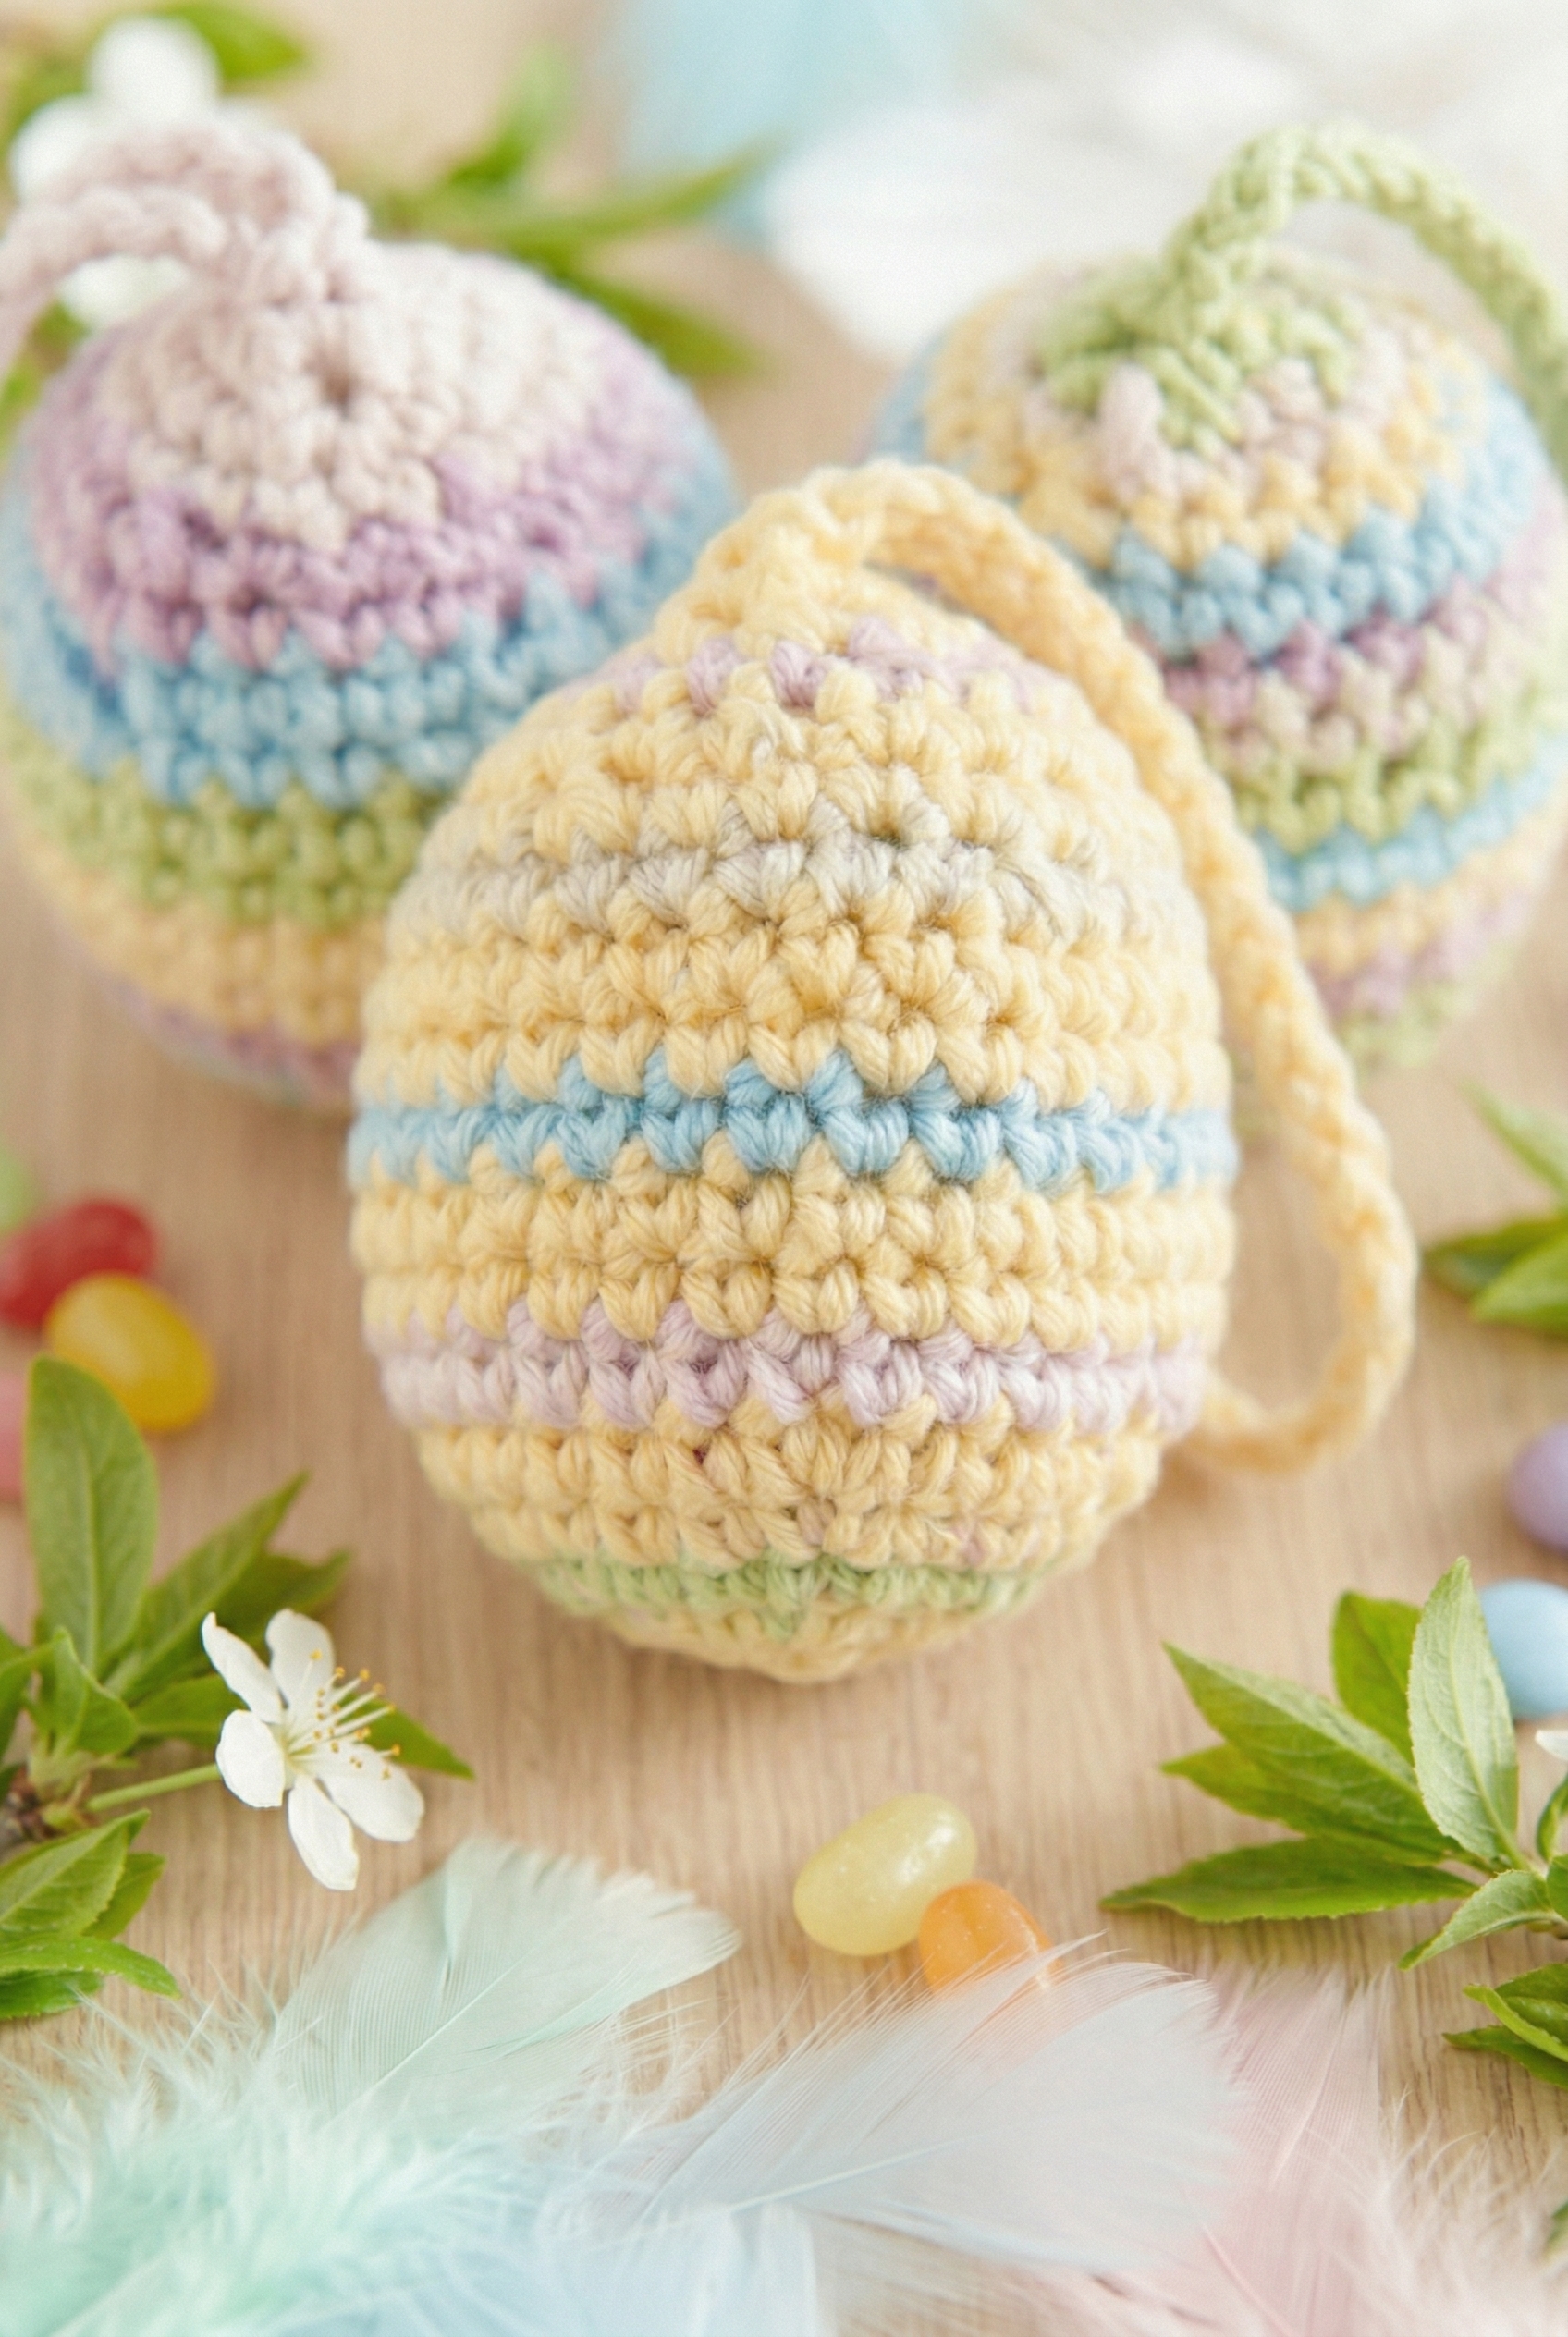
I wanted something that felt soft and a little vintage, not the bright neon Easter palette you see everywhere this time of year. So I went with a pastel stripe sequence: soft yellow as the main body, with bands of light blue, lavender, pale gray, and just a small section of green near the base. It sounds like a lot of colors but it really does come together in a calm, cohesive way, I think.
The finished piece is egg-shaped, worked in a chunky textured stitch that gives the surface some real visual interest without being complicated. There's a simple looped handle at the top so you can hang it anywhere. No face, no appliqué, nothing fussy. Just a clean little egg with good color and a nice weight to it. It sits at an easy skill level, so if you've got a few projects under your belt you'll have no trouble at all.
Crocheted Easter eggs are one of the easiest and most satisfying spring projects. Once you've made a few, try tucking them into a basket alongside my mini Easter carrots for a full handmade Easter display.
Why You'll Love This Pattern
Striped pastels and a simple shape make this egg a genuinely satisfying quick make.
- Fast to finish: The small size means you can complete one egg in a single sitting, so making several for a display is actually realistic.
- Stripe variety keeps it interesting: Switching colors across the bands breaks up the repetition and gives you something to look forward to as you work through each round.
- Ready to hang straight away: The looped handle is built right in, so there's no separate finishing step before you can put it to use.
Gather Your Supplies
The color list looks long, but you only need 50 g of each shade, so this is a genuinely good way to use up small balls sitting in your stash.
- Sport weight cotton (main yarn): For small crocheted eggs and a basket, I always reach for a fine cotton. It holds its shape without being stiff, picks up stitch definition nicely at a tighter gauge, and blocks well if you want the finished pieces to sit flat and neat. You'll want about 50 g per color, so six colors total for the eggs and basket stripes. The second yarn in this project is a fine metallic thread, and you hold two strands of it together alongside the cotton as you work. That's what gives everything a subtle shimmer. Two spools of the gold metallic should be plenty for the whole project.
- 3 mm [US C] hook: A 3 mm hook keeps the fabric tight enough that the stuffing won't show through the stitches, which matters a lot with small amigurumi-style pieces.
- Wadding, cotton wool, or similar stuffing: You'll need enough to stuff each egg as you go, before the opening closes up. Don't overstuff or the seams pull. A small bag of polyfil goes a long way here.
- Also needed: scissors, tapestry needle, stitch markers
Alternative Yarn Suggestions
The metallic thread component is the less common part of this supply list, so it's worth knowing what to look for if you're substituting. For the cotton, any sport or fine weight cotton will work. For the metallic, you want something very fine, a thread or lace weight with a metallic or cupro sheen, held double.
- Sport weight mercerized cotton: Mercerized cotton has a slight natural sheen and a smooth, consistent twist that works really well at this gauge. Look for something around 150 to 180 yards per 50 g ball. It's a solid swap and widely available.
- Fine weight bamboo-cotton blend: Bamboo blends have a soft drape and a gentle luster that plays nicely with the metallic thread. Aim for a similar yardage per gram to your main yarn so your gauge stays consistent. The texture is slightly different from pure cotton but not by any means a problem.
Color Sequence & Yarn Changes
The colors are interchangeable across the eggs and basket stripes, so there's no fixed order you have to follow. Pick whatever combination appeals to you. When you switch colors, carry the unused strand loosely up the inside of the piece rather than cutting and rejoining every time, especially on the striped sections.
Essential Info
Everything you need to know before you pick up your hook.
| Skill Level | Level 2 — Easy |
| Pattern Gauge | 22 sc x 24 rounds with 1 thread DROPS Muskat and 2 threads DROPS Glitter = 4" x 4". |
| Finished Size | Basket: Continue with sc in each sc until piece measures 6 cm [2½"] from sc/ch round. |
| Yarn Weight | 2 Fine / Sport |
| Fiber | DROPS Muskat: 100% Cotton; DROPS Glitter: 60% Cupro, 40% Polyester (metallic effect) |
| Terminology | US |
Stitches & Abbreviations
Keep this list open while you work.
- ch = chain
- sc = single crochet
- sl st = slip stitch
- st(s) = stitch(es)
- rnd(s) = round(s)
- 2 sc tog = single crochet 2 together (decrease): Insert hook in next st, yarn over, pull up a loop (2 loops on hook); insert hook in next st, yarn over, pull up a loop (3 loops on hook); yarn over, pull through all loops on hook.
Special Stitches
- Single crochet 2 together (2 sc tog): Insert hook in next st, yarn over, pull up a loop (2 loops on hook); insert hook in next st, yarn over, pull up a loop (3 loops on hook); yarn over, pull through all loops on hook.
Read Before Starting
Both the eggs and the basket are worked in the round throughout. I work with 1 thread of DROPS Muskat held together with 2 threads of DROPS Glitter for the entire project, so wind off an extra ball of Glitter before you start. Stripe sequences and color combinations are entirely your call on both pieces, so there's that creative freedom built right in.
For the basket, I replace the first sc of each round with a ch 1, then close each round with a sl st into the first sc. It keeps the edges tidy. At every color change, I carry the old thread ends along and work over them in the next round. No weaving in ends afterwards. That tip alone makes this project much faster to finish.
Crochet Instructions
Here's how I work through each piece of this Easter egg crochet pattern, starting with the egg itself and then the basket.
The Egg
The egg is worked in rounds, starting from a magic ring and closing each round with a slip stitch. I use the ch 1 at the beginning of each round as written, and join with a slip stitch as instructed. This is also where you get to have fun: crochet in stripes and color combinations of your own choice.
Round 1: Ch 3 with 1 thread Muskat and 2 threads Glitter. Form a ring with 1 sl st in 1st ch. Ch 1, 6 sc in ring, sl st in ch from beg of round. [6]
Round 2: Ch 1, 2 sc in each sc, sl st in ch from beg of round. [12]
Round 3: Ch 1, *1 sc in 1st sc, 2 sc in next sc* repeat around, sl st in ch from beg of round. [18]
Round 4: Ch 1, *1 sc in each of the first 2 sc, 2 sc in next sc* repeat around, sl st in ch from beg of round. [24]
Round 5: Ch 1, *1 sc in each of the first 3 sc, 2 sc in next sc* repeat around, sl st in ch from beg of round. [30]
Round 6: Ch 1, sc in each sc, sl st in ch from beg of round. [30]
Round 7: Ch 1, sc in each sc, sl st in ch from beg of round. [30]
Round 8: Ch 1, sc in each sc, sl st in ch from beg of round. [30]
Round 9: Ch 1, sc in each sc, sl st in ch from beg of round. [30]
Round 10: Ch 1, sc in each sc, sl st in ch from beg of round. [30]
Round 11: Ch 1, sc in each sc, sl st in ch from beg of round. [30]
Round 12: Ch 1, sc in each of the first 3 sc, *2 sc tog, sc in each of the next 6 sc* repeat 3 more times, sc in each of the last 3 sc, sl st in ch from beg of round. The decreases are distributed evenly around, so count carefully before you start this round.
Round 13: Ch 1, sc in each of the first 3 sc, *sc in each of the next 5 sc, 2 sc tog* repeat 3 more times, sc in each of the last 3 sc, sl st in ch from beg of round.
Now fill egg with wadding, cotton wool or similar.
Round 14: Ch 1, *2 sc tog, sc in each of the next 4 sc* repeat 4 more times, sl st in ch from beg of round. [20] The opening is narrowing quickly now, so get your stuffing in before this round closes things up too much.
Round 15: Ch 1, *sc in each of the next 3 sc, 2 sc tog* repeat 4 more times, sl st in ch from beg of round. [16]
Round 16: 2 sc tog around (crochet all sc tog 2 by 2). [8]
Round 17: 2 sc tog around (crochet all sc tog 2 by 2). [4]
Round 18: Sc across opening through both layers. Working through both layers here closes the top of the egg flat rather than leaving a small hole to seam.
Do not fasten off; continue to Loop.
The Hanging Loop
The loop is worked right after the egg closes, using the same thread without cutting. Don't fasten off after Round 18.
Round 19: Continue with the same thread and ch approx 30. Sl st across opening through both layers. Cut and fasten the thread. The chain length is approximate, so adjust it if you want a shorter or longer loop for hanging.
Cut and fasten the thread.
The Basket
The basket is also worked in rounds, and like the egg, you can stripe and color it however you like. For this piece, replace the first sc on each round with ch 1, and finish each round with a sl st in the first sc. Note that this section uses a 3 mm (US C) hook.
Round 1: Ch 2 with 1 thread Muskat and 2 threads Glitter and hook size 3 mm [US C]. 7 sc in 1st ch, sl st in 1st sc. [7] Starting into the second chain from the hook gives you a tighter, neater center than a magic ring would with this thread combination.
Round 2: Ch 1, 2 sc in each sc, sl st in 1st sc. [16] You'll notice this gives you 16 rather than 14. The starting ch 1 accounts for the first stitch, so the count works out correctly.
Round 3: Ch 1, *1 sc in first sc, 2 sc in next sc* repeat around, sl st in 1st sc. [24]
Round 4: Ch 1, sc in each sc, sl st in 1st sc. [24]
Round 5: Ch 1, *1 sc in the first 2 sc, 2 sc in next sc* repeat around, sl st in 1st sc. [32]
Round 6: Ch 1, sc in each sc, sl st in 1st sc. [32]
Round 7: Ch 1, *1 sc in the first 3 sc, 2 sc in next sc* repeat around, sl st in 1st sc. [40]
Round 8: Round 8-12: Continue increasing 8 sts on every round with 1 additional sc between each increase until there are a total of 12 rounds. [80] Each round you add one more plain sc before the increase stitch. So Round 8 has 4 sc before each increase, Round 9 has 5, and so on through Round 12. Keep track of which round you're on so the increases stay aligned.
Round 9: Round 13: *Ch 1, skip 1 sc, sc in next sc* repeat around. This eyelet round creates the decorative open mesh that runs around the basket. The ch 1 and skip pair replaces what would be 2 sc, so your stitch count stays the same.
Round 10: Round 14: *Sc in ch, sc in next sc* repeat around. Working a sc into each chain space closes the eyelets back up and restores your full stitch count for the rounds that follow.
Round 11: Next rounds: Continue with sc in each sc until piece measures 6 cm [2½"] from sc/ch round. Measure from the eyelet round, not from the base. This is the straight-sided wall of the basket.
Round 12: Last round: *Ch 1, skip 1 sc, sc in next sc* repeat around. Cut and fasten the thread. This second eyelet round finishes the top edge of the basket with the same open detail as the one lower down.
Cut and fasten the thread.
Finishing & Assembly
The egg and basket are worked as completely separate pieces, so there's no seaming or joining between them. Once both are done, I just weave in any remaining ends. If you carried your color-change ends as you worked, there won't be many. Any that are left I weave in with a tapestry needle, running the tail through several stitches in different directions so it stays put. The Glitter thread can be a little slippery, so I take an extra pass or two with those ends specifically.
If you love the egg shape, you'll enjoy this bunny Easter egg crochet pattern — it takes the basic egg and adds adorable bunny ears and a face.
Frequently Asked Questions
What yarn weight works best for these Easter eggs?
I use a fine weight (sport weight) yarn with a 3 mm hook, and that gives the eggs a nice firm fabric that holds its shape well once stuffed. A heavier yarn will make the eggs come out larger and the stitches looser, so I'd stick with the recommended weight if you want the size to stay consistent.
How firmly should I stuff the eggs?
I stuff mine pretty firmly. If you go too light, the egg loses that rounded egg shape and starts looking a bit deflated. Pack the stuffing in as you go rather than all at once at the end, it's much easier to get an even shape that way.
Is this pattern suitable for a beginner?
It's listed as Level 2 Easy, so you do need to know the basics: chain, slip stitch, single crochet, increases, and decreases. If you've finished at least one small project before, you'll be fine. Complete beginners might find the shaping rounds a little confusing at first.
Can I use leftover yarn scraps for this project?
These eggs are actually a great stash buster. Because the yarn weight is sport weight, you don't need much per egg, so small amounts left over from other projects work perfectly. Just make sure whatever scraps you're using are close to the same weight so the tension stays consistent across the egg.
What hook size do I need?
A 3 mm hook, which is a US C size. I'd avoid going up a hook size even if your tension feels tight, because a tighter fabric is actually what you want here so the stuffing doesn't show through the stitches.
Before You Go
I'd love to see how your Easter eggs turn out, especially if you get creative with the color combinations. Tag me on Instagram or drop a photo in the comments below. And if you're saving ideas for next spring already (no judgment, I do it too), this one is worth pinning so you can find it again when the time comes.
🥚 Build a full Easter set! This egg looks adorable alongside the Baby Chick, Easter Bunny, and Mini Easter Carrots for a complete spring basket display.


Emily says
Absolutely love this pattern! It’s super easy to follow and the final result turned out so cute. I made a few in different colors and they look amazing as Easter decorations. Thank you for sharing this free pattern!