
Baby shower season hit and I needed something small, quick, and genuinely cute to bring as a gift, and that's exactly how this Baby Sandals Crochet Pattern came to be one of my go-to makes. It's a beginner-friendly project that works up faster than you'd expect, and honestly, tiny baby shoes never stop being adorable no matter how many pairs you make.

Jump to:
About the Design
What I really like about this one is that it feels like a complete little project. There's the sole, the upper, and then a sweet flower applique that ties the whole thing together. Each piece has a purpose, and working through them in order actually makes a lot of sense once you get going. It's the kind of pattern where you finish and feel like you actually made something, not just assembled a few rows.
I'd make these for any new baby in my life, honestly. They work for a shower gift, a newborn photo session, a holiday outfit, pretty much any occasion where you want to hand someone something handmade that looks like you put real thought into it.
Why You'll Love This Pattern
These little sandals are a beginner-friendly make that actually looks impressive as a finished gift.
- True Beginner Level: No complicated stitches here, so if you're still building confidence this is a pretty solid project to tackle.
- Quick Gift Option: The small size means you can finish a pair in one sitting, which is no trouble at all when a baby shower is coming up fast.
- Built-In Embellishment: The flower applique is included right in the pattern, so the finishing detail is already figured out for you.
- Great Stash Buster: Tiny project means tiny yarn usage, which makes this a really good way to use up small amounts of yarn you already have.
- Gifting Appeal: Handmade baby shoes land well as gifts because they feel special and personal without requiring a huge time commitment.
Your Supply List
Two colors, one hook, and probably less yarn than you think — these are tiny baby sandals, after all.
- DK Weight Acrylic Yarn in Cream and Salmon Pink: DK weight acrylic is a solid call for baby items like this. It holds its shape well through all those small rounds and strap sections, and it's easy to wash, which matters a lot for anything going on a baby. Since yardage isn't specified in the pattern, a rough estimate for a 3–6 month sized sandal pair puts you somewhere around 50–80 yards total across both colors, with cream being the heavier hitter and salmon pink used in smaller amounts for the accent rounds and straps.
- G/6 (4.0 mm) Crochet Hook: This size pairs well with DK weight acrylic and keeps the fabric firm enough that the sandal holds its structure without being stiff or uncomfortable.
- Also needed: yarn needle, scissors
Color Sequence & Yarn Changes
The color changes here are pretty deliberate, so it's worth reading through the color usage before you start. Cream carries most of the work across the sandal base and main strap rounds, with salmon pink coming in at specific rounds for the accent edges, strap bases, and the appliqué flower. Keeping both colors loosely at the ready rather than cutting and rejoining every time will save you a fair amount of weaving in later.
Quick Details
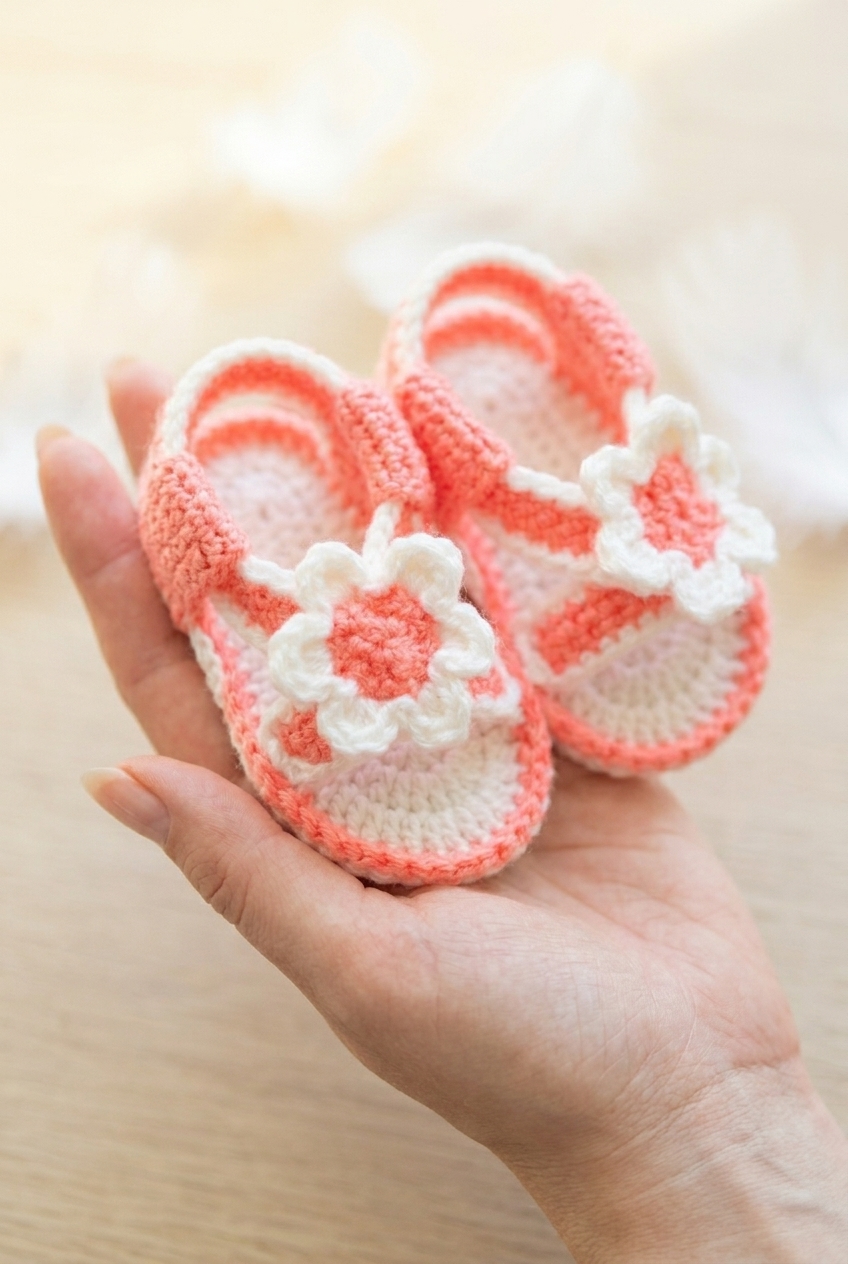
These little baby sandals work up fast and fit the 3–6 month stage nicely.
| Skill Level | Beginner |
| Pattern Gauge | First 15 chains should measure approximately 2" in length. |
| Finished Size | Finished sandal measures 4" |
| Yarn Weight | 3 Light / DK |
| Fiber | Acrylic |
| Terminology | US |
Stitch Guide & Abbreviations
Standard stitches throughout, nothing unusual here.
- C = Cream
- P = Salmon Pink
- ch = chain
- ch sp = chain space
- sl st = slip stitch
- sc = single crochet
- hdc = half double crochet
- dc = double crochet
- tr = treble crochet
- sc2tog = single crochet 2 stitches together (insert hook in next st, yarn over, pull up a loop; insert hook in next st, yarn over, pull up a loop; yarn over, pull through all loops on hook)
- magic circle = adjustable ring (wrap yarn to form a ring, work stitches into ring, pull tail to tighten)
Important Notes
This pattern is written for the 3–6 month size using US terminology throughout. Before you start, check your gauge: your first 15 chains should measure about 2" long. It's a quick check and worth doing, especially since the finished sandal is only 4" and a small difference in tension will show up fast at this scale.
The pattern uses two colors: Cream (C) and Salmon Pink (P). DK weight acrylic works well here. The samples were made with King Cole Baby Comfort in shade 585 for the cream and King Cole Dollymix in shade 174 for the pink, but any DK acrylic in similar shades will do the job. You'll need a G/6 (4.0 mm) hook and a yarn needle for finishing.
How to Make the Baby Sandals Crochet Pattern
Follow each section in order and you'll have a complete pair of baby sandals with straps and flower appliqués.
Left Foot Sandal
This is the sole and base of the left sandal, built outward from a foundation chain. The shaping in the later rounds creates the toe and heel curves, so keep your tension consistent as the stitch count climbs.
First Step: Using C, ch 15.
Round 1: Sc in 2nd ch from hook and in each ch across. [14 sc]
Round 2: Turn work clockwise, sc in each foundation ch st around. [28 sc total from Rounds 1 & 2] You're working into the underside of the starting chain here, which closes the oval shape of the sole.
Round 3: 2 sc in next st, sc in next 12 sts, 2 sc in next st, 2 sc in next st, sc in next 12 sts, 2 sc in next st. [32 sc]
Round 4: Sc in next st, 2 sc in next st, sc in next 13 sts, 2 sc in next st, sc in next st, 2 sc in next st, sc in next 13 sts, 2 sc in next st. [36 sc]
Round 5: Sc in next 2 sts, 2 sc in next st, sc in next 14 sts, 2 sc in next st, sc in next 2 sts, 2 sc in next st, sc in next 14 sts, 2 sc in next st. [40 sc]
Round 6: Sc in next 3 sts, 2 sc in next st, sc in next 15 sts, 2 sc in next st, sc in next 3 sts, 2 sc in next st, sc in next 15 sts, 2 sc in next st. [44 sc]
Round 7: Sc in next 4 sts, 2 sc in next st, sc in next 16 sts, 2 sc in next st, sc in next 4 sts, 2 sc in next st, sc in next 16 sts, 2 sc in next st. [48 sc]
Round 8: Sc in next 5 sts, 2 sc in next st, sc in next 17 sts, 2 sc in next st, sc in next 5 sts, 2 sc in next st, sc in next 17 sts, 2 sc in next st. [52 sc]
Round 9: Sc in next 6 sts, 2 sc in next st, sc in next 5 sts, sl st in next 5 sts, sc in next 2 sts, hdc in next 2 sts, dc in next 4 sts, 2 dc in next st, dc in next 3 sts, hdc in next 2 sts, sc in next st, 2 sc in next st, sc in next 8 sts, sl st in next 5 sts, sc in next 5 sts, 2 sc in next st. [56 sts] The mix of slip stitches, hdcs, and dcs here is doing the shaping work — the taller stitches build up the toe area while the slip stitches flatten the sides. Keep track of where you are in the sequence; it's worth counting halfway through.
Round 10: Join P, sc in next 7 sts, 2 sc in next st, sc in next 5 sts, sl st in next 5 ch sps, sc in next 9 sts, 2 sc in next st, sc in next 7 sts, 2 sc in next st, sc in next 5 sts, sl st in next 5 ch sps, sc in next 9 sts, 2 sc in next st, sc along until color meets up and finish with a sl st. Fasten off and tie in tails. [60+ sts] This is where you switch to color P — join it at the start of the round and carry on. The "sc along until color meets up" at the end just means you work the remaining stitches until you've come full circle back to where P began.
Right Foot Sandal
Rounds 1–8 of the right sandal are identical to the left, so you can work straight through those without any changes. The difference comes in Round 9, where the toe shaping is mirrored to the opposite side.
First Step: Using C, ch 15.
Round 9: Sc in next 6 sts, 2 sc in next st, sc in next 5 sts, sl st in next 5 sts, sc in next 8 sts, 2 sc in next st, sc in next st, hdc in next 2 sts, dc in next 3 sts, 2 dc in next st, dc in next 4 sts, hdc in next 2 sts, sc in next 2 sts, sl st in next 5 sts, sc in next 5 sts, 2 sc in next st. [56 sts] Compare this to the left sandal's Round 9 and you'll see the taller stitches have shifted to the other side of the oval — that's what makes it a true right foot.
Round 10: Same as Left Foot Round 10. [60+ sts]
Front Foot Strap
Make 2. These short straps sit across the front of each sandal and will later anchor the large strap in place. They're worked the same way as the sole: one pass along the chain, then back along the underside to create a flat oval.
First Step: Using P, ch 15.
Round 1: Sc in 2nd ch from hook and in each ch across. [14 sc]
Round 2: Turn work clockwise, sc in each foundation ch st around. [28 sc total from Rounds 1 & 2]
Round 3: Join C, sc in each st around. [28 sc] Fasten off and tie in tails.
Side Panel Loop
Make 4. These small rectangular panels are sewn into loops and attached to the sides of each sandal so the large strap can thread through them. The piece widens slightly in the middle and then narrows back down, which helps it hold its shape once it's folded and sewn.
First Step: Using P, ch 5.
Round 1: Sc in 2nd ch from hook and in each ch across. [4 sc]
Round 2: Ch 1 (does not count as st here or throughout), turn, sc in each st across. [4 sc] Note that the ch 1 at the start of each row is a turning chain only — it doesn't count as a stitch, so don't work into it on the following row.
Rounds 3–4: Repeat Round 2. [4 sc]
Round 5: Ch 1, turn, sc in next st, 2 sc in next 2 sts, sc in last st. [6 sc]
Round 6: Ch 1, turn, sc in each st across. [6 sc]
Rounds 7–9: Repeat Round 6. [6 sc]
Round 10: Ch 1, turn, sc in next st, sc2tog twice, sc in last st. [4 sc]
Round 11: Ch 1, turn, sc in each st across. [4 sc]
Rounds 12–13: Repeat Round 11. [4 sc] Fasten off, leaving enough yarn to sew up and onto sandal. Leave a generous tail here — you'll need it to both close the loop and attach it securely to the sandal.
Large Strap
Make 2. These are the main ankle straps that thread through the side panel loops and connect across the front. The construction is the same oval method used for the front foot straps, just worked from a longer foundation chain.
First Step: Using P, ch 40.
Round 1: Sc in 2nd ch from hook and in each ch across. [39 sc]
Round 2: Turn work clockwise, sc in each foundation ch st around. [78 sc total from Rounds 1 & 2]
Round 3: Join C, sc in each st around. [78 sc] Fasten off and tie in tails.
Appliqué Flower
Make 2. These flowers are sewn onto the front straps as the finishing detail. The petals in Round 3 are worked in sets using a bracket repeat, so read through the sequence once before you start — it moves quickly once you're in it.
Step 1: Using P, form a magic circle and crochet 10 sc into the ring. Pull ends to tighten. [10 sc]
Round 2: 2 sc in each st around. [20 sc]
Round 3: Join C, *[hdc, dc, tr, dc, hdc] in next st, sl st in next 2 sts*, repeat from * to * until you have 6 petals. Fasten off leaving enough yarn to sew onto sandal. Each petal is worked entirely into a single stitch, with the slip stitches between petals keeping everything flat. Count your petals as you go — it's easy to lose track once you're in the rhythm of it.
Finishing: Sew your flower appliqués onto the front straps, over the top of the large strap ends. Secure firmly into place.
Final Touches
With all the pieces finished, it's time to put the sandals together. I sew each side panel into a loop first, then attach one to each side of both sandals toward the back. Next I sew the front foot straps onto each sandal toward the toe end, one on each side. Then I thread a large strap through the two loops on each sandal and sew the strap ends down onto the front foot straps, overlapping the panels — make sure those joins are really secure, since this is what holds the sandal on. Finally, I sew the flower appliqués over the front of each sandal, right on top of where the large strap ends meet the front strap. That covers the raw attachment points and finishes everything off neatly.
Care Instructions
These sandals are worked in acrylic, so machine washing on a gentle cycle is fine. I'd skip the dryer though, just lay them flat to dry so the straps hold their shape and the flower appliqués don't get knocked around. The large strap is sewn and overlapped at the front, so a little care when washing keeps those seams from loosening over time. If you're making these as a gift, tuck a quick care note inside the box.
Baby & Child Safety Notes
These are sized for a 3 to 6 month old, so construction security matters a lot. The flower appliqués and large strap ends are sewn onto the front straps, and the pattern specifically says to secure them firmly. Before putting these on a baby, give every sewn join a firm tug. If anything feels loose, reinforce it. The side panel loops also need to be securely fastened since the large strap threads through them, and you don't want that coming undone during wear.
Frequently Asked Questions
How does the large strap actually attach to the sandal?
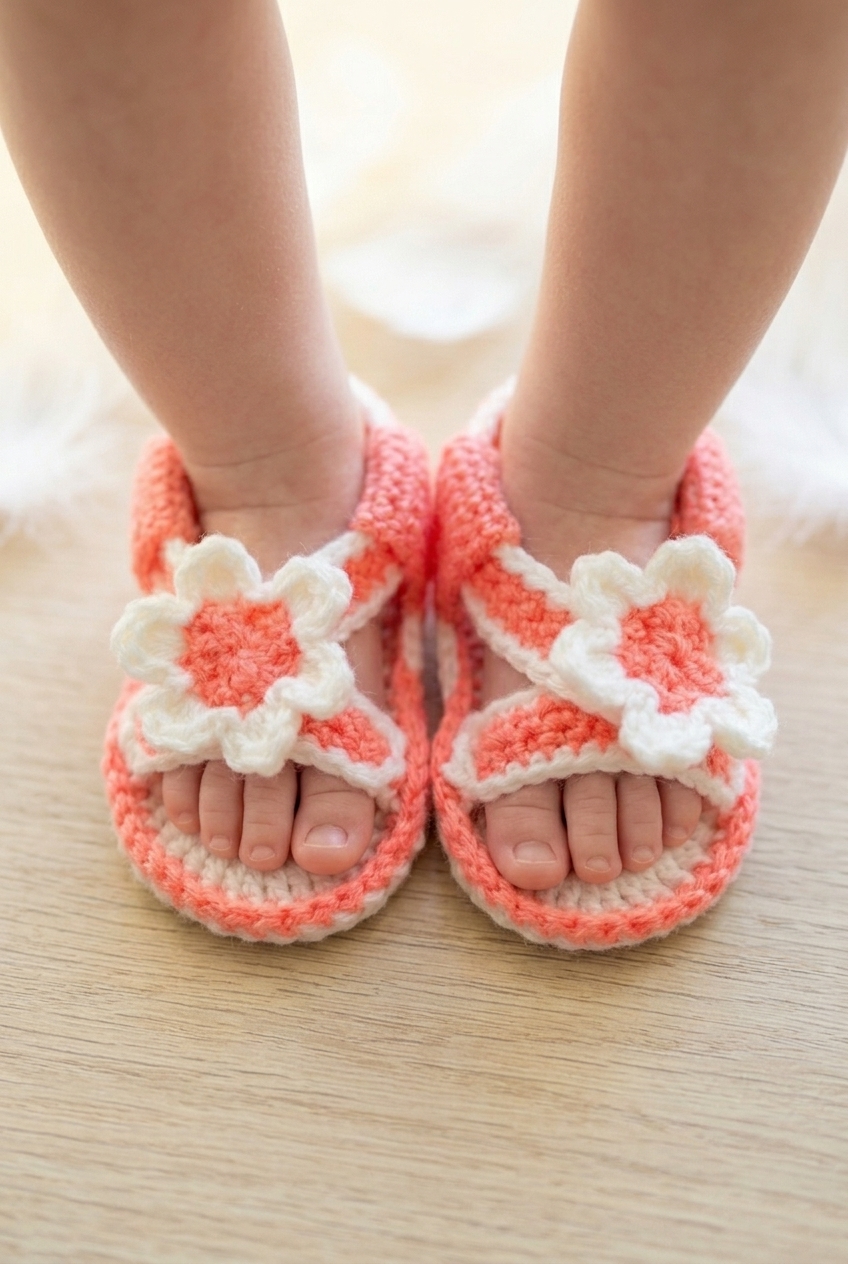
The large strap threads through the side panel loops, then gets sewn down onto the front foot straps with the ends overlapping each panel. The flower appliqués go right on top of those strap ends, which hides the join and holds everything in place. Sew it all down firmly since this is the piece doing most of the work keeping the sandal on.
Are the left and right sandals actually different, or are they the same piece?
They are different. The sole is the same through Round 8, but Round 9 is mirrored between the two feet. The shaping for the toe area shifts direction depending on which foot you're making, so don't skip ahead and repeat the same Round 9 twice. The pattern writes them out separately so it's easy to follow.
What does the gauge check actually measure in this pattern?
The gauge here is based on the starting chain rather than a traditional swatch. Your first 15 chains should measure approximately 2 inches. It's a quick check before you commit to the full sole, and it's worth doing since the sole length directly affects how the finished sandal fits a 3 to 6 month old foot.
How are the flower appliqués made?
Each flower starts with a magic circle and 10 single crochets into the ring, then Round 2 doubles that to 20 stitches. Round 3 switches to cream and works a sequence of hdc, dc, tr, dc, hdc repeated to form 6 petals with slip stitches between them. You make two and sew them onto the front straps once everything else is assembled.
How many separate pieces do I need to make before I can assemble the sandals?
Quite a few. You need the two sandal soles, two front foot straps, four side panel loops, two large straps, and two flower appliqués. That's 13 pieces total. The individual pieces are all fairly quick to work up, but setting aside time for the assembly and sewing is worth planning for, especially getting those loops and straps positioned correctly.
Now It's Your Turn!
I'd love to see how yours turn out, so if you make a pair, tag me on Instagram or drop a photo in the comments below. The cream and salmon pink combination is so sweet, but I keep thinking about how good these would look in a soft yellow or mint too. If you're saving this for a baby shower gift or just keeping it for later, pin it to your crochet board so you can find it when you need it. And if you hit a snag anywhere in the assembly, leave a comment and I'll do my best to help you sort it out.


Leave a Reply