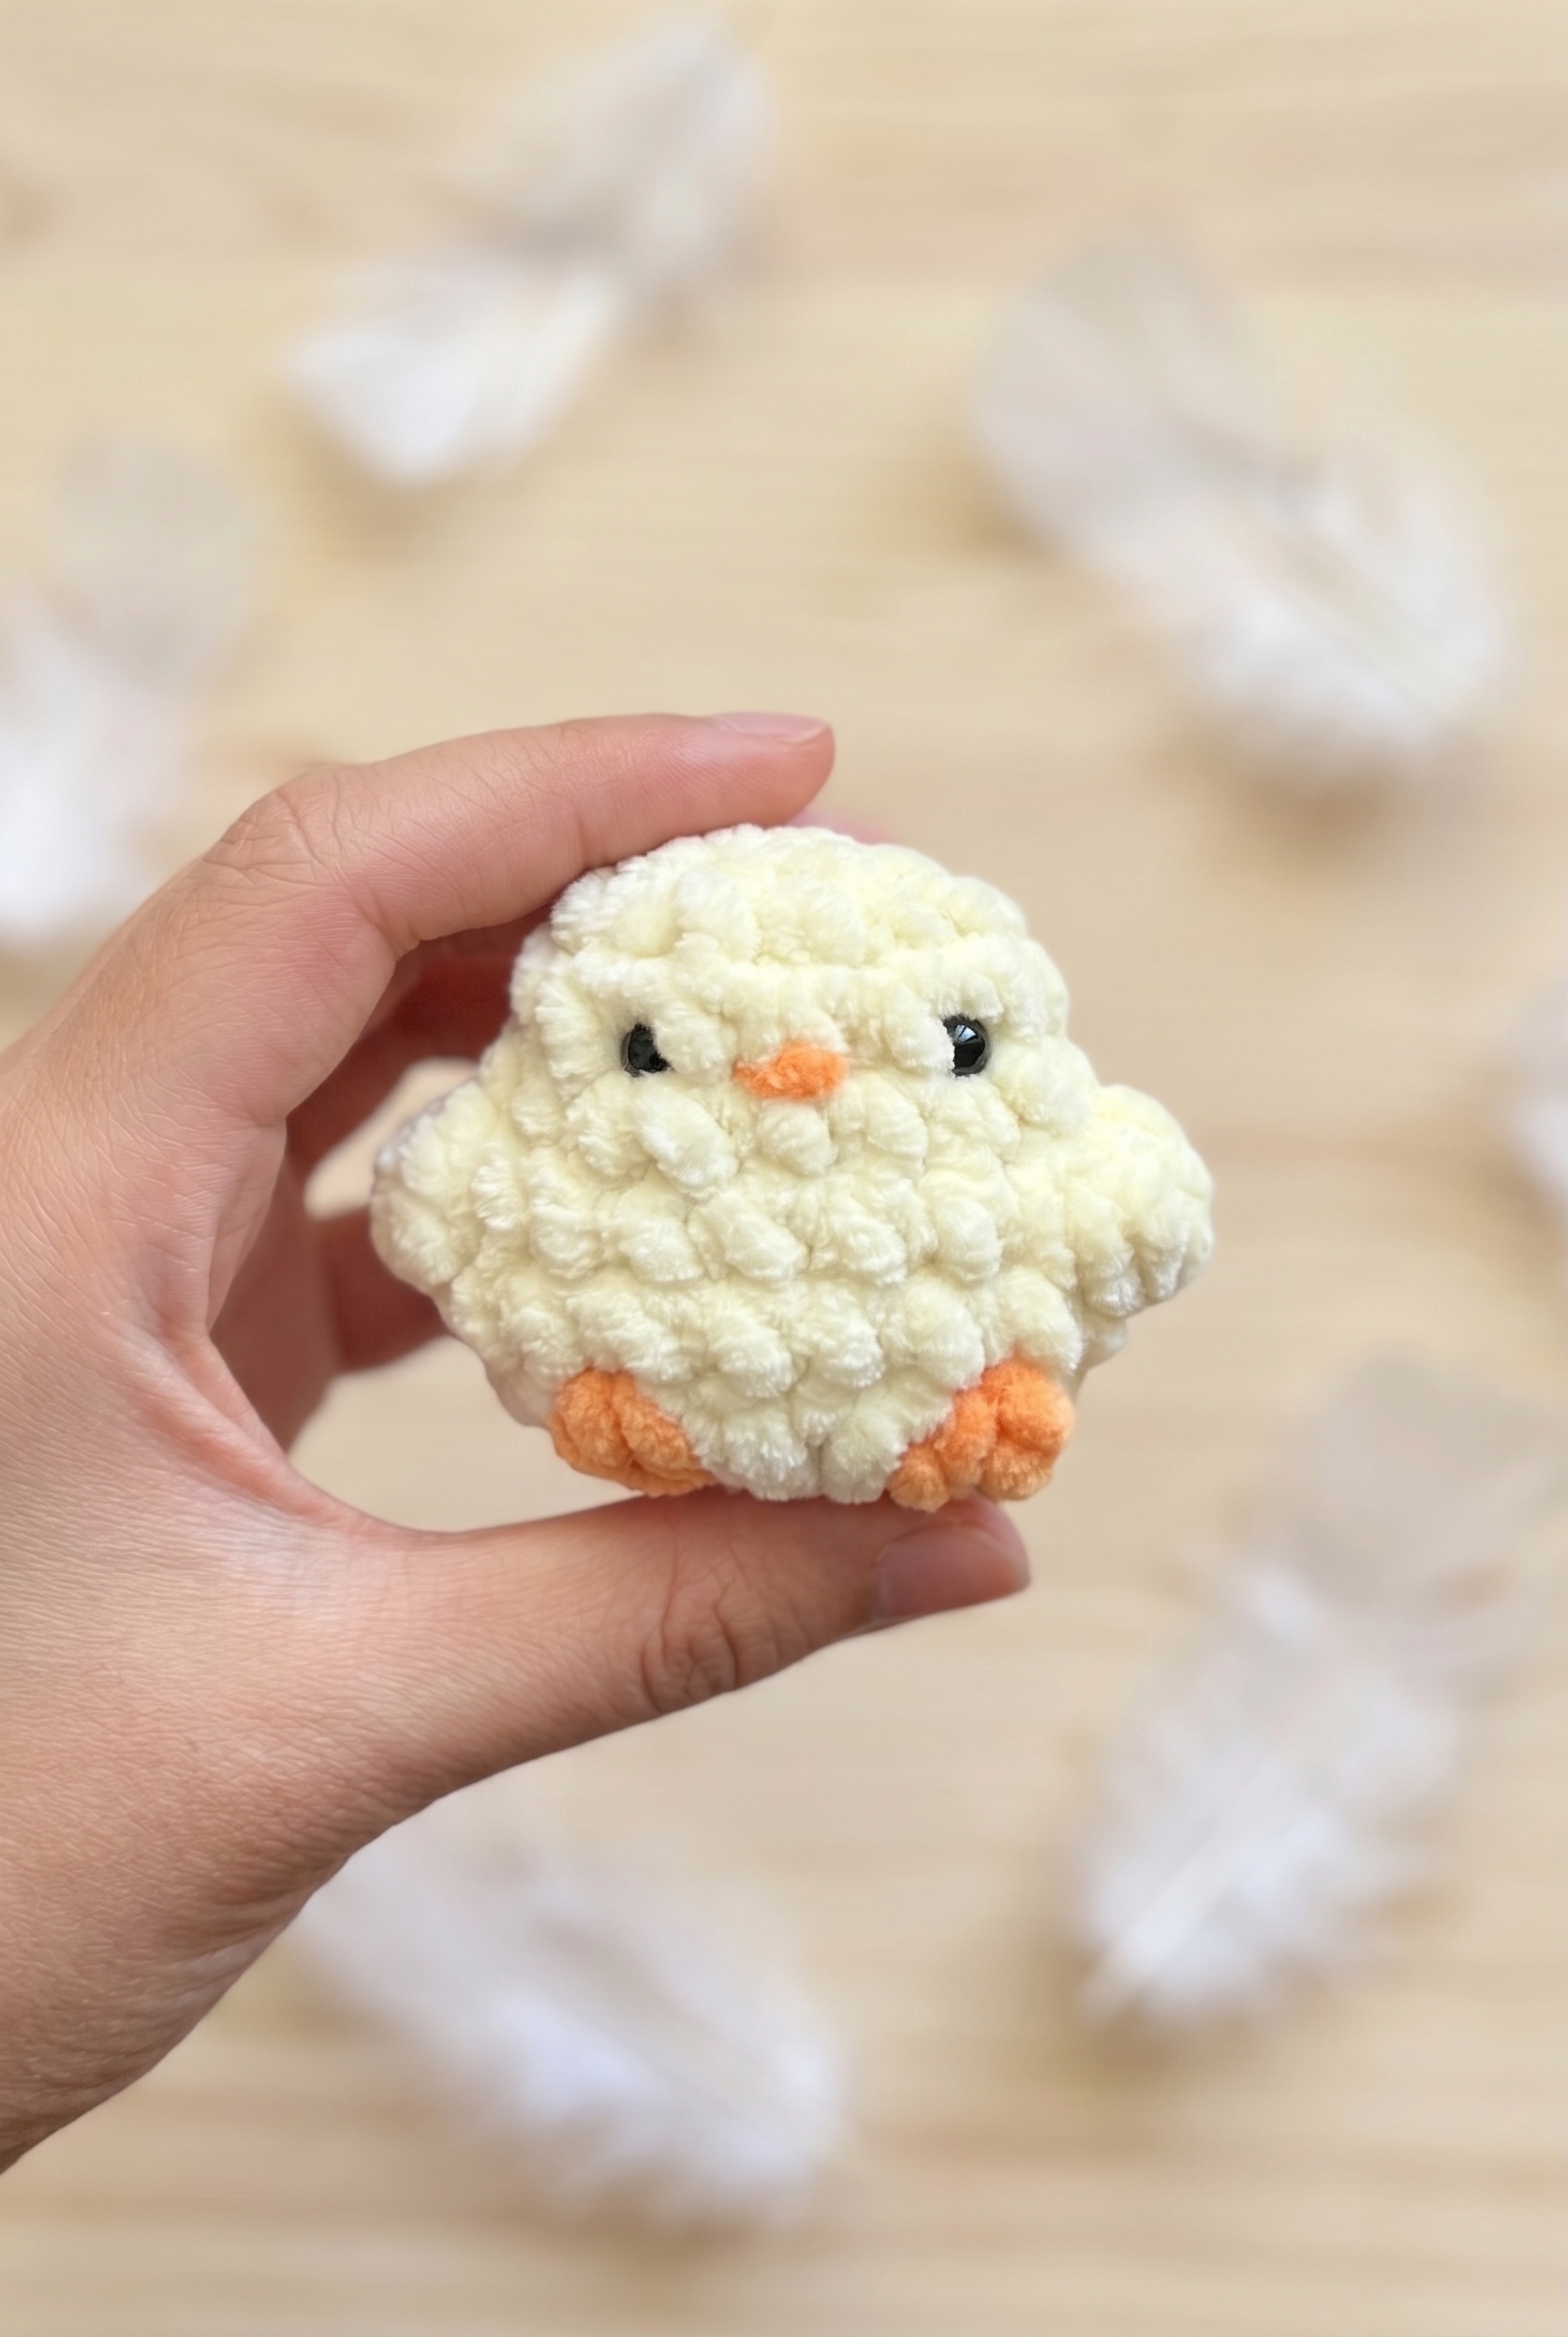
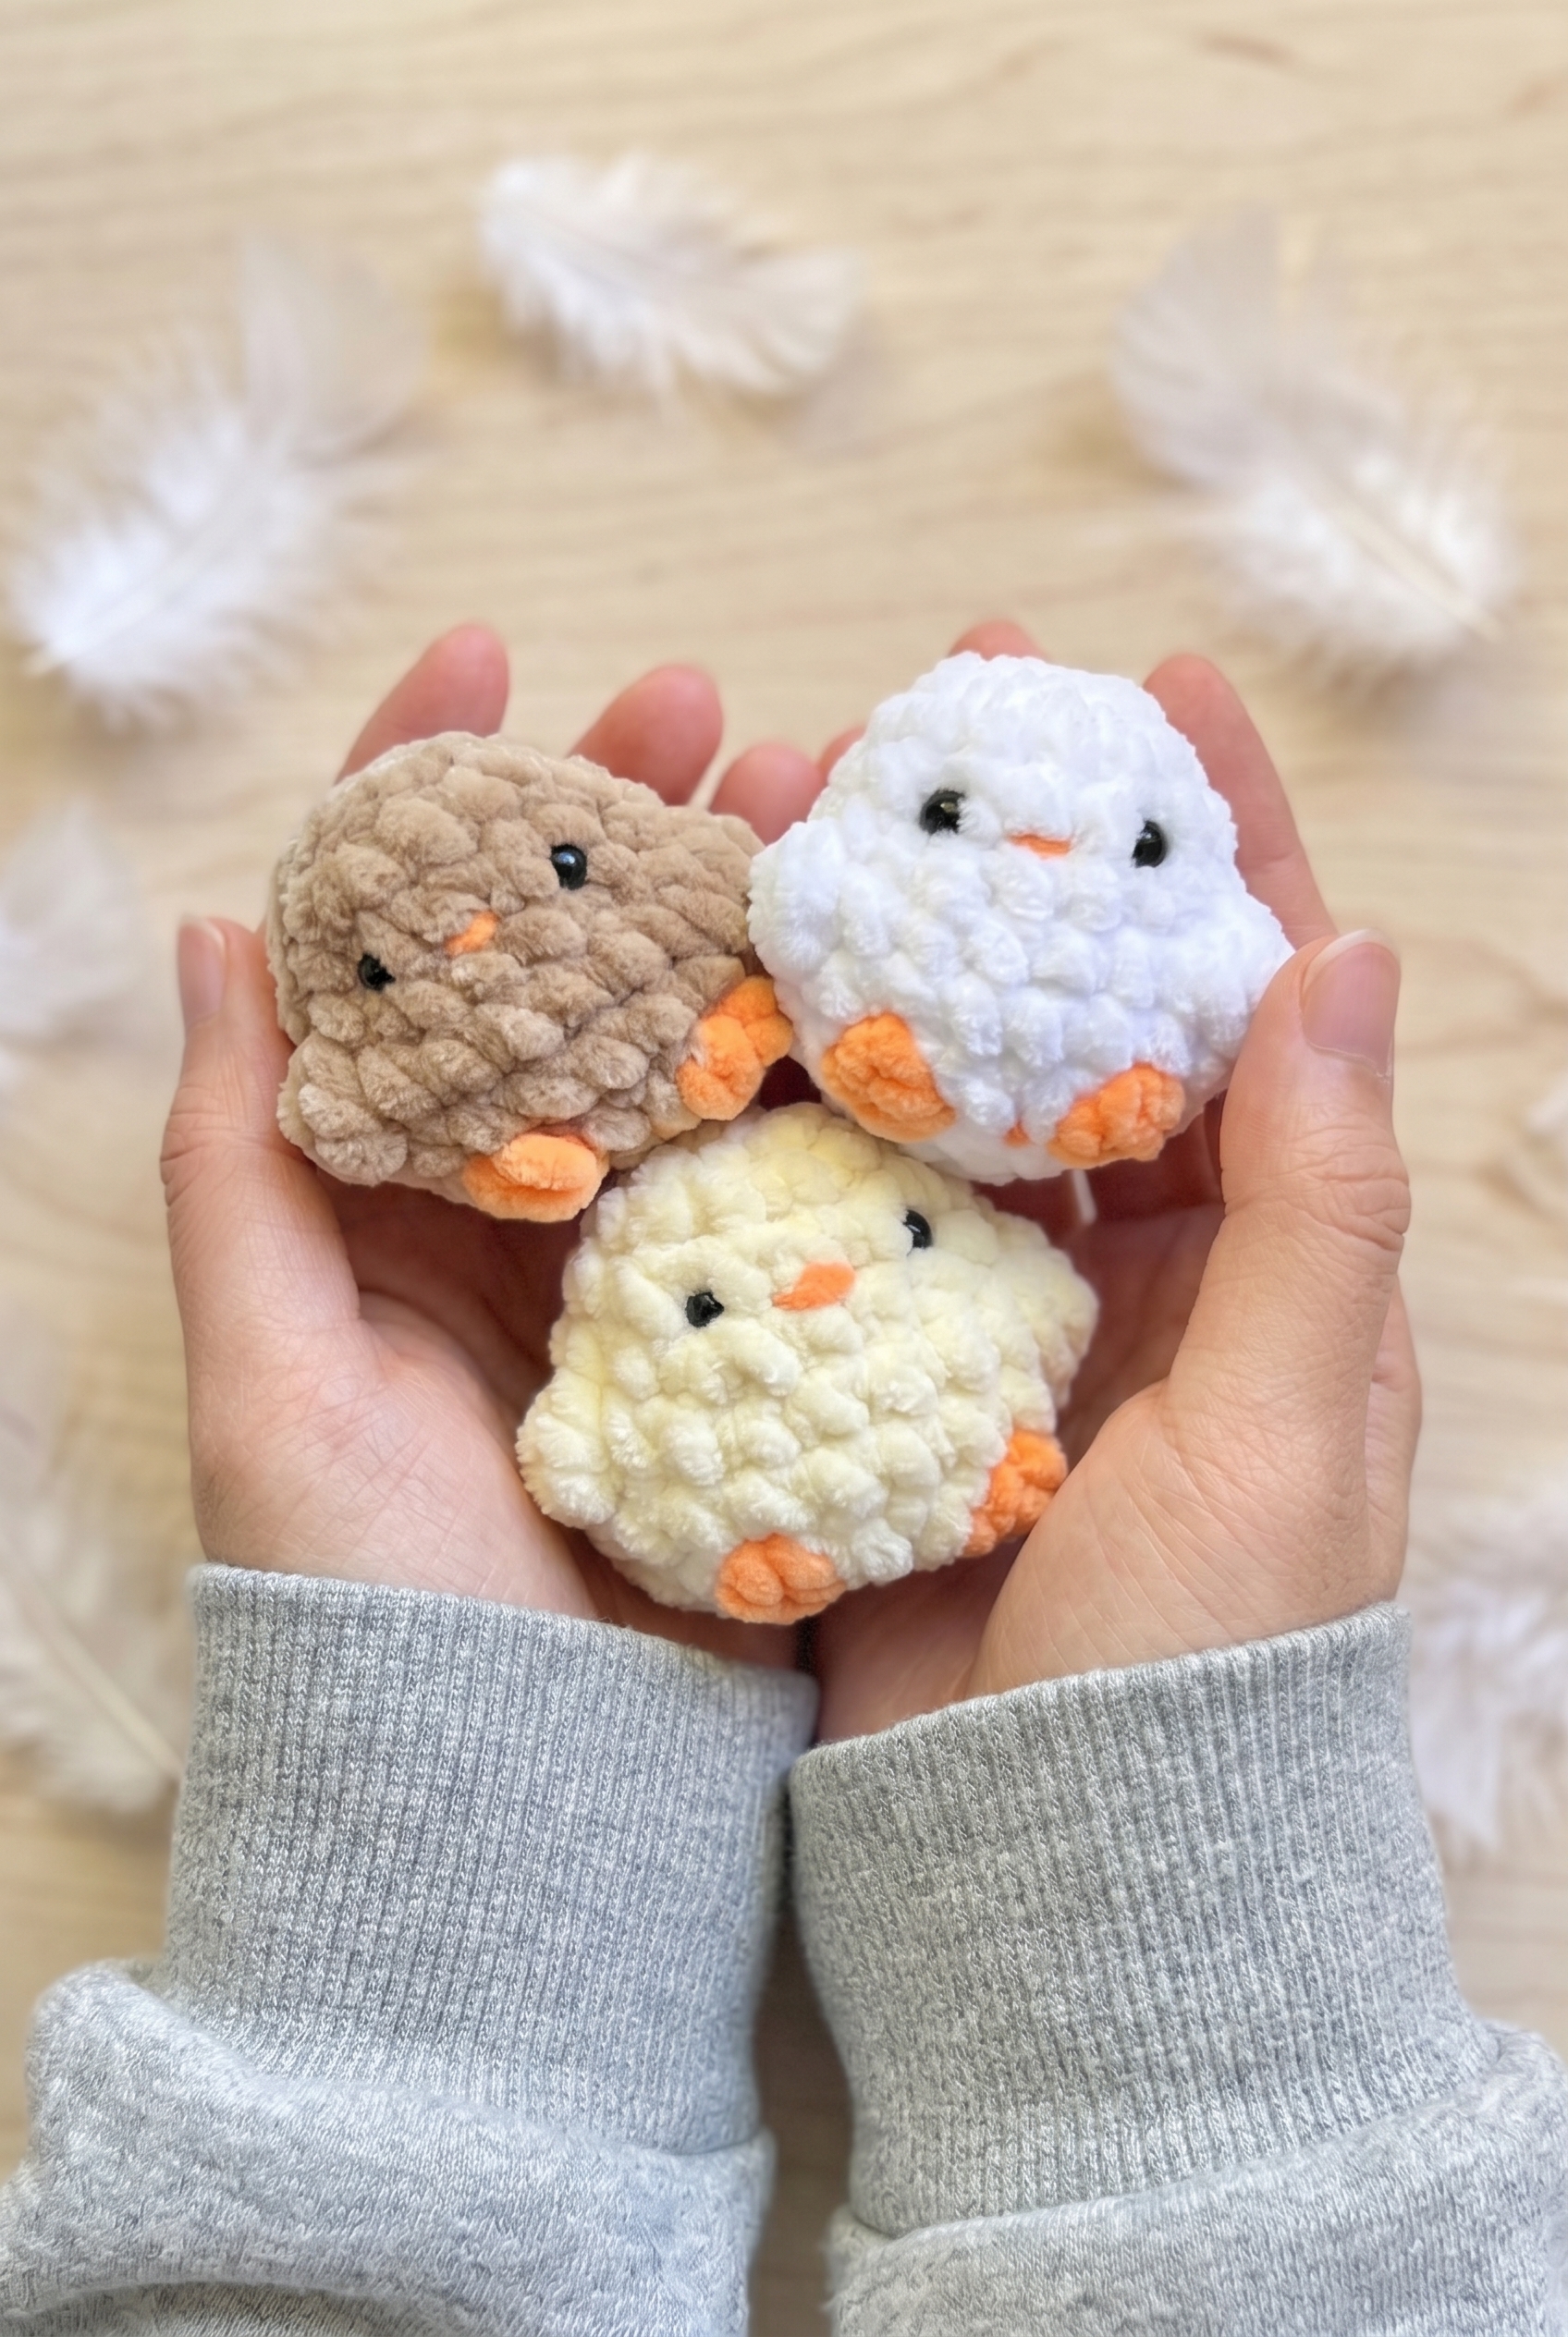
Spring is right around the corner, and I just finished up the most satisfying little project: a Baby Chick Crochet Pattern that comes together so fast you'll probably end up making a whole flock before you even realize it. This is an easy amigurumi, compact enough to tuck into an Easter basket or perch on a shelf, and it's the kind of make that feels rewarding from start to finish.

Jump to:
Behind the Pattern
What I really like about this one is how much personality fits into such a small finished piece. The construction is straightforward amigurumi, but there's something about the way the little feet and beak come together that makes the whole thing feel complete. I designed this with Easter in mind, but honestly it works any time you want a quick handmade gift that doesn't look quick. Parents, grandparents, kids, teachers. Pretty much anyone would be happy to receive one of these.
It's also a great pattern if you want to make several at once. Because the finished size is so compact, you can knock out a small batch without burning through a ton of yarn or time. I've made these in different colorways and each one has its own little character, which I did not expect going in.
Why This Pattern Stands Out
Tiny, fast, and genuinely charming, this chick is a perfect last-minute Easter gift.
- Beginner Friendly: This is rated easy, so if you know basic amigurumi construction, you'll have no trouble at all.
- Quick to Finish: The small finished size means you can complete one in a single sitting, which makes it ideal for batch making.
- Great for Gifting: The finished size is perfect for Easter baskets, party favors, or a small handmade token for someone you're thinking of.
- Colorway Flexibility: I go with whatever soft neutrals or pastels I have on hand, and every version comes out looking intentional.
- Technique Value: If you're newer to adding small details like beaks and feet, this pattern is a really good low-stakes way to practice those skills.
Gather Your Supplies
Two colors, a tiny hook, and a handful of stuffing — that is genuinely the whole list.
- Bulky Weight Yarn (Yellow, Main Color): Bulky weight acrylic works really well here because it crochets up quickly and holds its shape nicely once stuffed. For a small amigurumi like this, you're probably looking at somewhere around 20-40 meters for the body — not much at all. A soft, slightly stretchy bulky acrylic is the move, nothing too stiff or textured.
- Bulky Weight Yarn (Orange, Accent Color): You'll use orange for the feet and beak, so the yardage is minimal. A small scrap of bulky weight acrylic in orange is all you need, maybe 5-10 meters at most. Same fiber as your main color keeps the tension consistent between pieces.
- 3.5 mm Crochet Hook: A 3.5 mm hook is on the smaller side for bulky weight yarn, and that's the point. The tighter gauge keeps the stuffing from showing through the stitches, which matters a lot with amigurumi.
- 6 mm Safety Eyes: This pattern uses 6 mm safety eyes, placed between Rounds 4 and 5 about 3 to 4 stitches apart. Get them in before you close up the piece.
- Polyfil Stuffing: You'll add stuffing as the body closes up. The pattern notes say to stuff lightly if you want a squishier result, so don't pack it too tight.
- Also needed: scissors, yarn needle, stitch marker
Color Sequence & Yarn Changes
Yellow is your main color for the body, and orange comes in separately for the feet and beak. Since this is a no-sew pattern, most of the color separation happens by working each piece independently rather than switching mid-round, so there's no complicated carrying or color-change technique to worry about. The beak attachment is listed as optional, so if you skip it, your orange usage drops down to just the feet.
Pattern Overview
A tiny stuffed chick worked in the round, coming in just over two inches tall with bobble texture and no sewing required.
| Skill Level | Easy |
| Pattern Gauge | Gauge is not critical for this project. Use a hook size that creates a tight, firm fabric so stuffing does not show through. |
| Finished Size | 2 ⅛" (2.2") |
| Yarn Weight | 5 Bulky |
| Terminology | US |
Stitch Guide & Abbreviations
Short list — most of these you already know.
- bbl = bobble stitch (YO, insert hook in indicated st, YO and pull up a loop, YO and pull through 2 loops) repeat as directed, then YO and pull through all loops on hook
- ch = chain
- dc = double crochet
- dec = decrease (sc2tog)
- FO = fasten off
- inc = increase (2 sc in same st)
- R = round
- sc = single crochet
- st(s) = stitch(es)
- YO = yarn over
Special Stitches
- Bobble Stitch (bbl): YO, insert hook in indicated st, YO and pull up a loop, YO and pull through 2 loops. Repeat as directed, then YO and pull through all loops on hook.
Pattern Notes
This is a no-sew pattern. The body is worked in continuous rounds throughout. Color A (Yellow) is used for the body; Color B (Orange) is used for the feet and beak.
Safety eyes go in between Rounds 4 and 5, about 3 to 4 stitches apart. Get those placed before you close up the body — once it's stuffed and shut, you're past the window. The beak is optional and can be sewn on after finishing.
Add stuffing as you go. If you want a squishier result, stuff lightly. A tighter fabric helps keep the stuffing from showing through, so don't size up on the hook if you can help it.
The Pattern
Here's everything you need to work through this baby chick crochet pattern from start to finish.
The Chick Body
The whole chick is worked in one piece, in continuous rounds from the top of the head down. I use Color A (Yellow) for the body throughout, with Color B (Orange) brought in briefly for the beak and feet details. One thing worth knowing before you start: the bobble stitches in Round 8 are made with 2 dc, so you'll have 3 loops on your hook when you complete them.
Round 1: Ch 2, 5 sc in 2nd ch from hook. [5 sc]
Round 2: Inc x 5. [10 sc]
Round 3: (Sc, inc) x 5. [15 sc]
Round 4: Sc around. [15 sc]
Round 5: (2 sc, inc) x 5. [20 sc]
Safety eyes placement: Insert between Rounds 4-5 about ¾ stitches apart.
Round 6: 6 sc, bbl with 3 dc, 6 sc, bbl with 3 dc, 11 sc. [20 sc] The two bobbles here sit opposite each other and form the wing nubs. Count carefully before and after — it's easy to lose track of position mid-round.
Round 7: Sc around. [20 sc]
Round 8: Dec, sc, change to color B and make a bbl, change back to color A; dec, sc, change to color B and make a bbl, change back to color A; (dec, 2 sc) x 3. [15 sc] This is the most involved round in the pattern. You're decreasing to begin closing the body while also working the two Color B bobbles for the feet and beak. Keep your Color B yarn loose at the back when carrying it so it doesn't pull. Remember: these bobbles use 2 dc, not 3.
Round 9: (Sc, dec) x 5. [10 sc]
Round 10: Dec x 5. [5 sc]
Stuffing: Add stuffing; stuff lightly if you want it more squishy.
FO. Sew through the front loops before closing the hole.
Care Instructions
Hand washing is the safest bet for this little chick. Submerge it gently in cool water, squeeze out the excess without wringing, and let it air dry completely before storing. The safety eyes are plastic and can warp or loosen with heat, so keep it away from the dryer entirely. Once it's dry, the stuffing should bounce back to its original shape just fine.
Baby & Child Safety Notes
The 6 mm safety eyes are the main thing to think about here. Before giving this chick to a young child, tug on each eye firmly from the front to make sure the washer on the back is locked in tight. If it's going to a baby or a toddler who still puts things in their mouth, I'd skip the safety eyes entirely and embroider the eyes instead. The beak is listed as optional and sewn on, so for very young children you can leave it off or make sure those stitches are pulled tight and the tail ends are well-secured inside the body.
Frequently Asked Questions
When do I insert the safety eyes?
Insert the safety eyes between Rounds 4 and 5, about 3 to 4 stitches apart. Do this before you finish closing up the body, because once you're past Round 8 or so and the opening gets small, it's really hard to get your fingers in to attach the washers properly.
What are the bobble stitches in Round 6 for?
Those bobbles form the little wings on the sides of the body. Round 6 has two bobbles made with 3 dc each, and they sit opposite each other to give the chick that rounded, slightly puffy wing shape. They're worked right into the round, no separate pieces to attach.
How do the feet get added if this is a no-sew pattern?
The feet are worked in using color changes in Round 8. You switch to orange, make a bobble with 2 dc, then switch back to yellow and continue the round. That's how the orange feet appear without any sewing. The bobbles in Round 8 are smaller than the ones in Round 6, using only 2 dc instead of 3.
How much should I stuff the chick?
Stuff it lightly if you want a squishy, soft result. I packed mine pretty firmly the first time and it came out a bit stiff, so I'd lean toward less stuffing than you think you need. Add it at Round 10 before you close the hole.
Does the beak have to be sewn on?
No, the beak is listed as optional. If you want a cleaner, safer toy for a young child, skipping it is a perfectly reasonable choice. If you do add it, use the orange yarn and sew it on securely, pulling the tail ends inside the body so nothing comes loose.
🐣 Love Easter-themed makes? The Baby Chick pairs beautifully with the Easter Bunny, Mini Easter Carrots, and Easter Egg for a complete basket display. All four use the same basic amigurumi techniques — new to those? The Safety Eyes and Stuffing guides walk you through the finishing steps.
Before You Go
This little chick is one of those patterns that works up so fast you'll probably make more than one, whether that's for an Easter basket, a baby gift, or just because you have leftover yellow yarn sitting there. If you make one, I'd love to see it. Tag me on Instagram or drop a photo in the comments. And if you're saving this for later, go ahead and pin it so you can find it again when spring rolls around and you need something small and quick.


Leave a Reply