
I've been making a lot of small, practical projects lately, and this Fruit and Vegetable Bag Crochet Pattern has been one of the most satisfying ones to work up. It's a reusable mesh produce bag you can crochet in an evening, and honestly it's the kind of thing you end up making a whole stack of once you realize how quick and useful they are. If you've been wanting to make something that actually gets used every single week, this is a really good one to try.

Jump to:
Behind the Pattern
What I like about this design is that it isn't just a bag with a drawstring thrown on top. There's a solid crocheted base that gives it real structure, and then the mesh portion opens up above that, so the whole thing holds its shape without being stiff or bulky. I find that combination of techniques actually a fun one to work through, because you get two different feels within one small project. The transition between the solid base and the open mesh is the part I keep thinking about when I'm making these.
These make a really lovely handmade gift, especially for someone who's been trying to cut back on single-use plastic bags at the grocery store. I've given them as hostess gifts, tucked them into holiday gift sets, and made a few just to keep in my own kitchen. They suit any occasion where you want to give something useful without overthinking it.
Why This Pattern Stands Out
A practical, everyday bag you can crochet in a single sitting.
- Skill level: Rated easy, so this works well if you're past the very basics and want a project with a bit more structure.
- Quick to make: The finished size is compact, which means you can realistically finish one in an evening without rushing.
- Great for gifting: Small, useful, and handmade, these are the kind of thing people actually appreciate receiving.
- Technique variety: You work both a solid base and an open mesh in the same project, so you get to practice two different approaches without it feeling like a lot.
- Make multiples: Once you've worked through it once, making a second or third goes really fast, and they're useful to have in a set.
Gather Your Supplies
Two colors, one hook, and a single stitch marker — that is genuinely the whole list.
- Fine Weight Cotton Yarn (Weight 2): Cotton is the right call for a structured little bag like this. It holds its shape without being stiff, and the fine weight keeps the fabric tight enough that the chain-space sections look clean and deliberate rather than loose and sloppy. You'll need 50 g of off white and 50 g of powder pink, so two small balls or partial skeins do the job.
- 3 mm Crochet Hook (US C): A 3 mm pairs well with fine cotton and keeps the fabric from going too open. That said, gauge really does matter here, so if your tension runs tight or loose, don't hesitate to adjust up or down a size.
- Stitch marker: You'll want one on hand to track the beginning of your rounds, especially once the chain-space sections start and the structure gets a little harder to read at a glance.
- Also needed: scissors, tapestry needle
Color Sequence & Yarn Changes
The pattern lists both off white and powder pink for the bag but doesn't specify exactly where each color falls, so you have some flexibility in how you use them. A clean color change at the start of a round works best here — join the new color on the slip stitch that closes the round, then start your chain-3 in the new color so the transition sits neatly.
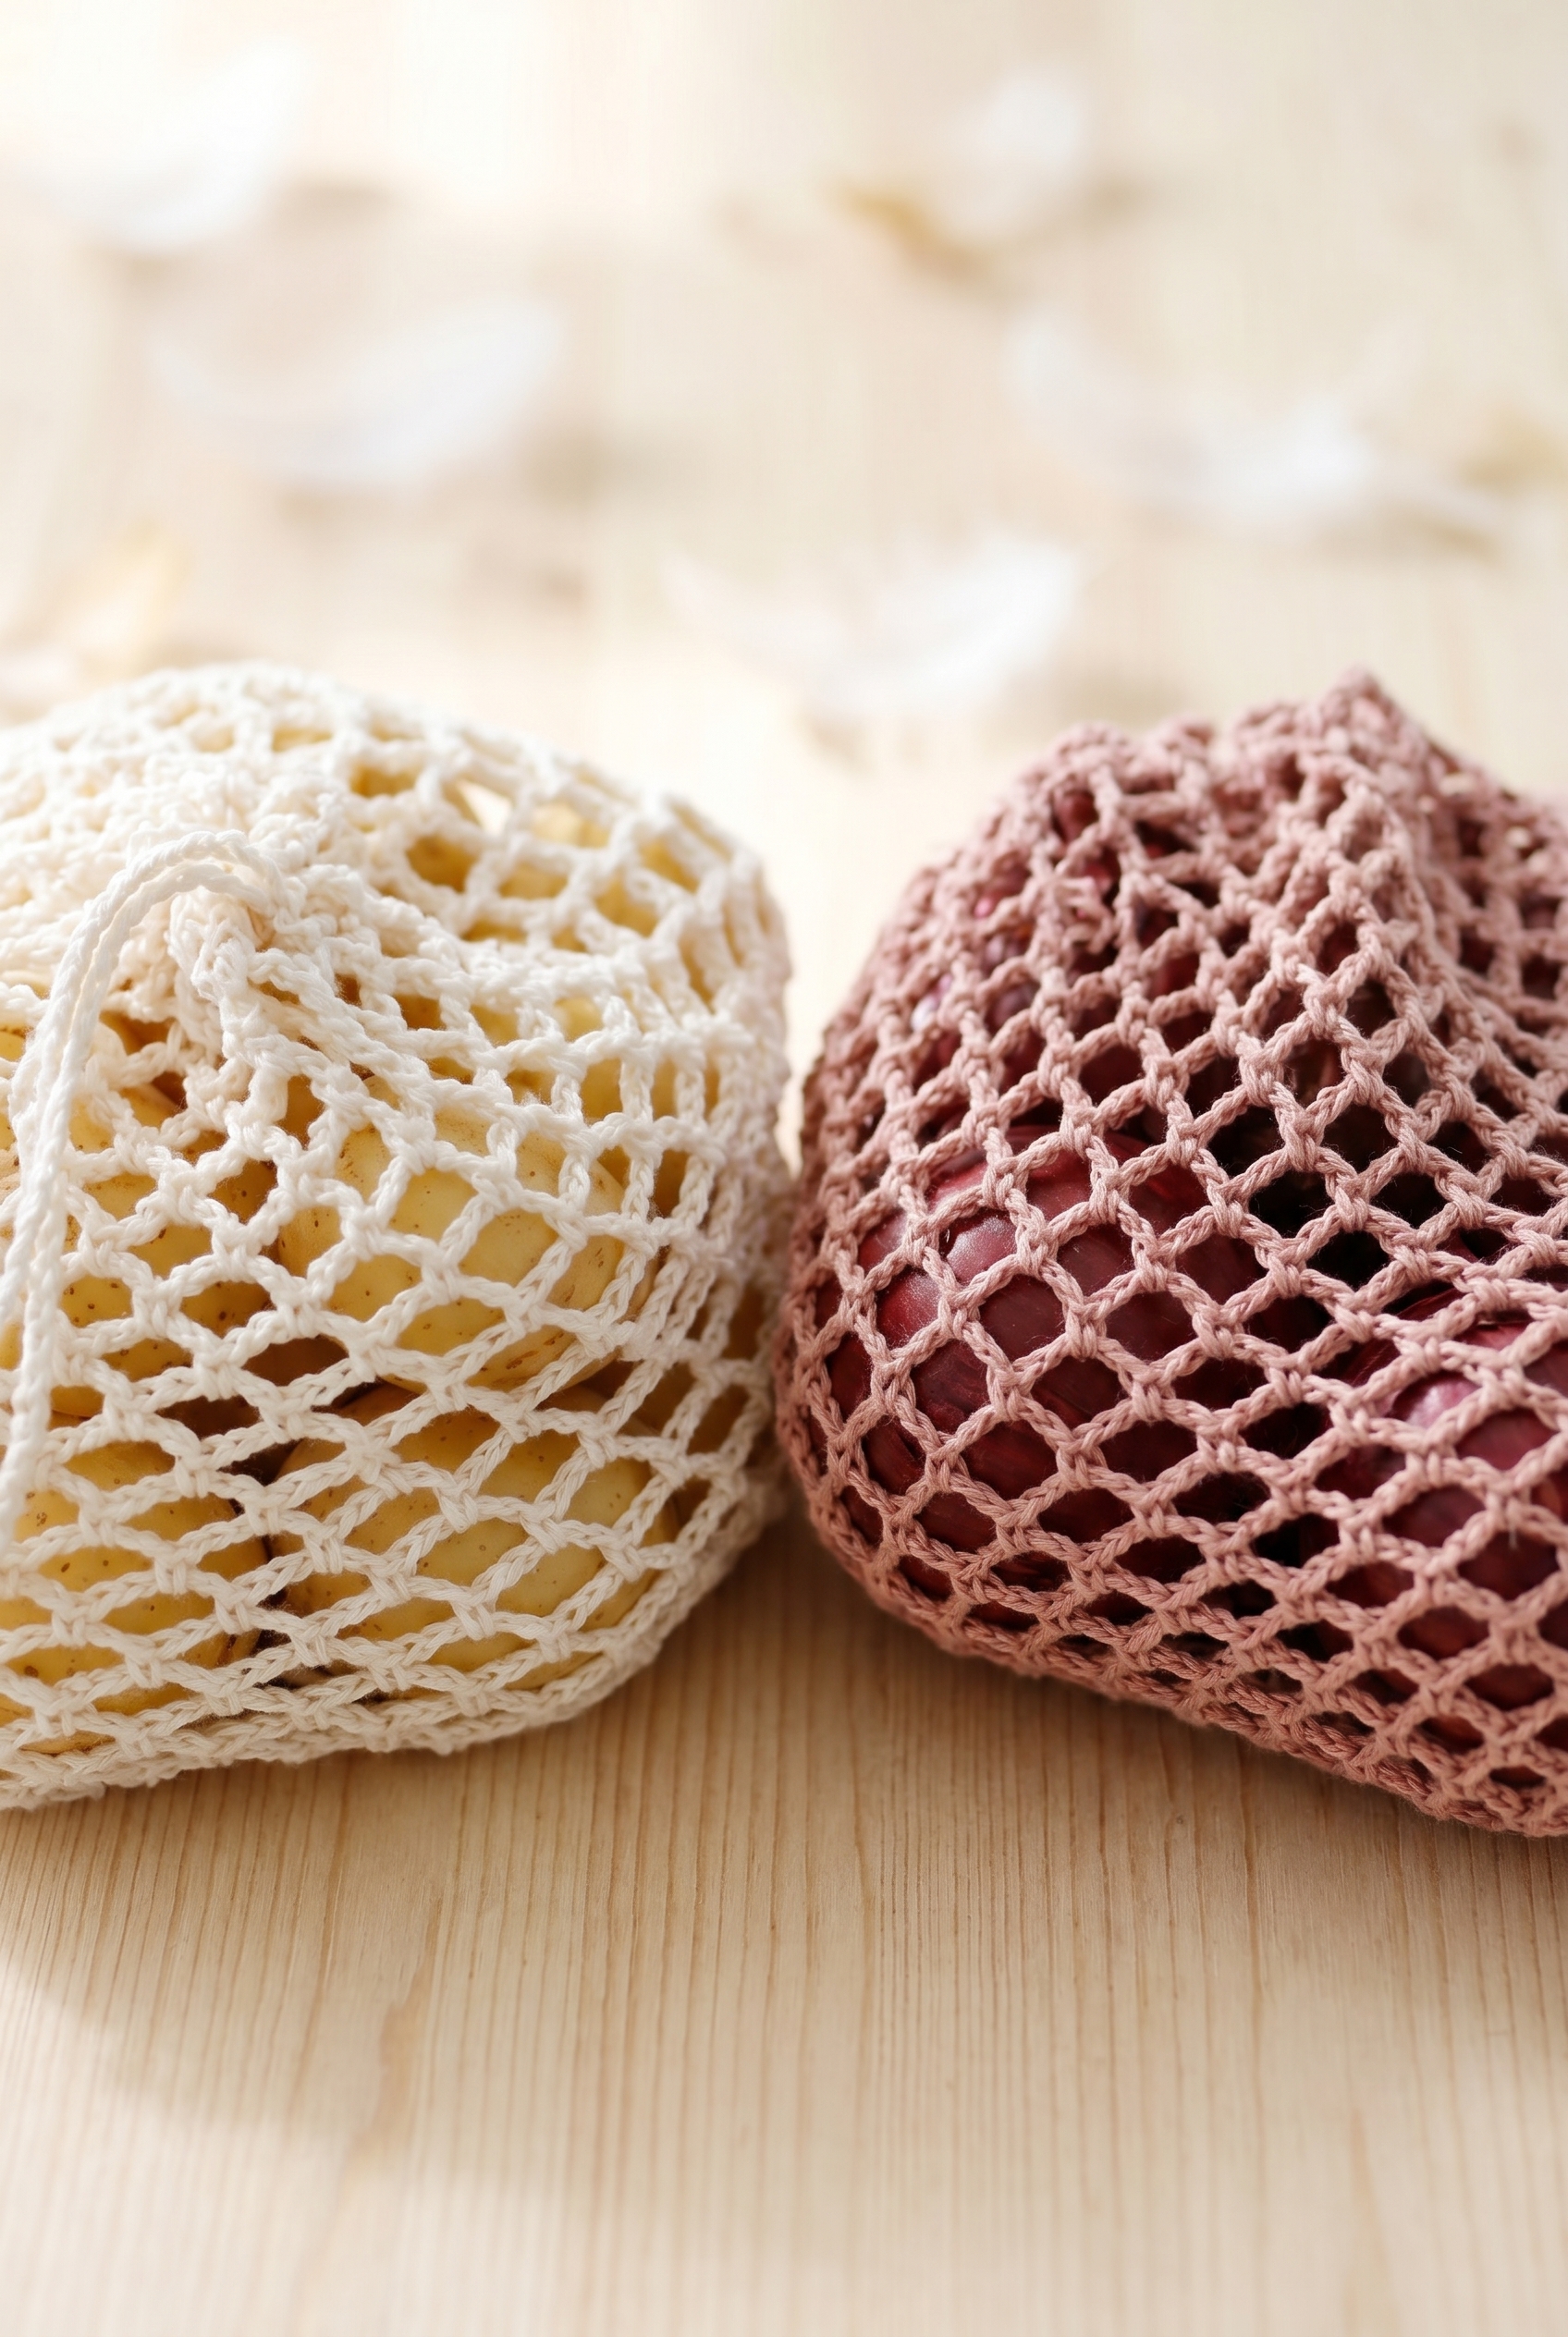
Quick Details
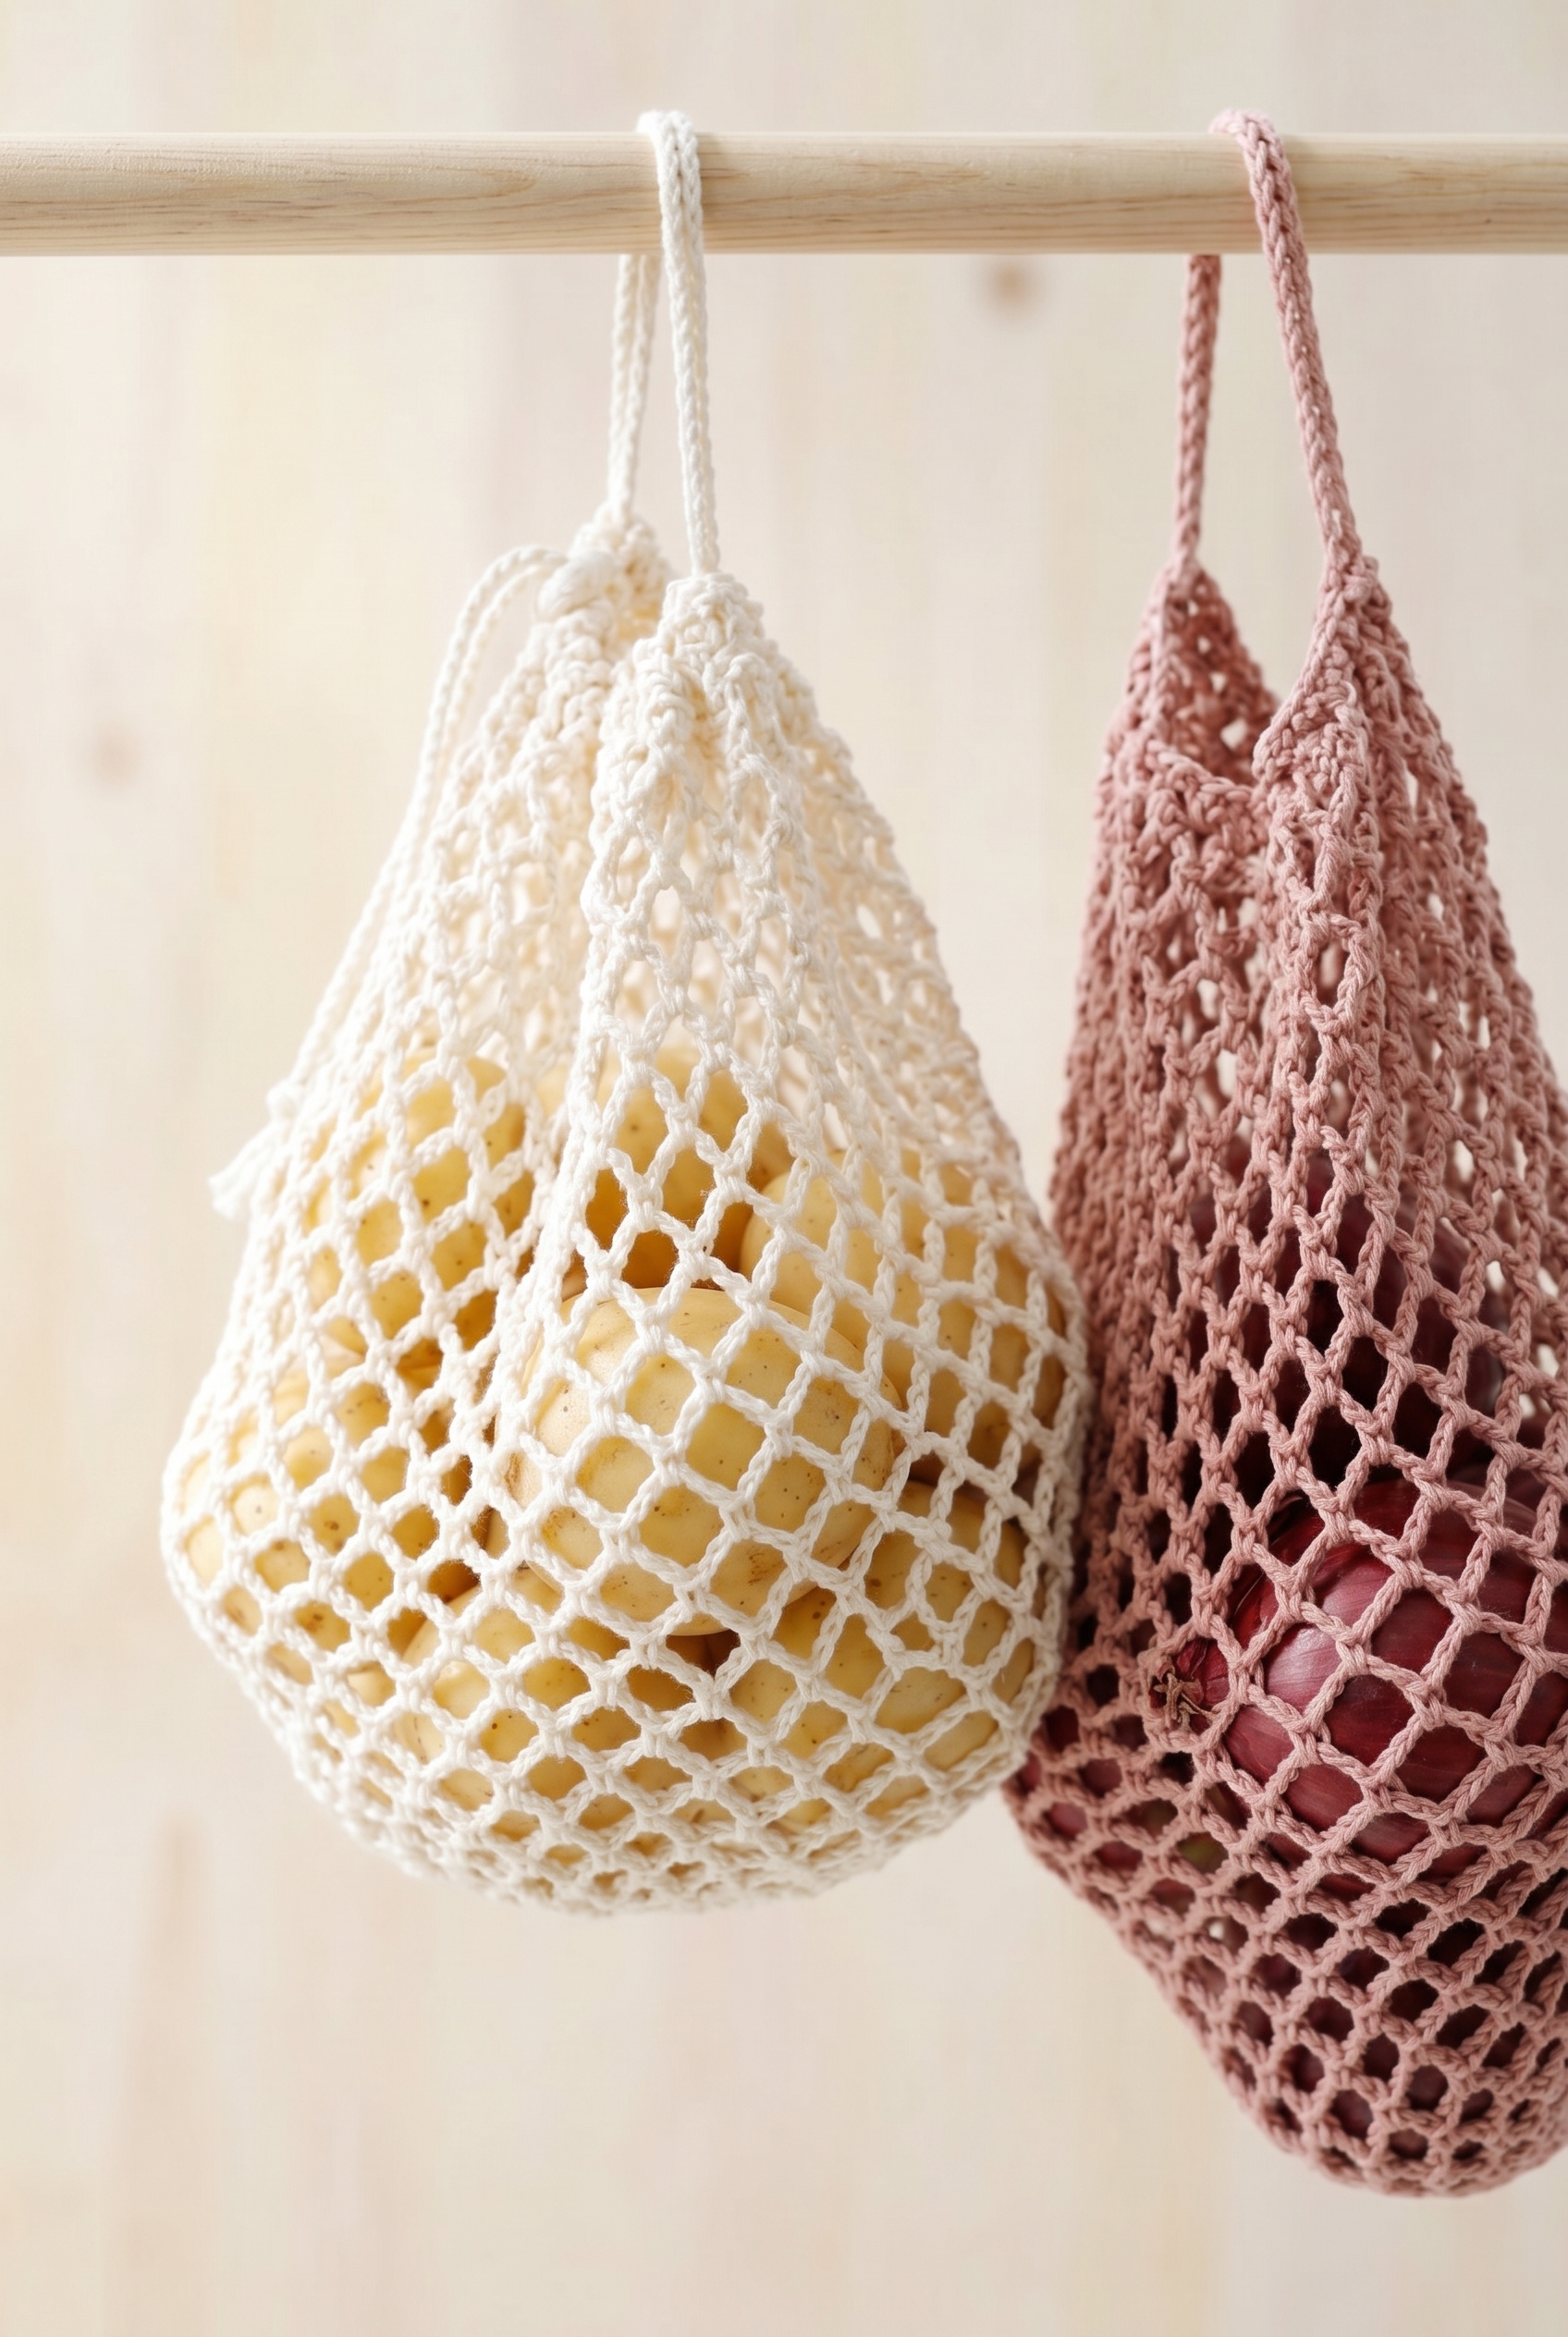
A little cotton net bag worked in the round from the bottom up, with two sizes and a chained handle.
| Skill Level | Easy |
| Pattern Gauge | 24 dc in width and 13 rows in height = 10 x 10 cm (4" x 4") |
| Finished Size | Width: approx. 14–19 cm (5 ½"–7 ½") measured flat Height: approx. 17–20 cm (6 ¾"–8") measured flat without handle |
| Yarn Weight | 2 Fine |
| Fiber | 100% Cotton |
| Terminology | US |
Customizing the Size
This pattern comes in two sizes: XS and S. The pictured bag is size S. The sizing difference shows up in the width (14 cm vs. 19 cm flat) and a small amount of height. If you want something in between, you can adjust the number of chain-spaces in the net rounds, but do swatch first so you know where your gauge lands before committing to a size.
Stitches & Abbreviations
Just the basics here — nothing unfamiliar.
- ch = chain
- sc = single crochet
- dc = double crochet
- sl st = slip stitch
- st(s) = stitch(es)
- * * = repeat instructions between asterisks as directed
Important Notes
Gauge matters more than hook size. The 3 mm hook is a starting point. If you're getting more than 24 dc across 10 cm, go up a hook size. Fewer than 24, go down. The finished bag weighs roughly 22–25 g, so you won't need much yarn, but a tight or loose gauge will shift the size noticeably on something this small.
Chain tension is its own thing to watch. If you work the chain with the yarn sitting at the outermost position on the hook, it tends to come out too tight. Each chain stitch should be about as wide as a double crochet. If your chains are pulling snug, consciously loosen your grip or try working them with a hook one size up.
At the start of every double crochet round, ch 3. That chain-3 counts as your first dc. Skip the first dc from the previous round directly below it, work across, then close the round with a sl st into the 3rd chain of that starting ch-3. This is consistent throughout the bag body.
The bag starts at the bottom with a circle of double crochet, then builds upward using chain-spaces to create the net structure. The handle is a row of chain stitches worked at the top once the body is complete. There are no separate pieces to sew together.
Let's Make the Fruit and Vegetable Bag Crochet Pattern
Here's how the bag comes together, starting from the flat circular bottom and working up through the open net body to the simple drawstring handle.
Building the Bottom
The bottom is a flat circle worked in double crochet rounds, and it sets the size for the whole bag. Note that the bottom is finished at size XS — if you're making size S, continue straight into the Net section after completing Round 4.
Round 0: Work 4 ch with crochet hook size 3 mm = US C and DROPS Safran. Form them into a ring with 1 sl st in the first ch. This magic ring method gives you a tight, closed center to build from.
Round 1: Work 12 dc around the ring. [12 dc]
Round 2: Work 2 dc in each st. [24 dc]
Round 3: *2 dc in first st, 1 dc in next st* repeat around. [36 dc]
The bottom measures approx. 5 cm (2") in diameter.
Round 4: *2 dc in first st, 1 dc in each of next 2 sts* repeat around. [48 dc]
The piece measures approx. 6 cm (2 ⅜") in diameter.
Working the Net Body
Now the bag opens up into its net structure, worked in chain-space rounds that expand with each row. Continue with chain-spaces as follows — the stitch count will vary depending on your size, giving you between 18 and 24 chain-spaces to work with.
Round 1: Ch 2, *skip 1 st, 1 sc in next st, ch 2* repeat around, finishing with 1 sl st around the first ch-2 on the round. [18–24 ch-spaces] This round transitions you from the solid dc base into the open net. The slip stitch goes around the chain-2 arch, not into a stitch — keep that in mind as you close the round.
Round 2: Ch 3, insert a marker in these ch (first chain-space). *1 sc around next ch-space, ch 3* repeat to the first chain-space, 1 sl st around this chain-space. The marker tracks your first chain-space so you know exactly where each round ends. Move it up as instructed in the rounds that follow.
Round 3: Ch 4, move the marker to these ch (first chain-space). *1 sc around next ch-space, ch 4* repeat to the first chain-space, 1 sl st around this chain-space.
Round 4: Ch 5, move the marker to these ch (first chain-space). *1 sc around next ch-space, ch 5* repeat to the first chain-space, 1 sl st around this chain-space. By this point the chain-spaces have expanded from 2 to 5 chains, and that's where they stay for the rest of the bag.
Rounds 5+: Repeat Round 4 until the piece measures 17–20 cm (6 ¾"–8") measured flat. Cut and fasten off. Measure the bag flat rather than stretched — the net will have some give, so check it relaxed.
Cut and fasten off.
Adding the Handle
The handle is a simple chain drawstring threaded through the top of the net to cinch and carry the bag.
Step 1: Work a row of ch, 60 cm (23 ⅝") long, and thread it up and down through the last round. Tie a knot in the end. Weaving the chain in and out through the final round of chain-spaces creates the drawstring effect — pull it tight to close the bag, or leave it loose to keep it open while you fill it.
Care Instructions
This bag is worked in 100% cotton, so it washes well, but I'd skip the machine wash and hand wash it instead to keep the net structure from stretching out of shape. Lay it flat to dry rather than hanging it. Because the handle is a crocheted chain threaded through the top round and tied in a knot, pulling the bag off a hook or overloading it can stress that knot over time, so it's worth checking it every now and then and retying if it loosens.
Frequently Asked Questions
Do I need to change hook sizes as the net section grows?
The hook size is a guide, not a fixed rule. If your chain-spaces are pulling tight or the net looks stiff, go up a hook size. The chain stitches in the net rounds need to sit loosely, and the pattern notes that 1 chain should be as wide as 1 double crochet. If yours are coming out tighter than that, a larger hook will sort it out.
What does the stitch marker actually do in this pattern?
It tracks the first chain-space of each net round so you know where to end with a slip stitch. You move it up each round as the chain-spaces get bigger, from ch-2 up to ch-5. Without it, it's easy to lose your place, especially once you're repeating the same ch-5 round multiple times to reach the finished height.
How long should the handle chain be, and can I adjust it?
The chain is worked to 60 cm (about 23 ⅝") and then threaded up and down through the last round of the bag before tying a knot at the end. You can absolutely make it longer if you want more of a shoulder-bag drop. Just chain more before you thread it through.
How do I know when to stop adding net rounds?
Keep repeating the ch-5 round until the bag measures 17 to 20 cm (6 ¾" to 8") when laid flat, not counting the handle. The range gives you some flexibility depending on how you want it to fit, whether you're using it for small citrus or larger produce.
Can I use both colors in the same bag, or is each color for a separate bag?
The pattern lists 50 g of off white and 50 g of powder pink, but doesn't specify placement, so each color is likely intended for a separate bag rather than color changes within one. That said, there's nothing stopping you from switching colors between the bottom circle and the net section if you want a two-tone look.
Happy Crocheting
I hope you enjoy making this little bag as much as I do. It works up quickly, and there's something satisfying about crocheting something that actually gets used every week at the market. If you make one, I'd love to see it, so tag me on Instagram or drop a photo in the comments below. And if you're saving patterns for later, this one pins really well on Pinterest for when you're ready to start your next project.
🥦 Complete your kitchen set: The Pantry Basket with Handle and Small Storage Basket complement this bag perfectly for a coordinated home collection.


Leave a Reply