
This X Marks the Spot Bookmark Crochet Pattern is actually one of my favorites I've put together. It's quick, it's satisfying, and the laced detail running down the center makes it feel way more special than the time it takes to make.

Jump to:
About This Project
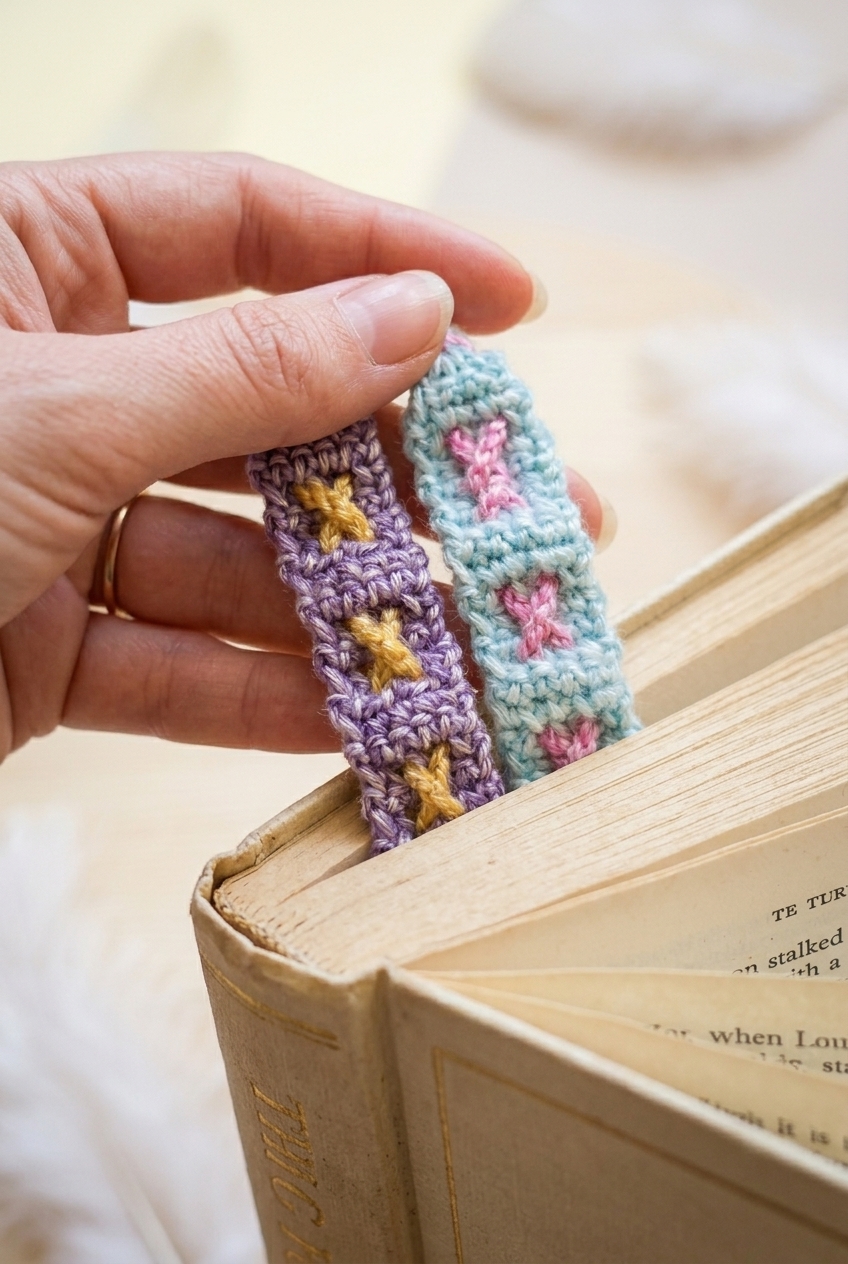
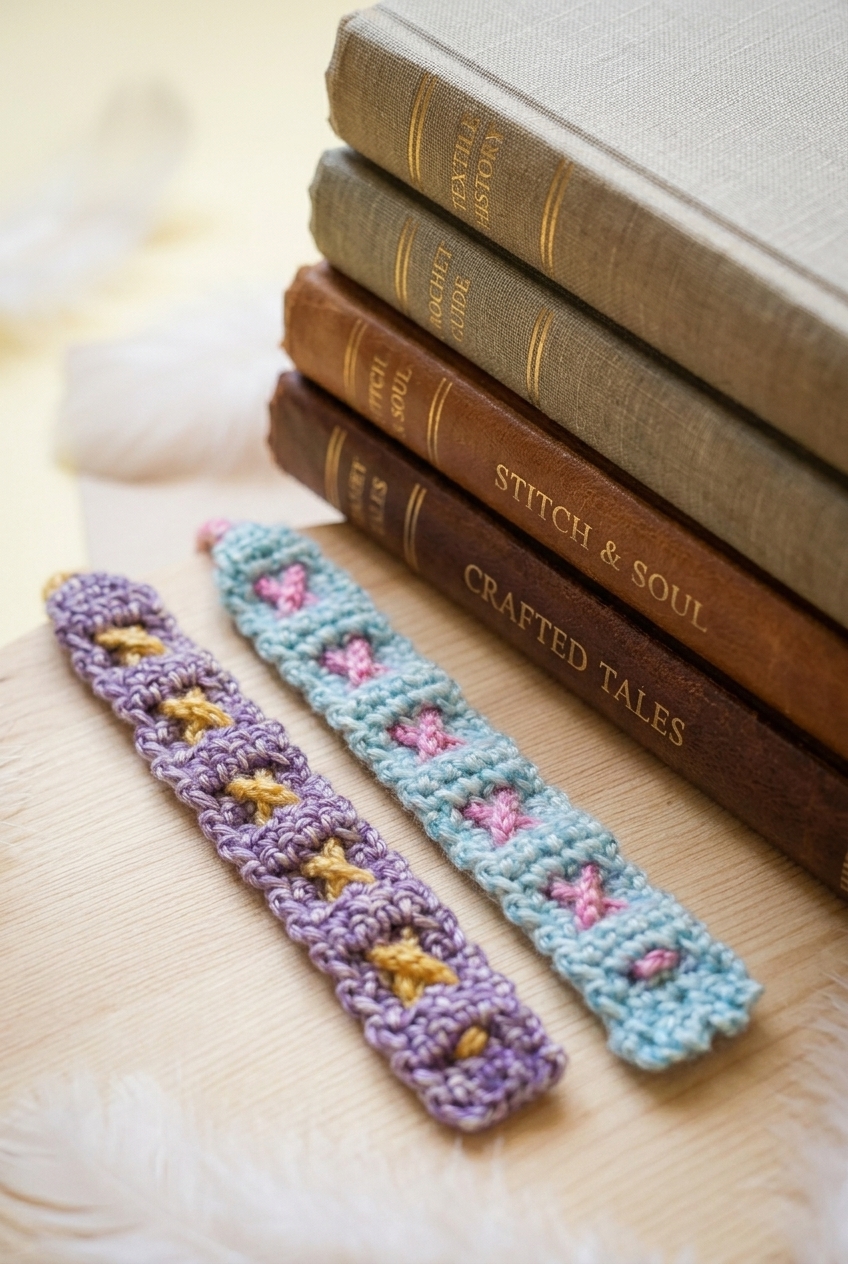
What I love about this one is the construction. You're not just crocheting a flat strip and calling it done. The ladder of openings down the center gets laced through with a contrasting color, and that detail is what really makes it. It's a pretty simple technique, but the result looks like you put a lot more thought into it than you did.
This is the kind of project I make for people who actually read. Teachers, librarians, the friend who always has a book in their bag. It's small enough to finish in one sitting, which also makes it a no-brainer when you need a last-minute handmade gift and don't want to stress about it.
Why You Need This on Your Hook
A fast, beginner-friendly make that looks genuinely thoughtful as a handmade gift.
- Beginner Friendly: No complicated stitches here, so if you're still building confidence this is a really good one to try.
- Quick Finish: You can realistically complete one in a single sitting, which is a nice change of pace.
- Great for Gifting: Small, practical, and personal enough to feel like a real handmade gift rather than an afterthought.
- Scrap Yarn Friendly: Two contrasting colors in small amounts means this is a perfect stash buster.
- Technique Payoff: The lacing technique is simple but gives you a new skill you'll actually want to use again.
Your Supply List
This is a great excuse to dig into those small yarn scraps you have been saving for no particular reason.
- DK Weight Cotton-Blend Yarn (78% Cotton, 22% Acrylic): A DK cotton blend works really well here because it gives the bookmark enough structure to hold its shape without being stiff or scratchy. The acrylic content keeps it from stretching out over time, which matters for something that gets pulled in and out of books regularly. You only need a small amount of each color, so this is the kind of project where leftover scraps from other makes are more than enough.
- 3 mm Crochet Hook: A 3 mm hook keeps your stitches tight and neat, which is exactly what you want for a flat bookmark. Looser tension can make the fabric look a little sloppy at this scale. The pattern notes do mention you can go up a size if needed and just adjust your tension to compensate.
- Also needed: darning needle, scissors
Color Sequence & Yarn Changes
The bookmark body and picot border are worked in your main color, with the braided section using the complementary colors. The braid is made from a chain that runs approximately twice the length of the chain at the top of the bookmark, so around 100 to 120 chains, and then a separate chain of 60 before you cut anything. Keep all your colors attached until you are done with the braid so you have enough length to work with.
Key Information
A slim, woven bookmark worked in rows with a picot finish at each end.
| Skill Level | Beginner |
| Pattern Gauge | Gauge is not critical for this project. Use a hook size and tension that create a neat fabric and consistent ch-1 spaces for weaving. |
| Finished Size | 6" tall x 1" wide |
| Yarn Weight | 3 Light / DK |
| Fiber | 78% Cotton, 22% Acrylic |
| Terminology | US |
Stitches & Abbreviations
Short list — most of it you already know.
- ch = chain
- fsc = foundation single crochet
- sc = single crochet
- sc2tog = single crochet 2 together (decrease)
- sc3tog = single crochet 3 together (decrease)
- sk = skip
- sl st = slip stitch
- sp = space
- st(s) = stitch(es)
Special Stitches
- fsc (foundation single crochet): Make a slip knot. Ch 2, insert hook in 1st ch, yo, pull up a loop, yo, pull through 1 loop (creates the foundation ch), yo, pull through 2 loops. For next fsc, insert hook under 2 loops of the foundation ch just made, yo, pull up a loop, yo, pull through 1 loop, yo, pull through 2 loops.
- Picot: Ch 3, insert hook in 1st ch, sl st to join.
Helpful Tips
This pattern is worked flat in rows the whole way through. No joining rounds, no working in the round at any point. Turning chains do not count as stitches, so don't work into them at the end of a row.
Gauge really doesn't matter here. The bookmark is a fixed narrow strip, so what you're aiming for is even tension and ch-1 spaces that sit open enough to weave through cleanly. A 3 mm hook is the suggested starting point, but if your tension runs tight, go up a size and see how it feels.
The pattern uses Scheepjes Stone-Washed (78% Cotton, 22% Acrylic; 142 yds per 50 g skein) in a DK weight, but any 3-weight yarn will work. You won't use much of each color, so this is a good scrap yarn project. Suggested colorways are 849 Yellow Jasper, 811 Deep Amethyst, 813 Amazonite, and 836 Tourmaline, though the color choices are entirely up to you.
Step-by-Step Instructions
Here's how I work through the X Marks the Spot Bookmark crochet pattern, from the foundation row all the way to the finished picot edge.
Bookmark Body
This is the main piece — a narrow rectangular panel worked in rows with a repeating eyelet pattern that creates the ch-1 holes you'll weave through later. Before you start, note that you do not cut yarn at the end. After Row 36, you'll chain 60 for the braid section.
Row 1: Fsc 5. [5 fsc]
Row 2: Ch 1, turn, sc in each st across. [5 sc]
Row 3: Ch 1, turn, sc in 1st sc. *Ch 1, sk 1 sc, sc in next st* repeat once more. [3 sc, 2 ch-1 sps] This is the eyelet row — those ch-1 spaces are what the long chain will weave through to form the X pattern, so keep your tension consistent here.
Row 4: Ch 1, turn, sc in each st and ch-1 sp across. [5 sc] Working into the ch-1 spaces closes the eyelets back up and restores your full stitch count.
Row 5: Ch 1, turn, sc in each st. [5 sc]
Rows 6–32: Repeat Rows 3–5 nine more times. [5 sc] This covers the bulk of the bookmark body — nine full repeats of the three-row eyelet sequence.
Row 33: Repeat Row 3. [3 sc, 2 ch-1 sps]
Row 34: Repeat Row 4. [5 sc]
Row 35: Ch 1, turn, sc2tog, sc in next st, sc2tog. [3 sc] The shaping starts here — you're decreasing down toward a point at the top of the bookmark.
Row 36: Ch 1, turn, sc3tog. [1 sc]
Do not cut yarn. Ch 60.
Braids
Now you'll make the two additional chains that get braided together with the one you just chained off the bookmark body. Using a complementary color, ch 100–120 — approximately twice as long as the chain at the top of the bookmark. You'll now have three chains total to braid. Make sure all three chains are the same length before braiding, adding or dropping chains as needed. Stabilize the bookmark (for example, with a heavy object), then braid the three chains together. When finished, sew the braids together, wrap yarn around, and weave through to secure, creating a tassel. Leave a 1.5"–2" tail.
Assembly: Weaving the X Pattern
This is where the bookmark gets its name. Using a darning needle, attach to the starting end of the long chain and weave through the ch-1 holes in the bookmark body to create an X pattern. Start weaving from the bottom-most holes and work diagonally. Once one side is woven in, work the other side — the motion is like lacing up a shoe. Take your time here; consistent tension across the weaving makes a real difference in how the finished X sits.
Finishing: Picot Border
The picot border runs along the bottom edge and gives the bookmark a tidy, decorative finish. Using the same yarn color as the main bookmark body, flip the bookmark so the bottom right side is facing up, insert your hook in the rightmost stitch, and attach yarn.
Row 1: *Ch 3, sl st in 1st ch (picot made), sl st in next stitch* repeat across. [4 picots] Each picot is a tiny three-chain loop anchored with a slip stitch — work into the ch-3 base chain, not the loop itself.
Weave in all tails.
Care Instructions
Since this bookmark is made with a cotton-acrylic blend, it holds up well to hand washing with cool water and a little gentle soap. Lay it flat to dry so the braid stays neat and the picot border keeps its shape. I'd skip the dryer entirely, just because the braid can get a bit tangled and misshapen with heat and tumbling. Once it's dry, you can store it pressed flat inside a book or tucked into a small pouch if you're gifting it.
Frequently Asked Questions
What is a foundation single crochet and do I need to know it before starting?
Foundation single crochet (fsc) replaces a starting chain plus a row of single crochets in one step. The bookmark body starts with 5 fsc, so yes, you'll need to know this before you begin. It's not complicated once you try it a couple of times, but I'd recommend practicing on a small swatch first if you've never done it.
How does the X pattern actually get made? Is it embroidered on?
The X is created by weaving the long chain through the ch-1 holes in the bookmark body, not by embroidering or sewing anything separately. You attach a darning needle to the end of the chain and lace it diagonally through the holes, working one side first and then the other, like lacing up a shoe. The chain is worked right into the pattern, so nothing extra is added after the fact.
Can I use a different hook size?
Gauge isn't important for this project, so yes, you can go up in hook size. A larger hook will give you a slightly wider, more relaxed fabric. The 3 mm is just what I use for DK-weight cotton, but if you only have a 3.5 mm or 4 mm on hand, it'll still work fine. Just keep your tension fairly consistent so the ch-1 holes stay visible for weaving.
How long should the braid chains be?
The two extra chains should each be roughly twice the length of the chain at the top of the bookmark, so about 100 to 120 chains each. Before you start braiding, hold all three chains together and make sure they match in length. The pattern notes say to add or drop chains as needed, so don't stress about hitting an exact number.
Do I need a lot of yarn for this? Can I use scraps?
This is a GREAT scrap project. You only need a small amount of each color, so leftover DK-weight yarn works perfectly. I've made these using odds and ends from other projects. Just make sure you have enough of your main color to finish the bookmark body and picot border without running out mid-row.
Happy Crocheting
I hope you have a lot of fun with this one. It's such a satisfying little make, and once you've done the weaving step and that X comes together, it's pretty hard not to immediately start another in a different color combination. If you make one, I'd love to see it. Tag me on social media or drop a photo in the comments below. And if you're saving this for later, pinning it to your crochet projects board on Pinterest is a great way to keep it handy.


Leave a Reply