
Storage that actually looks good is kind of hard to find, and that's exactly why I ended up making this Two Tone Rectangular Basket Crochet Pattern. I wanted something sturdy enough to actually use around the house but with enough personality to leave out in the open without hiding it in a cabinet. This one really does check both boxes, and honestly I've already made a few of them.

Jump to:
About This Project
What I love about this one is the two-tone construction. Working with two contrasting colors and having them play off each other in a structured, boxy shape feels really satisfying to finish. It's not just a plain basket. The color blocking gives it a whole design element that makes it feel intentional, like something you'd actually buy. I'd make this for a friend who just moved into a new place, or honestly just keep it for myself on a bookshelf or in the bathroom.
It also comes in two sizes, which I find way more useful than a single-size pattern. You can make both and nest them, or just pick the one that fits your space. Either way, pretty simple to work up once you get the hang of the construction.
Why You'll Want to Make This
Two sizes, bold color blocking, and built-in handles make this basket as practical as it is stylish.
- Beginner-friendly build: This is rated easy, so if you're newer to working in the round with structure, this is a no-trouble project to build that skill.
- Two sizes included: The pattern gives you both a large and small version, so you can make a matching set or just pick what fits your space.
- Great gift option: A handmade storage basket is genuinely useful, which makes it one of those gifts people actually appreciate instead of just being polite about.
- Functional details: The integrated loop handles aren't just decorative. They make the basket actually easy to grab and move around.
- Year-round use: No seasonal limitations here. This works in any room, any time of year, and holds up to actual daily use.
Your Supply List
Two colors, one hook, and the supply list is basically done.
- Weight 7 Jumbo T-Shirt Yarn (2 colors): T-shirt yarn is the right call here because it gives these baskets the structure they need to actually hold their shape. It's thick, it's stiff enough to stand up on its own, and it works up fast at this weight. You'll need approximately 160 yards of each color, so two separate balls or cones, one for Color A and one for Color B.
- US N/P (10 mm) Crochet Hook: This size pairs well with jumbo t-shirt yarn and gives you a fabric that's firm without being a fight to work through. If your finished basket turns out floppy, drop down a hook size. The tighter the stitch, the more the basket holds its walls upright.
- Also needed: scissors
Alternative Yarns
T-shirt yarn can be hard to find locally depending on where you are, and the quality varies a lot between brands. A few other options will get you a similar result.
- Jumbo cotton rope yarn: Also weight 7, and it gives you that same stiff, structured fabric. Yardage per ball varies, but aim for at least 160 yards per color. It tends to be a little more consistent in thickness than t-shirt yarn, which makes the stitch count easier to keep even.
- Recycled fabric yarn: Another weight 7 option that behaves almost identically to t-shirt yarn. It's made from strips of knit fabric, so the texture is similar. Check the yardage carefully since balls can run shorter than expected.
Color Sequence & Yarn Changes
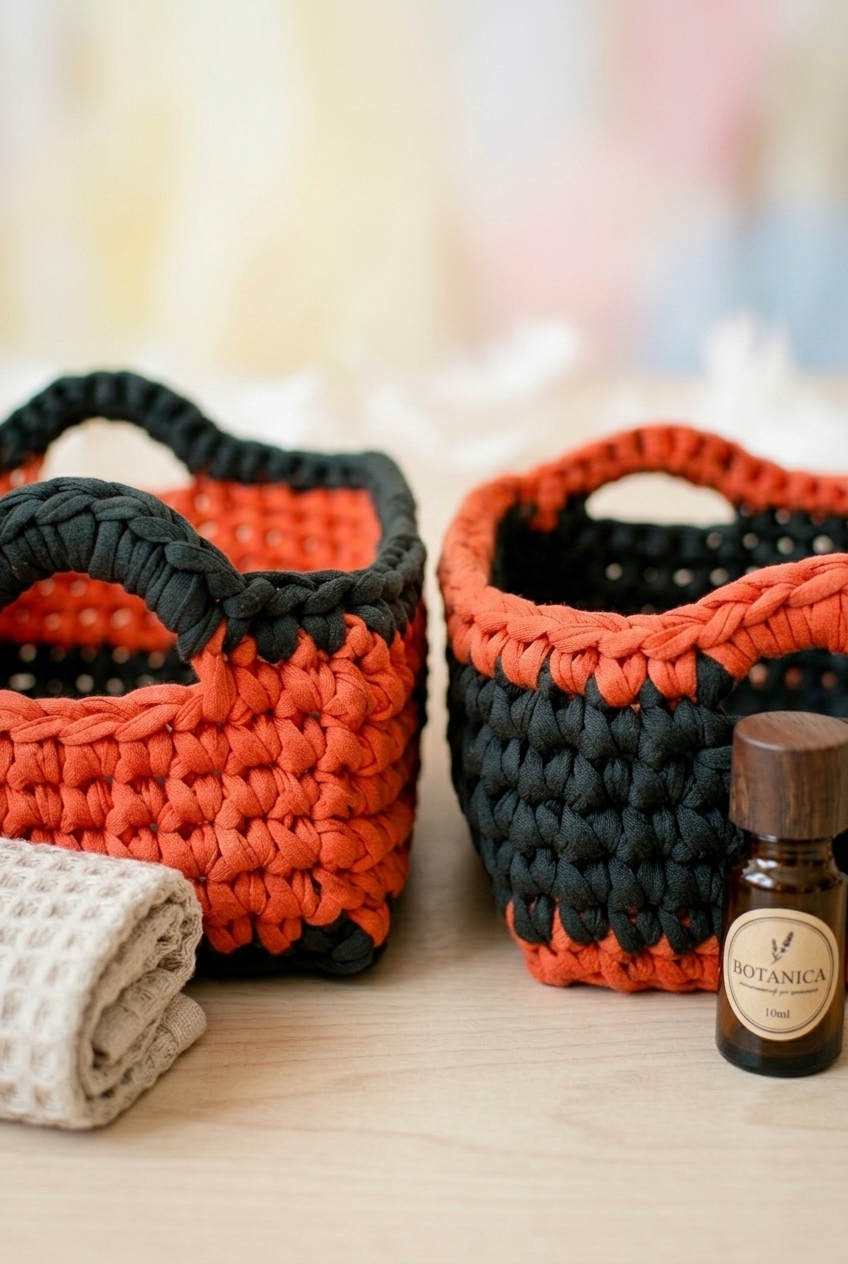
The color placement is swapped between the two baskets: Color A is the bottom and accent on the large basket, while Color B takes that role on the small one, and vice versa for the upper sides. It's worth keeping that straight before you start because you're essentially working the same construction twice with the colors flipped, and grabbing the wrong ball mid-round is easy to do.
Essential Info
Two nesting rectangular baskets worked in jumbo yarn, sized to stack inside each other with the colors swapped between them.
| Skill Level | Easy |
| Pattern Gauge | Gauge is not critical for this project. Use a hook size that creates a tight, firm fabric so the basket holds its shape. |
| Finished Size | Large Rectangular Basket: approx. 11 in long x 8 in wide x 4¾ in tall Small Rectangular Basket: approx. 10 in long x 7 in wide x 4 in tall |
| Yarn Weight | 7 Jumbo |
| Terminology | US |
Stitch Guide & Abbreviations
Short list. All basics you've probably used a hundred times.
- CA = Color A
- CB = Color B
- ch = chain
- rep = repeat
- sc = single crochet
- sk = skip
- st(s) = stitch(es)
The Critical Details
This pattern is written in US crochet terms. Each basket starts with a flat bottom worked in rows, then transitions to joined rounds for the sides. The ch 1 at the beginning of any row or round does not count as a stitch, anywhere in the pattern. Stitch counts are given at the end of each round so you can check your work as you go.
The two baskets are designed to nest inside each other when you're not using them, which is a nice bonus for storage. The color arrangement is intentionally reversed between them: CA is the main color on the large basket and the accent on the small one, with CB doing the opposite. So if you're buying yarn, that swap affects how much of each color you'll use across the pair.
Hook size matters here even though gauge isn't measured. Jumbo yarn can produce a pretty floppy fabric if your tension runs loose, and a basket needs to hold its shape on its own. If the sides are collapsing or the base isn't sitting flat, go down a hook size. A firm, dense fabric is what you're after.
The Pattern
Both baskets are worked the same way: a flat bottom in rows, then you pick up around the edges and work the sides in joined rounds.
Large Rectangular Basket: Bottom
The bottom of the large basket is worked flat in rows with CA. It's a simple rectangle — just single crochet back and forth until you have the foundation you'll build the sides up from.
Foundation: With CA, ch 11. [11 ch]
Row 1: Sc in 2nd ch from hook and in each ch across. Turn. [10 sc]
Row 2: Ch 1, sc in each st across. Turn. [10 sc]
Rows 3–19: Repeat Row 2. Do not fasten off. [10 sc] You'll have 19 rows total when you're done — don't fasten off, because you're going straight into the sides.
Large Rectangular Basket: Upper / Sides
The sides are worked in joined rounds, picking up stitches all the way around the bottom rectangle. You'll switch from CA to CB after Round 1, then back to CA for the final handle round.
Round 1: Ch 1, sc in each st across, sc in the edge of each row along the side, sc in each st across, sc in the edge of each row along the remaining side. Join and fasten off CA. [58 sc] Working into the row edges is how you turn the flat bottom into a 3D basket — aim for one sc per row edge to keep the count consistent.
Round 2: Join CB in same st as join. Ch 1, sc in same st and in each st around. Join. [58 sc]
Round 3: Ch 1, sc in same st and in each st around. Join. [58 sc]
Rounds 4–6: Repeat Round 3. [58 sc]
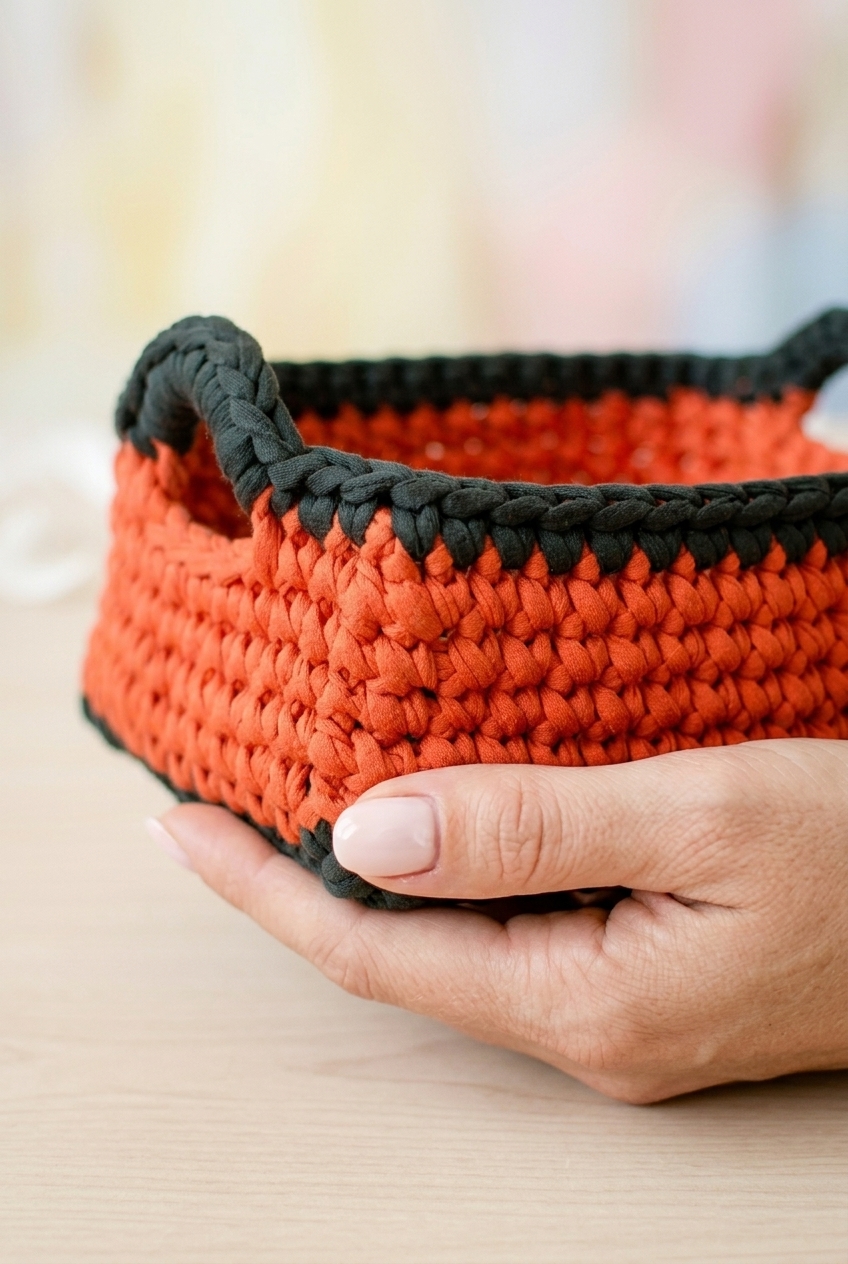
Round 7 (Handle Round): Ch 1, sc in same st and in each of next 2 sts, ch 6, sk next 4 sts, sc in each of next 25 sts, ch 6, sk next 4 sts, sc in each of next 22 sts. Join and fasten off CB. [50 sc + 2 ch-6 loops] The two ch-6 loops are your handles — skipping 4 stitches on each side creates the opening, and the chain spans it.
Round 8: Join CA in same st as join. Ch 1, sc in same st and in each of next 2 sts, 8 sc around ch-6 loop, sc in each of next 25 sts, 8 sc around ch-6 loop, sc in each of next 22 sts. Join and fasten off. [66 sc] Working 8 sc around each chain loop fills in the handles and gives them a finished edge.
Weave in ends.
Small Rectangular Basket: Bottom
The small basket bottom is worked flat in rows with CB — same construction as the large one, just a slightly smaller rectangle to start from.
Foundation: With CB, ch 9. [9 ch]
Row 1: Sc in 2nd ch from hook and in each ch across. Turn. [8 sc]
Row 2: Ch 1, sc in each st across. Turn. [8 sc]
Rows 3–17: Repeat Row 2. Do not fasten off. [8 sc]
Small Rectangular Basket: Upper / Sides
Just like the large basket, you'll pick up around the rectangle and work the sides in joined rounds — this time starting in CB, switching to CA for the body, then finishing back in CB for the final round.
Round 1: Ch 1, sc in each st across, sc in the edge of each row along the side, sc in each st across, sc in the edge of each row along the remaining side. Join and fasten off CB. [50 sc]
Round 2: Join CA in same st as join. Ch 1, sc in same st and in each st around. Join. [50 sc]
Round 3: Ch 1, sc in same st and in each st around. Join. [50 sc]
Rounds 4–5: Repeat Round 3. [50 sc]
Round 6 (Handle Round): Ch 1, sc in same st and in next st, ch 5, sk next 4 sts, sc in each of next 21 sts, ch 5, sk next 4 sts, sc in each of next 19 sts. Join and fasten off CA. [42 sc + 2 ch-5 loops] The handles on the small basket use a ch-5 loop instead of ch-6, keeping them proportional to the smaller size.
Round 7: Join CB in same st as join. Ch 1, sc in same st and in next st, 7 sc around ch-5 loop, sc in each of next 21 sts, 7 sc around ch-5 loop, sc in each of next 19 sts. Join and fasten off. [56 sc]
Weave in ends.
Care Instructions
Since the fiber isn't specified for this pattern, check your yarn label before washing. T-shirt yarn is often cotton-based and can usually handle a gentle machine wash, but some blended versions are hand-wash only. Either way, reshape the baskets while they're still damp and let them dry upright so the sides hold their form. Stacking the small basket inside the large one while they dry actually helps both keep their shape at the same time.
Frequently Asked Questions
Go down a hook size. The 10 mm hook gives a looser fabric with bulky t-shirt yarn, which works fine for most yarns, but some are just softer or stretchier than others. A tighter stitch tension is the fix here, not a different yarn. Try a 9 mm and see if the sides stand up better.
The colors are swapped between the two sizes. Color A makes up the bottom of the large basket and the finishing round, while Color B handles the sides and handles. On the small basket, those roles flip: Color B is the bottom and Color A does the sides and handles. So both baskets use the same two colors, just in opposite positions.
They do. That was a deliberate part of the sizing. The small basket nests inside the large one when you're not using them separately, which is handy if you're making these as a set or just want to keep things tidy on a shelf.
No separate sewing. The handles are worked directly into the sides during the handle round. You chain across a gap, skip a few stitches, and then in the following round you work single crochets around that chain loop to fill it in. The large basket uses a ch-6 loop with 8 sc worked around it; the small uses a ch-5 loop with 7 sc.
Each color comes in at approximately 160 yards. Since the colors swap roles between the two baskets, you use both Color A and Color B across both projects. If you're buying yarn specifically for this, two skeins of t-shirt yarn at around 160 yards each should cover you for the full set.
Once you finish the flat rectangular bottom, you don't fasten off. Round 1 of the sides picks up stitches all the way around the bottom piece: across the last row of stitches, along the row edges on each long side, and across the foundation chain end. That round connects everything into a continuous loop and you just keep going in joined rounds from there.
Happy Crocheting
I hope you love how these baskets turn out. There's something satisfying about a project that works up fast AND actually gets used around the house, and the nesting feature means they store away neatly when you don't need both out at once. If you make them, I'd love to see your color combination — come tag me on Instagram or drop a photo in the comments below. And if you're saving this for later, pin it to your crochet projects board so you can find it when you're ready to grab that t-shirt yarn.


Leave a Reply