
Baby shower season hit and I needed something fast, cozy, and genuinely cute to give. That's exactly how this Super Chunky Baby Booties Crochet Pattern came to life in my project basket. It works up in two sizes to cover those first months, and honestly it's become one of my go-to baby gifts because it feels special without being a huge time commitment.

Jump to:
The Inspiration
I made these for a friend who was expecting her first baby in the fall, and I wanted something that felt a little more substantial than the usual dainty bootie pattern. There's something really satisfying about a bootie that looks like it actually stays on a tiny foot, you know? The construction here is what I love most. You're building the sole and the upper in a way that comes together cleanly, and the trim around the opening gives it a finished, intentional look that makes the whole thing feel polished.
These are genuinely the kind of thing you make once and then immediately want to make again in a different color for every baby you know.
Why You Need This on Your Hook
These chunky booties make the most satisfying, grab-and-go baby gift you'll ever crochet.
- Skill level fit: Rated intermediate, so you'll want some basic construction experience, but nothing here is going to stop you in your tracks.
- Two sizes included: The pattern covers 0–6 months and 6–12 months, so you can make both and have a gift that actually grows with the baby.
- Quick time investment: Chunky yarn means these work up fast. A great weekend project or last-minute shower gift.
- Gifting potential: Handmade baby booties are pretty much always the hit of any baby shower, and a chunky pair feels extra cozy and giftable.
- Technique value: Good practice for bootie construction if you haven't made them before, and the trim detail is a nice skill to add to your repertoire.
Materials You'll Need
Two colors, one hook, and a couple of buttons — that covers it.
- Super Bulky Weight Yarn (Weight 6), Two Colors — Purple and White: Super bulky is the right call for baby booties because it works up fast and gives the finished boot a soft, squishy structure that holds its shape without being stiff. For fiber, check your yarn label since the pattern doesn't specify, but a soft acrylic or acrylic blend is a practical choice for baby items — easy to wash, easy to find. You won't need a lot of either color. A rough estimate for both sizes is somewhere around 30–50 meters of Purple and just a small amount of White, maybe 5–10 meters, since it's only used for the finishing round.
- 5.5 mm Crochet Hook: This size pairs well with a weight 6 yarn and keeps the fabric tight enough that the bootie has some body to it. A looser hook size would make the stitches too open for a structured little shoe.
- Buttons, 2 cm diameter (2 total, 1 per boot): The buttonhole is built right into Round 8 by skipping a stitch, so the button size here actually matters. A button that's too small will slide through and not hold, and one that's too large won't fit through at all. Stick close to 2 cm.
- Also needed: yarn needle, scissors
Color Sequence & Yarn Changes
Purple is the main color and carries most of the work, with White joining only at Round 10 for a single edging round around the top of the boot. One thing worth noting: the materials mention the option of holding Purple and White together for the main boot rounds, so read through the pattern notes before you wind your yarn to make sure you're set up the way you want.
Essential Info
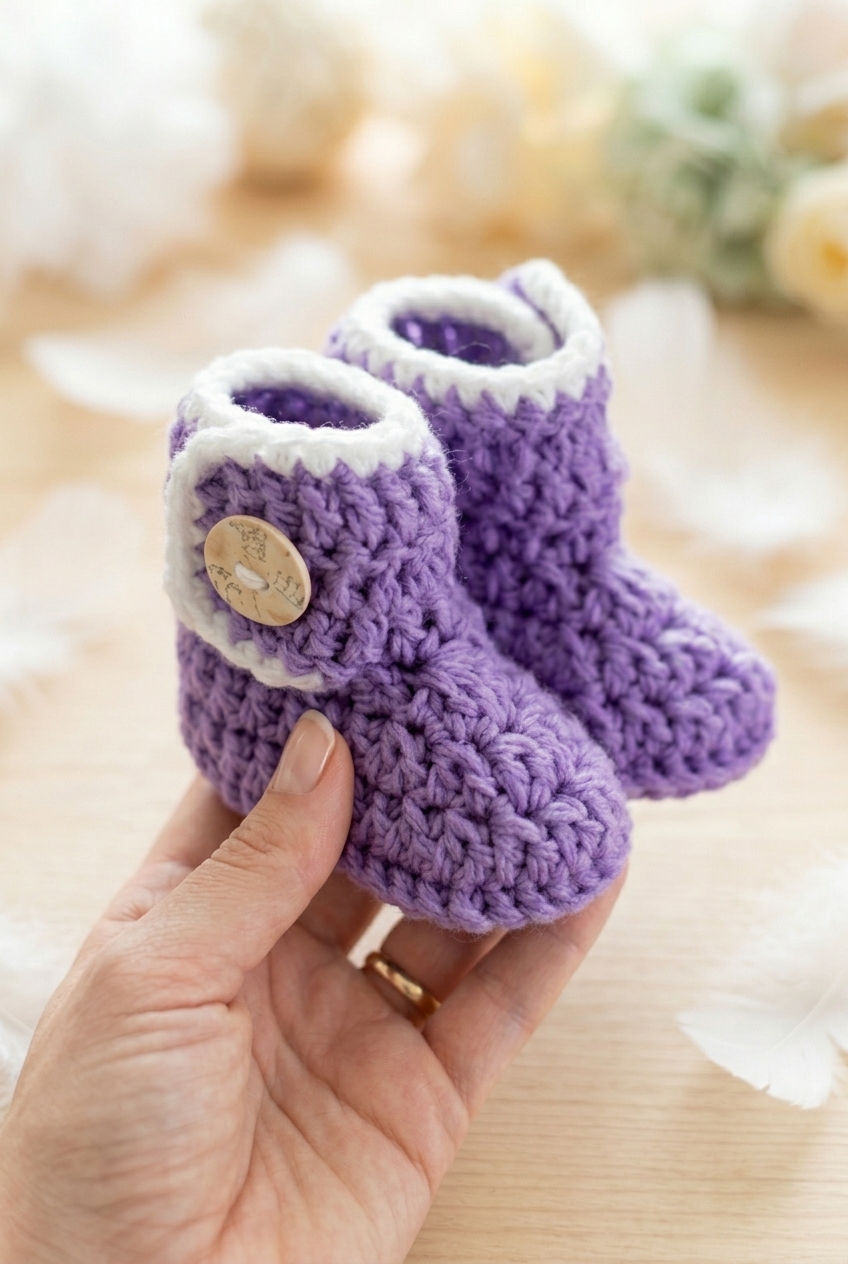
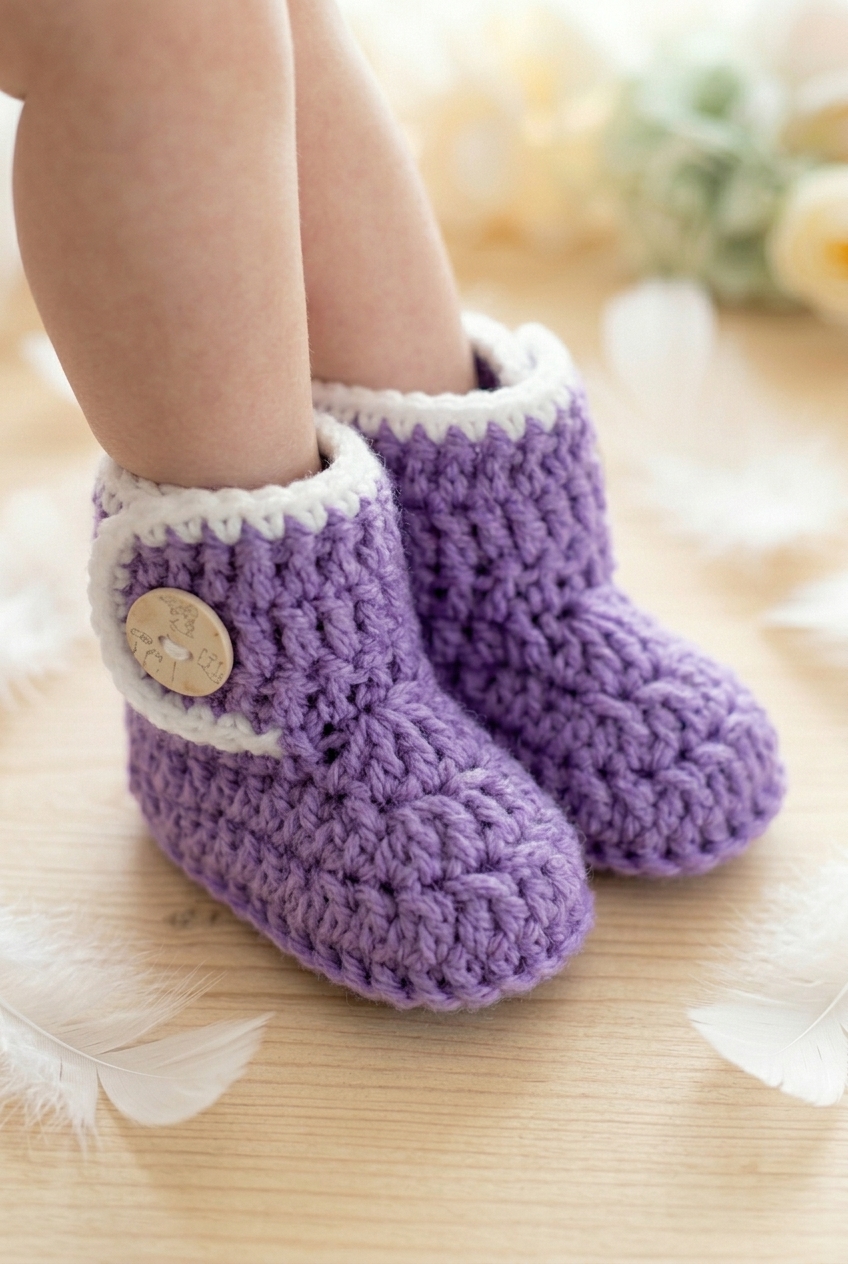
These little button-strap booties come in two sizes and use a back post stitch detail that gives the cuff a nice, defined ridge.
| Skill Level | Intermediate |
| Pattern Gauge | Gauge is not critical for this project. Use a hook size that creates a firm fabric and adjust hook size/yarn so the booties fit the intended baby size. |
| Finished Size | Sizes: 0–6 months (6–12 months) |
| Yarn Weight | 6 Super Bulky |
| Terminology | US |
Customizing the Size
Since gauge isn't critical here, sizing is mostly a matter of hook and yarn. Going up a hook size or using a slightly heavier yarn will give you a larger bootie; going down will tighten things up. The best check is just holding the finished sole against the baby's foot before you work the upper. The two sizes in this pattern cover 0–6 months and 6–12 months, and the stitch counts for the larger size are always in parentheses throughout.
Abbreviations & Stitches Used
Nothing unusual here beyond the back post stitch, which is listed below with its own instructions.
- ch = chain
- sl st = slip stitch
- sk = skip
- ea = each
- sc = single crochet
- dc = double crochet
- dc2tog = double crochet 2 together (decrease)
- dc5tog = double crochet 5 together (decrease)
- scbps = single crochet back post stitch
- RS = right side
- WS = wrong side
Special Stitches
- scbps (single crochet back post stitch): Insert hook from back to front, then back to front again around the post of the indicated stitch (pushing the post to the back of the work), yarn over, pull up a loop, yarn over, pull through 2 loops.
Pattern Notes
Numbers in parentheses throughout the pattern are for the larger size (6–12 months). The first number is always 0–6 months. If you only see one number, it applies to both sizes.
You'll need to know the double crochet foundation stitch before starting. It's used to build the sole, and the pattern assumes you're already familiar with it. The scbps is also required and is defined above.
The right and left boots are not identical. They differ only in the direction of the strap worked in Round 7, so pay attention to which boot you're making before you start that round. The buttonhole is formed simply by skipping 1 stitch in Round 8. No special technique needed for that part.
Each boot uses one button, 2 cm in diameter. Sew it to correspond with the buttonhole placement after finishing. The yarn for this pattern is worked as 2 strands of DK or light worsted held together, which brings it up to a super bulky weight. You can also use a single strand of super bulky if you have one on hand. Check your yarn label for fiber content, as the pattern doesn't specify a particular fiber.
Super Chunky Baby Booties Crochet Pattern Instructions
Work through both booties section by section, starting with the shared sole and toe shaping before splitting into the right and left boot straps.
Both Boots — Sole and Toe Shaping
This section builds the sole and works up through the toe shaping, and you'll make both boots exactly the same way up to this point. You're using yarn P and a 5.5 mm hook throughout.
First Steps: Using P and a 5.5 mm hook, ch 7 (9). 3 dc in 2nd ch from hook, 1 dc in next 4 (6) ch, 3 dc in last ch. With RS facing, turn work clockwise and work into foundation chains again: 3 dc in first ch (same ch as previous), 1 dc in next 4 (6) ch, 3 dc in last ch, sl st in first dc to join. [20 (24)]
Round 1: Ch 1 (does not count as st here or throughout), 1 dc in same st as previous sl st, 3 dc in next 2 sts, 1 dc in next 5 (7) sts, 3 dc in next 2 sts, 1 dc in next st, 3 dc in next 2 sts, 1 dc in next 5 (7) sts, 3 dc in last 2 sts, sl st in first dc to join. [36 (40)]
Round 3: Ch 1, 1 scbps around each previous dc stitch around, sl st in first sc to join. [36 (40)] WS on inside. The scbps (single crochet through the back post) creates a ridge that defines the edge of the sole. After this round, the wrong side sits on the inside.
Round 4: Ch 1, starting in same st as previous sl st, 1 dc in next 11 (13) sts, dc2tog 7 times, 1 dc in last 11 (13) sts, sl st in first dc to join. [29 (33)] The toe shaping starts here. The seven dc2tog decreases pull the front of the boot inward.
Round 5: Ch 1, starting in same st as previous sl st, 1 dc in next 10 (12) sts, dc2tog 5 times, 1 dc in last 9 (11) sts, sl st in first dc to join. [24 (28)]
Round 6: Ch 1, starting in same st as previous sl st, 1 dc in next 8 (10) sts, dc2tog, dc5tog, dc2tog, 1 dc in last 7 (9) sts, sl st in first dc to join. [18 (22)] The dc5tog pulls five stitches together at the very tip of the toe — work it slowly and make sure you're catching all five legs before pulling through.
Right Boot — Strap and Buttonhole
From here the two boots split, with the strap placement mirrored on each side. Work this section for the right boot only.
Round 7: Ch 1, turn, starting in same st as previous sl st, sl st in next 8 (10) sts, ch 1, turn, 1 dc in each st around working into the same sts as your slip stitches were worked into (you may also prefer to work a dc2tog at the back of the shoe to avoid a gap), now work 5 dc foundation sts starting in the next st (this stitch is already worked). [23 (27)] The slip stitches at the start of this round anchor the strap position. The 5 dc foundation stitches extend the strap out from the boot body.
Round 8: Ch 1, turn, 1 dc in first st, sk 1 st (buttonhole), 1 dc in each st along. [23 (27)] Skipping that single stitch creates the buttonhole. Keep your tension consistent here so the hole stays open but doesn't stretch out.
Round 9: Ch 1, turn, 1 dc in each st along. [23 (27)] Fasten off and tie in all tails.
Left Boot — Strap and Buttonhole
The left boot strap is worked the same way as the right, just starting from the opposite side of the boot after completing Rounds 1 through 6.
Round 7: Ch 1, starting in same st as previous sl st, sl st in next 8 (10) sts, ch 1, turn, 1 dc in each st around working into the same sts as your slip stitches were worked into (you may also prefer to work a dc2tog at the back of the shoe to avoid a gap), now work 5 dc foundation sts starting in the next st (this stitch is already worked). [23 (27)]
Round 8: Ch 1, turn, 1 dc in first st, sk 1 st (buttonhole), 1 dc in each st along. [23 (27)]
Round 9: Ch 1, turn, 1 dc in each st along. [23 (27)] Fasten off and tie in all tails.
Both Boots — Edging and Button
This final round adds a clean edge around the strap and top of each boot using yarn W, then finishes with the button. Work it the same way on both boots.
Round 10: Join W in the corner underneath the strap, work 1 sc neatly around the edge, around the top and back around to where you started. Fasten off and tie in all tails. Sew on button to correspond with the buttonhole. Take your time placing the button so it lines up cleanly with the buttonhole before sewing it down.
Care Instructions
Check your yarn label for washing instructions since the fiber isn't specified in this pattern, and the care will depend entirely on what you used. That said, I'd hand wash these in cool water and reshape them while damp, then lay them flat to dry. The buttons can loosen if you're not careful, so check the thread after the first wash and reinforce if needed. Store them somewhere they won't get squished out of shape before gifting.
Baby & Child Safety Notes
These booties use a 2 cm button on each boot, and that is a choking hazard for babies and young children. Sew each button on as securely as you possibly can, using a doubled thread and passing through multiple times before knotting off. Check the buttons regularly, especially after washing, and if one ever feels loose, take the bootie out of rotation until it's re-sewn. For very young babies who might be putting everything in their mouths, supervised wear only.
Frequently Asked Questions
Why do the right and left boots have different Round 7 instructions?
The difference is in the direction of the strap. For the right boot, you turn before working the slip stitches in Round 7, and for the left boot, you don't. That small change is what makes the strap sit on the correct side of each boot so the buttonhole lines up properly when they're on a baby's feet.
How is the buttonhole made in this pattern?
The buttonhole is just a skipped stitch in Round 8. You work one dc, skip the next stitch, then continue in dc along the rest of the strap. That gap becomes the buttonhole. It's simple but it works well with the 2 cm buttons called for in the pattern.
What does the single crochet back post stitch do in Round 3?
Round 3 is worked entirely in scbps, and that's what creates the ridge that defines the sole from the upper part of the boot. It also flips the work so the wrong side ends up on the inside. You do need to be comfortable with that stitch going in, because it's structural here, not just decorative.
Can I use the purple and white yarns separately instead of held together?
The materials note holding Purple and White together for the main boot rounds, so that double strand is part of how the fabric gets its density with a super bulky weight. Separating them would give you a thinner, looser fabric and the booties might not hold their shape as well. I'd stick with holding them together as written.
What is the dc foundation stitch and why does this pattern need it?
The dc foundation stitch lets you work a chain and double crochet at the same time, creating a foundation row that's more flexible than a regular chain. In Round 7, you use it to build the strap extension, working 5 dc foundation stitches directly onto the boot. If you haven't used it before, it's worth practicing on a swatch first.
Where exactly does the white edging round start?
Round 10 starts in the corner underneath the strap. You join White there and work one round of single crochet neatly around the entire top edge of the boot, including around the strap, and back to where you started. It's a finishing round, so keep your tension even and don't pull too tight or it'll distort the opening.
Now It's Your Turn!
I'd love to see how yours turn out, especially if you swap the colors or try a different button style. Tag me on social media or drop a photo in the comments below. And if you're saving this for later, pin it to your baby gifts board so you can find it when you need it. These work up so fast that once you finish the first pair, you'll probably want to make a second in the next size up before you even put your hook down.


Leave a Reply