
This Sunflower Bookmark Crochet Pattern is honestly one of my favorites I've put together. It's a quick, satisfying project that finishes up fast and feels so worth it when you're done.

Jump to:
About the Design
What I really love about this one is how much personality it packs into such a small project. The construction is layered in a way that feels more interesting than your average bookmark. You're working a few separate pieces and bringing them together, which keeps things from getting repetitive. It's the kind of make where you finish and think, okay, I need to make ten more of these.
This is the perfect thing to make for a book lover in your life. Teachers, librarians, a friend who always has a novel in their bag. It's thoughtful without being a huge time commitment, and that combination is pretty hard to beat.
Why You Need This on Your Hook
A charming, giftable make that works up fast and never gets old.
- Beginner Friendly: Rated easy, so newer crocheters can jump right in without stress.
- Quick Time Investment: Small enough to finish in a single sitting, which makes it great for last-minute gifts.
- Great for Gifting: Bookmarks are one of those universally appreciated gifts, and a handmade one makes it even better.
- Yarn Stash Project: This uses very little yarn, so it's a no-trouble way to use up scraps you've been holding onto.
- Multi-Piece Construction: Working separate elements and joining them is a nice technique to get comfortable with, without the pressure of a bigger project.
What You'll Need
Three colors, one hook, and scraps you probably already have — that is the whole list.
- DK Weight 100% Mercerized Cotton: A DK cotton works really well here because the stitch definition is clean and the fabric holds its shape without being stiff. Mercerized cotton specifically has a slight sheen and a smooth surface that makes the flower look crisp and finished. You'll need about 15 yards in yellow, 10 yards in green, and 2 yards in black, so this is a perfect project for small leftovers.
- Size E/4 (3.5 mm) Crochet Hook: This size pairs well with DK cotton and gives you a firm, tight fabric. The stitches stay defined without the hook dragging or the yarn splitting.
- Also needed: yarn needle, scissors
Color Sequence & Yarn Changes
The black is only used for the first two rounds of the flower head, then you switch to yellow for the petals in round 3. The green is completely separate and only comes in for the stem and leaves, which are worked in rows. Since the yardage for each color is small, there's no need to carry yarn between sections. Just cut and join as you go, and weave in the ends before moving to the next piece.
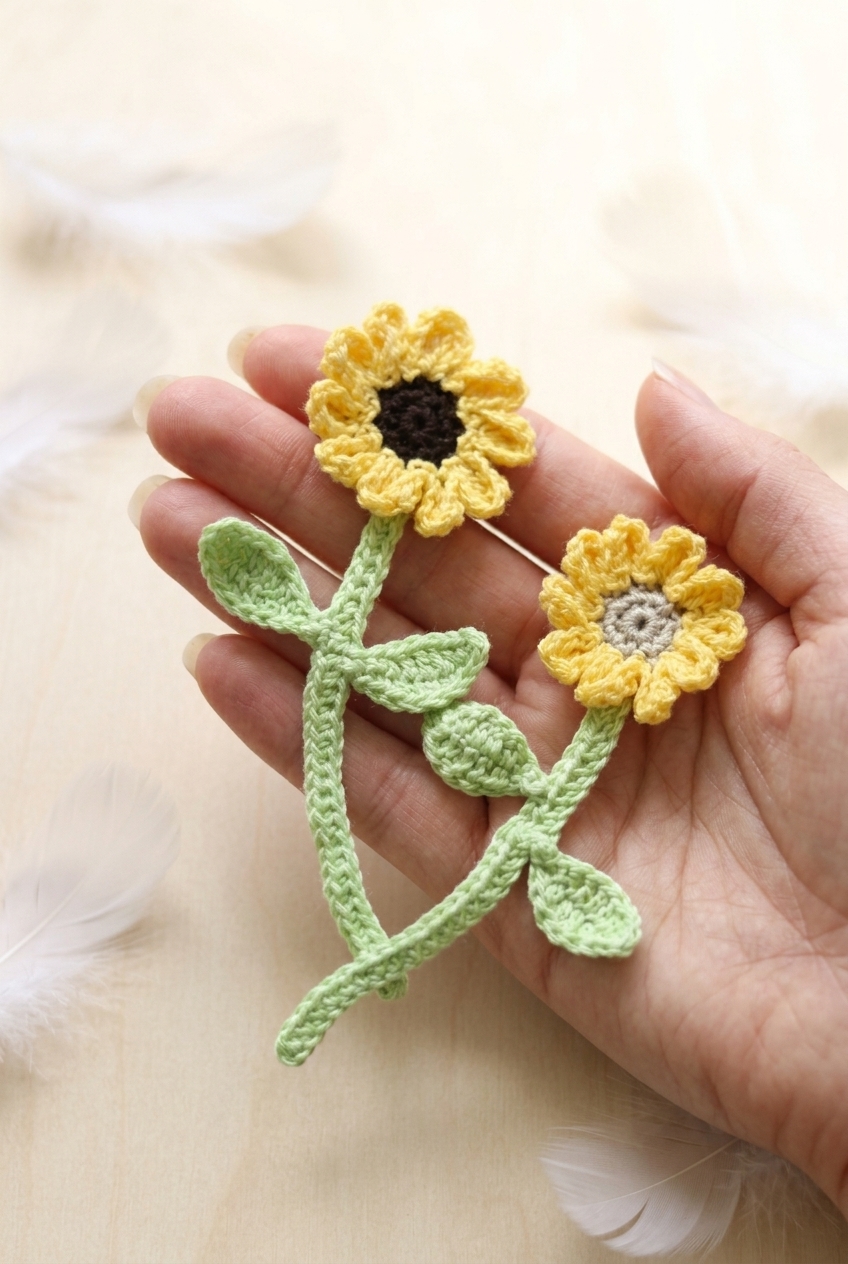
Project Summary
A small crocheted flower with a stem, worked in mercerized cotton and sized to wear as a hair accessory or pin.
| Skill Level | Easy |
| Pattern Gauge | 28 sts x 20 rows of sc = 4 inches |
| Finished Size | Approximately 2.25 x 7.5 inches |
| Yarn Weight | 3 Light / DK |
| Fiber | 100% Mercerized Cotton |
| Terminology | US |
Stitches & Abbreviations
This pattern uses a solid mix of basic stitches plus a few taller ones for the flower petals.
- blo = back loop only
- ch = chain
- dc = double crochet
- flo = front loop only
- hdc = half double crochet
- rep = repeat
- rnd = round
- row = row
- sc = single crochet
- sk = skip
- sl st = slip stitch
- tr = triple crochet
- yo = yarn over
- magic ring = adjustable ring (work stitches into the ring, then pull tail to close)
Before You Begin
This pattern is written in US terms. The flower is worked in rounds; the stem is worked in rows. Those are two separate constructions, so you'll finish one before moving to the other. The ch 1 at the beginning of a row is just a turning chain and doesn't count as a stitch, so don't work into it at the end of the following row. Weave in ends as you go or at the finish, whichever you prefer. Gauge here is 28 sts x 20 rows of sc to 4 inches, and because this is a small accessory with fixed dimensions, it's worth checking before you get too far in.
Crochet Instructions
Here's how I work through each piece of this sunflower bookmark crochet pattern, from the flower head down to the leaves.
Flower Head
This is the centerpiece of the whole bookmark. With Color C, make a magic ring (or ch 2 and work into the 2nd ch from hook) to get started — everything builds out from that center.
Round 1: Work 10 sc into the center of the ring. Join with a sl st in the 1st st. (10)
Round 2: Ch 1, 2 sc in each st around. Join with a sl st in the 1st st. Fasten off Color C. Join Color A in the flo of any st. (20) This is where you drop Color C for good and bring in Color A for the petals. Make sure you're joining into the front loop only — that's what the petal round works into.
Round 3: With Color A, working in the flo all the way around: *[ch 3, 3 tr, ch 3, sl st] all in the same st, sk the next st, sl st into the flo of the next st; rep from * around. Join with a sl st in the 1st st. Each repeat of that bracket creates one petal. Skipping the stitch between petals is what gives them separation, so don't skip that skip.
Fasten off Color A. Weave in ends.
Stem
The stem is worked in rows with Color B, and it attaches directly to the back of the flower head using the loops left behind from Round 3. Those back loops are what you'll be working into here.
Row 1 (Setup): Join Color B with a sl st in the blo behind any flower petal. The back loops from Round 2 are sitting underneath the petals — find one and anchor your yarn there.
Row 2 (Chain): Ch 31. (31)
Row 3: Hdc in the 2nd ch from hook and in each st across. Join with a sl st in the next blo stitch on the flower head. (30) Working hdc across the chain gives the stem a little body. The slip stitch at the end anchors it back to the flower head, so make sure that join is snug.
Fasten off. Weave in ends.
Leaves
Make 2 of these. Each leaf is worked in the round along both sides of a foundation chain, which gives it that pointed, symmetrical shape. You'll sew them onto the stem once both are finished.
Round 1 (Foundation): With Color B, ch 10. (10)
Round 2: Sl st in the 2nd ch from hook, sc in the next st, hdc in the next st, dc in each of the next 3 sts, hdc in the next st, sc in each of the next 2 sts. Turn work to work along the opposite side: sl st in the 1st st, sc in the next st, hdc in the next st, dc in each of the next 3 sts, hdc in the next st, sc in the next st, sl st in the final st. When you reach the end of the first side, pivot and work back along the underside of the chain — you're essentially going around the whole thing. The varying stitch heights are what shape the leaf.
Fasten off, leaving a long tail. Position leaf on stem in desired location and sew into place using the long tail. Weave in ends. Repeat for 2nd leaf.
Finishing
Once both leaves are made, I position each one on the stem wherever it looks right to me — there's no fixed placement, so I just pin them in place first and step back to check before committing. I sew each leaf down using the long tail left from fastening off, working a few stitches through the stem to secure it. Once it feels solid, I weave in the tail on the back side. Do the same for the second leaf, and the bookmark is done.
Care Instructions
Since this bookmark is made from 100% mercerized cotton, it holds up well to hand washing in cool water with a little gentle soap. Lay it flat to dry so the stem stays straight and the petals keep their shape. Cotton can take a while to dry, so I usually just leave it on a towel overnight. If it gets a little wrinkled from being tucked in a book, a quick press with a cool iron through a damp cloth will sort it right out.
Frequently Asked Questions
How do I attach the stem to the flower head?
The stem attaches directly to the flower head by joining Color B with a slip stitch in the back loop only, behind one of the petals. From there you chain 31 and work one row of half double crochet back across, then slip stitch into the next back loop on the flower head to anchor it. No sewing required for this part.
Where do I position the leaves on the stem?
The pattern leaves that up to you. I placed mine roughly in the lower third of the stem so they sit closer to the base of the flower, but you can position them wherever looks right to you. Once you decide, just sew each leaf into place using the long tail you left when fastening off.
Why are the petals worked in the front loops only?
Working Round 3 in the front loops only is what creates the dimensional petal effect. The back loops stay free, and that's exactly where you join the stem. If you worked through both loops, you'd lose that attachment point and the petals would lie flatter against the flower center.
How much yarn do I actually need for this? Can I use scraps?
Yes, scraps work perfectly here. You only need about 15 yards of yellow, 10 yards of green, and 2 yards of black. The black center uses so little that it's basically whatever is left on a partial skein. I'd say any DK weight cotton scraps you already have on hand are fair game.
What does the finished bookmark actually look like? How big is it?
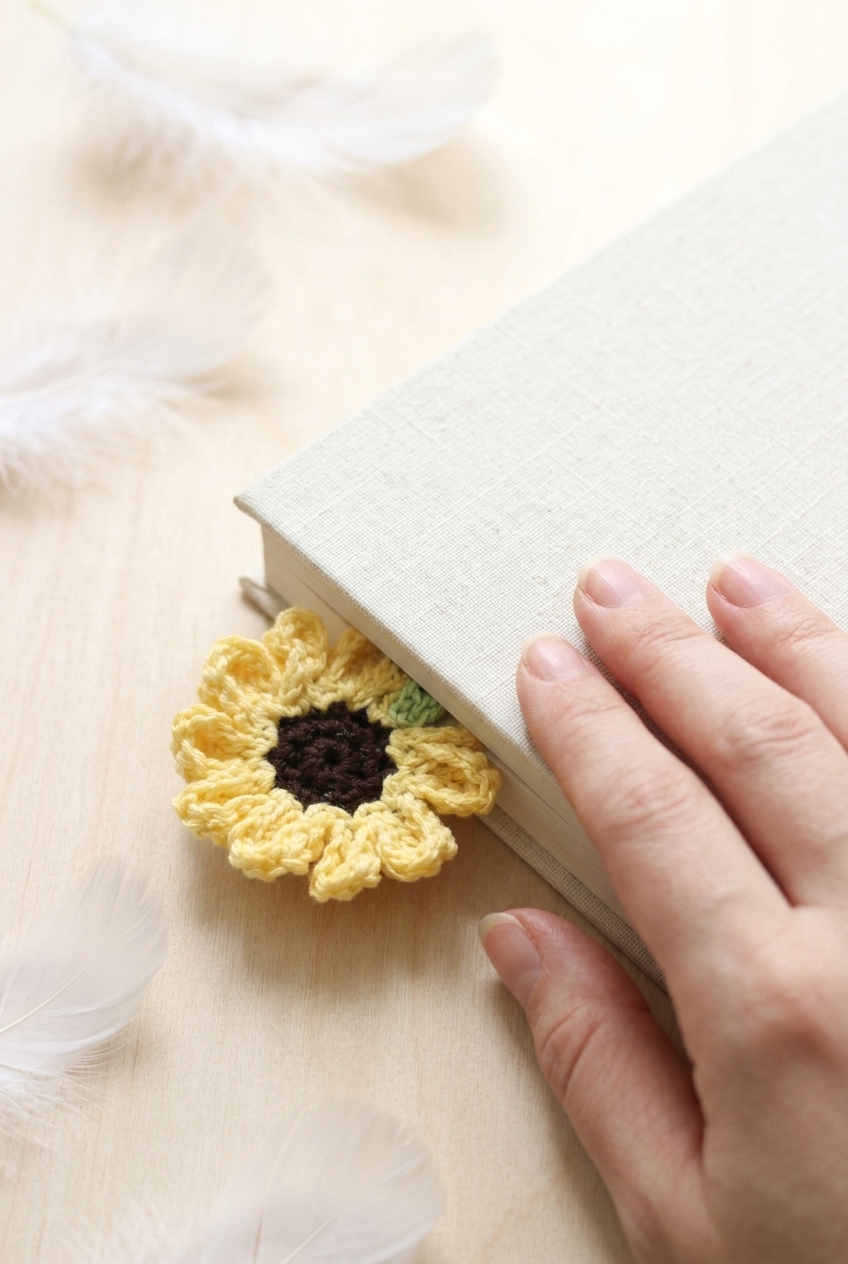
It finishes at approximately 2.25 by 7.5 inches. The flower head sits at the top and the hdc stem hangs down into the book pages. The two leaves are sewn onto the stem and give it a little dimension. It's a flat bookmark, not stiff, so it tucks into a book without buckling the pages.
Before You Go
If you made this little sunflower bookmark, I'd love to see it. Tag me on Instagram or drop a photo in the comments below. And if you're saving patterns for later, this one is worth pinning because it really does come together fast, and it's the kind of small project that's VERY satisfying to finish in a single sitting. Let me know in the comments where you landed on leaf placement. I'm curious whether everyone defaults to the same spot or if people are spreading them out more.


Leave a Reply