
Bookmarks are one of those small makes that are genuinely so satisfying to finish, and this Strawberry Flower Bookmark Crochet Pattern is actually one of my favorites I've put together. It's a sweet little project made up of separate applique pieces, including a strawberry, tiny flowers, and leaves, all strung together on a cord you can make as long as you want. Perfect for gifting, perfect for keeping.

Jump to:
Behind the Pattern
What I really love about this one is that it's made in pieces. You crochet each element separately, which means you can take it slow, work on one component at a time, and it never feels overwhelming. There's something really satisfying about assembling everything at the end and watching it come together into this cute little set.
I'd make this for a bookish friend in a heartbeat. It's the kind of handmade gift that feels thoughtful without being a huge time commitment, and because the cord length is totally customizable, it works for all kinds of books and notebooks. Also just... a really fun one to keep for yourself.
What Makes This Pattern Special
A modular, mix-and-match bookmark you can personalize and finish in one sitting.
- Easy skill level: No advanced techniques here, so it's a no-trouble project even if you're fairly new to crochet.
- Modular construction: Each piece is made separately, so you can work in short sessions without losing your place.
- Customizable length: The bookmark cord length is totally adjustable, so it fits any book or planner you want.
- Great for gifting: Small, quick, and personal enough that it makes a genuinely lovely handmade gift.
- Scrap yarn friendly: The pieces are small, so this is a perfect way to use up yarn you already have sitting around.
Gather Your Supplies
Four colors, one hook, and small enough scraps that you could probably pull everything from your stash right now.
- Worsted Weight Acrylic Yarn in Red, White, Green, and Yellow: A 100% acrylic worsted weight is the right call here. It holds its shape well for small stuffed pieces, and the tighter stitch definition makes the embroidered seeds on the strawberry actually look like seeds. Yardage isn't specified in the pattern, but these are small bookmark pieces, so a few yards of each color will go a long way. Red will be your most-used color, but even that won't take much.
- 5 mm (H-8) Crochet Hook: A 5 mm pairs well with worsted weight acrylic and gives you a firm enough fabric that the stuffing doesn't show through the stitches.
- Polyester Fiberfill: Just a small pinch for the strawberry body. The opening closes up fairly quickly, so have the stuffing ready to go before you get too far into the final rounds.
- Also needed: yarn needle, scissors, stitch markers
Color Sequence & Yarn Changes
The pattern is broken into separate parts, and each color stays in its own section, so there's no mid-round color switching to worry about. Red carries the most work across Parts 1 and 3, white is used just for the embroidered seeds and one round of the flower petals, and green and yellow each handle their own small pieces. Cutting and fastening off between parts keeps everything clean.
The Quick Stats
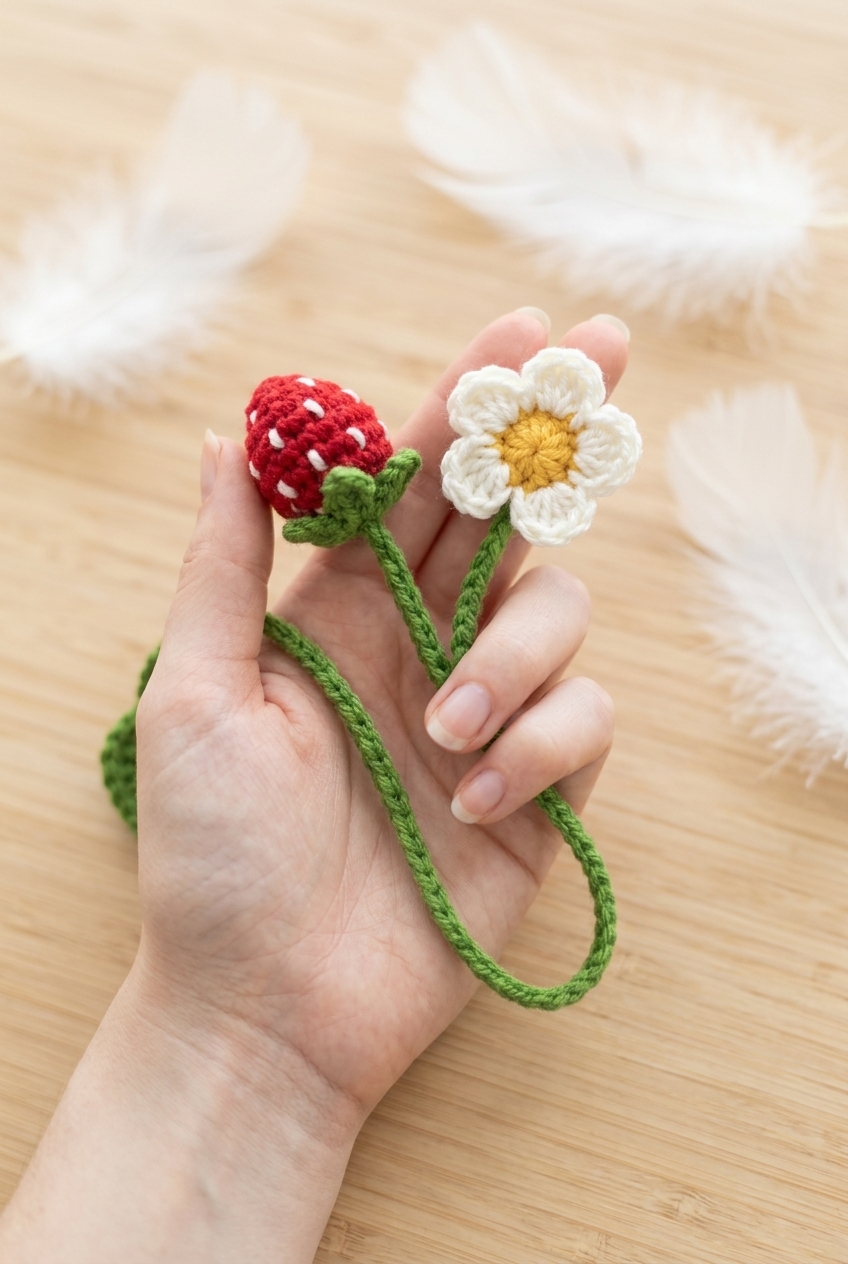
Three tiny crocheted bookmarks, each one a different combination of strawberries, leaves, and flowers, all small enough to tuck into a paperback without wrinkling the pages.
| Skill Level | Easy |
| Pattern Gauge | 18 sc x 21 rows = 4 inches |
| Finished Size | Each strawberry: 2" (H) x 1.5" (W) x 1.5" (D) Each leaf motif: 1.5" (H) x 1.5" (W) Each flower motif: 2" (H) x 2" (W) Bookmark string length: ~12 inches (customizable) |
| Yarn Weight | 4 Medium / Worsted |
| Fiber | 100% Acrylic |
| Terminology | US |
Stitch Guide & Abbreviations
Nothing unusual here, just the basics plus one decrease stitch.
- ch = chain
- dc = double crochet
- hdc = half double crochet
- rnd = round
- sc = single crochet
- sc2tog = single crochet 2 together (decrease over 2 stitches)
- sl st = slip stitch
- st(s) = stitch(es)
- tr = treble crochet
Special Stitches
- Invisible Decrease (sc2tog): Insert hook in front loop only of next st, insert hook in front loop only of following st, yarn over, pull through 2 loops, yarn over, pull through 2 loops.
Important Notes
Most pieces are worked in joined rounds. Each round ends with a sl st to join, and unless the instructions say otherwise, the first stitch of the new round goes into that same joining stitch. Keep the right side of your stitches facing outward as you work throughout.
One thing worth knowing about how stitch counts are written here: the number attached to an abbreviation tells you how many of that stitch to work into the same stitch. So 1sc means one single crochet, and 2sc means two single crochets into one stitch, which is an increase. That notation shows up consistently across all three motifs.
This set covers three bookmark combinations: Strawberry + Leaf, Flower + Leaf, and Strawberry + Flower. The instructions for each motif are written separately, so you'll mix and match depending on which combination you're making.
The bookmark string is worked as a chain, and the default 50 chains gives you roughly 12 inches. If you want something shorter or longer, just adjust the chain count before you attach your motifs.
Let's Make the Strawberry Flower Bookmark Crochet Pattern
Here's how I work through each piece of this strawberry flower bookmark crochet pattern, from the berry itself to the leaf string that holds it all together.
Crocheting the Strawberry Body (Rounds 1–8)
This is the main body of the bookmark. With Yarn A (red), make a magic ring (or ch 4, sl st into 1st ch to form ring, ch 1). You'll build the strawberry from the bottom tip upward, increasing out to a full round shape before beginning to close it in.
Round 1: 6 sc into ring, sl st to join, ch 1. [6 sc]
Round 2: [1 sc, 2 sc] x 3, sl st to join, ch 1. [9 sc]
Round 3: [2 sc, 1 sc, 1 sc] x 3, sl st to join, ch 1. [12 sc]
Round 4: [1 sc, 1 sc, 2 sc] x 4, sl st to join, ch 1. [16 sc]
Round 5: 1 sc in each st around, sl st to join, ch 1. [16 sc]
Round 6: 1 sc in each st around, sl st to join, ch 1. [16 sc]
Round 7: 1 sc in each st around, sl st to join, ch 1. [16 sc]
Secure working loop with a stitch marker. Embroider seeds before continuing to Round 9.
Round 8: [sc2tog, 1 sc, 1 sc] x 4, sl st to join, ch 1. [12 sc]
Embroidering the Seeds
With a length of Yarn B (white), you'll stitch the seeds directly onto the strawberry body before closing it up. Working on the piece while it's still open makes it much easier to secure the yarn ends on the inside.
Step 1: Insert needle between Rounds 7–8 (inside to outside), leaving a short tail inside.
Step 2: Reinsert needle 1 round directly below (between Rounds 6–7) to complete 1 seed over Round 7.
Step 3: Repeat around Round 7, placing 1 seed every 2 stitches. [8 seeds total]
Step 4: Move down 2 rounds; embroider 8 more seeds over Round 5, staggered with the seeds above (2 sts apart each).
Step 5: Embroider 4 seeds over Round 3, spaced 3 sts apart, vertically aligned with every other seed in Round 7.
Step 6: Tie ends together on the inside and trim excess.
Closing the Strawberry (Round 9)
Now that the seeds are done, it's time to stuff and close the berry. Remove your stitch marker and pick the working loop back up.
Round 9: [sc2tog] x 6, sl st to join. [6 sc]
Stuff the strawberry until full. Remove stitch marker and continue stuffing during Round 9.
Fasten off, leaving a tail for sewing closed.
Closing the Bottom of the Strawberry
With the berry stuffed and fastened off, I close the remaining opening using the yarn tail and a tapestry needle.
Step 1: To close: pass needle through the front loop only of each stitch around, pull tight, knot, and weave in ends.
Step 2: Set strawberry aside.
Crocheting the Strawberry Leaves
These little leaves sit on top of the strawberry and give it that finishing touch. With Yarn C (green), ch 4, sl st into 1st ch to form ring. Each point of the leaf is worked as its own small spike directly into the ring.
Round 1: [ch 4, sl st into 2nd ch from hook, 1 sc into next ch, 1 hdc into next ch, sl st into ring] x 5. [20 sts]
Fasten off, leaving a tail for sewing.
Attaching the Leaves to the Strawberry
With the leaves finished, I sew them onto the top of the berry using the yarn tail.
Step 1: Sew leaves onto the top center of the strawberry (securing between each leaf, between Rounds 8–9). Knot and weave in ends.
Crocheting the Strawberry Flower
This flower is the second bookmark topper option, and it works up quickly in two rounds. With Yarn D (yellow), make a magic ring (or ch 4, sl st into 1st ch to form ring, ch 1). The petals are formed in Round 2 using Yarn B (white).
Round 1: 10 hdc into ring, sl st into 1st hdc to join. [10 hdc]
Round 2: [5 dc into next st, sl st into next st] x 5, sl st into 1st dc to join. [30 sts]
Join Yarn B (white) into any stitch of Round 1, pull up a loop. Ch 2. Begin Round 2 in the same stitch.
Fasten off Yarn B and weave in tails.
Crocheting the Leaf Bookmark String
This is the long string that actually functions as the bookmark, with a small leaf at one end. With Yarn C (green), ch 8. The leaf is worked along both sides of the foundation chain, then the long bookmark chain follows directly after.
Round 1: 1 dc into 3rd ch from hook, 2 tr into next ch, 1 dc into next ch, 1 hdc into next ch, 1 sc into next ch, sl st into next ch, ch 1, then working into the other side of the chain: sl st, 1 sc, 1 hdc, 1 dc, 2 tr, 1 dc, ch 2, sl st into same st as last dc, ch 50. [70 sts]
Fasten off Yarn C (or Yarn D—see note), leaving a tail for sewing.
Option A: Assembling the Strawberry and Leaf Bookmark
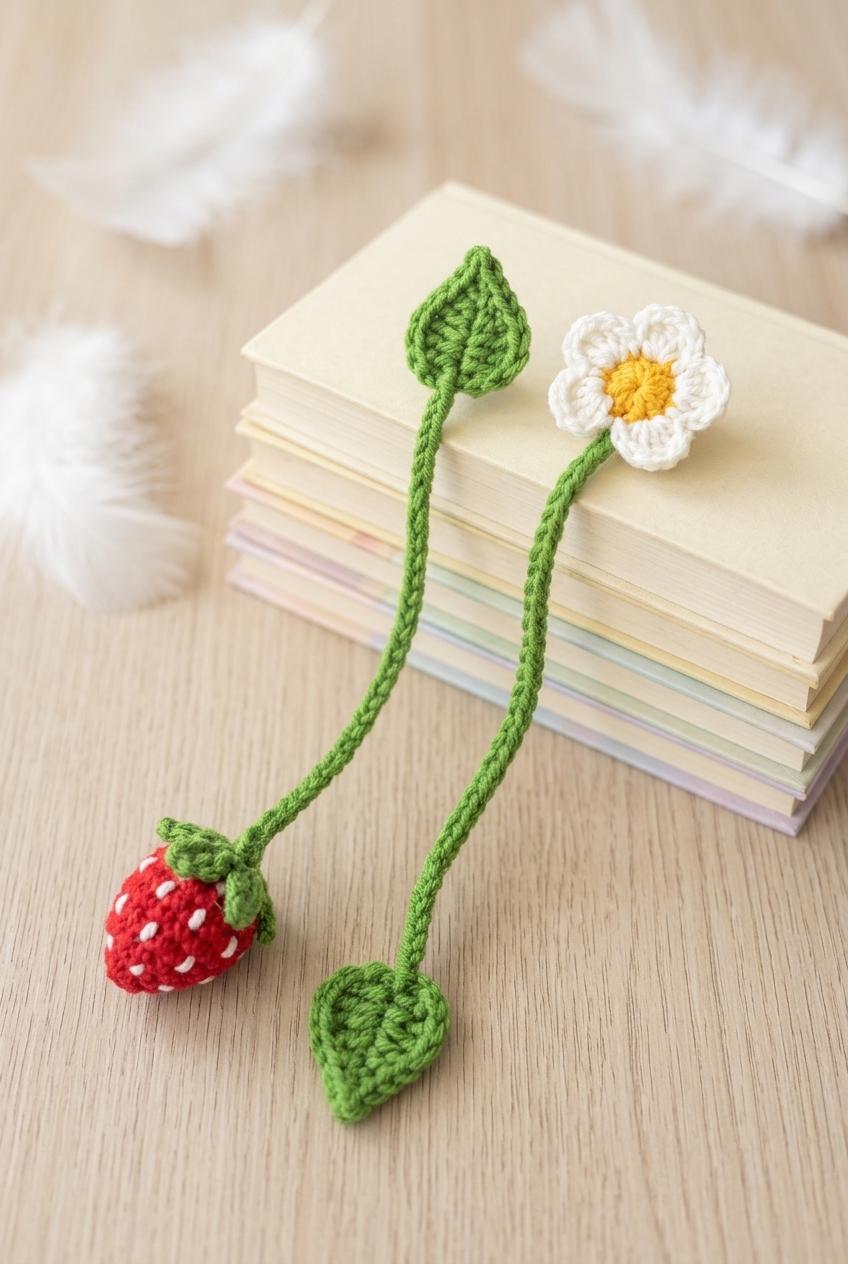
This option pairs the strawberry topper with the leaf bookmark string.
Step 1: Use the tail from the leaf to sew the end of the chain onto the top center of the strawberry (in the middle of the leaves).
Step 2: Knot, trim, and weave in ends.
Option B: Assembling the Flower and Leaf Bookmark
This option uses the flower as the topper instead of the strawberry.
Step 1: Use the tail from the leaf to sew the end of the chain into the sl st between any two petals of the flower.
Step 2: Knot, trim, and weave in ends.
Option C: Assembling the Strawberry and Flower Bookmark
This version connects both the strawberry and the flower with a plain chain string, so one sits at each end of the bookmark.
Step 1: With Yarn C (green), leave a beginning tail, ch 50 and fasten off leaving an end tail.
Step 2: Sew one end of the chain to the top of the strawberry (center of leaves).
Step 3: Sew the other end into the sl st between two petals of the flower.
Step 4: Knot both ends, trim, and weave in all remaining ends.
Putting It All Together
This pattern gives you three ways to finish, depending on which pieces you've made. For Option A, the leaf bookmark string attaches to the top of the strawberry, right in the center of the leaves. For Option B, that same string connects to the flower instead, slipping into the slip stitch between two petals. Option C is the version that uses both toppers: a plain 50-chain string in Yarn C bridges the strawberry on one end and the flower on the other, with each end sewn in and knotted securely before weaving in the last of the tails.
Care Instructions
These bookmarks hold up well to everyday use, but since they're stuffed with polyester fiberfill, I'd skip the washing machine entirely. Hand washing in cool water is the way to go if they ever need a refresh. Gently squeeze out the water, reshape the strawberry while it's still damp, and lay everything flat to dry. The fiberfill can clump a little if it gets tossed around wet, so letting it dry fully before using it again keeps the shape looking right.
Frequently Asked Questions
The opening is still wide enough at that point to get your needle in and work comfortably. Once you close up Round 8 and stuff the strawberry, the body is too firm and the gap too small to stitch neatly. I pause after Round 7, embroider all 20 seeds, then pick the working loop back up and continue. It's one of those timing steps that makes a real difference in how the finished piece looks.
I stuff mine pretty firmly. The strawberry is only 2 inches tall, and if the stuffing is too loose the shape goes a little lumpy and the sc2tog decreases in Round 9 pull unevenly. Pack the fiberfill in snugly as you work Round 9, adding a little more before you close it off completely.
The chain length is completely customizable. The pattern gives you a starting point of around 50 chains, but you can add or skip chains to fit whatever book you're using. Thicker books need a longer string, and if you're making one for a slim paperback, shorter works fine. Just chain until you have the length you want before fastening off.
Option A pairs a strawberry with a leaf at the end of the chain. Option B skips the strawberry and connects the leaf chain directly to the flower. Option C uses both a strawberry and a flower, with the chain running between them. All three use the same leaf and chain construction from Part 6. The only difference is what you sew each end to.
Round 1 is worked in yellow to form the center, then you join white into any stitch of Round 1 and work Round 2 in white to create the five petals. Each petal is a 5-dc fan with a sl st between them. It's a quick color join, not a full color change mid-row, so it's less fiddly than it sounds.
Before You Go
I'd love to know which combination you end up making. Option C with the strawberry and flower connected is my personal favorite, but I've seen the flower-only version come out REALLY beautifully with a variegated green for the leaf chain. If you make one, tag me on Instagram or drop a photo in the comments. And if you're saving this for later, pinning it to your bookmarks or small projects board is a great way to find it again when the mood strikes.


Leave a Reply