
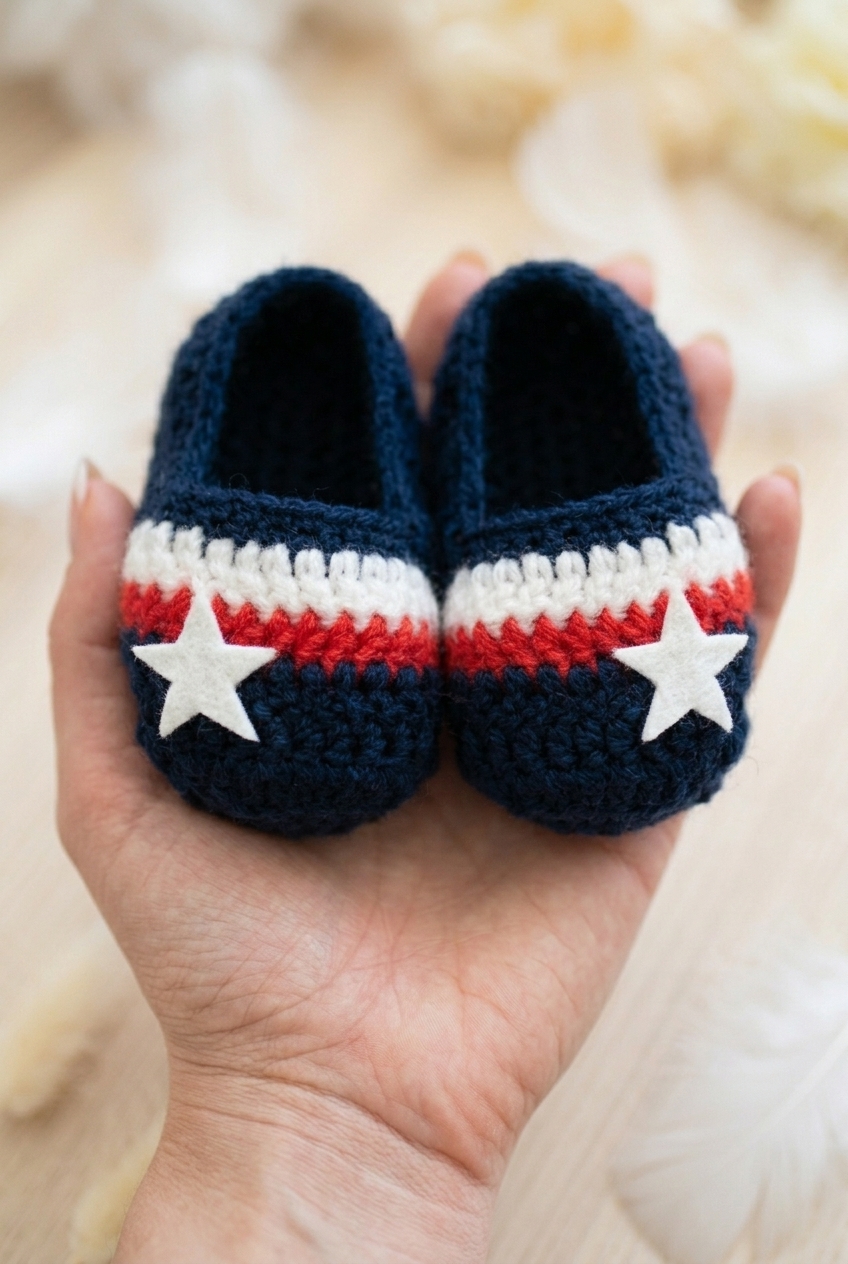
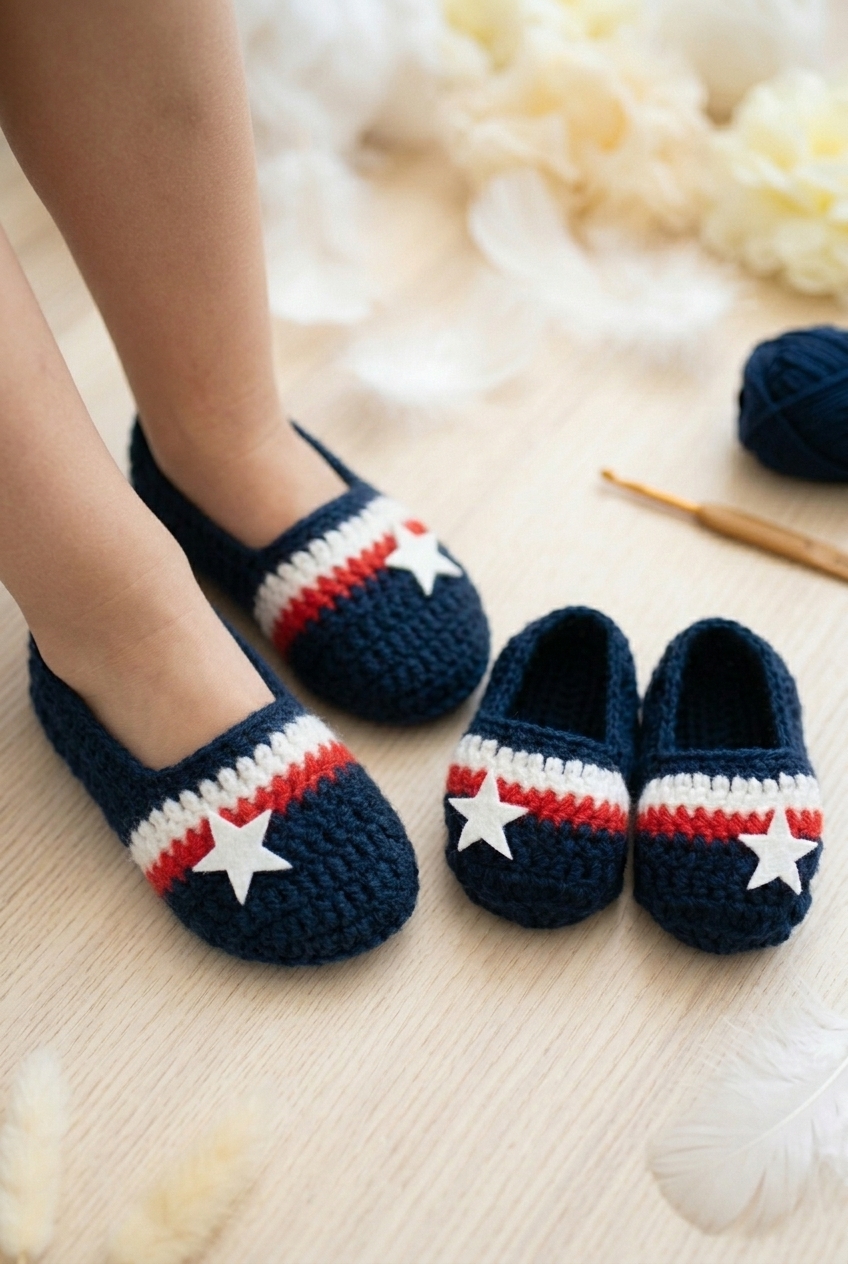
Baby gift season snuck up on me again, and I found myself wanting to make something a little more special than the usual plain booties. That's how this Star Stripes Slippers Crochet Pattern came together. It's sized for the 18 months to 2 years range, so it hits that sweet spot where babies are starting to toddle around and everything they wear is basically the cutest thing you've ever seen.

Jump to:
About This Project
What I really love about this one is the star appliqué. It sounds like a small detail, but it's actually what makes the whole thing feel intentional and finished rather than just... a baby shoe. I made a few pairs and ended up giving most of them away immediately because people kept asking for them. That's always a good sign.
This is a beginner pattern, so if you're newer to crochet and want something that actually looks impressive without being a nightmare to work through, this is a pretty good pick. The construction is straightforward, and the stripe work gives you something to look forward to as you go.
Why This Pattern Stands Out
A beginner-friendly baby slipper that looks like you put in way more effort than you did.
- True Beginner Level: No complicated stitch work here. If you can single crochet and follow a basic increase pattern, you're good to go.
- Fast Gift Project: These work up quickly, which makes them a no-stress option when a baby shower is coming up faster than expected.
- Star Appliqué Detail: The star is made separately and attached, so it's easy to customize or swap out if you want a different look.
- Great Technique Practice: Working in stripes and adding an appliqué are both skills that carry over into bigger projects. You're actually learning something useful here.
- Gifting Sweet Spot: The 18 months to 2 years sizing is honestly underserved in baby patterns, so this fills a gap that a lot of makers are looking for.
Gather Your Supplies
Three colors, white felt, and a single hook — that is the whole list for these little sneakers.
- Bulky weight acrylic yarn (3 colors: navy blue, red, and white): Bulky weight acrylic is a solid call for baby slippers. It works up fast, holds its shape without any fuss, and washes well, which matters a lot for anything going on a toddler's feet. You'll need three separate colors: navy blue does the heavy lifting as the main shoe body, red and white come in for the front piece detail. Yardage isn't specified in the original pattern, but for a size 18 months to 2 years slipper, budget somewhere around 50-80 yards of navy and just 10-20 yards each of red and white — you really won't need much of those accent colors at all.
- G/6 (4.0 mm) crochet hook: A G/6 pairs well with bulky acrylic and keeps the fabric tight enough that the slipper holds its structure without going stiff.
- White felt (for stars): You'll cut the star decorations from white felt and glue them onto the front piece, so grab a small sheet. A standard craft store piece is more than enough.
- Fabric glue: This is what attaches the felt stars to the finished slipper. Regular craft glue can work in a pinch, but fabric glue bonds better and won't crack after a few washes.
- Also needed: scissors, yarn needle
Color Sequence & Yarn Changes
The slippers are made in two separate pieces that get sewn together at the end, so the color changes are pretty contained. Navy blue runs through the main shoe body entirely, then you set it aside and work the front piece separately, starting with navy again, switching to white, then red, and rejoining navy for the final round before the two pieces come together.
Essential Info
These little three-color slippers come together in two crocheted pieces that get joined at the end.
| Skill Level | Beginner |
| Pattern Gauge | 4 dc = 1" |
| Finished Size | 18 months – 2 years only |
| Yarn Weight | 5 Bulky |
| Fiber | 100% Acrylic |
| Terminology | US |
Stitches & Abbreviations
All standard stitches, plus three decreases you'll want to read through before you start.
- B = Navy Blue
- R = Red
- W = White
- ch = chain
- ch sp = chain space
- sl st = slip stitch
- sc = single crochet
- hdc = half double crochet
- dc = double crochet
- dcas = don't count as stitch
- sc2tog = single crochet 2 together (decrease): insert hook in next st, yarn over, pull up a loop; insert hook in next st, yarn over, pull up a loop; yarn over, pull through all 3 loops on hook.
- hdc2tog = half double crochet 2 together (decrease): yarn over, insert hook in next st, yarn over, pull up a loop; yarn over, insert hook in next st, yarn over, pull up a loop; yarn over, pull through all 5 loops on hook.
- dc2tog = double crochet 2 together (decrease): yarn over, insert hook in next st, yarn over, pull up a loop, yarn over, pull through 2 loops; yarn over, insert hook in next st, yarn over, pull up a loop, yarn over, pull through 2 loops; yarn over, pull through all 3 loops on hook.
- () = total stitches
Special Stitches
- sc2tog: Insert hook in next st, yarn over, pull up a loop; insert hook in next st, yarn over, pull up a loop; yarn over, pull through all 3 loops on hook.
- hdc2tog: Yarn over, insert hook in next st, yarn over, pull up a loop; yarn over, insert hook in next st, yarn over, pull up a loop; yarn over, pull through all 5 loops on hook.
- dc2tog: Yarn over, insert hook in next st, yarn over, pull up a loop, yarn over, pull through 2 loops; yarn over, insert hook in next st, yarn over, pull up a loop, yarn over, pull through 2 loops; yarn over, pull through all 3 loops on hook.
Read Before Starting
This pattern is sized for 18 months to 2 years only. Gauge is 4 dc = 1", and it's worth checking before you get far into the main shoe piece since fit matters more than you'd think on something this small.
Each slipper is made in two separate pieces: the main shoe and a front piece. Once both are finished, they're joined together using a round of single crochet worked around the edges. That joining round is what connects them and finishes the look at the same time, so don't skip it.
The Pattern
Here's everything you need to work through these star stripes slippers crochet pattern from sole to finished shoe.
Main Shoe (Make 2)
This is the base of the slipper. You're working in rounds using Color B, starting from a foundation chain that gets worked on both sides to build the oval sole, then shaping up into the shoe body.
Round 1: Using B, ch 17. 2 sc in 2nd ch from hook, 1 sc in next 14 ch, 2 sc in last ch. [18 sc]
Round 2: Turn work clockwise, crochet into the foundation ch: 2 sc in first foundation ch sp, 1 sc in next 14 ch sp, 2 sc in last ch sp. [36 sc] You're now working into the underside of that same foundation chain, completing the oval. Keep your tension even here — the sole shape depends on it.
Round 3: 1 sc in next st, 2 sc in next st, 1 sc in next 15 sts, 2 sc in next st, 1 sc in next st, 2 sc in next st, 1 sc in next 15 sts, 2 sc in last st. [40 sc]
Round 4: 1 sc in next 2 sts, 2 sc in next st, 1 sc in next 16 sts, 2 sc in next st, 1 sc in next 2 sts, 2 sc in next st, 1 sc in next 16 sts, 2 sc in last st. [44 sc]
Round 5: 1 sc in next 3 sts, 2 sc in next st, 1 sc in next 17 sts, 2 sc in next st, 1 sc in next 3 sts, 2 sc in next st, 1 sc in next 17 sts, 2 sc in last st. [48 sc]
Round 6: 1 sc in next 4 sts, 2 sc in next st, 1 sc in next 18 sts, 2 sc in next st, 1 sc in next 4 sts, 2 sc in next st, 1 sc in next 18 sts, 2 sc in last st. [52 sc]
Round 7: 1 sc in next 5 sts, sc2tog, 1 sc in next 10 sts, ch 1 (dcas), turn, 1 sc in next 16 sts, hdc2tog, 1 hdc in next 11 sts. [28 sts] This is where the shoe transitions from a flat sole into a three-dimensional shape. The ch 1 and turn create the opening at the top of the shoe, and the decreases begin pulling in the toe area. Pay attention to the stitch count here — it drops significantly.
Round 8: Ch 2 (counts as st), 1 dc in next st and in each st around. [28 dc]
Round 9: Repeat Round 8. [28 dc] Fasten off leaving a very long tail for finishing.
Fasten off leaving a very long tail for finishing.
Front Piece
This is the tongue-style front panel that gets sewn onto the main shoe. It's worked flat in rows with color changes to create the stripe detail, then shaped with decreases to taper toward the toe.
Round 10: Using B, ch 21. 1 sc in 2nd ch from hook and in each ch across. [20 sc]
Round 11: Join W, ch 2 (counts as st here and throughout), 1 dc in next st and in each st across. [20 dc] Drop Color B and join White here. The ch 2 counts as your first dc throughout this section, so don't work an extra stitch into the base of it.
Round 12: Join R, ch 2, 1 dc in next st and in each st across. [20 dc] Drop White and join Red for this stripe.
Round 13: Re-join B, ch 2, dc2tog, 1 dc in next 15 sts, dc2tog. [18 dc] Back to Color B, and the shaping begins. The decreases sit one in from each end.
Round 14: Ch 2, dc2tog, 1 dc in next 13 sts, dc2tog. [16 dc]
Round 15: Ch 2, dc2tog twice, 1 dc in next 7 sts, dc2tog twice. [12 dc] Two decreases on each side now instead of one — the tapering accelerates.
Round 16: Ch 2, dc2tog twice, 1 dc in next 3 sts, dc2tog twice. [8 dc]
Finishing
With both pieces complete, it's time to put the shoe together. The long tail you left at Round 9 does the heavy lifting here, so make sure you didn't trim it short.
Step 1: Sew your front piece onto your main shoe, making sure the last 8 sts match symmetrically to the front of the shoe. Using your remaining long tail from Round 9, crochet 1 sc onto the front piece to join, then sc in each st around the main shoe. Sew up any remaining gaps on either side. Fasten off and tie in all tails. Centering those 8 stitches before you start joining saves a lot of frustration — pin it in place first if you need to.
Step 2: Cut two small 5-pointed stars from white felt (folding the felt in half can make this easier). Glue the stars onto the front of each shoe with fabric glue, positioned slightly to one side.
Step 3: Repeat all steps for the second shoe.
Care Instructions
These slippers are 100% acrylic, so machine washing is fine. I'd go with cold water and a gentle cycle, then lay them flat to dry. The felt stars are the one thing to be careful with. Fabric glue holds well once it's fully cured, but repeated hot-water washing can loosen the bond over time. If a star starts to lift, a small dot of fresh fabric glue will set it right back down.
Baby & Child Safety Notes
These slippers are sized for 18 months to 2 years, so the felt stars deserve a close look before you put them on a little one. The stars are glued on, not sewn, so check that the glue has fully dried and the edges are secure before use. If a star ever starts to peel, take it off completely rather than leaving it half-attached. A toddler can work a loose piece free faster than you'd expect, and felt pieces are a choking hazard at this age.
Frequently Asked Questions
The pattern has two separate pieces. How do they actually connect?
The main shoe and the front piece are crocheted separately, then you sew the front piece onto the shoe, lining up those last 8 stitches symmetrically at the toe. From there, you use the long tail you left at the end of Round 9 to crochet a round of single crochet all the way around to join them. Any small gaps left on either side get sewn closed by hand.
Why does the pattern tell me to leave a very long tail at the end of Round 9?
That tail is doing real work. You use it later to crochet the joining round of single crochet that connects the front piece to the main shoe. If you cut it too short, you won't have enough yarn to work all the way around and you'll have to rejoin, which is messier. Leave it longer than you think you need.
How do I get the felt stars to look neat and stay put?
Folding the felt in half before cutting helps you get two matching stars in one cut. Once they're cut, let the fabric glue dry completely before handling the slippers. I'd position each star slightly to one side of center on the front piece rather than dead center. It gives them a more finished, intentional look.
There are three colors in this pattern. When do the color changes happen?
All three color changes happen in the front piece, not the main shoe. The main shoe is worked entirely in navy. The front piece starts in navy (Round 10), then white comes in for Round 11, red for Round 12, and navy again for Rounds 13 through 16. The color changes are straightforward row-by-row joins, nothing complicated.
How do I make sure both slippers end up the same size?
Work both main shoes and both front pieces before you start any finishing. That way you can compare them side by side. The symmetry step that matters most is when you sew the front piece on: the 8 stitches at the bottom of the front piece need to line up evenly across the toe of the main shoe on both slippers.
Now It's Your Turn!
These little Star Stripes Slippers are the kind of quick project that feels VERY satisfying to finish, mostly because they look so put-together for how fast they work up. If you make a pair, I'd love to see them. Tag me on social media or drop a photo in the comments below. And if you're saving patterns for later, go ahead and pin this one. It's a great one to have on hand when you need a last-minute baby gift and have a weekend to spare.


Leave a Reply