
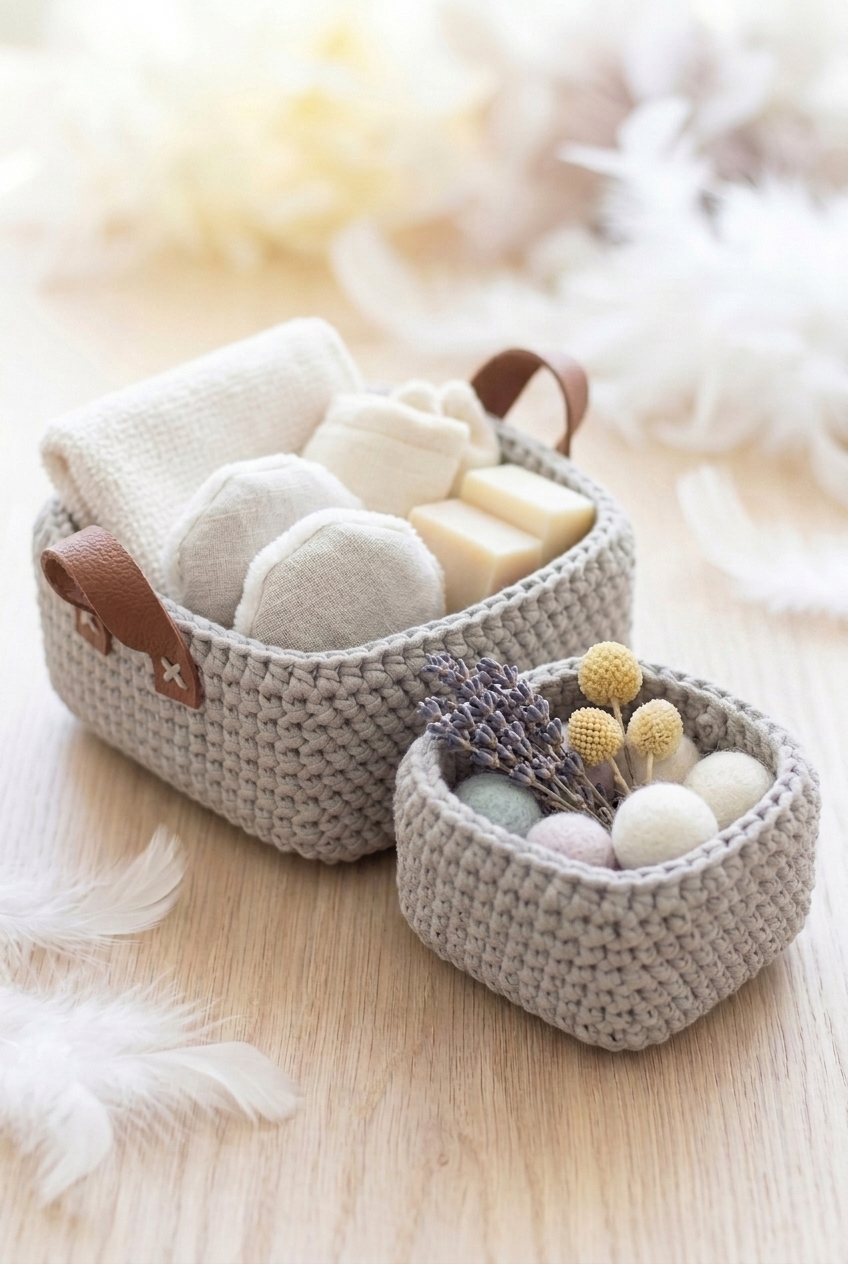
This Square Basket Crochet Pattern is honestly one of my favorite things I've made in a while. It's a set of two baskets that nest together, which makes the whole thing feel so much more useful than a single basket ever could. The kind of project that looks intentional on a shelf, not just "something I crocheted."

Jump to:
Behind the Pattern
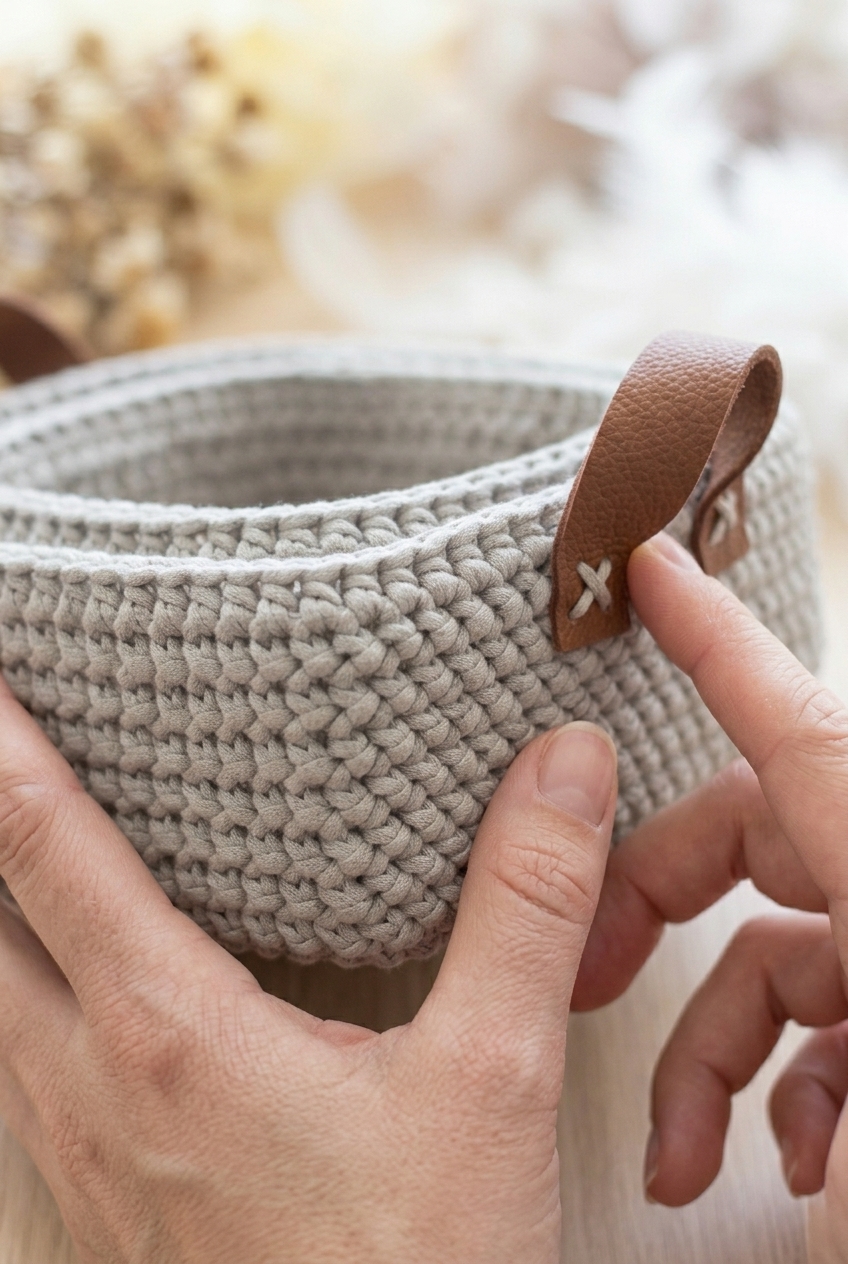
What I really love about this one is the leather handle detail. It just elevates the whole thing. I've made plenty of crochet baskets that look fine but feel a little craft-fair, and adding that one small hardware element makes it feel more like something you'd actually buy. I made these as a gift and the person genuinely thought I'd bought them, which. yeah. That's the goal.
The two-size set is a really practical format too. You get a smaller basket and a larger one, and they're designed to work together. I keep mine on my desk, one inside the other when I need the space, or both out when I need to sort things. It's the kind of thing you'll find a use for immediately.
What Makes This Pattern Special
Two nested baskets with a leather handle detail that actually looks store-bought.
- Skill Level: This is an intermediate pattern, so it's not for total beginners, but there's nothing intimidating once you get going.
- Two Sizes Included: You get both a smaller and larger basket in one pattern, and they're sized to nest together or use separately.
- Gifting Potential: These make a genuinely impressive handmade gift, especially with the leather handle accent doing a lot of the heavy lifting.
- Technique Value: Good practice for working with structure and shaping, skills that carry over into a lot of other home decor projects.
- Everyday Usefulness: These aren't decorative-only. They're sturdy enough for actual storage, which makes the time investment worth it.
Gather Your Supplies
Two hook sizes are in play here, so grab both before you sit down.
- Bulky Weight Cotton/Nylon Blend Yarn (Color: Clay): A bulky cotton/nylon blend is the right call for a basket. The cotton gives it structure and that slightly stiff drape you want so the sides actually hold their shape, and the nylon adds just enough durability for something that will sit on a shelf and get used. For the smaller basket you'll need about 125 yards, and for the larger basket, about 205 yards.
- Hook H (5.0 mm) and Hook G (4.25 mm): The H hook handles the base and sides, where you want a slightly more open, flexible fabric. The G hook steps in for the inner lining and tightens things up so the two layers sit neatly against each other without the lining bunching or sagging.
- Heavy duty plastic canvas: This is what keeps the basket from collapsing. It gets cut to fit and tucked inside, so the structure comes from the canvas, not from blocking or starch. Most craft stores carry individual sheets, which is all you need.
- Leather strips and small hole punch: The leather strips are used for the handles, and the hole punch is how you get clean attachment points without tearing through the material. A standard office punch won't cut it here, so a dedicated small hole punch is worth having on hand.
- Also needed: yarn needle, stitch marker
Project Info
Two sizes of structured storage baskets, each with a fold-down fabric lining and a plastic canvas base to keep everything upright.
| Skill Level | Intermediate |
| Pattern Gauge | Gauge is not critical for this project. Use a hook size that creates a firm fabric so the basket holds its shape and the inner lining folds neatly. |
| Finished Size | Smaller Basket: 6 in wide x 2.5 in tall Larger Basket: 7.5 in wide x 3 in tall |
| Yarn Weight | 5 Bulky |
| Fiber | Cotton/nylon blend |
| Terminology | US |
Customizing the Size
To resize either basket, chain the length you want one side to be, then work the same number of rows as you have stitches in that foundation chain. The rest of the construction follows from there.
Stitches & Abbreviations
Most of this list is familiar territory, with one specialty stitch worth reading before you start.
- ch = chain
- sc = single crochet
- hdc = half double crochet
- hhdc = herringbone half double crochet
- sl st = slip stitch
- sk = skip
- st(s) = stitch(es)
- 3rd loop = special hdc loop (see Special Stitches)
Special Stitches
- Hhdc (herringbone half double crochet): Yo, insert hook into st. Yo, pull loop through st and through first loop on hook. Yo, pull through remaining 2 loops.
- 3rd loop: The 3rd loop of an hdc is found just below the back loop, on the side of the work facing away from you. Reach over the 2 top loops and insert hook into this loop.
Pattern Notes
This pattern is written in US crochet terms. One thing to pay attention to before you begin: the construction shifts methods partway through. Part of the basket is worked in rows, part in seamless rounds, and a small section in joined rounds. Don't join, chain, or turn unless the instructions specifically tell you to. A stitch marker at the beginning of your seamless rounds will save you a headache. When the pattern says "join," that's always a sl st to the top of the first stitch of that round. The ch 1 at the start of any row or round does not count as a stitch.
Heavy duty plastic canvas is used for the base insert. It's sold in individual sheets at most craft stores, so you won't need to buy more than one. Yarn amounts for each size: the smaller basket uses approximately 125 yards, and the larger uses approximately 205 yards.
Crochet Instructions
This square basket crochet pattern is worked in two parts for each size: a flat rectangular base in rows, then sides picked up and worked in rounds to build the walls and inner lining.
Smaller Basket: Base
Start here with the larger H hook. The base is worked flat in rows — a simple rectangle of single crochet that becomes the floor of the basket.
Foundation: Ch 17. [17 sts]
Row 1: Sc in 2nd ch from hook and in each remaining ch. [16 sc]
Rows 2–16: Ch 1, turn. Sc across. [16 sc] Keep your tension consistent through all 16 rows — the base needs to lie flat so the sides pick up evenly.
Smaller Basket: Sides
Now you'll transition from working flat rows to working in rounds. You're picking up stitches around all four edges of the base to build the walls, then continuing into an inner lining that folds back down inside the basket. Keep the H hook for now — you'll switch to the smaller G hook partway through.
Round 1: Ch 1, turn. Hhdc in each st across (16 sts). Turn corner and hhdc in each row along the edge (16 sts). Turn corner and hhdc in each st from the starting chain (16 sts). Turn corner and hhdc in each row (16 sts). Do not join. [64 sts] This is the round where you establish the basket's perimeter. Work into the row ends along the short sides and into the chain along the bottom — one stitch per row end, one stitch per chain. Don't join at the end; you're working in a continuous spiral from here.
Rounds 2–6: Hhdc in each st around. [64 sts] Five rounds of even hhdc build the outer walls of the basket.
Round 7: Hhdc in each of the first 62 sts. Sc in each of the 2 remaining sts. Join. [64 sts] The two sc at the end ease the transition before you join and switch hooks — they sit at a corner so the join is less visible.
Round 8: Ch 1. Hdc in each st around. Join. [64 sts]
Switch to smaller (G/4.25 mm) hook.
Round 9: Sc in 3rd loop of each st around. Do not join. [64 sc] Working into the third loop of the hdc creates a ridge that marks the fold line between the outer wall and the inner lining. Make sure you're finding that back bump consistently on every stitch.
Rounds 10–18 (or until inner edge touches bottom of basket when folded down): Sc in each st around. [64 sc] The round count here is a guide, not a fixed rule. Fold the lining down periodically to check — you want it to just reach the bottom of the basket when folded. Stop when it does.
Sl st into next st to smooth the round. Fasten off and weave in ends. Proceed to Adding Plastic Canvas.
Larger Basket: Base
Same construction as the smaller basket, just a wider rectangle. Use the larger H hook throughout the base. BASE (worked in rows, larger H hook).
Foundation: Ch 23. [23 sts]
Row 1: Sc in 2nd ch from hook and in each remaining ch. [22 sc]
Rows 2–22: Ch 1, turn. Sc across. [22 sc] Twenty-two rows gives you a noticeably longer base than the smaller version — keep your tension even so the rectangle stays flat and doesn't curl.
Larger Basket: Sides
The sides of the larger basket follow the same structure as the smaller one — pick up around all four edges, build the walls in hhdc, then transition to the inner lining. SIDES (switch to rounds). You'll switch to the G hook at Round 10.
Round 1: Ch 1, turn. Hhdc in each st across (22 sts). Turn corner and hhdc in each row along the edge (22 sts). Turn corner and hhdc in each st from the starting chain (22 sts). Turn corner and hhdc in each row (22 sts). Do not join. [88 sts]
Rounds 2–8: Hhdc in each st around. [88 sts] Seven rounds of hhdc for the outer walls — one more than the smaller basket to keep the proportions right.
Round 9: Hhdc in each of the first 86 sts. Sc in each of the 2 remaining sts. Join. [88 sts]
Round 10: Ch 1. Hdc in each st around. Join. [88 sts]
Switch to smaller (G/4.25 mm) hook.
Round 11: Ch 1. Sc in 3rd loop of each st around. Do not join. [88 sc] Same as the smaller basket — the third loop of the hdc creates the fold ridge. The ch 1 here doesn't count as a stitch; it just gives you a clean start before you work into those back bumps.
Rounds 12–21 (or until inner edge touches bottom of basket when folded down): Sc in each st around. [88 sc] Fold the lining down to check the length as you go. The larger basket has more interior depth to cover, so you may work closer to all 10 rounds — but let the fit guide you.
Sl st into next st to smooth the round. Fasten off and weave in ends. Proceed to Adding Plastic Canvas.
Adding Plastic Canvas (Both Sizes)
This is what gives the basket its structure. The plastic canvas strips sit between the outer wall and the inner lining, keeping the sides firm and upright. These steps are the same for both the smaller and larger basket.
Step 1: Cut strips of plastic canvas that are the same height as the inner lining layer and as long as two sides of the basket. Cut at least 4 strips (more for extra stability). Measure against your actual basket — the lining height can vary depending on how many rounds you worked.
Step 2: Set the basket completely unfolded. Fold each strip in half and insert one along each edge of the basket.
Step 3: Fold the inner lining layer down over the canvas.
Step 4: Work the fabric until everything lays neat and flat.
Step 5: (Optional) Sew the inner edge of the fabric to the bottom of the basket to keep it in place. (Skip this if you want the basket to be machine washable.)
Adding Handles (Optional)
Leather handles are a clean, sturdy finishing touch. This step is optional — the basket works fine without them — but they do make it easier to carry and give it a more polished look.
Step 1: Cut two equal-sized strips of leather in your desired size.
Step 2: Punch 4 holes in each end in a square shape.
Step 3: Using a small yarn needle, sew the handles to the sides of the basket, working through both layers of crocheted fabric and the plastic canvas in between. Sewing through the canvas takes a little more effort, but it's what keeps the handles secure under weight.
Care Instructions
The cotton/nylon blend holds up well to machine washing, but if you've sewn the inner lining down to the basket bottom, I'd hand wash it instead to keep those stitches from loosening over time. The plastic canvas inserts are the main thing to think about here: pull them out before washing if you can, especially if you're tossing the basket in a machine. Reshape the basket while it's still damp and let it air dry upright so the sides hold their square shape. If you added leather handles, spot clean those separately rather than submerging them.
Frequently Asked Questions
What is the hhdc stitch and is it hard to learn?
Hhdc stands for herringbone half double crochet. It's a variation of the standard hdc where you pull the loop through the first loop on your hook before completing the stitch, which creates a tighter, more structured fabric. It's not difficult once you get a few stitches in, but the first row or two can feel awkward. The good news is that this basket is mostly hhdc for the sides, so you'll have plenty of repetition to get comfortable with it.
Why does the pattern switch between two hook sizes?
The larger H hook (5 mm) is used for the base and outer sides to get a firm, structured fabric. Then you switch to the smaller G hook (4.25 mm) for the inner lining. The tighter gauge on the lining helps it sit snugly inside the basket once it's folded down over the plastic canvas. If both sections were worked at the same tension, the lining would be too loose to lay flat.
Do I have to add the plastic canvas, or can I skip it?
You can skip it, but the basket won't hold its square shape without support. The plastic canvas is what keeps the sides standing straight and the corners crisp. Without it, the basket will be soft and floppy, which might work if you just want a fabric bin, but it won't look structured the way the finished photos show. Heavy duty plastic canvas sheets are easy to find at most craft stores and cut down with regular scissors.
How do I know when the inner lining is long enough?
Fold the lining down toward the inside of the basket as you work. When the edge just touches the bottom of the basket without pulling or bunching, you're done. The pattern gives a round range for this reason: the smaller basket is roughly rounds 10 through 18, and the larger is rounds 12 through 21, but your actual row count depends on your tension. Check the fit as you go rather than crocheting to a fixed number.
Can I make a different size basket?
Yes. To resize, chain the length you want one side to be, then crochet the same number of rows as you have stitches in each row to form a square base. The rest of the construction follows the same logic from there. Keep in mind you'll need to adjust your plastic canvas strips and yardage accordingly. The smaller basket uses about 125 yards and the larger uses about 205 yards, so scaling up will add yardage faster than you might expect.
How do I attach the leather handles so they stay secure?
Punch four holes in a square pattern at each end of the leather strip, then use a small yarn needle to sew the handle through both layers of crocheted fabric AND the plastic canvas in between. Working through all three layers is what makes the handles sturdy enough to actually hold weight. If you skip the canvas layer, the handles will pull through the fabric over time.
Before You Go
I'd love to see how your baskets turn out, especially if you went with the leather handles or tried a different colorway than Clay. Tag me on Instagram or drop a photo in the comments below. And if you're saving this for later, the Pinterest button is right there waiting for you. These make up quickly once you get the hang of the hhdc, and I have a feeling once you finish one size you'll immediately want to make the other.


Leave a Reply