
I've been on a bit of a small toy kick lately, and this one was really a fun one to put together. The Rainbow Pocket Pal Crochet Pattern is a compact little stuffed figure that comes together fast and lands in that sweet spot between satisfying to make and genuinely cute to give away. It's an easy-level project, so you don't need to be deep into amigurumi territory to pull this off. Perfect for a quick make when you want something finished and in your hands by the end of the afternoon.

Jump to:
Behind the Pattern
What I like about this design is how much personality comes out of a pretty simple construction. The striped color progression gives the whole thing a cheerful, playful feel without requiring any complicated colorwork techniques. You're basically just changing colors as you go, and the result looks way more intentional than the effort involved. I find that really satisfying.
This is the kind of thing I'd reach for when I need a gift for a small kid, or honestly just something to keep on a desk. It's small enough to tuck into a bag or a pocket, which makes it a natural fit for a birthday gift, a party favor, or one of those "just because" moments. (I've also found that making a few of these in a row is oddly relaxing once you get the rhythm down.) The finished size keeps the project commitment low, which means you can make several without it feeling like a whole production.
Why You'll Want to Make This
This tiny stuffed toy is a quick, low-commitment make with a big gifting payoff.
- Skill Level: Easy. If you're comfortable with basic amigurumi construction, you'll have no trouble at all with this one.
- Fast Finish. The compact size means you can realistically complete this in a single sitting, which is pretty great when you want a quick win.
- Gifting Potential. Small toys like this are ideal for kids' gifts, stocking stuffers, or party favors, and they cost very little in materials.
- Color Play. The striped construction is a nice low-stakes way to practice clean color changes without committing to a complicated project.
- Stash Friendly. You only need small amounts of each color, so this is a solid option for using up leftover yarn sitting in your bin.
What You'll Need
Six colors, all in small amounts — this is a perfect project for DK scraps.
- DK Weight Yarn (Weight 3 Light), 6 colors: DK weight gives you enough stitch definition to see the color changes clearly, and the slightly lighter weight keeps the finished toy compact at around 4 inches. Each color is only 3 g, so you need very little of each. Total across all six colors is 18 g, and honestly most of that will come from your scrap bin. You'll need Purple (A), Light Blue (B), Green (C), Yellow (D), Orange (E), and Pink (F), 3 g each. Fiber isn't specified in the pattern, so check your label and go with whatever you have on hand in these colors.
- 2.75 mm Crochet Hook: A smaller hook than you'd typically pair with DK keeps the fabric tight so the stuffing doesn't show through the stitches. At this scale, that really does matter.
- 6 mm Black Buttons (x2) and 11 mm White Buttons (x2): These layer together to form the eyes. The white sits behind the black to give that classic cartoon eye look. Two sizes, so make sure you have both before you start assembling.
- 15 mm Black Buttons (x2): These are larger and used separately from the eye set, so keep them sorted from the smaller black buttons.
- Black Embroidery Thread: Used for facial details. A single strand is usually enough for fine lines at this scale.
- Fiberfill Stuffing: You won't need much given the finished size, but stuff the body as you go before the opening closes up. A small handful does it.
- Pink Felt Circles (optional): These are the cheeks, placed around Rounds 13 and 14 during the yellow section of the body. You can cut them freehand from a scrap of felt. Totally optional but they add a lot of character.
- Also needed: embroidery needle, yarn needle, scissors
Color Sequence & Yarn Changes
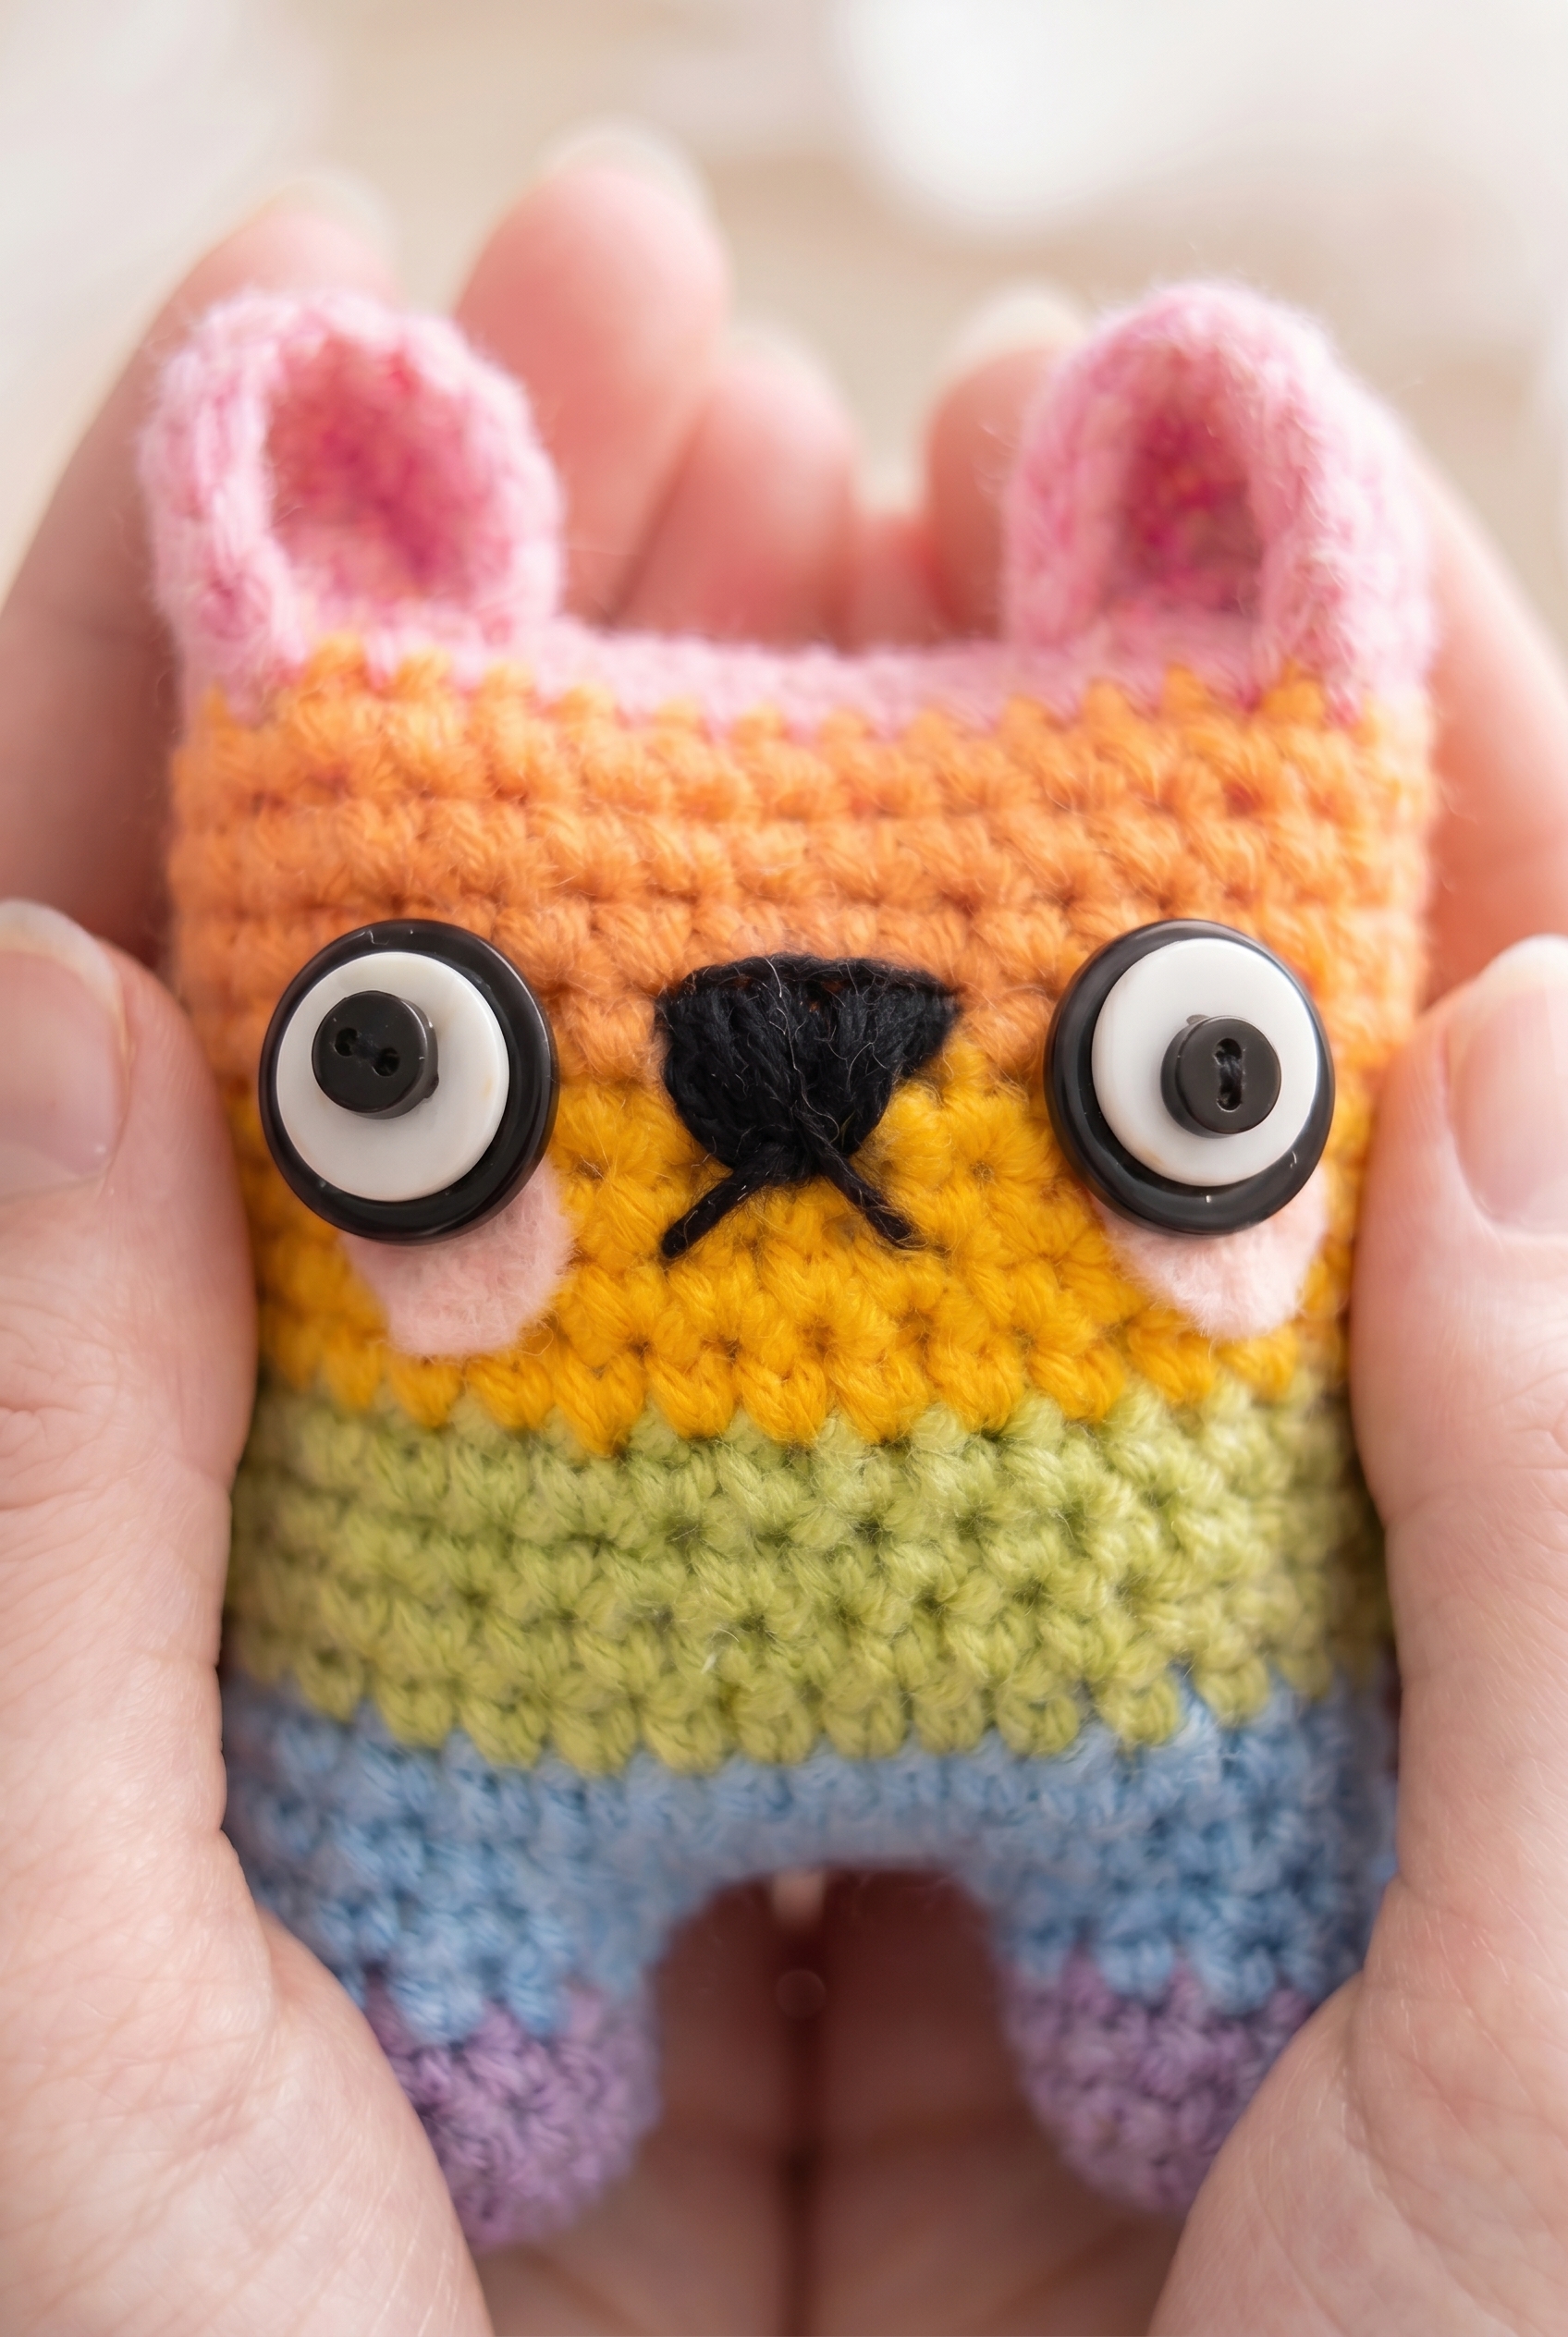
The color changes here follow a strict striped sequence from the legs up through the body, so it helps to read through the color usage before you start. Each color runs for roughly four rounds before you switch, which keeps the changes manageable and means you're not carrying yarn across long stretches. The legs start in Purple and Light Blue before the body picks up from Blue and continues through Green, Yellow, Orange, and finally Pink for the last body round and the ears.
Key Information
This little toy comes out to just under 4 inches when worked in DK weight, but the yarn weight is really up to you.
| Skill Level | Easy |
| Pattern Gauge | Gauge is not critical for this project. Use a hook size that creates a tight, firm fabric so stuffing does not show through. |
| Finished Size | 4 inches / 3 ⅞" approx. |
| Yarn Weight | 3 Light / DK |
| Terminology | US |
Stitch Guide & Abbreviations
All basic stitches here, nothing unusual.
- ch = chain
- inc = increase (2 sc in same st)
- MR = magic ring
- sc = single crochet
- sk = skip
- st(s) = stitch(es)
- tog = together
- x = times
Pattern Notes
I used DK weight yarn with a 2.75 mm hook, which gives that just-under-4-inch result. That said, any yarn weight works fine with this pattern. Go up in weight for a bigger toy, down for something smaller. The hook size matters more for fabric density than for sizing: you want the stitches tight enough that stuffing doesn't peek through. If you can see gaps, go down a hook size.
How to Make the Rainbow Pocket Pal Crochet Pattern
Work through each piece in order and the Rainbow Pocket Pal comes together quickly.
Leg 1 (Lilac)
You'll make both legs separately before joining them into the body. This first leg starts in lilac and switches to blue on the final round, so have your blue yarn ready before you begin Round 5.
Round 1: Ch 2, sc 6 in 2nd ch from hook, or MR 6. [6 sc]
Round 2: Inc around. [12 sc]
Round 3: Sc around. [12 sc]
Round 4: Sc around. [12 sc]
Round 5 (BLUE): Sc around. [12 sc] Switch to blue at the start of this round by drawing the new color through on the last pull-through of your final sc in Round 4.
Bind off, leaving a long tail to sew the gap between the legs closed.
Leg 2
Leg 2 is worked exactly the same as Leg 1. Don't bind off after Round 5 — you'll continue directly from this leg into the body join in the next section.
Round 1: Ch 2, sc 6 in 2nd ch from hook, or MR 6. [6 sc]
Round 2: Inc around. [12 sc]
Round 3: Sc around. [12 sc]
Round 4: Sc around. [12 sc]
Round 5 (BLUE): Sc around. [12 sc]
Body (Joining the Legs and Continuing)
This is where the body takes shape. You'll join both legs with a chain bridge, then work upward through a full rainbow of color changes: blue, green, yellow, orange, and pink. The section notes mark each color transition — JOINING THE LEGS, CONTINUING IN BLUE, SWITCH TO GREEN, SWITCH TO YELLOW, SWITCH TO ORANGE, SWITCH TO PINK — so keep your yarn colors close. The join round is the trickiest part of the whole pattern; take it slowly and it'll make sense as you go.
Round 6: Ch 5, sc into a st on Leg 1. Sc around Leg 1 a further 10 sc (11 sc on Leg 1 total). There should be a sc on Leg 1 that hasn't been stitched into. Ch 5, sc into a st on Leg 2, leaving a 1 sc gap between the legs (1 skipped st on each leg). Sc around Leg 2 for another 10 sc (11 sc on Leg 2; 22 sc total around plus 2 x ch 5). [32] The two ch-5 bridges become the crotch of the body — you'll sc across them in Round 7 to close everything into one continuous round.
Round 7: Sc in each sc and ch around. [32 sc]
Round 8: Sc around. [32 sc]
Rounds 9–12: Round 9: Sc around. [32 sc] Round 10: Sc around. [32 sc] Round 11: Sc around. [32 sc] Round 12: Sc around. [32 sc] These are your green rounds. Switch to green before Round 9 and work all four rounds in that color.
Rounds 13–16: Round 13: Sc around. [32 sc] Round 14: Sc around. [32 sc] Round 15: Sc around. [32 sc] Round 16: Sc around. [32 sc] Switch to yellow at the start of Round 13.
Rounds 17–20: Round 17: Sc around. [32 sc] Round 18: Sc around. [32 sc] Round 19: Sc around. [32 sc] Round 20: Sc around. [32 sc] Switch to orange at Round 17, then to pink at Round 21 — so Round 20 is your last orange round.
Round 21: Sc around. [32 sc] This is your pink round. Stuff the body before you close it off.
Bind off, leaving a long tail for sewing the head shut.
Ears (Make 2) (Pink)
The ears are worked flat in rows rather than in the round. Make two of these in pink — they're quick and only four rows each.
Row 1: Ch 2, sc 5 in 2nd ch from hook, or MR 5. [5 sc] Ch 1, turn.
Row 2: *Sc, inc* x 2, sc across. [7 sc] Ch 1, turn.
Row 3: *Sc, inc* x 3, sc across. [10 sc] Ch 1, turn.
Row 4: Sc across. [10 sc]
Bind off, leaving a long tail for sewing.
Arms (Make 2)
Make two arms worked in the round. These are small and come together fast — just five rounds each.
Round 1: Ch 2, sc 6 in 2nd ch from hook, or MR 6. [6 sc]
Round 2: *Inc, inc, sc* x 2 across. [10 sc] The double increase at the start of each repeat creates a slight widening at the hand end of the arm.
Round 3: Sc around. [10 sc]
Round 4: Sc around. [10 sc]
Round 5: Sc around. [10 sc]
Bind off, leaving a long tail for sewing.
Final Touches
Once all the pieces are finished, it's time to put the Pocket Pal together. I start by sewing the gap between the legs closed using the long tail left from Leg 1 — just a few stitches to close that crotch seam neatly. Then I sew the top of the head shut straight across, right side to left. Next I stuff each arm and sew them to the sides of the body, positioning them between Rounds 9–12 (the green rounds). Each ear gets folded in half vertically and sewn to the top corners of the head. If you're adding cheeks, sew them on now at around Rounds 13–14, which are the yellow rounds. Using black embroidery thread, I sew on a triangular nose and a V-shaped mouth. Finally, if you're using button eyes, sew them on now, layering both sets of 3 buttons on top of each other.
Care Instructions
Because this little pal is stuffed with fiberfill and finished with layered button eyes, I'd skip the washing machine entirely. Hand wash gently in cool water if it needs a clean, then squeeze out the excess water without wringing and lay it flat to dry. The layered buttons can shift or the thread can loosen if the toy gets tossed around wet, so letting it dry fully before it goes back into little hands is worth the wait. If it's more of a display piece, a quick brush with a dry cloth is usually enough.
Baby & Child Safety Notes
This pattern uses buttons for the eyes, including 6 mm and 15 mm black buttons and 11 mm white buttons. Buttons are a choking hazard for babies and children under three, so this toy isn't suitable for very young children as written. If you're making it for a toddler or want to be on the safe side, swap the button eyes for embroidered eyes using black embroidery thread instead. Also give the seams a firm tug before handing it over, especially where the arms and ears are attached, to make sure everything is secure.
Frequently Asked Questions
How much yarn do I actually need for this? Can I use scraps?
Each color uses only 3 g, so yes, this is a great scrap-buster. Six colors at 3 g each means you need about 18 g total across all the rainbow shades. Most people will have more than enough left over from other DK weight projects. Just make sure your scraps are all a similar weight so the color bands stay consistent.
When do I stuff the body? The pattern doesn't seem to say.
Stuff the body before you sew the head shut at the end. Once you've finished Round 21 and bound off, that's your window. The arms get stuffed separately before you sew them to the sides of the body, between the green rounds (Rounds 9-12). I stuff mine pretty firmly so the toy holds its shape, but how firm you go is really up to you.
How do the legs join to the body? Is it tricky?
The legs join in Round 6 using two chains of 5 that bridge the gap between them. You crochet into 11 stitches on each leg, skip one stitch on each leg where the gap is, then work the chain bridges across. It sounds fiddly the first time you read it, but once you've got both legs in your hands and you're working around them, it clicks pretty quickly. Leave yourself that long tail on Leg 1 because you'll use it to sew the gap between the legs closed afterward.
What's the deal with the layered button eyes?
The eyes are made by stacking two sets of buttons on top of each other: a 6 mm black button, an 11 mm white button, and a 15 mm black button, all sewn together through the same spot. It gives the eyes that classic wide-eyed amigurumi look without needing safety eyes or special tools. Just make sure your thread is pulled through firmly and knotted securely on the inside.
Do the ears have any shaping, or are they just flat pieces?
The ears are worked flat in rows and come out as a small curved fan shape, wider at the base than at the start. Once they're done, you fold each one in half vertically and sew it to the top corners of the head. That fold is what gives them a little dimension rather than lying completely flat against the head.
Are the cheeks required, or are they optional?
They're optional. The pattern suggests pink felt circles placed around Rounds 13-14, which fall in the yellow section of the body. I like how they look against the yellow, but the face reads just fine without them if you'd rather keep it simple or don't have felt on hand.
Now It's Your Turn!
I'd love to see your finished Rainbow Pocket Pal, so if you make one, tag me on social media or drop a photo in the comments below. These little guys are SO satisfying to finish, especially when you get to that final round and all those color bands are stacked up together. If you're saving this for later, pin it to your crochet board so you can find it when you're ready to dig into your DK scraps. And if you have questions I didn't cover here, just ask in the comments. I check them regularly and I'm happy to help you work through it.


Leave a Reply