
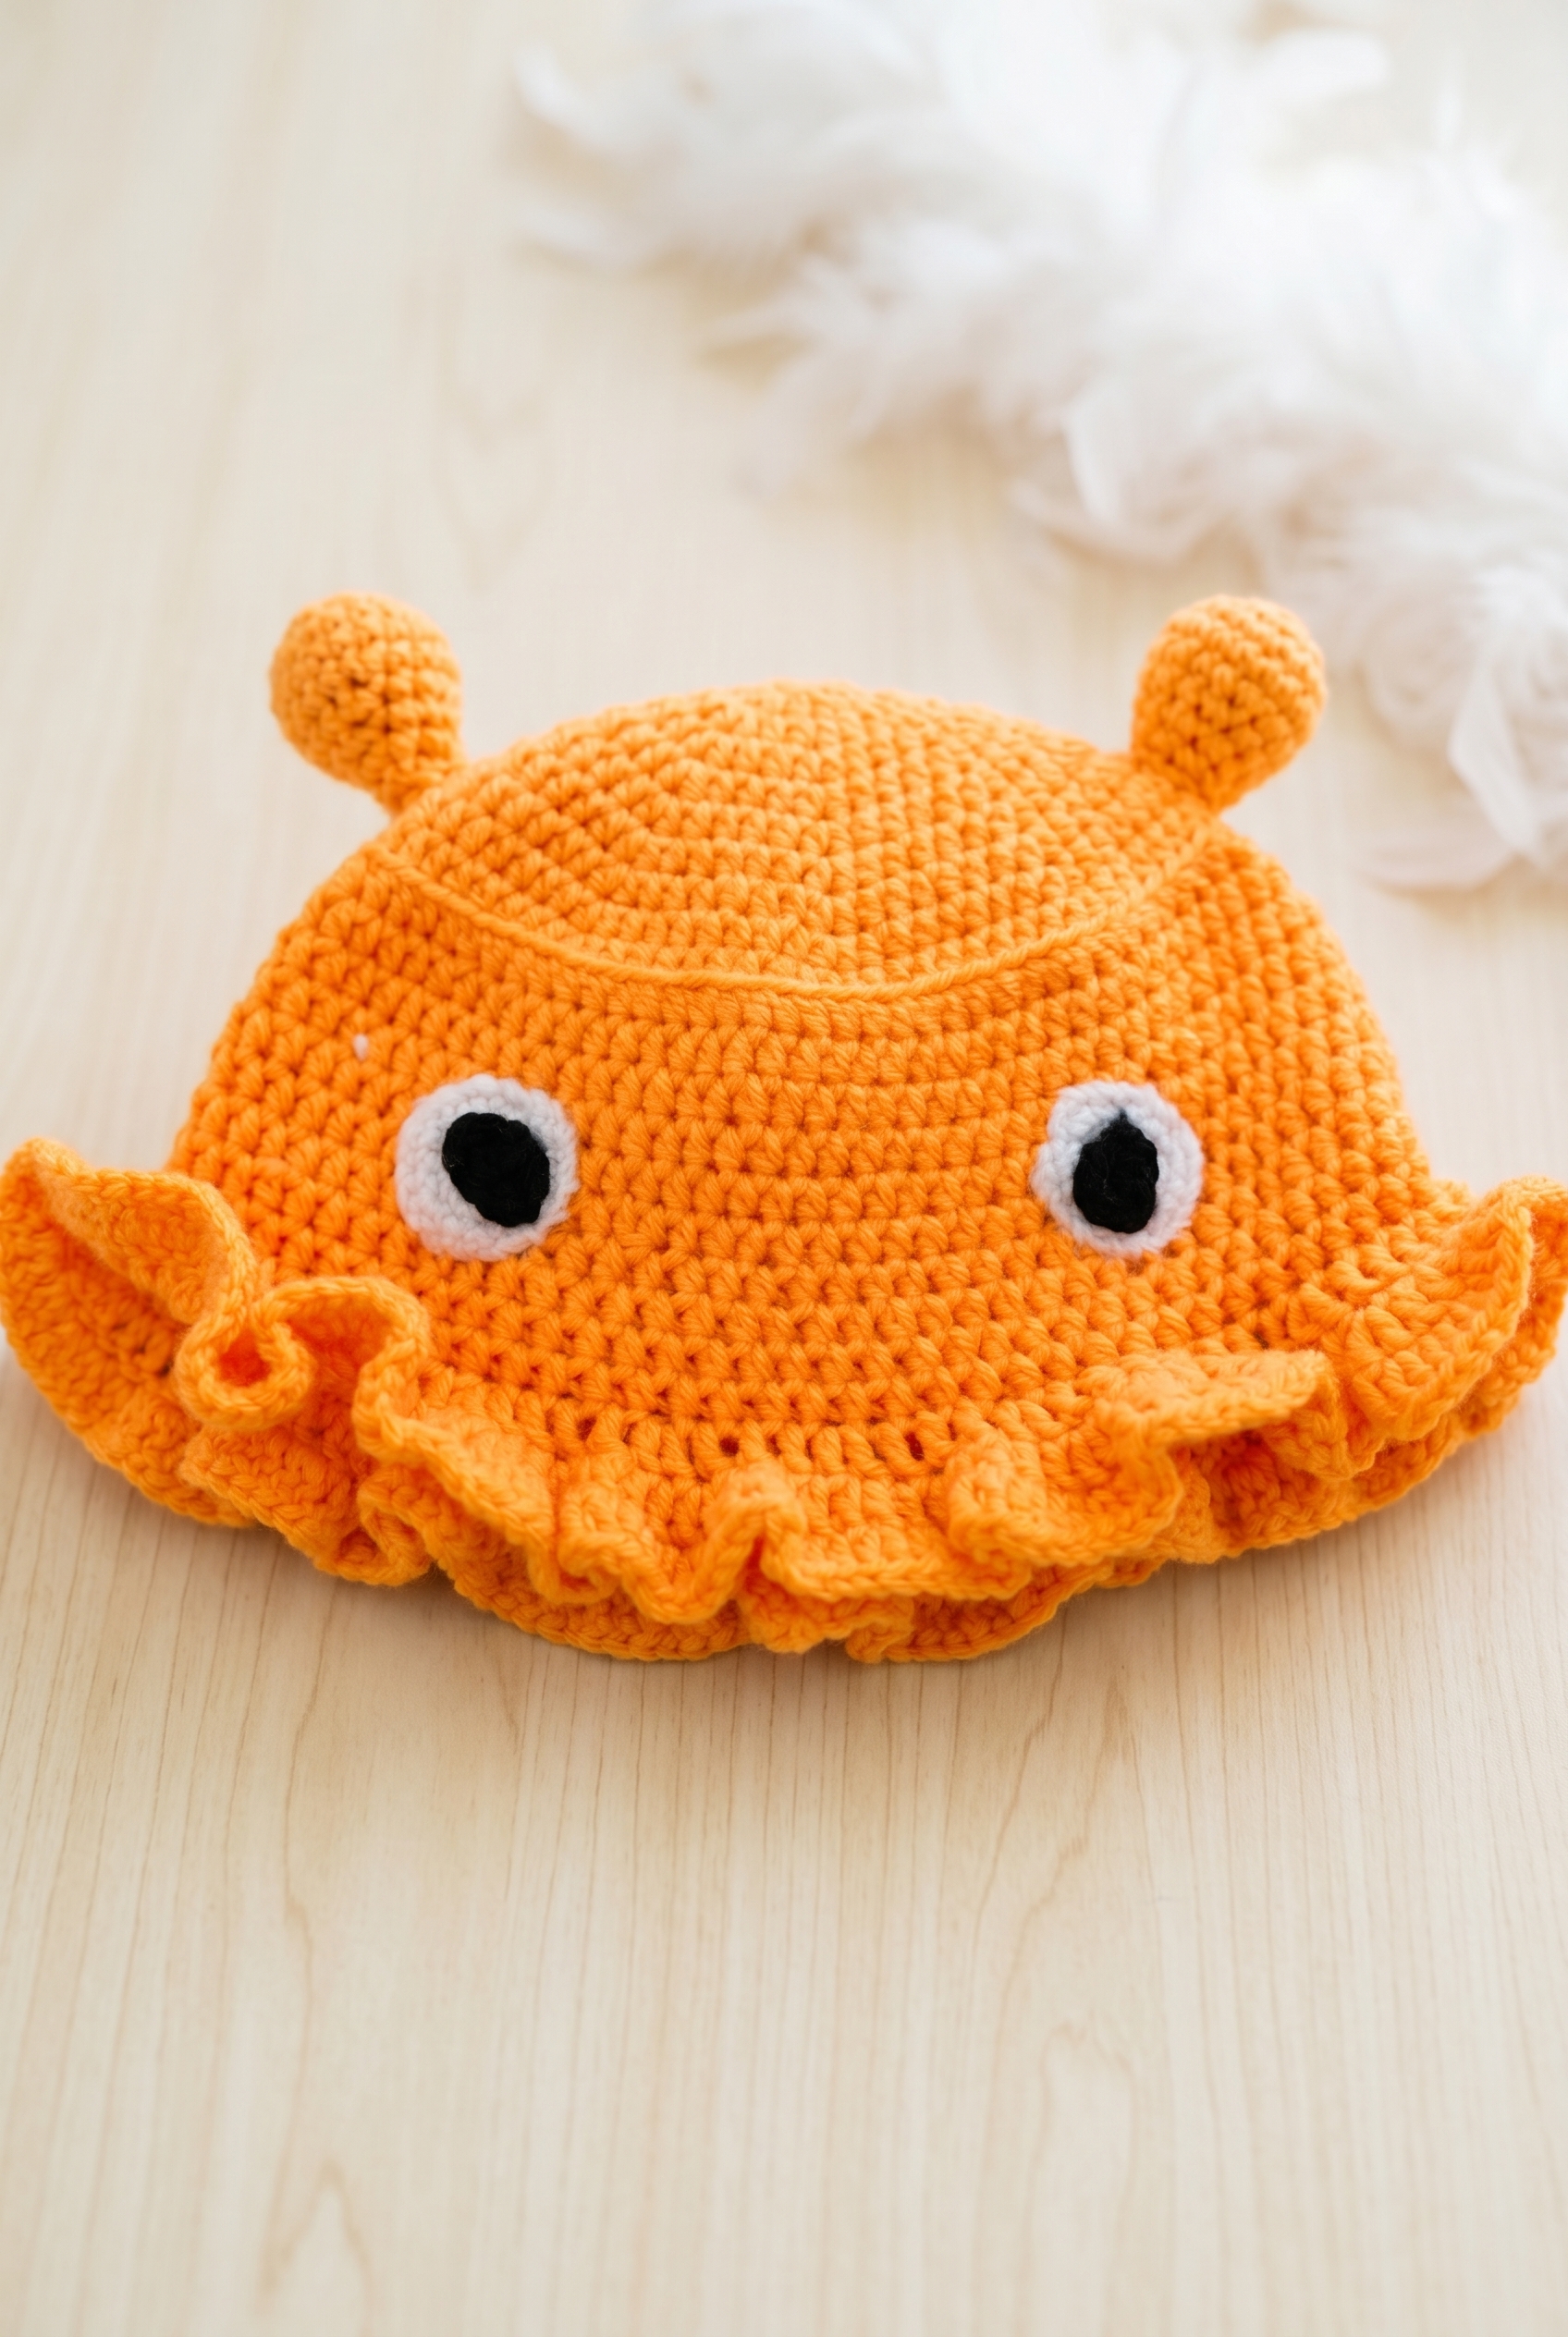
Octopus Bucket Hat Crochet Pattern, a bucket hat with a full octopus worked right into the structure, tentacles and all, and I'm really pleased with how it came together as a finished piece you can actually wear.

Jump to:
About This Project
What I find satisfying about this one is that it's not just a hat with a patch sewn on. The octopus is part of the hat itself, so the construction has a little more going on than a standard bucket hat pattern. I made this with gifting in mind, specifically for kids and the kind of adult who is not afraid to wear something with personality. It works for either, and that range is part of what makes it fun to make.
It sits at an intermediate skill level, so if you've made a few hats before and you're comfortable working in the round, you won't have any trouble with this. There are a few extra steps that make it feel more like a project than a quick make, and I think that's actually part of the appeal.
Why This Pattern Stands Out
The octopus design is built into the hat structure, not just added on top.
- Skill level: Intermediate, so you'll want some experience working in the round before diving in.
- Gifting potential: This makes a really strong gift for kids or anyone who likes a hat with character.
- Construction interest: The tentacle and eye details are integrated into the design, which gives you more to work with than a plain hat pattern.
- Technique value: You'll practice shaping, surface details, and finishing work all in one project.
- Wearability: It's a functional hat first, so the finished piece actually gets worn rather than sitting on a shelf.
Gather Your Supplies
Two hook sizes are in play for this one, so grab both before you sit down.
- Worsted Weight Yarn (Medium Weight 4): A worsted weight acrylic works really well here. It's got enough body to hold the hat's structure without going stiff, and it crochets up at a nice, predictable gauge. You'll need three colors: orange for the bulk of the project (the hat top, sides, brim, and fins), plus small amounts of black and white or cream for the eyes. The eye and pupil portions use so little yarn that scrap pieces are completely fine, but for the orange you're probably looking at somewhere in the range of 80 to 120 yards depending on the size you're making.
- Crochet Hooks: 4 mm and 3 mm: The pattern uses two hooks with a 1 mm difference between them. The larger hook handles the main hat construction, and the smaller one is for the fins and eyes, which are worked in continuous rounds and benefit from a tighter tension to keep the fabric from gapping.
- Stitch marker: Continuous rounds can get away from you fast, especially on the smaller pieces. Dropping a marker at the start of each round saves a lot of counting backward later.
- Also needed: yarn needle, scissors
Color Sequence & Yarn Changes
Orange is your main color from start to finish on the hat itself, so no mid-project color changes there. The black and white are only used for the separate eye pieces, which means you can work those independently and sew everything on at the end rather than juggling multiple colors at once.
Quick Details
A few key numbers for this shark hat before you cast on your magic ring.
| Skill Level | Intermediate |
| Pattern Gauge | Approx. 4 hdc x 3 rows = 1 inch with 4 mm hook |
| Finished Size | Approx. 10 in (25.5 cm) diameter at end of Round 10; approx. 3.5 in (9 cm) side height (Rounds 11-20); brim approx. 2.5 in (6.5 cm) (Rounds 21-23) |
| Yarn Weight | 4 Medium / Worsted |
| Terminology | US |
Stitch Guide & Abbreviations
All standard stitches here, nothing unusual.
- beg = beginning
- BLO = back loop only
- ch = chain
- dc = double crochet
- dec = decrease (work 2 stitches together as one)
- FLO = front loop only
- FO = fasten off
- hdc = half double crochet
- inc = increase (work 2 stitches in the same stitch)
- MR = magic ring
- rnd = round
- sc = single crochet
- sl st = slip stitch
- st = stitch
Pattern Notes
You'll need two hooks for this pattern, sized 1 mm apart from each other. A 4 mm and a 3 mm is the typical pairing, but whatever combination fits that 1 mm gap will work. The different hook sizes handle different sections of the hat, so keep both nearby.
The hat is worked in rounds throughout. For the top of the hat and the side section, the ch 2 at the beginning of a round counts as the last stitch of that round. Most of the time it stands in as the second stitch of the last increase, so don't work into it again at the end. It trips people up the first time, but it clicks fast once you see it in context.
Increases work differently depending on where you are in the hat. On the top section, every increase is 2 hdc in the same stitch. On the brim, every increase is 2 dc in the same stitch. The fins and eyes are worked in continuous rounds, no joining at the end of each round.
Gauge is estimated at approx. 4 hdc x 3 rows = 1 inch with the 4 mm hook. The finished dimensions listed in the card above are also estimates. Hat sizing can shift depending on yarn brand, tension, and fiber content. The fiber isn't specified for this pattern, so check your yarn label and swatch if fit is a concern.
Crochet Instructions
Here's how I work through this octopus bucket hat crochet pattern, section by section.
Top of the Hat
Work this section in color A with a 4 mm hook. You're building the flat crown of the hat outward from a magic ring, adding eight increases every round to keep it lying flat as it grows.
Round 1: In a MR, ch 2, 7 hdc. Sl st in ch to join. [8]
Round 2: Ch 2, *inc* x8. Sl st in ch to join. [16]
Round 3: Ch 2, *hdc, inc* x8. Sl st in ch to join. [24]
Round 4: Ch 2, *2 hdc, inc* x8. Sl st in ch to join. [32]
Round 5: Ch 2, *3 hdc, inc* x8. Sl st in ch to join. [40]
Round 6: Ch 2, *4 hdc, inc* x8. Sl st in ch to join. [48]
Round 7: Ch 2, *5 hdc, inc* x8. Sl st in ch to join. [56]
Round 8: Ch 2, *6 hdc, inc* x8. Sl st in ch to join. [64]
Round 9: Ch 2, *7 hdc, inc* x8. Sl st in ch to join. [72]
Round 10: Ch 2, *8 hdc, inc* x8. Sl st in ch to join. [80]
Sides of the Hat
Now you drop down into the sides of the hat. Round 11 is worked in the back loops only — that's what creates the ridge that separates the crown from the body of the hat. After that, you're just working straight down.
Round 11: Ch 2, in BLO, hdc around. Sl st in ch to join. [80] Working into the back loop only here is what forms that clean folded edge between the top and sides.
Rounds 12–20: Ch 2, in both loops, hdc around. Sl st in ch to join. [80] Work this round 9 times — no shaping, just building the height of the hat.
Brim
The brim fans out quickly over three rounds, and it starts in the front loops only on round 21 — same idea as the BLO ridge at the top, just flipping the direction of the flare.
Round 21: Ch 2, in FLO, *3 dc, inc* x20. Sl st in ch to join. [100] Switching to double crochet here adds height to the brim and helps it flare out.
Round 22: Ch 2, in both loops, *dc, inc*. Sl st in ch to join. [150]
Round 23: Ch 2, *inc* around. Sl st in ch to join. [300]
FO and weave in ends.
Fins
Work in color A with a 4 mm hook. Make 2. These are worked in continuous rounds — no joining, no chains at the start of each round. All increases are made with 2 sc in the same stitch.
Start with 18 sc in a magic ring, then work the increases over the next few rounds: *sc, inc* x4 to reach 12, then *2 sc, inc* x4 for 16, then *3 sc, inc* x4 for 20. Work two even rounds of sc around at 20 stitches, then begin decreasing: *3 sc, dec* x4 brings you to 16, then *2 sc, dec* x4 for 12. On round 9, work *sc, dec* x4 to reach 8 stitches.
Start stuffing.
Work one even round of sc around at 8, then on round 11, *2 sc, dec* x2, sl st to join to close down to 6 stitches. Finish stuffing before you close this off completely.
Finish stuffing and FO; leave a long tail for sewing.
Eyes (White)
Work in color C with a 4 mm hook. Make 2. These are worked in continuous rounds, and all increases are made with 2 sc in the same stitch.
Start with 16 sc in a magic ring, then inc around to reach 12, and finish with *sc, inc* x6, sl st to join for 18 stitches. The slip stitch join on the last round is intentional — it closes the piece before you fasten off.
FO; leave a long tail for sewing. Sew to rounds 14–17 on the sides of the hat about 15 sets apart.
Pupils
Work in color B with a 3 mm hook. Make 2. All increases are made with 2 sc in the same stitch. Each pupil is worked in a single round along a foundation chain, so you'll be working down one side and back up the other.
Round 1: Ch 4. In the second ch from the hook, inc, sc, 3 sc in next st. Working on the other side of the ch, into the st with 1 sc in it, sc, sc in the last st. Sl st to join. [8] The 3 sc in the same stitch at the end of the chain creates the rounded tip of the oval shape.
FO; leave a long tail for sewing. Sew on the white at an angle.
Final Touches
Once all the pieces are finished, it's time to put the hat together. I sew the fins on between rounds 8 and 9, positioning them across from each other on opposite sides of the hat. Then I sew the white eye circles to rounds 14–17 on the sides of the hat, spacing them about 15 stitches apart. Finally, I sew each pupil onto its white eye at a slight angle — that little tilt is what gives the octopus its personality.
Blocking
Since the fiber isn't specified here, check your yarn label before you do anything. If you're working with acrylic, a light steam block works well to help the brim sit flat and even out any wonky stitches around the crown. I hold the iron a few inches above and let the steam do the work rather than pressing down. If you used wool or a wool blend, wet blocking gives you more control over the shape. Soak it briefly, squeeze out the water in a towel, and then shape it over a bowl or a hat form while it dries. The brim especially benefits from being stretched out flat while it's still damp.
Care Instructions
Check your yarn label first, since the care will depend entirely on the fiber you used. For most worsted weight acrylics, a gentle machine wash on cold and a low-heat tumble dry works fine. The stuffed fins are the one thing I'd be careful with: too much heat can compress the stuffing and flatten them out. If you're hand washing, reshape the fins while the hat is still damp and let it dry flat or over a bowl so the crown holds its shape.

Frequently Asked Questions
Why does this pattern use two different hook sizes?
The 4 mm hook is for the hat body and fins, and the 3 mm hook is just for the pupils. The pupils are small and worked in a single round, so going down a hook size keeps them tighter and more compact so they don't look floppy against the white eyes. It's a small detail but it makes a difference in how the finished face reads.
What does it mean that the ch 2 counts as the last stitch of the round?
It's a bit unusual, but in this pattern the ch 2 at the start of each round counts as the second stitch of the last increase, not the first stitch of the round. So when you're working your increases, the very last inc of the round uses the ch 2 as one of its two stitches. Keep that in mind when counting or you'll end up one stitch off.
When do I stuff the fins, and how firmly?
Start stuffing at Round 9 of the fin and finish before you close up at Round 11. I stuff mine moderately, not packed tight. The fins are decorative and sit on the sides of the hat, so you want them to have a little dimension without being so stiff they stick straight out at a weird angle.
Where exactly do the fins and eyes get sewn on?
The fins go between Rounds 8 and 9 on the sides of the hat, positioned across from each other. The white eyes are sewn to Rounds 14 through 17, about 15 stitches apart. Once the eyes are on, the black pupils get sewn onto the white at a slight angle, which gives the octopus a little personality.
The brim stitch count jumps a lot. Is that normal?
Yes, completely. The brim goes from 80 stitches up to 100, then 150, then 300 by the final round. That dramatic increase is what creates the wide, floppy brim shape. Round 23 doubles every stitch, so the count shoots up fast. It's working as intended, and the brim will ruffle and spread out the way it's supposed to.
Do I need to use a stitch marker for this pattern?
It's listed as optional, and for the hat body I'd say you can get away without one since the rounds are joined. The fins and eyes are worked in continuous rounds though, so a stitch marker is genuinely useful there to track where your round starts. I'd grab one just for those pieces.
Happy Crocheting
I had so much fun putting this one together, and I really hope you do too. If you make your Octopus Bucket Hat, I'd love to see it. Tag me on social media or drop a photo in the comments below. And if you're saving patterns for later, this one pins really well on Pinterest for when the mood strikes. Let me know if you run into any questions along the way.


Leave a Reply