
I've made a lot of bookmarks over the years, but this one genuinely makes me laugh every single time I pick it up. The Nerdy Bookworm Bookmark Crochet Pattern is one of those projects that starts as a quick little make and ends up being the thing everyone asks about when they spot it peeking out of your book.

Jump to:
About the Design
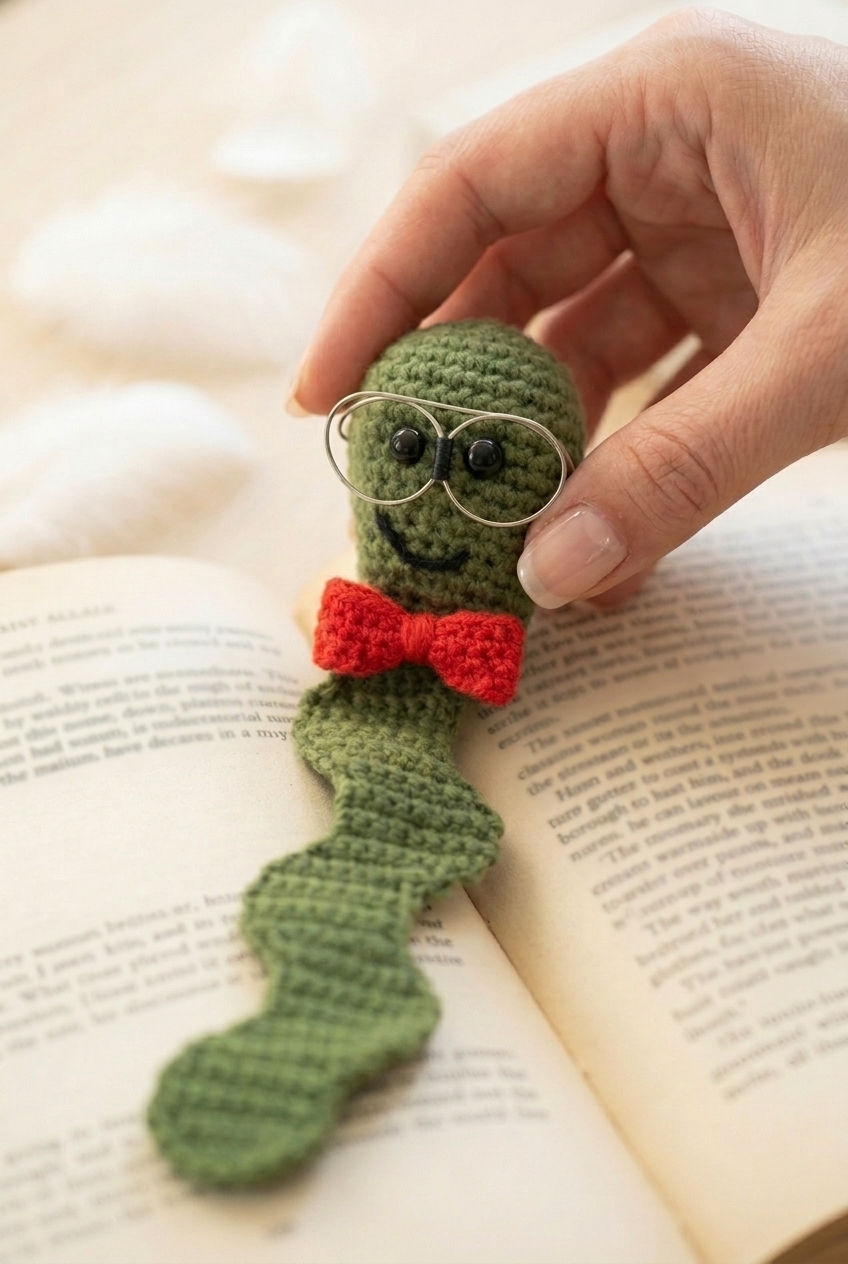
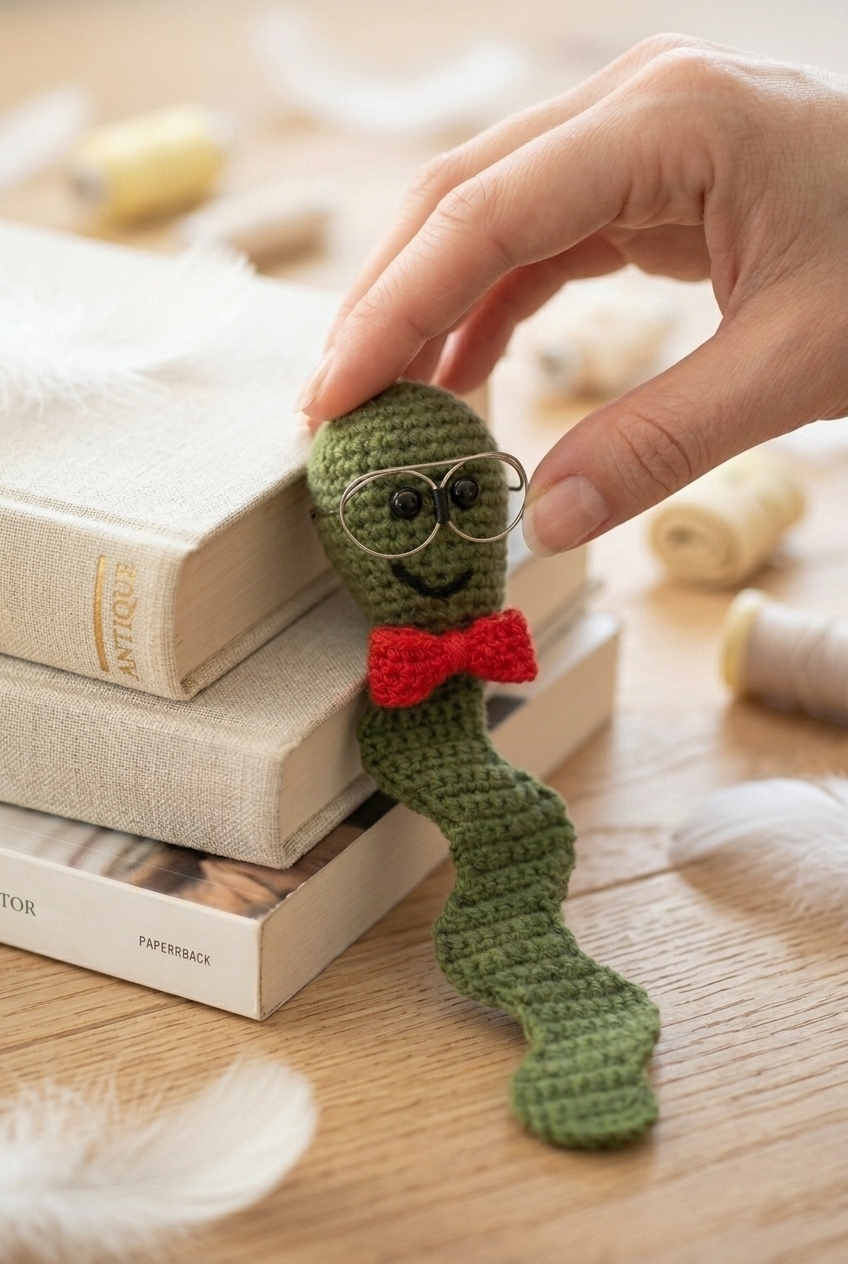
What I really love about this one is how much personality it packs into such a small project. The construction is pretty clever: you're working a long, slim body with a rounder head, and then adding the little accessories as separate pieces. That bow tie especially. It's its own tiny crochet moment and it's so satisfying to attach at the end. The glasses are what really seal the deal though, and the fact that they're actual metal frames just takes the whole thing up a notch.
I'd make this for any book lover, honestly. Kids, adults, teachers, that friend who has a book in every room of their house. It's a genuinely fun gift that feels thoughtful without taking forever to finish.
Why You Need This on Your Hook
This is the bookmark that actually makes people stop and ask where you got it.
- Beginner-friendly build: This is an easy-level pattern, so no tricky techniques are standing between you and a finished project.
- Quick, satisfying finish: It's small enough to complete in one or two sittings, which makes it a great pick-up-and-go project.
- Perfect gift potential: Book lovers, teachers, librarians. the list of people who would actually use this is pretty long.
- Scrap yarn friendly: The small size means you can dig into your stash without committing to a full skein of anything.
- Accessory construction practice: Making the bow tie and attaching the glasses as separate pieces is a nice low-stakes intro to working with add-on components.
Your Supply List
Three colors, one hook, and a few odd notions — that is the whole list for this little guy.
- Worsted Weight Yarn, Green (main body): Worsted weight is the right call here because amigurumi this small needs a yarn that holds its shape and keeps the stuffing from poking through the stitches. I go with a smooth worsted acrylic for projects like this — it crochets up tightly on a G hook and the finished piece stays firm. You'll probably use somewhere around 30 to 50 yards for the head and strap, though the pattern doesn't give an exact number, so having a full skein on hand is the safe move.
- Worsted Weight Yarn, Red (bow tie): Same weight as the green, just a different color. The bow tie is small, so a leftover scrap or partial skein is more than enough — maybe 10 yards at most.
- Worsted Weight Yarn, Black (mouth embroidery): You only need a small amount for the mouth, so a scrap piece works perfectly. A yard or two is genuinely all you need here.
- Size G (4 mm) Crochet Hook: The pattern notes specifically say to crochet on the tighter side, and a G hook with worsted weight gets you there. Going up a size tends to leave gaps in the fabric, which looks fine for blankets but not great for amigurumi.
- Safety Eyes or Buttons: The pattern places the eyes in Round 11, about 5 stitches apart. If this bookmark is going to a small child, skip the safety eyes entirely and use sewn-on buttons or embroidered eyes instead — safety eyes can be a choking hazard even when secured properly.
- 16 Gauge Wire (for glasses): This is the one item you might not have sitting around. The wire gets shaped into glasses frames and attached to the finished piece. Sixteen gauge is stiff enough to hold the shape but still bendable by hand.
- Electrical Tape: This goes with the wire. You'll wrap the ends to keep them from poking through the yarn or scratching anyone handling the bookmark.
- Polyfill or Scrap Yarn (stuffing): The head gets stuffed, so have a small amount ready. Stuff it before the opening closes up — once the last few rounds are done it gets awkward to add more.
- Also needed: stitch marker, upholstery needle, scissors
Color Sequence & Yarn Changes
The green is your main color for the entire head and strap, so you won't be switching colors mid-round anywhere in the body. The red bow tie is worked separately and attached at the end, and the black is just for embroidering the mouth onto the finished head, so there's no actual yarn carry to manage here.
Project Info
A little amigurumi head that sits right on top of your page and actually stays put.
| Skill Level | Easy |
| Pattern Gauge | Gauge is not critical for this project. Use a hook size that creates a tight, firm fabric so stuffing does not show through |
| Finished Size | Approx. 2 in (5 cm) wide strap and 12 in (30 cm) long overall (estimated) |
| Yarn Weight | 4 Medium / Worsted |
| Fiber | Not specified — check the yarn label |
| Terminology | US |
Abbreviations & Stitches Used
Short list, all familiar stitches.
- ch = chain
- rnd = round
- row = row
- sc = single crochet
- sc2tog = single crochet 2 together (decrease)
- sl st = slip stitch
- st(s) = stitch(es)
- 2 sc in next st = increase (work 2 sc in the same stitch)
Special Stitches
- Invisible decrease: Use the invisible decrease for sc2tog for cleaner decreases.
- Magic circle: Magic circle, 6 sc into circle.
Important Notes
This is an amigurumi bookmark worked in a continuous spiral. Don't join at the end of each round. Drop a stitch marker into the first stitch of each round and move it up as you go — it's the only way to keep track without losing your place.
Crochet on the tighter side. If your fabric feels loose or you can see gaps, go down a hook size. The stuffing shouldn't be visible through the stitches at all. Gauge itself doesn't matter here, but the density of your fabric does.
Use the invisible decrease method when working sc2tog. It makes a real difference in how clean the finished piece looks, especially on the head section where the decreases are visible.
If you're adding safety eyes, place them in Round 11, approximately 5 stitches apart. Get them in before you stuff and close up the head — you can't go back once the opening is too small.
How to Make the Nerdy Bookworm Bookmark Crochet Pattern
Follow each section in order and you'll have a fully assembled Nerdy Bookworm Bookmark Crochet Pattern ready to tuck into your favorite book.
The Bookworm's Head
The head is worked in rounds with green yarn, starting from a magic circle and expanding out into a small stuffed sphere. This is the focal point of the whole bookmark, so take your time getting the shaping right before you close it off.
Round 1: Magic circle, 6 sc into circle. [6]
Round 2: 2 sc in each st around. [12]
Round 3: sc in each st around. [12]
Round 4: *sc in next st, 2 sc in next st* repeat around. [18]
Round 5: sc in each st around. [18]
Round 6: *sc in next 2 sts, 2 sc in next st* repeat around. [24]
Rounds 7–14: sc in each st around. [32] Eight even rounds to build up the body of the head before you start closing it down.
Round 15: *sc in next 2 sts, sc2tog* repeat around. [24]
If using safety eyes, insert them in Round 11, approximately 5 sts apart. Add stuffing now.
Rounds 16–18: sc in each st around. [24]
Round 19: *sc in next st, sc2tog* repeat around. [16]
Rounds 20–21: sc in each st around. [16]
Closing the head: Squish the head closed and line up the remaining 16 sts. Crochet through the first two sts together, then the next two, continuing across until the head is closed. [8 sts across] Place stitch marker in the last stitch. You'll be working directly from this closed edge to begin the strap, so don't fasten off yet.
The Bookmark Strap
Continue working flat in rows from the closed head edge. The strap is a long strip of rows with a repeating diagonal texture created by shifting the increase and decrease from one end to the other each row.
Row 1: ch 1, 2 sc in first st, sc in next 5 sts, sc2tog. [8 sc]
Row 2: ch 1, sc2tog, sc in next 5 sts, 2 sc in last st. [8 sc]
Row 3: ch 1, 2 sc in first st, sc in next 5 sts, sc2tog. [8 sc]
Row 4: ch 1, sc2tog, sc in next 5 sts, 2 sc in last st. [8 sc]
Rows 5–8: Row 5: ch 1, sc in each st. [8 sc] Row 6: ch 1, sc in each st. [8 sc] Row 7: ch 1, sc in each st. [8 sc] Row 8: ch 1, sc in each st. [8 sc]
Row 9: ch 1, sc2tog, sc in next 5 sts, 2 sc in last st. [8 sc]
Row 10: ch 1, 2 sc in first st, sc in next 5 sts, sc2tog. [8 sc]
Row 11: ch 1, sc2tog, sc in next 5 sts, 2 sc in last st. [8 sc]
Row 12: ch 1, 2 sc in first st, sc in next 5 sts, sc2tog. [8 sc]
Row 13: ch 1, sc2tog, sc in next 5 sts, 2 sc in last st. [8 sc]
Rows 14–17: Row 14: ch 1, sc in each st. [8 sc] Row 15: ch 1, sc in each st. [8 sc] Row 16: ch 1, sc in each st. [8 sc] Row 17: ch 1, sc in each st. [8 sc]
Row 18: ch 1, sc2tog, sc in next 5 sts, 2 sc in last st. [8 sc]
Row 19: ch 1, 2 sc in first st, sc in next 5 sts, sc2tog. [8 sc]
Row 20: ch 1, sc2tog, sc in next 5 sts, 2 sc in last st. [8 sc]
Row 21: ch 1, 2 sc in first st, sc in next 5 sts, sc2tog. [8 sc]
Rows 22–25: Row 22: ch 1, sc in each st. [8 sc] Row 23: ch 1, sc in each st. [8 sc] Row 24: ch 1, sc in each st. [8 sc] Row 25: ch 1, sc in each st. [8 sc]
Row 26: ch 1, 2 sc in first st, sc in next 5 sts, sc2tog. [8 sc]
Row 27: ch 1, sc2tog, sc in next 5 sts, 2 sc in last st. [8 sc]
Row 28: ch 1, 2 sc in first st, sc in next 5 sts, sc2tog. [8 sc]
Row 29: ch 1, sc2tog, sc in next 5 sts, 2 sc in last st. [8 sc]
Rows 30–33: Row 30: ch 1, sc in each st. [8 sc] Row 31: ch 1, sc in each st. [8 sc] Row 32: ch 1, sc in each st. [8 sc] Row 33: ch 1, sc in each st. [8 sc]
Row 34: ch 1, sc2tog, sc in next 5 sts, 2 sc in last st. [8 sc]
Row 35: ch 1, 2 sc in first st, sc in next 5 sts, sc2tog. [8 sc]
Row 36: ch 1, sc2tog, sc in next 5 sts, 2 sc in last st. [8 sc]
Row 37: ch 1, 2 sc in first st, sc in next 5 sts, sc2tog. [8 sc]
Rows 38–41: Row 38: ch 1, sc in each st. [8 sc] Row 39: ch 1, sc in each st. [8 sc] Row 40: ch 1, sc in each st. [8 sc] Row 41: ch 1, sc in each st. [8 sc]
Row 42: ch 1, 2 sc in first st, sc in next 5 sts, sc2tog. [8 sc]
Row 43: ch 1, sc2tog, sc in next 5 sts, 2 sc in last st. [8 sc]
Row 44: ch 1, 2 sc in first st, sc in next 5 sts, sc2tog. [8 sc]
Row 45: ch 1, sc2tog, sc in next 5 sts, 2 sc in last st. [8 sc]
Rows 46–49: Row 46: ch 1, sc in each st. [8 sc] Row 47: ch 1, sc in each st. [8 sc] Row 48: ch 1, sc in each st. [8 sc] Row 49: ch 1, sc in each st. [8 sc]
Row 50: ch 1, sc2tog, sc in next 5 sts, 2 sc in last st. [8 sc]
Row 51: ch 1, 2 sc in first st, sc in next 5 sts, sc2tog. [8 sc]
Row 52: ch 1, sc2tog, sc in next 5 sts, 2 sc in last st. [8 sc]
Row 53: ch 1, sc2tog, sc in next 5 sts. The stitch count begins dropping here as the tail of the strap tapers to a point.
Row 54: ch 1, sc2tog, sc in next 3 sts, sc2tog.
Row 55: ch 1, sc2tog, sc, sc2tog.
Fasten off and weave in ends.
The Bow Tie
With red yarn, you'll work a small tube in the round that gets pinched and wrapped into a bow tie shape after. It's a quick piece, just four rounds total.
Round 1: ch 24, join to first ch with sl st (being careful not to twist the chain). [24] Take a moment to confirm the chain lies flat before joining — a twisted foundation here can't be undone once you've joined.
Rounds 2–4: ch 1, sc in each ch around, join with sl st to top of first sc. [24]
Fasten off, leaving a long tail for wrapping and sewing.
Putting It All Together
With all three pieces finished, here's how I put the bookworm together. The bow tie goes on first: pinch it together in the middle and wrap the tail yarn securely around the center to form a bow shape, then sew it onto the base of the head. For the eyes, if you're using buttons, position them about 5 sts apart and sew them in place. For glasses, wrap 16-gauge wire around a circular object (approximately the diameter of a quarter) to form round glasses frames, bend and angle the ends, then poke the wire through the back of the head so the ends do not stick out. Sew yarn around the wire ends a few times to secure, and add a small piece of electrical tape to the center bridge to help hold the glasses in place. Finally, embroider a small mouth using black yarn.
Care Instructions
Because this bookmark has wire inside the glasses frames, keep it out of the washing machine entirely. If it gets grubby, spot clean the yarn with a damp cloth and a tiny drop of mild soap, then let it air dry flat. The wire can shift if the head gets bent around too much, so I'd store it tucked inside a book rather than loose in a bag. The electrical tape on the glasses bridge can lose its grip over time, so check it occasionally and replace it if needed.
Baby & Child Safety Notes
This bookmark is not suitable for young children. It contains 16-gauge wire for the glasses frames, which can be a puncture risk, and the buttons or safety eyes used for the eyes are a choking hazard for kids under three. If you're making this for an older child who reads independently, swap the button eyes for embroidered ones and skip the wire glasses entirely. A little embroidered circle in black yarn reads just as well as a glasses frame and removes the safety concern completely.
Frequently Asked Questions
When do I insert the safety eyes or sew on the button eyes?
Insert safety eyes at Round 11, about 5 stitches apart, before you close up the head. That's the timing-critical step here. Once you've decreased past Round 15 and added your stuffing, there's no good way to get back in. If you're using buttons instead of safety eyes, you can sew those on after the head is fully closed and assembled.
How do I keep the wire glasses from poking through the head?
After bending the wire ends, poke them through the back of the head and sew over them a few times with yarn to hold them flat. The electrical tape on the center bridge helps keep the whole frame from shifting. Make sure no wire end is left exposed where it could scratch or poke. It takes a little fiddling to get right, but once it's secured it stays put.
How is the strap attached to the head?
The strap isn't sewn on separately. You close the head by crocheting the remaining stitches together into a flat seam, then continue working directly from that closed edge in flat rows. So the head and strap are one continuous piece of crochet, no seaming required between them.
How much stuffing should I use in the head?
Stuff it on the firmer side. A floppy head won't hold the glasses well and tends to flop over the book page rather than sitting neatly. I packed mine pretty solidly before closing up. You can use polyfill or just scraps of leftover yarn if you don't have stuffing on hand.
What does the strap texture look like, and why does the stitch count shift each row?
The strap stays at 8 stitches throughout, but the alternating increases and decreases at each end create a subtle wave or twist along the edges. It gives the strap a bit of visual interest instead of plain flat rows. The overall length comes out to about 12 inches, long enough to drape over a book page and hold its place.
How is the bow tie shaped? It looks three-dimensional in the photos.
The bow tie is crocheted as a small tube: chain 24, join into a ring, then work 3 rounds of single crochet around it. Once you fasten off, you pinch the tube flat in the center and wrap the yarn tail tightly around the middle to cinch it into a bow shape. That wrapping is what creates the 3D look. Then sew it onto the base of the head.
Happy Crocheting
This little bookworm has become one of my favorite quick makes, mostly because it's the kind of thing you can finish in an afternoon and immediately put to use. If you make one, I'd love to see it. Tag me on Instagram or drop a photo in the comments. And if you're saving this for later, pin it so you can find it again when you're ready to stitch one up for the reader in your life.


Leave a Reply