
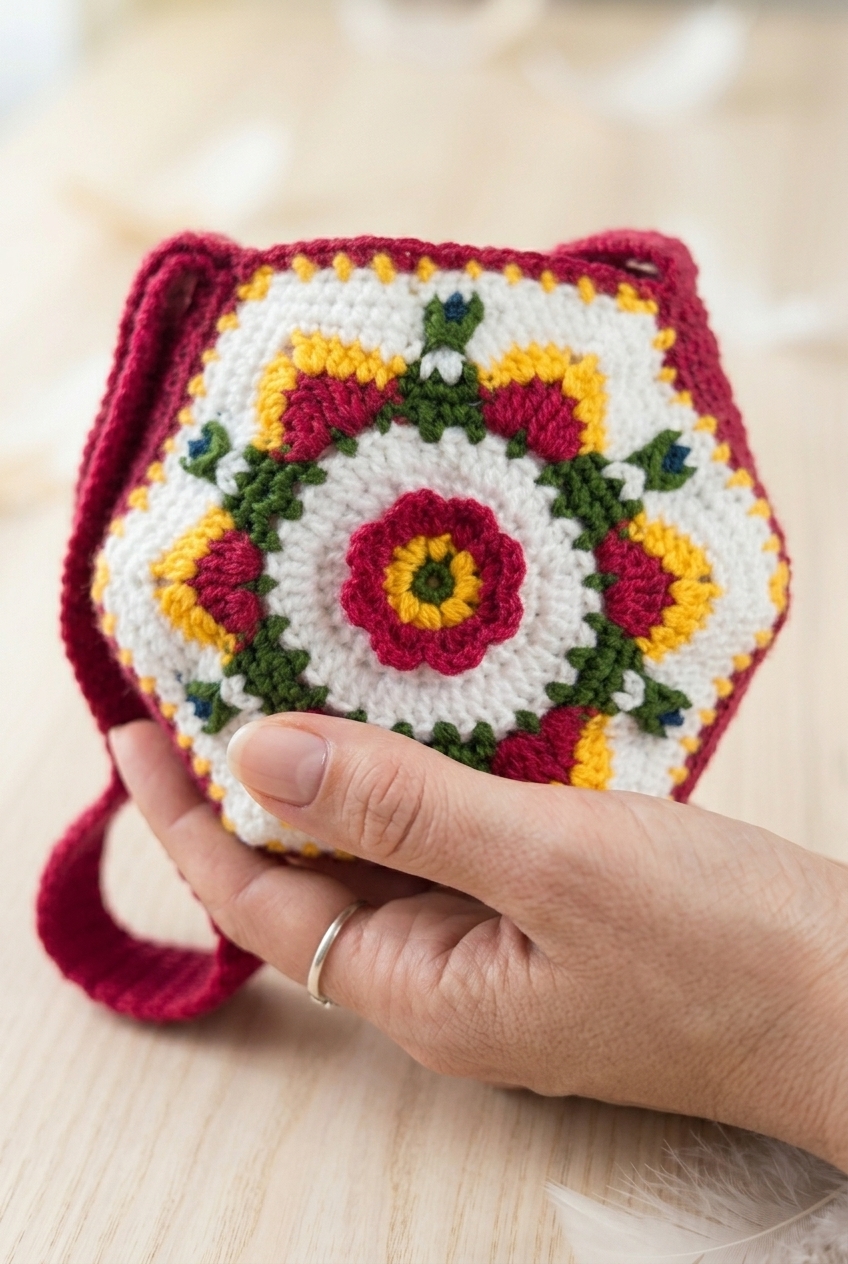
Matyo Inspired Bag Crochet Pattern is honestly one of my favorite things I've made because of it. Matyo embroidery is this incredibly rich Hungarian folk art tradition, and translating that energy into crochet felt like such a fun challenge. The result is a bag that feels genuinely special, like something you'd pick up at an artisan market and treasure for years.

Jump to:
About This Project
What I love about this one is how the construction actually tells the story of the design. The body is built around a granny-square style motif that radiates outward, which means you're not just crocheting a plain rectangle and calling it a bag. Each round adds something, and by the time you're done you've got this finished piece that feels way more intentional than a lot of bags I've made. That's pretty satisfying.
I'd make this for someone who appreciates handmade things with a real sense of craft behind them. It's not a basic everyday tote. It's more of a "I made this and I'm a little proud of it" kind of bag, which means it also makes a really thoughtful gift for someone who loves color and folk-inspired design.
What Makes This Pattern Special
A folk art-inspired bag that's actually as fun to make as it is to carry.
- Intermediate skill level: You'll need some experience under your belt, but nothing here requires advanced techniques you've never seen before.
- Motif-based construction: The body is built from a radiating motif, so the process feels varied and engaging rather than repetitive.
- Great gifting potential: The folk art aesthetic makes this feel like a considered, one-of-a-kind gift for the right person.
- Real technique value: Working through this pattern is a genuinely good way to get comfortable with motif shaping and color work together.
- Wearable and functional: It's decorative in feel but sized to actually use, which isn't always a given with statement bags.
Gather Your Supplies
Five colors are in play here, so pull them all out before you start.
- Worsted Weight Yarn (5 colors: green, yellow, red, white, and blue): A standard worsted weight works well for this project because the stitch definition stays clean and the fabric holds its shape without being stiff. The yarn cycles through multiple colors across the rounds, so you want something that doesn't split easily when you're picking it up and putting it down constantly. Yardage isn't specified in the pattern, but for a two-panel bag construction like this, budget somewhere around 50 to 100 yards per main color and a smaller amount for blue, since it appears only briefly.
- 4.00 mm Crochet Hook: A 4.00 mm pairs well with worsted weight and gives you a firm, even fabric. For a bag that needs to hold its shape across two panels and five sewn sides, you don't want a loose gauge.
- Also needed: yarn needle, scissors
Color Sequence & Yarn Changes
The color changes happen frequently across the rounds, and the pattern notes are clear that you should add the new color on the last yarn over of the previous stitch. It's worth keeping all five colors loosely accessible rather than buried in a bag, because you'll be reaching for them often and in a specific order. Blue has the smallest role of the five, appearing only during the Round 11 joins, so a shorter length is all you need there.
Pattern Overview
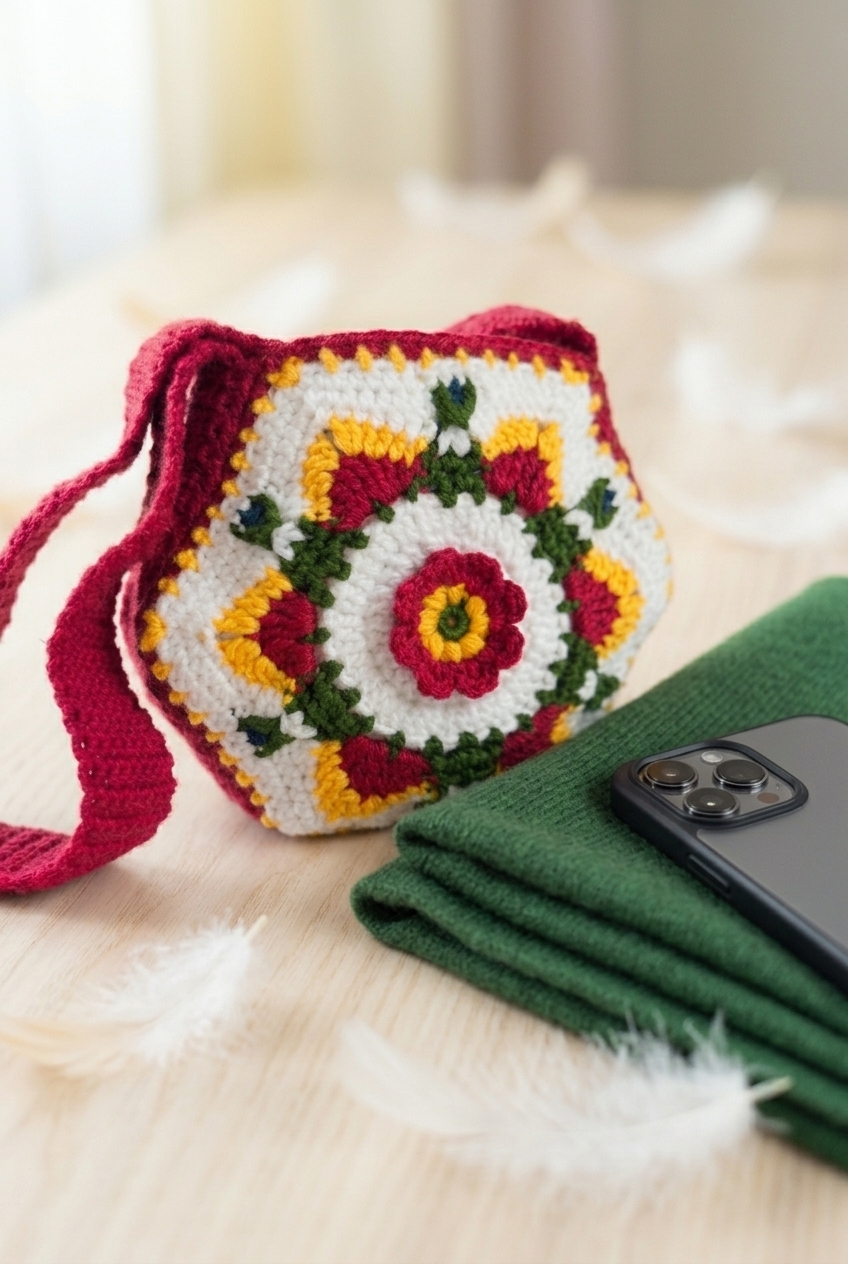
A structured hexagonal bag worked in two matching panels, joined on five sides with a long single crochet strap.
| Skill Level | Intermediate |
| Pattern Gauge | Gauge is not critical for this project. Use a hook size that creates a firm fabric suitable for a bag so the stitches are dense and the shape holds. |
| Finished Size | Approx. 10 in (25 cm) wide x 10 in (25 cm) tall (excluding strap); strap approx. 260 rows long and 8 sc wide |
| Yarn Weight | 4 Medium / Worsted |
| Fiber | Not specified — check the yarn label |
| Terminology | US |
Abbreviations & Stitches Used
This bag uses a solid mix of standard stitches plus a few textured ones worth reviewing before you start.
- ch = chain
- ch-sp = chain space
- st(s) = stitch(es)
- sl st = slip stitch
- sc = single crochet
- hdc = half double crochet
- dc = double crochet
- tr = treble crochet
- fps = front post stitch
- PS = puff stitch
- dc3cl = 3 dc cluster
- dc2tog = double crochet 2 together
- * * = repeat instructions between * * as directed
Special Stitches
- PS (puff stitch): Yarn over, insert hook in indicated st, yarn over, pull up a loop; repeat (yarn over, insert hook in same st, yarn over, pull up a loop) 2 more times; yarn over, pull through all loops on hook.
- dc3cl (3 dc cluster in same st): (Yarn over, insert hook in indicated st, yarn over, pull up a loop, yarn over, pull through 2 loops) 3 times in the same st; yarn over, pull through all 4 loops on hook.
- fps (front post stitch): Work the indicated stitch around the post of the stitch from the previous round, inserting the hook from front to back to front around the post.
Important Notes
This pattern is not suitable for beginners. The stitch combinations and shaping require some familiarity with reading crochet patterns and working textured stitches consistently.
You'll make two main panels. Each panel has six sides, and when you're ready to assemble, you sew five of those sides together. The sixth side stays open — that's your bag opening. Keep that in mind as you're finishing up your panels so you don't accidentally close the whole thing.
When changing colors, work the new color on the last yarn over of the stitch before the color change. Pulling the new color through at that final step gives you a clean transition at the start of the next stitch.
Since gauge isn't critical here, your main goal is a firm, dense fabric. If your stitches feel loose or the fabric is floppy, go down a hook size. A bag needs to hold its shape.
How to Make the Matyo Inspired Bag Crochet Pattern
Here's how I work through each piece of this bag, from the floral panels out to the strap and final assembly.
Main Panel
Make 2 of these panels. Each one builds outward from a small center loop, adding color and texture round by round until the full medallion shape is complete. The two finished panels become the front and back of the bag.
Round 1: In G, ch 4, sl st in first ch to form a loop, 8 sc into center of loop, sl st in first sc and join Y. [8 sc]
Round 2: In Y, starting in same st as previous sl st, *PS, ch 1* repeat around, sl st in first PS joining R. [8 PS] The puff stitches sit in the round and the ch-1 spaces between them are what Round 3 works into, so keep those spaces open and don't pull too tight.
Round 3: In R, sl st in next ch-1 sp, *[ch 2, 2 dc, ch 2, sl st] in same ch-1 sp, sl st in next ch-1 sp* repeat around, sl st in back loop of next sl st. [8 petals] That final sl st into the back loop only is important — Round 4 works into those back loops to continue behind the petals.
Round 4: 2 sc in same back loop of same sl st and in each back loop of each sl st around (between petals), sl st in first sc joining W. [16 sc]
Round 5: In W, ch 3, 1 dc in same st as previous sl st, 2 dc in next st and in each st around, sl st in top of ch 3. [32 dc]
Round 6: Ch 3, *2 dc in next st, 1 dc in next st, 2 dc in next st* repeat around, sl st in top of ch 3 joining G. [48 dc]
Round 7: In G, starting in same st as previous sl st, *1 sc in next st, ch 3, skip 1 st* repeat around, sl st in first sc joining R. [24 ch-3 sps] These ch-3 spaces are the foundation for the larger petal round coming up, so count them before moving on.
Round 8: In R, *[1 sc, 1 dc, 2 tr] in next ch-3 sp, [2 tr, 1 dc, 1 sc] in next ch-3 sp joining G in end of last st, ch 2, 1 sc in next ch-3 sp, ch 2, 1 sc in next ch-3 sp, ch 2 re-joining R* repeat around, sl st in first sc, ch 1 joining Y. [6 petals] Watch the color joins here — G and R swap mid-repeat, and you're carrying and re-joining as you go around. Keep the floats snug but not tight.
Round 9: In Y, starting in same st as previous sl st, *1 sc in next st, 1 hdc in next st, 2 dc in next 2 sts, ch 2, 2 dc in next 2 sts, 1 hdc in next st, 1 sc in next st joining G in end of st, 1 sc in next ch-2 sp, ch 2, 1 sc in next ch-2 sp, ch 2, 1 sc in next ch-2 sp re-joining Y in end of st* repeat around, sl st in first sc in Y. [6 petals]
Round 10: Join W with ch 1, ch 2, 1 dc in next st, 1 hdc in next 2 sts, 1 sc in next 2 sts, [1 sc, ch 2, 1 sc] in next ch-2 sp, 1 sc in next 2 sts, 1 hdc in next 2 sts, 1 dc in next 2 sts, skip next st, dc2tog (the 2 ch-2 sps), skip next st, 1 dc in next 2 sts, 1 hdc in next 2 sts, 1 sc in next 2 sts, [1 sc, ch 2, 1 sc] in next ch-2 sp, 1 sc in next 2 sts, 1 hdc in next 2 sts, 1 dc in next 2 sts, skip next st, dc2tog (the 2 ch-2 sps), skip next st repeat from * to * until end, sl st in top of ch 3. The dc2tog here pulls together the two ch-2 spaces between petals, drawing the fabric in at those points.
Round 11: Ch 2, 1 hdc in next 5 sts, 1 sc in next st, [1 sc, ch 2, 1 sc] in next ch-2 sp, 1 sc in next st, 1 hdc in next 5 sts joining G in end of last st, skip next st, 1 tr fps around next dc2tog posts joining B in end of st, dc3cl in next st (previous dc2tog st) re-joining G in end of cluster, 1 tr fps around same dc2tog posts joining W in end of st, skip 1 st, 1 hdc in next 5 sts repeat from * to * until end, skipping last 1 hdc repeat; instead skip ch 2 at beginning, sl st in first hdc in W. [114 sts] The front post trebles wrap around the dc2tog post from the previous round — work them snugly so they sit flat against the panel.
Round 12: In W, ch 2, 1 hdc in next 6 sts, [1 sc, ch 2, 1 sc] in next ch-2 sp, skip next st, 1 hdc in next 16 sts repeat from * to * to last ch-2 sp, [1 sc, ch 2, 1 sc] in last ch-2 sp, skip next st, 1 hdc in last 9 sts, sl st in top of ch 2 joining Y. [120 sts]
Round 13: In Y, ch 3, skip next st, sl st in next st repeat from * to * twice more, ch 3, skip next st, [1 sc, ch 2, 1 sc] in next ch-2 sp, ch 3, skip next 2 sts, sl st in next st, repeat from * to * 7 more times repeat from to until end, ending with a * to * repeat of 4 times and joining R. [60 picots] Keep track of where you are in the repeat sequence here — the picot count at the end is a good way to check you haven't dropped or added any.
Round 14: In R, ch 1, 2 sc in next 4 ch-3 sps, [1 sc, ch 2, 1 sc] in next ch-2 sp, 2 sc in next 9 ch-3 sps repeat from * to * until end, ending 2 sc in last 5 ch-3 sps, sl st in first sc. Fasten off and weave in all ends.
Fasten off and weave in all ends.
Strap
The strap is a long, straightforward strip worked in rows. It's repetitive by design, so it's a good section to work through at your own pace.
Row 1: Ch 8 sc foundation sts. [8 sc] TURN
Rows 2–260: 1 sc in each st along. [8 sc] TURN — 259 rows of plain single crochet. Consistent tension across all of them will keep the strap from twisting or curling unevenly.
Finishing
With both panels and the strap complete, this section brings everything together into the finished bag.
Step 1: Sew the strap to both panels, positioning it along the sides.
Step 2: Sew five sides together, leaving one side open for the bag opening.
Starting at the bottom is recommended so the strap seam is less visible.
Step 3: Finally, sew the remaining seam on the strap to finish.
Care Instructions
For day-to-day use, spot cleaning is your best bet with this bag. The strap takes the most stress, and running the whole thing through a washing machine can loosen those sewn seams over time. If you do need a full wash, hand wash it gently in cool water and reshape it while it's still damp. Lay it flat to dry with the opening facing up so the panels hold their shape as they dry out.
Frequently Asked Questions
Do I really need to make two panels, or can I just fold one piece?
Two separate panels is the way to go here. Each panel is worked in rounds from the center out, building that Matyo floral motif, so there's no natural fold point. You sew five of the six sides together and leave one open for the bag opening. Folding a single panel wouldn't give you the same structure or the clean finished edge at the top.
There are a lot of color changes in this pattern. Any tips for managing them?
Change your color on the last yarn over of the stitch before the new color begins. That's the key to keeping your color joins clean throughout. With five colors moving in and out across the rounds, I'd recommend keeping small bobbins or butterflies for each color rather than pulling from full skeins. It cuts down on the tangle situation considerably.
The strap is 260 rows of single crochet. Is there a way to make it shorter?
Yes, just stop earlier. The finished strap is about 260 rows long and 8 stitches wide, which gives you a shoulder bag length. If you want something shorter for a crossbody or a hand carry, work fewer rows and check the length by holding it up before you sew it on. Just make sure both ends are long enough to reach both panels and sit comfortably along the sides.
What does the puff stitch (PS) do in Round 2, and is it hard to work?
The puff stitch in Round 2 creates those raised, rounded bumps that form the inner ring of the floral motif. It's not a difficult stitch, but it does require a bit of tension control since you're pulling up multiple loops before closing them off. If your puffs are coming out flat, try loosening your tension slightly when pulling up each loop.
Why does Round 3 use the back loop of the slip stitches instead of the top of the stitch?
Working into the back loop of those slip stitches in Round 3 lets you build Round 4 behind the petals without disturbing them. If you worked into the top of the stitch, you'd be crocheting through or over the petal layer, and the whole motif would bunch up. The back loop keeps each round sitting cleanly on top of the last.
Is this pattern suitable for someone who hasn't done colorwork before?
Colorwork beginners will likely find this one challenging. The rounds involve joining multiple colors mid-round, sometimes switching between three colors within a single round, and the joins need to happen at specific stitch points to keep the motif looking sharp. Getting comfortable with color joins on a simpler project first would make this a much less frustrating experience.
Now It's Your Turn!
This bag is one of those projects that looks complicated from the outside but makes a lot more sense once you're a few rounds in and the motif starts to take shape. If you make one, I'd love to see your color choices, especially if you go with something other than the traditional palette. Tag me on social media or drop a photo in the comments. And if you're saving this for later, pinning it to your crochet bag board on Pinterest is a good way to keep it handy for when you're ready to pick up that 4 mm hook.


Leave a Reply