
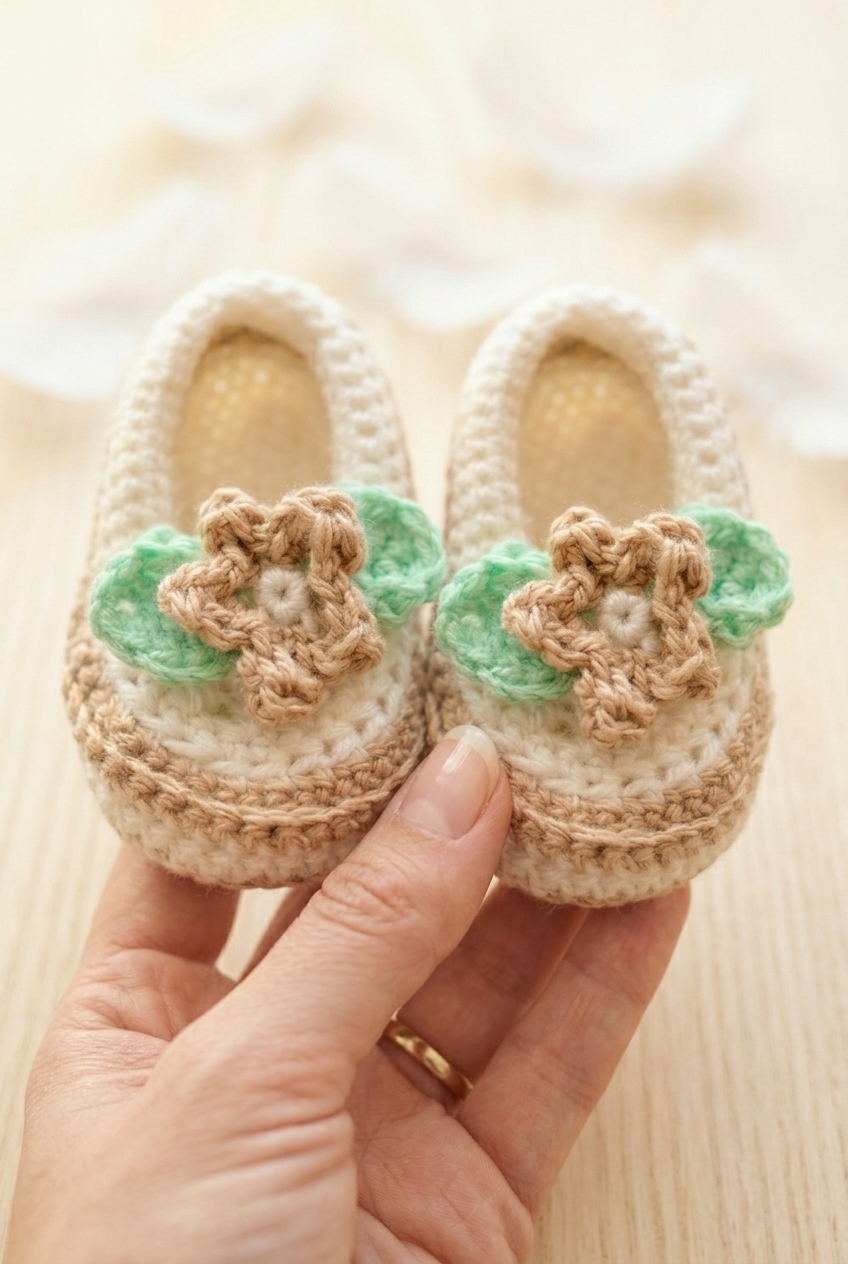
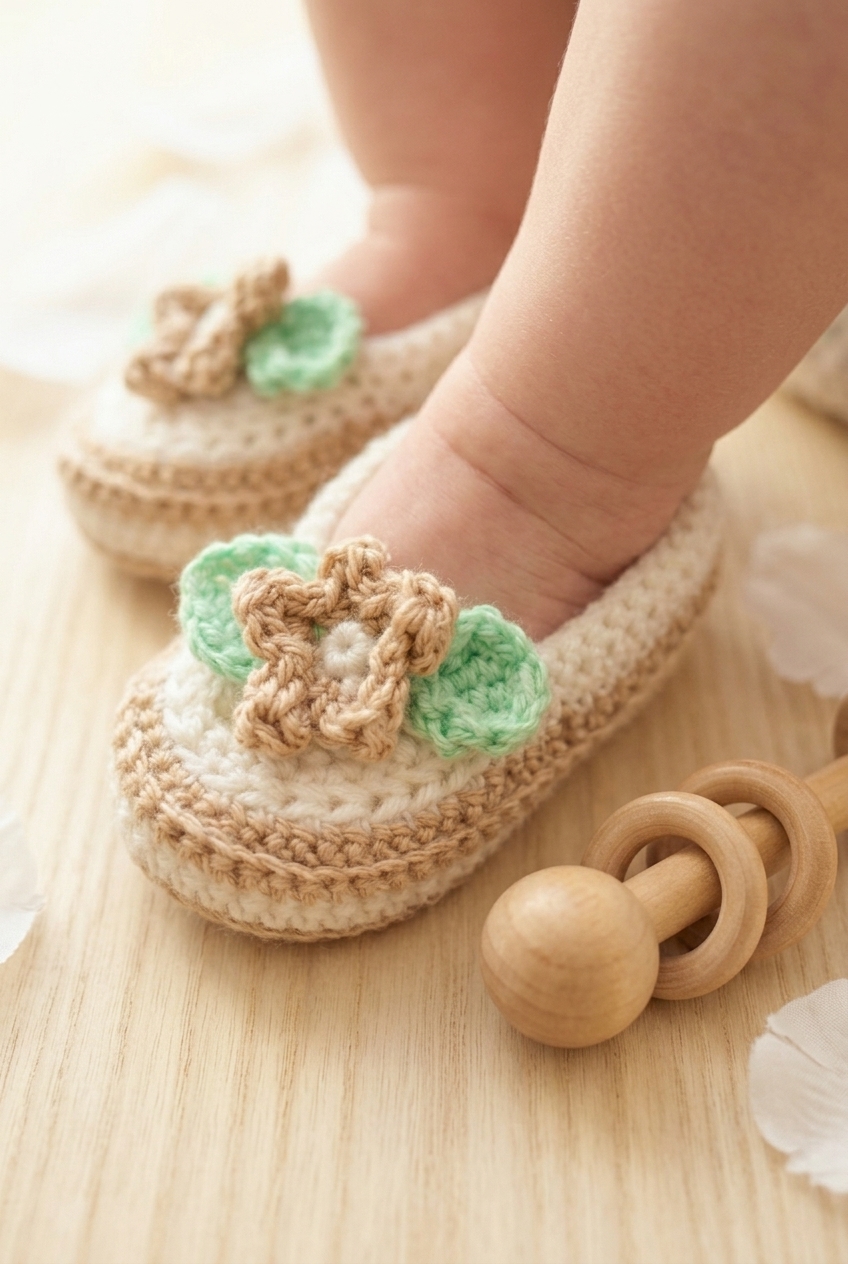
Baby shoes are one of those projects I keep coming back to, and this Leafy Steps Baby Shoes Crochet Pattern has quickly become one of my favorites to gift. It works up in multiple sizes from newborn through toddler, so you can make a pair for basically any baby in your life right now.

Jump to:
The Inspiration
I wanted to design something that felt a little more special than a plain bootie but wasn't going to take forever to finish. Baby shower season hits HARD in my circle, and I needed something I could actually complete in a reasonable amount of time without sacrificing that handmade, thoughtful feel. That's really where this one came from.
What I love most is that the little floral detail on the toe makes it feel like a finished, polished gift. Someone opens this and it looks like you put real effort in. And honestly, it's a pretty satisfying make because the construction is straightforward but the result doesn't look beginner at all.
Why You'll Want to Make This
These little shoes make the kind of baby gift people actually remember getting.
- Beginner Friendly: No tricky techniques here, so if you can work basic crochet stitches, you've got this no trouble at all.
- Four Sizes Included: The pattern covers newborn through toddler, so one download takes care of a lot of gifting occasions.
- Quick Gift Project: A pair works up fast, which makes this a solid go-to when a baby shower sneaks up on you.
- Great for Scraps: The accent details use small amounts of contrasting yarn, so this is a really good stash buster.
- Gifting Appeal: The finished shoes look polished and put-together, which means they land well even among non-crochet people who might not otherwise appreciate handmade gifts.
Materials You'll Need
Three colors, one hook, and a yarn needle — that covers the whole list.
- Worsted Weight Acrylic Yarn (3 colors: Cream, Brown, and Lime Green): A worsted weight acrylic is the right call for baby booties. It holds its shape well through repeated washing, and the stitch definition at this weight makes the shoe construction clean and easy to follow. Yardage isn't specified in the pattern, but for a project this size across four baby sizes, plan on roughly 30–50 yards of Cream, 10–15 yards of Brown, and 10–15 yards of Lime Green as a general working estimate.
- G/6 (4.0 mm) Crochet Hook: This size pairs well with worsted acrylic and gives you a firm, tight fabric. For baby items, you want the stitches close enough that the booties hold their structure without being stiff to work with.
- Also needed: yarn needle for sewing
Color Sequence & Yarn Changes
The color changes here are pretty straightforward, but it helps to know the layout before you start. Cream carries most of the shoe, Brown comes in for one round on the shoe body and then again for the flower petals, and Lime Green is used only for the leaf rounds on the flower. You'll re-join Cream partway through the shoe as well, so don't cut it too short when you set it aside after Round 6.
The Quick Stats
A baby accessory in four sizes, with a little flower that gets to skip the gauge swatch entirely.
| Skill Level | Beginner |
| Pattern Gauge | 9 sc to 4 cm (gauge is not important for the flower) |
| Finished Size | Sizes: 0–3 months (3–6 months, 6–18 months, 18 months–2 years) |
| Yarn Weight | 4 Medium / Worsted |
| Fiber | 100% Acrylic |
| Terminology | US |
Customizing the Size
Four sizes are already written out for you: 0–3 months, 3–6 months, 6–18 months, and 18 months–2 years. Throughout the pattern, the first number always refers to the smallest size, and the numbers in parentheses follow in order from there. If you want to nudge a size up or down slightly, adjusting your hook size by half a millimeter is usually enough, since gauge here is 9 sc to 4 cm with a worsted weight yarn.
Stitch Guide & Abbreviations
Standard stitches all the way through, nothing unusual.
- B = Brown
- C = Cream
- G = Lime Green
- ch = chain
- ch sp = chain space
- sl st = slip stitch
- sc = single crochet
- hdc = half double crochet
- dc = double crochet
- tr = triple crochet
- sk = skip
- st(s) = stitch(es)
- sc2tog = single crochet 2 stitches together (decrease)
- BLO = back loop only
- FLO = front loop only
- magic circle = adjustable ring: form a loop, work stitches into the loop, then pull tail to tighten
The Critical Details
This pattern is written in US terminology throughout. The four sizes are 0–3 months, 3–6 months, 6–18 months, and 18 months–2 years. Whenever you see numbers in parentheses, they correspond to those sizes in that exact order. The first number, outside any parentheses, is always 0–3 months.
Gauge matters for the main accessory piece: 9 sc to 4 cm. Swatch if you want a consistent fit across sizes. The flower is a different story. Gauge isn't a factor there, so you can work it a little looser or tighter without any real consequence to the finished result.
Three colors are used: Brown (B), Cream (C), and Lime Green (G). Keep your color changes tidy and weave in ends as you go if you can. It's much easier than dealing with a pile of them at the end on a small accessory like this.
Leafy Steps Baby Shoes Crochet Pattern Instructions
Work through each piece in order and you'll have a pair of sweet little shoes with floral appliqués ready to attach at the end.
Shoe (Make 2)
You'll make two shoes, each worked in rounds starting from an oval foundation chain that forms the sole. The sole builds outward through the first several rounds before the sides and toe shaping take over.
Round 1: Using C, ch 17 (19, 21, 23). 2 sc in 2nd ch from hook, 1 sc in next 14 (16, 18, 20) ch, 2 sc in last ch. Turn work clockwise, crochet into the foundation ch sps: 2 sc in first ch sp, 1 sc in next 14 (16, 18, 20) ch sp, 2 sc in last ch sp. [36 (40, 44, 48) sc] This is an oval foundation — you're working down one side of the chain and back up the other, placing increases at both ends to shape the toe and heel.
Round 2: 1 sc in next st, 2 sc in next st, 1 sc in next 15 (17, 19, 21) sts, 2 sc in next st, 1 sc in next st, 2 sc in next st, 1 sc in next 15 (17, 19, 21) sts, 2 sc in last st. [40 (44, 48, 52) sc]
Round 3: 1 sc in next 2 sts, 2 sc in next st, 1 sc in next 16 (18, 20, 22) sts, 2 sc in next st, 1 sc in next 2 sts, 2 sc in next st, 1 sc in next 16 (18, 20, 22) sts, 2 sc in last st. [44 (48, 52, 56) sc]
Round 4: 1 sc in next 3 sts, 2 sc in next st, 1 sc in next 17 (19, 21, 23) sts, 2 sc in next st, 1 sc in next 3 sts, 2 sc in next st, 1 sc in next 17 (19, 21, 23) sts, 2 sc in last st. [48 (52, 56, 60) sc]
Round 5: 1 sc in next 4 sts, 2 sc in next st, 1 sc in next 18 (20, 22, 24) sts, 2 sc in next st, 1 sc in next 4 sts, 2 sc in next st, 1 sc in next 18 (20, 22, 24) sts, 2 sc in last st. [52 (56, 60, 64) sc]
Round 6: 1 sc in next 5 sts, 2 sc in next st, 1 sc in next 6 (8, 10, 12) sts, 1 hdc in next 5 sts, 1 dc in next 8 sts, 2 dc in next st, 1 dc in next 5 sts, 2 dc in next st, 1 dc in next 8 sts, 1 hdc in next 5 sts, 1 sc in next 6 (8, 10, 12) sts, 2 sc in last st. [56 (60, 64, 68) sts] This round starts transitioning the sole into the sides of the shoe — the taller stitches at the toe end begin building the upper.
Round 7: Join B and, BLO for this round, 1 sc in each st around. [56 (60, 64, 68) sc] Working into the back loops only here creates a ridge that marks the edge between the sole and the upper. Keep your tension even — it's easy to pull tight when switching to BLO.
Round 8: FLO for this round, with the inside of the shoe facing you, 1 sc in each st around. [56 (60, 64, 68) sc] You're now working into the front loops of Round 7 with the shoe turned so the inside faces you. This creates the folded cuff edge.
Round 9: Re-join C. 1 sc in next 5 sts, sc2tog, 1 sc in next 10 (12, 14, 16) sts, *sk 1, 1 hdc in next st* repeat 13 times, sk 1, 1 sc in next 10 (12, 14, 16) sts, sc2tog. [40 (44, 48, 52) sts] The skipped stitches across the toe section are doing the shaping work here — count carefully through that repeat section.
Round 10: 1 sc in each st around. [40 (44, 48, 52) sc]
Round 11: 1 sc in next 16 (18, 20, 22) sts, sk 1, 1 hdc in next st, *sk 1, 1 tr in next st* repeat 5 times, sk 1, 1 hdc in next st, sk 1, 1 sc in next 9 (11, 13, 15) sts. [32 (36, 40, 44) sts] The treble crochets across the toe give the shoe its rounded, structured front.
Round 12: 1 hdc in next 5 sts, 1 sc in next 27 (31, 35, 39) sts. [32 (36, 40, 44) sts] Sl st in next st to fasten off.
Flower with Leaves (Make 2)
Make two of these little appliqués — one for each shoe. The flower center is worked in C, the petals in B, and the leaves in G. Each leaf is its own small chain foundation worked back and forth, so it's a bit of a different rhythm than the rest of the project.
Round 1: Using C, 5 sc into a magic circle, pull to tighten. Join B with sl st to join circle. [5 sc]
Round 2: Continuing in B and FLO, *[1 sc, 1 dc, 1 tr, 1 dc, 1 sc] in next st*, repeat until end to make 5 petals. Fasten off. Each stitch group goes into a single stitch of the previous round, fanning out to form one petal.
Round 3 (first leaf): Join G in any back loop from Round 2. Ch 7, 1 sc in 2nd ch from hook, 1 dc in next ch, 1 tr in next 2 ch, 1 dc in next ch, 1 sc in last ch. [6 sts] You're attaching the leaf into one of the unused back loops left behind when you worked the petals in FLO.
Round 4: Turn work clockwise, crochet into the foundation ch sps of your previous chains: 1 sc in first ch sp, 1 dc in next ch sp, 1 tr in next 2 ch sp, 1 dc in next ch sp, 1 sc in last ch sp. Fasten off and tie in tails. [6 sts]
Round 5 (second leaf): Repeat Rounds 3 and 4, starting in any back loop from Round 2 to create a second leaf.
Putting It All Together
Once both shoes and both flower appliqués are finished, it's time to attach them. Using the remaining tails from your flower appliqué, sew your flowers onto the front of each shoe. I position the flower centered over the toe area and use the yarn tails to stitch it down securely before weaving them in on the inside of the shoe.
Care Instructions
Since these shoes are made with 100% acrylic yarn, they're pretty forgiving to wash. I'd toss them in the machine on a gentle cold cycle inside a mesh laundry bag to keep the flower appliqués from catching on anything. Lay them flat to dry rather than putting them in the dryer. The little crocheted flowers can lose their shape if they tumble around on heat. Once dry, you can gently reshape the petals with your fingers if they've flattened out a bit.
Baby & Child Safety Notes
The flower appliqués on these shoes are sewn on using yarn tails, so check those seams regularly, especially once a baby starts grabbing at everything. Make sure the flowers are attached firmly before putting the shoes on a little one. If any part of the appliqué starts to loosen, re-sew it before use. The shoes themselves have no buttons, snaps, or hard parts, so the main thing to watch is just keeping those sewn-on pieces secure.
Frequently Asked Questions
What does the BLO round actually do in these shoes?
Round 7 is worked in BLO, and that's what creates the little ridge you see where the sole meets the upper part of the shoe. It's a simple technique but it gives the shoes a much more finished, structured look. Round 8 then picks up those leftover front loops to crochet the inner lining, so both rounds are working together to form that folded edge.
Why do I re-join the cream yarn in Round 9 instead of just continuing?
Round 7 switches to brown for that contrast ridge, and Round 8 works in the front loops of that same round for the lining. So by Round 9, you're back to building the upper of the shoe in cream, which means you need to re-join it. It sounds fussier than it is. Just join cream at the start of Round 9 and carry on.
How are the leaves on the flower made?
Each leaf is a separate little strip crocheted off the back loops left over from Round 2 of the flower. You chain 7, work along one side with a mix of sc, dc, and tr stitches, then turn and work back along the foundation chain. It's the same idea as a foundation chain leaf. You make two of them per flower, each starting from a different back loop.
How do I know which size to make?
The pattern covers four sizes: 0–3 months, 3–6 months, 6–18 months, and 18 months–2 years. The first number in the pattern is always 0–3 months, and the numbers in parentheses follow in that order. If you're unsure, measuring the baby's foot is more reliable than going by age alone since sizing can vary quite a bit.
Does gauge matter for these shoes?
The pattern sets gauge at 9 sc to 4 cm, and for the shoes themselves it does matter more than you might expect since you're working to a specific finished size. That said, the flower gauge isn't important at all. If your shoes are coming out too large or small, adjusting your tension or swapping hook size slightly is the easiest fix.
Final Thoughts
There is something about tiny crocheted shoes that makes people stop scrolling, and these Leafy Steps ones are no exception. The brown contrast ridge, the little five-petal flower, those lime green leaves. It's a lot of personality for something that fits in the palm of your hand. If you make a pair, I'd love to see them. Tag me on Instagram or drop a photo in the comments below. And if you're saving this for a baby shower gift later, pin it now so you can find it when you need it.


Leave a Reply