
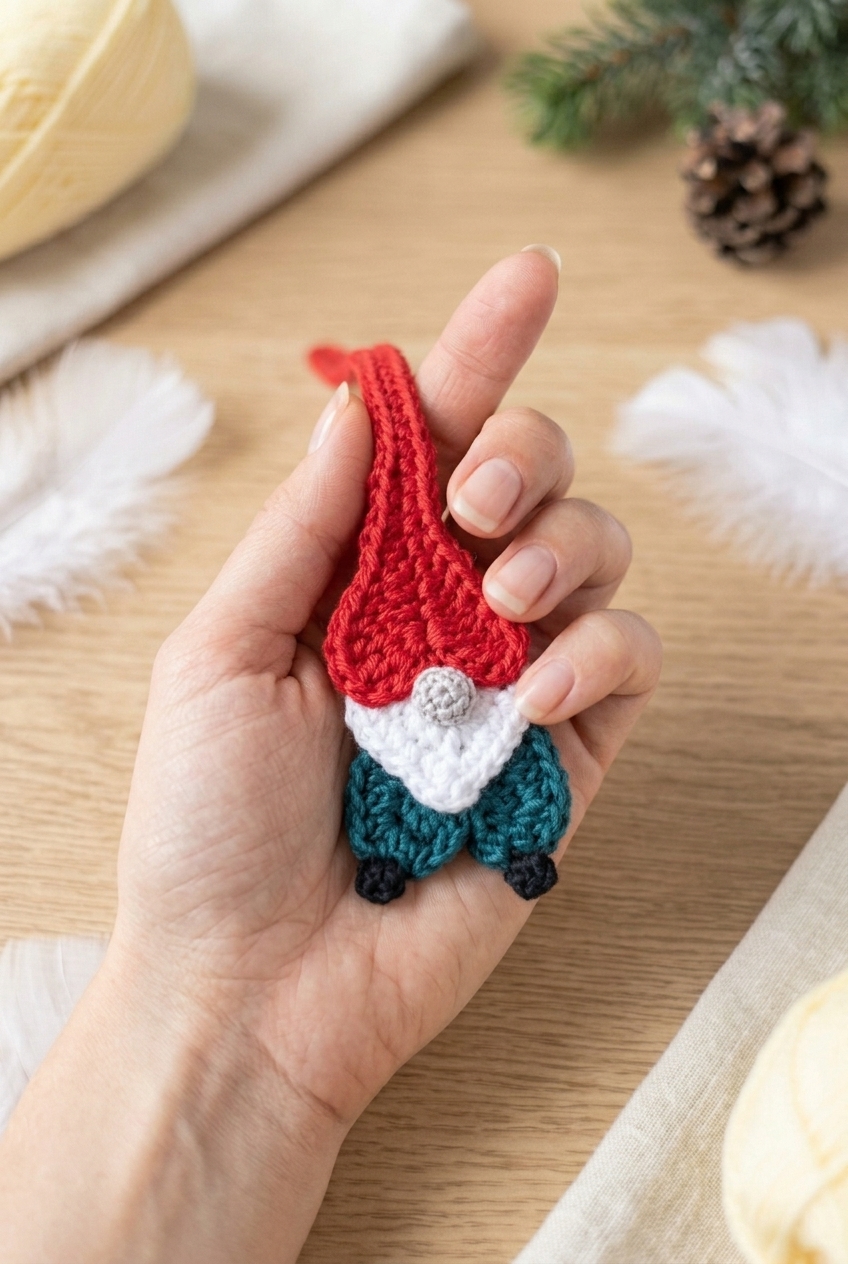
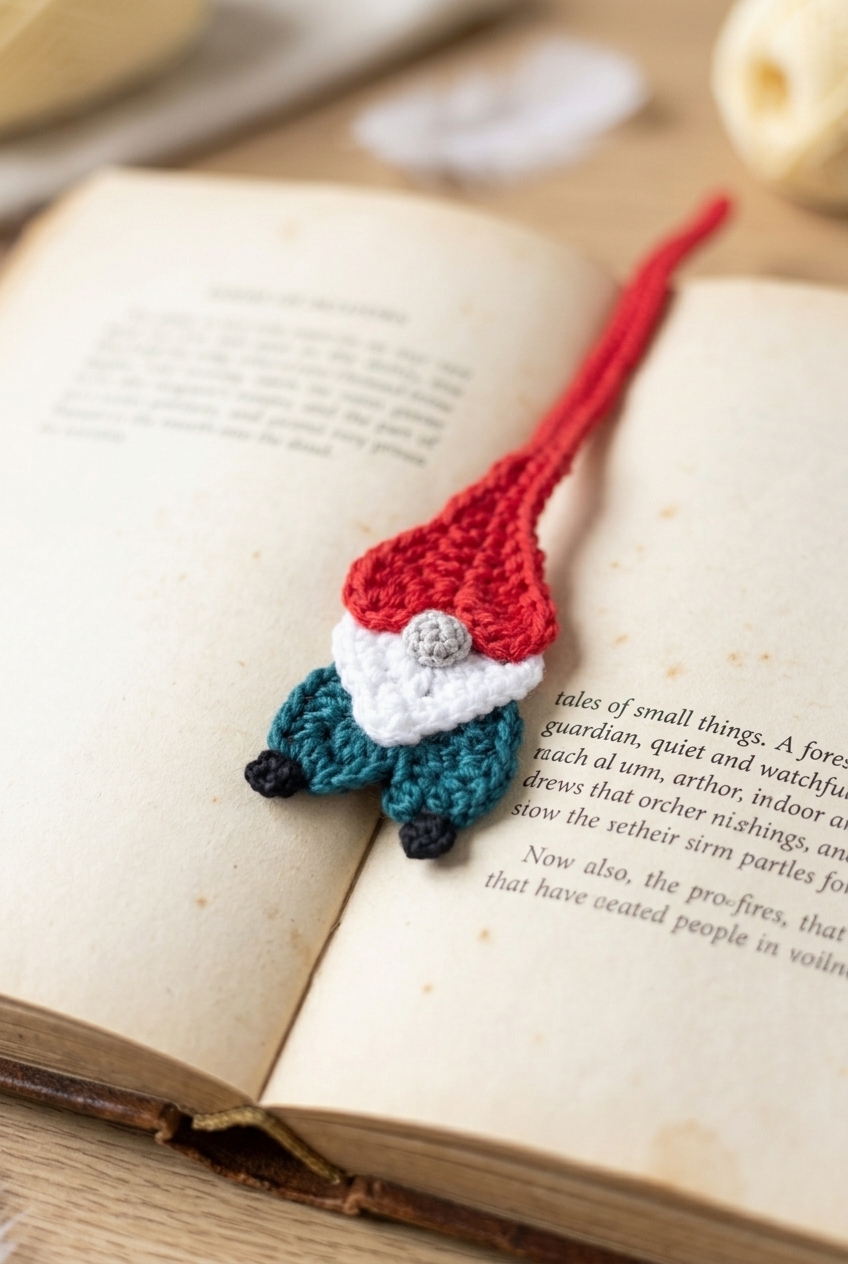
Gnome Bookmark Crochet Pattern is honestly one of my favorite little projects I've put together. It's small, it's charming, and it actually gets used. If you've been looking for something quick enough to finish in an evening but still interesting enough to keep you engaged, this is it.

Jump to:
The Inspiration
I wanted to make something that felt like a little gift you'd actually want to keep for yourself. Gnomes have this cozy, whimsical energy that really does translate beautifully into small crochet projects, and a bookmark felt like the perfect format. It's functional, it's a little unexpected, and it has just enough construction variety to make the process genuinely fun rather than repetitive.
This one is perfect for the book lovers in your life. The kind of person who has a stack of novels on their nightstand and a candle always burning nearby. It also makes a really sweet handmade gift for the holidays, a teacher appreciation gesture, or honestly just something to tuck into a card for a friend.
Why You Need This on Your Hook
This gnome bookmark is the handmade gift that actually gets used every single day.
- Skill level fit: Rated intermediate, so you'll work through a few satisfying techniques without it ever feeling overwhelming.
- Great for gifting: Small, personal, and practical. It's the kind of handmade gift people genuinely appreciate and hold onto.
- Seasonal versatility: Works beautifully as a holiday gift or ornament, but it's charming enough to give year-round.
- Quick to finish: Small enough to complete in one or two sittings, which makes it ideal for batch-making if you need several gifts at once.
- Technique variety: You'll practice working in the round, shaping, and a few fun detail elements. Good for building skills without committing to a big project.
Materials You'll Need
Two hook sizes are in play for this one, so grab both before you sit down.
- Lace Weight 100% Cotton Thread (4 colors): Lace weight cotton is the right call here because the finished gnome is only about 10 inches tall, and the four separate pieces need to hold their shape cleanly when sewn together. Cotton doesn't stretch the way acrylic does, so the seams stay put and the details read crisply at this small scale. The pattern doesn't specify exact yardage per color, but for a project this size you're probably looking at somewhere in the range of 20 to 50 yards per color, with Color C (Body) and Color A (Cap) likely using the most.
- Crochet Hook C / 2.75 mm (main hook): This is your workhorse hook for the Cap, Beard, Body, and Feet. At 2.75 mm with lace weight cotton, you get a tight enough fabric that the stuffed body holds its form without gaps showing through.
- Crochet Hook Size 6 / 1.8 mm (for Nose): The Nose is a small separate piece, and dropping down to a 1.8 mm hook keeps it proportional. It's a pretty small hook, so if you don't already own one it's worth picking up before you start.
- Also needed: yarn needle, sewing needle, matching sewing thread, scissors
Yarn Substitutes
Lace weight cotton thread isn't always sitting in everyone's stash, so here are a couple of directions you can go if you need to substitute.
- Size 10 crochet cotton thread: This is essentially the same weight category and behaves almost identically. It's widely available, comes in a huge range of colors, and will give you the same crisp stitch definition. You'd adjust your hook size slightly based on your gauge swatch.
- Fingering weight cotton: A step up from thread but still fine enough for a project this size. The finished gnome will come out very slightly softer and a touch less structured, but it works. Look for 100% cotton rather than a cotton blend so the pieces don't stretch out of shape when you're assembling them.
Color Sequence & Yarn Changes
Each of the four colors is used for a separate piece crocheted on its own, so there are no mid-row color changes to manage. Color A is for the Cap, Color B for the Beard, Color C for the Body, and Color D for the Feet. Keep your ends long enough to use for seaming when you join the pieces together later.
Key Information
Four separate pieces, one tiny gnome that actually works as a bookmark.
| Skill Level | Intermediate |
| Pattern Gauge | Gauge is not critical for this project. Use a hook size that creates a neat, firm fabric and matches the thread/yarn chosen. |
| Finished Size | Approximately 10" tall |
| Yarn Weight | 0 Lace / Thread |
| Fiber | 100% Cotton |
| Terminology | US |
Stitch Guide & Abbreviations
All standard stitches here, nothing unusual.
- ch = chain
- dc = double crochet
- hdc = half double crochet
- MR = magic ring
- rnd = round
- sc = single crochet
- sl st = slip stitch
- st(s) = stitch(es)
- tr = treble crochet
Before You Begin
This gnome bookmark is made in four separate pieces: the Cap, Beard, Body, and Nose. Each one is crocheted individually and then sewn together at the end. The main pieces use Knit Picks Curio Cotton Thread #3 worked with a C (2.75 mm) hook. The Nose is worked with a smaller size #10 thread and a 1.8 mm hook, so it comes out proportionally tiny next to the rest of the body. You'll need four colors total for the main thread: one for the Cap, one for the Beard, one for the Body, and one for the Feet. Assembly is done with a yarn needle and sewing needle with matching thread.
Since gauge isn't critical here, the main thing to aim for is a firm, tidy fabric with no loose, floppy stitches. Thread crochet tends to curl and gap more than yarn if the tension is off, so go down a hook size if your fabric feels too open. The finished size is an estimate and can shift slightly depending on your tension and thread brand.
Step-by-Step Instructions
This gnome bookmark crochet pattern comes together in several small pieces that you'll assemble at the end into one charming little character.
The Cap
The cap is the gnome's tall, pointed hat and it's worked in rounds along a foundation chain. Start with Hook C (2.75 mm) and Color A, ch 55. The chain is long because you're building the hat's full silhouette in a single pass, working across both sides of the foundation.
Round 1: (working under 2 loops) 3 tr in 5th ch from hook, dc in each of next 2 ch, hdc in each of next 2 ch, sc in each of next 46 ch, ch 2. Continue working on opposite side of chain: sl st in each of next 42, sc in each of next 4, hdc in each of next 2, dc in each of next 2, 3 tr in last ch, ch 4, sl st in same last ch. The stitch progression from trebles down to single crochets shapes the pointed tip at one end and the wide brim at the other. The slip stitches along the underside pull that edge in tight, giving the hat its silhouette without adding bulk.
Fasten off.
The Beard
The beard is worked in rounds from a magic ring using Hook C (2.75 mm) and Color B. It's shaped like a small heart, which gives the gnome's face that classic rounded, fluffy beard look once it's assembled.
Round 1: Ch 3, into ring: 3 dc, 3 hdc, ch 1, dc (heart point), ch 1, 3 hdc, 3 dc; ch 3, sl st in ring. The "(heart point)" note in the pattern is your cue that the single dc between the two ch-1 spaces forms the bottom dip of the heart shape. Keep that center dc snug.
Round 2: Ch 3, sc in first st, 2 sc in each of next 2 sts, sc in each of next 3 sts, sc in ch-1 sp, ch 1, dc in next st (heart point), ch 1, sc in ch-1 sp, sc in each of next 3 sts, 2 sc in each of next 2 sts, sc in next st, ch 3, sl st in center.
Fasten off.
The Body
The body is also heart-shaped and worked in rounds from a magic ring, this time using Hook C (2.75 mm) and Color C. It mirrors the beard's construction but uses hdc throughout the expansion round instead of sc, so it sits a little fuller.
Round 1: Ch 3, into ring: 3 dc, 3 hdc, ch 1, dc (heart point), ch 1, 3 hdc, 3 dc; ch 3, sl st in ring.
Round 2: Ch 3, hdc in first st, 2 hdc in each of next 3 sts, hdc in each of next 2 sts, hdc in ch-1 sp, ch 1, dc in next st (heart point), ch 1, hdc in ch-1 sp, hdc in each of next 2 sts, 2 hdc in each of next 3 sts, hdc in next st, ch 3, sl st in center.
Fasten off.
The Right Foot
The feet are worked directly onto the body rather than made separately. Using Hook C (2.75 mm), join Color D to the 2nd stitch of Round 2 of the Body. Working into an existing stitch like this means your join needs to be secure before you begin.
Round 1: Ch 1, 2 hdc in same st, ch 1, sl st in same st.
Fasten off.
The Left Foot
The left foot is worked the same way as the right, but you'll join Color D to the last stitch of Round 2 of the Body instead. Make sure you're joining to the correct end of the body so the feet sit symmetrically when the piece is laid flat.
Round 1: Ch 1, 2 hdc in same st, ch 1, sl st in same st.
Fasten off.
The Nose
The nose is a tiny circle worked with a much smaller hook and finer thread. Switch to Hook 6 (1.8 mm) and cotton thread size #10, then make a magic ring. The scale change here is significant, so take a moment to get comfortable with the thread before you begin.
Round 1: Ch 2, 9 hdc into ring, join with sl st to top of ch 2. Pull the magic ring closed firmly before joining so the center stays tight.
Fasten off.
Finishing Steps
With all the pieces made, it's time to put the gnome together. Lay everything out before you start sewing so you can see how the pieces relate to each other.
Step 1: Using a sewing needle and matching thread, sew the Body, Beard, Cap, and Nose together.
Step 2: Block as necessary.
Putting It All Together
Assembly is where the gnome really comes to life. I layer the pieces with the body at the base, the beard sitting just above it to cover the top of the body, and the cap overlapping the top of the beard. The nose goes centered on the beard between the cap brim and the beard's upper curve. I use a sewing needle and thread that matches each piece as I go, taking small, neat stitches so nothing shows from the front. A few passes through each join is enough to keep everything secure without the pieces shifting around in use.
Care Instructions
Since this bookmark is made from 100% cotton thread, it holds up well to hand washing in cool water with a little gentle soap. Lay it flat to dry so the sewn seams between the cap, beard, body, and nose stay in place and nothing shifts out of alignment. Cotton can take a while to dry fully at that small scale, so I just leave mine on a dry towel for a few hours. Once dry, it keeps its shape without much fuss.
Frequently Asked Questions
Why does this pattern use two different hook sizes?
The nose is crocheted with a much smaller hook, a 1.8 mm, because it uses size #10 cotton thread instead of the main thread weight. Using the C hook (2.75 mm) for that tiny piece would make it come out way too loose and floppy. Everything else uses the C hook throughout.
How many separate pieces do I need to crochet before assembly?
Six pieces total: the cap, beard, body, right foot, left foot, and nose. The feet are actually worked directly into the body's Round 2 rather than made separately and sewn on, so they come together fast. Once all six are done, you sew everything together with a sewing needle and matching thread.
The beard and body start the same way. Are those rounds actually different?
They start from the same magic ring setup, but Round 2 is different for each. The beard uses single crochet increases in Round 2, while the body uses half double crochet increases. That difference in stitch height is what gives each piece its distinct shape and size, so it matters to follow each section separately.
What does the cap construction actually look like? Is it worked in the round?
The cap starts with a foundation chain of 55 stitches and is worked across both sides of that chain in one round, which gives it that long pointed shape. It is not a tube or a flat circle. The tall treble crochets at one end form the tip, and the slip stitches along the back keep it flat.
Do I need sewing thread or can I just use the crochet thread to assemble the pieces?
The pattern calls for a sewing needle and matching sewing thread for assembly, and I'd stick with that. Crochet thread at this weight is thicker and can pull visibly through the joins, especially on something this small. Sewing thread gives you a much cleaner, nearly invisible seam between the pieces.
Happy Crocheting
This little gnome bookmark is one of those projects that looks impressive for how quickly it comes together. Four colors, a handful of tiny pieces, and a bit of hand-sewing and you've got something genuinely charming tucked into your pages. If you make one, I'd love to see it. Tag me on social media or drop a photo in the comments below. And if you want to save this for later, pinning it to your crochet bookmark board on Pinterest is always a good call.


Leave a Reply