
This Garden Fence Bookmark Crochet Pattern is actually one of my favorites I've made so far. It's small, it's quick, and it makes the most thoughtful little handmade gift, especially for anyone who loves books and gardens in equal measure.

Jump to:
The Inspiration
I wanted to make something that felt a little more special than a plain strip of crochet. The "garden fence" idea came from wanting that sense of something growing, something winding and organic, built right into a tiny functional object. There's something really satisfying about a project that has layers to it, even when it's small.
This one is perfect for gifting. Honestly, if you have a book lover in your life, a handmade bookmark with little floral details is going to land so well. I've already made a few of these for friends and they always get a reaction.
Why You Need This on Your Hook
A fast, charming make that turns into the most personal little gift.
- Beginner friendly: This is an easy-level pattern, so no experience crocheting accessories is needed to get a great result.
- Quick to finish: It's a small project, which means you can realistically finish one in a single sitting.
- Great for gifting: Bookmarks are universally loved and this one feels handcrafted in all the right ways, not just "homemade."
- Color flexibility: The flower and vine appliqués are easy to swap into any color combo, so you can customize for the person you're making it for.
- Technique variety: You get to practice a little of everything: basic stitches, simple appliqué work, and assembly, all in one tiny project.
Materials You'll Need
Three colors, one hook, and scraps you probably already have — that's really the whole list.
- DK Weight 100% Mercerized Cotton: Mercerized cotton is the right call here. It's got a slight sheen and holds its shape well, so the bookmark lies flat and the little flowers keep their definition instead of going limp. You'll need about 30 yards of white for the bookmark body and edging, around 10 yards of your flower color, and just 2 yards of green for the vines.
- Size E/4 (3.5 mm) Crochet Hook: A 3.5 mm hook keeps the fabric tight enough that the bookmark has some structure without being stiff. Cotton at this weight can get floppy fast if you go up a size, so stick with the E/4.
- Also needed: yarn needle
Color Sequence & Yarn Changes
The bookmark comes first, worked entirely in white, then you set that aside and make three small flowers separately in your chosen flower color. Once the flowers are sewn on, the green gets added last using a surface slip stitch for the vines, so you're only ever working with one color at a time. No carrying yarn across rows, no tricky mid-row switches.
Project Info
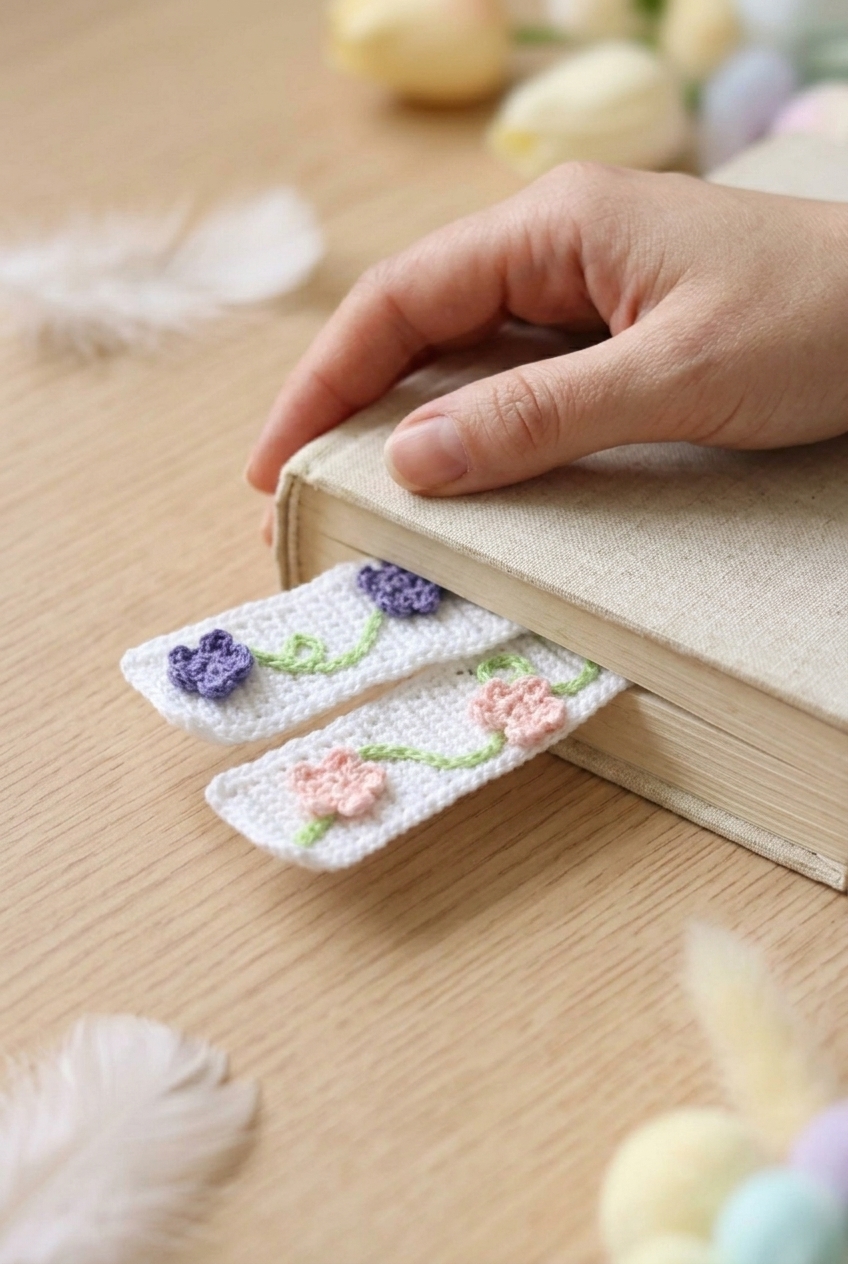
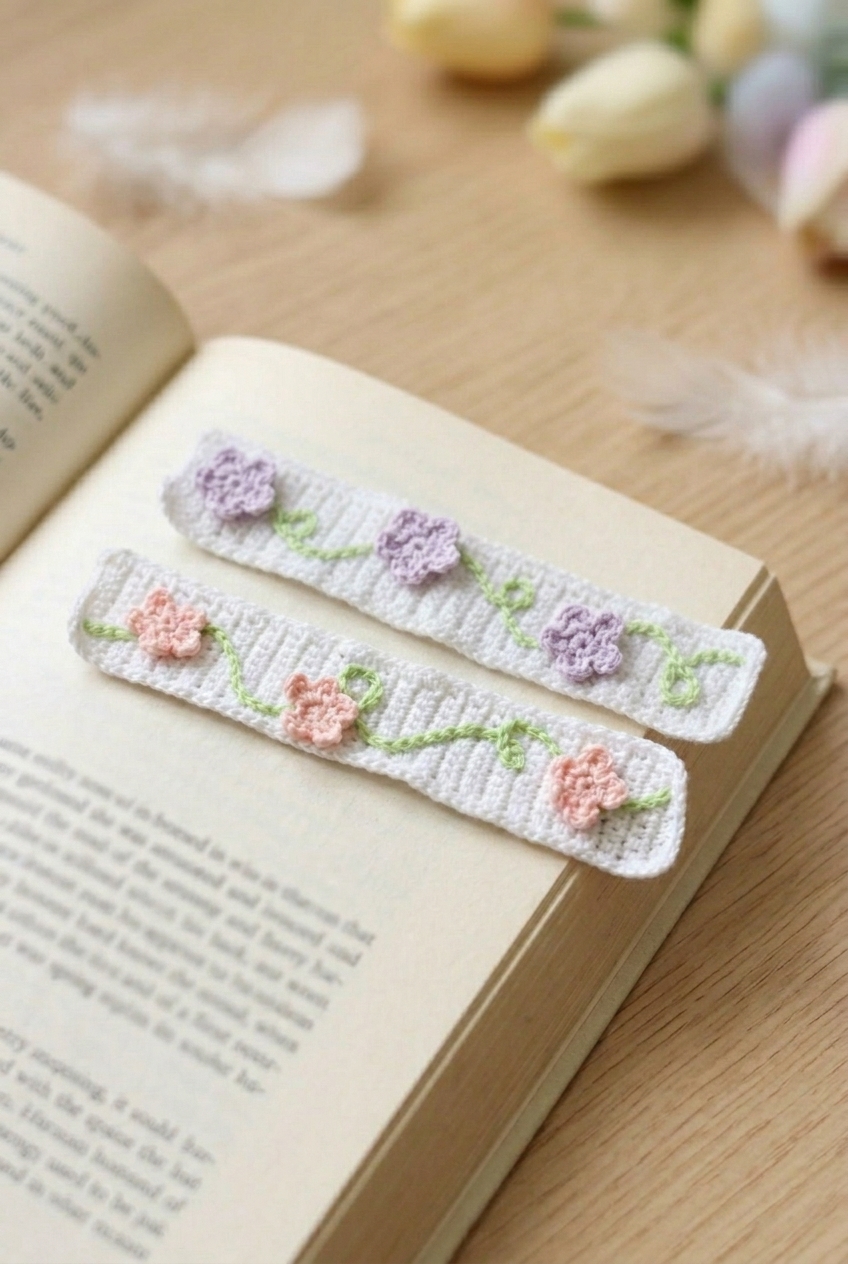
A slim cotton bookmark with three crocheted flowers sewn on and vines added in surface slip stitch.
| Skill Level | Easy |
| Pattern Gauge | 28 sts x 20 rows of pattern = 4 inches |
| Finished Size | Approximately 2 x 8.5 inches |
| Yarn Weight | 3 Light / DK |
| Fiber | 100% Mercerized Cotton |
| Terminology | US |
Stitch Guide & Abbreviations
Short list, all familiar stitches plus two you'll want to read through before starting.
- ch = chain
- dc = double crochet
- rep = repeat
- rnd = round
- sc = single crochet
- sk = skip
- sl st = slip stitch
- st(s) = stitch(es)
- yo = yarn over
- magic ring = adjustable ring (alternative start: ch 2 and work into 2nd ch from hook)
- surface sl st = surface slip stitch (insert hook from front to back in desired spot, yo and pull up a loop, pull loop through loop on hook; repeat in next spot)
Special Stitches
- Magic Ring: Adjustable ring (alternative start: ch 2 and work into 2nd ch from hook).
- Surface Sl St: Insert hook from front to back in desired spot, yo and pull up a loop, pull loop through loop on hook. Repeat in next spot.
Read Before Starting
The bookmark itself is worked flat in rows. The three small flowers are each worked separately in rounds, then sewn onto the bookmark once it's finished. After the flowers are in place, the vines are added directly onto the surface using the surface sl st technique described above. That's the order: bookmark, then flowers, then vines.
The ch 1 at the beginning of a row does not count as a stitch. Weave in ends as you go or at the end, your call, but the surface sl st vines will leave their own tails to deal with so it's worth staying on top of it.
Gauge here is 28 sts x 20 rows of pattern = 4 inches, and it's not estimated. For a bookmark this size, gauge matters more than it might seem. Too loose and it'll stretch and flop; too tight and the cotton will feel stiff. Worth doing a quick swatch if you're not sure where you land with DK cotton.
Step-by-Step Instructions
Here's how I work through this Garden Fence Bookmark Crochet Pattern, from the base rectangle all the way to the finished flowers.
The Bookmark Base
This is the foundation of the whole project. Start with Color A and chain 10 before beginning Row 1 — that starting chain sets the width of the bookmark.
Row 1: sc in 2nd ch from hook and in each ch across. ch 1, turn. [9 sc]
Rows 2–50: sc in 1st st, sc in each st across. ch 1, turn. [9 sc] This covers the bulk of the bookmark body — 49 more rows of straight single crochet. Keep your tension consistent here and the rectangle will lie flat.
Edging
The edging frames the bookmark and gives it a clean, finished border all the way around. You'll be working into the sides of rows along the long edges, so pick up stitches evenly as you go.
Round 1: 3 sc in 1st st, sc in each of next 10 sc, 1 sc in corner, evenly work 50 sc along long edge, 1 sc in corner st, sc in each st across bottom, 1 sc in corner, evenly work 49 sc along final long edge. Join with sl st in 1st st. The slight difference between the two long edges — 50 sc on one side and 49 on the other — accounts for the starting chain end versus the final row end. Don't try to make them match; just follow the counts as written.
Fasten off. Weave in ends and set aside.
Flowers
Make 3 flowers total. With Color B, make a magic ring (or ch 2 and work into 2nd ch from hook) to begin each one. These little flowers are quick to work up and you'll need all three before moving on to assembly.
Round 1: Work 5 sc into center of ring. Join with sl st in 1st st. [5 sc] Pull the magic ring closed snugly before joining.
Round 2: *[ch 3, dc, ch 3, sl st] all in same st, sl st in next st; rep from * 4 more times. Join with sl st in 1st st. Each repeat of the bracketed sequence creates one petal, and working it 4 more times after the first gives you 5 petals total — one for each sc from Round 1.
Fasten off, leaving a long tail for sewing.
Vines
The vines are worked directly onto the bookmark using a surface slip stitch in Color C. This technique sits on top of the fabric rather than going through it in the usual way, so it reads as a decorative line on the surface.
Step 1: Work the vines using a surface sl st technique in any design you like.
Step 2: How to surface sl st: From the top of the fabric, insert your hook into the space either above or below one stitch in from the edge. yo and draw up a loop, pulling it through the loop already on your hook. Move to the next desired space and repeat. Keep the tension relaxed as you go — pulling too tight will pucker the bookmark.
Step 3: Once the vine is complete, fasten off and weave in ends.
Attach Flowers
Now the three flowers get sewn onto the bookmark along the vine. Use the long tail you left when fastening off each flower — that's what I use to sew them down securely.
Step 1: Place flowers in desired position along the vine.
Step 2: Sew into place using the long tail.
Step 3: Fasten off, weave in ends, and block if desired.
Putting It All Together
Once the bookmark base, edging, vines, and flowers are all complete, I sew the flowers in their desired positions along the vine using the long tail left on each one. Take a moment to arrange all three before committing — spacing them out evenly tends to look good, but placement is entirely up to you.
Care Instructions
Since this bookmark is worked in 100% mercerized cotton, it holds up well to hand washing. I'd give it a gentle rinse in cool water if it gets grimy from being tucked in and out of books, then lay it flat to dry so the edging keeps its shape. The flowers are sewn on, so avoid wringing or twisting the bookmark when it's wet. That long tail holding each flower in place can loosen over time if it's stressed while damp.
Frequently Asked Questions
What is the surface slip stitch technique used for the vines?
Surface slip stitch is worked on top of the finished fabric rather than into it as you go. From the top of the bookmark, insert your hook into a space above or below a stitch, yarn over, and pull a loop through both the fabric and the loop on your hook. You just keep moving to the next space and repeating. It creates a raised line on the surface, which is exactly what gives the vines that dimensional look. Color C is only about 2 yards, so the vine section works up quickly.
Do the flowers need to be placed in a specific position?
No fixed placement is required. The pattern leaves that entirely up to you, which means you can space the three flowers evenly, cluster them, or stagger them along the vine however you like. I'd suggest laying the bookmark flat and pinning the flowers before sewing so you can see how they look before committing.
How do I make the magic ring if I'm not comfortable with that technique?
The pattern gives you an alternative right in the instructions: chain 2 and work into the 2nd chain from the hook. That gives you the same tight center as a magic ring without the fiddly adjustable loop. Either method works fine for a small flower this size.
Does the ch 1 at the beginning of each row count as a stitch?
It does not. The ch 1 is just a turning chain to get your hook into position. Your stitch count stays at 9 across every row, and you always work into the first actual stitch, not the chain.
Can I change the flower color, or does it need to match something specific?
The pattern calls it 'Flower color' without specifying a shade, so that choice is yours. I've seen these look lovely in soft pink, lavender, or even a warm yellow. You only need about 10 yards of Color B, so this is a great spot to use up a small scrap from your stash.
Final Thoughts
This little bookmark is one of those projects that takes almost no time but feels SO satisfying when it's done. The surface slip stitch vines are genuinely fun once you get the hang of the motion, and placing the flowers is the best part because there's no wrong answer. If you make one, I'd love to see your color choices in the comments below, especially if you went with something unexpected for the flowers. And if you're saving this for later, go ahead and pin it so it doesn't get buried in your browser tabs.


Leave a Reply