
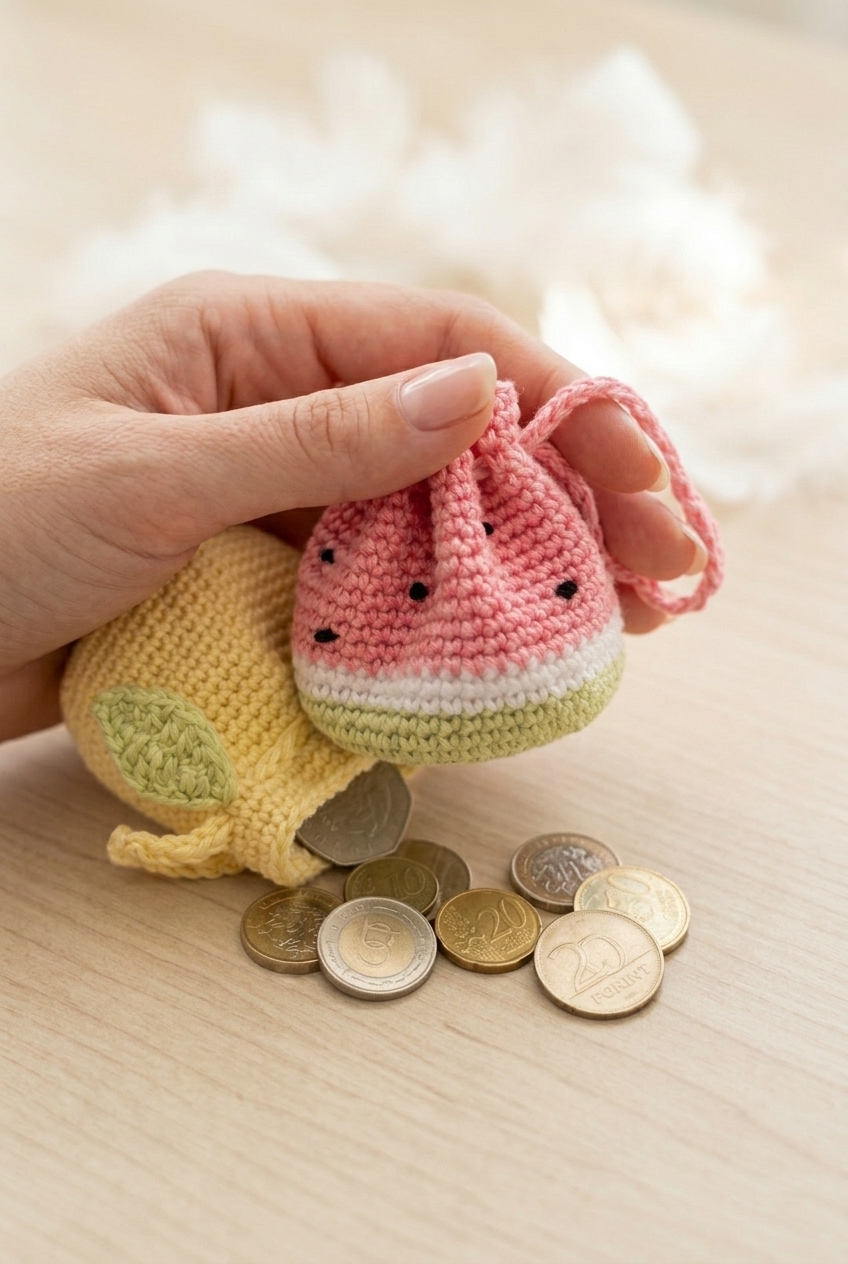
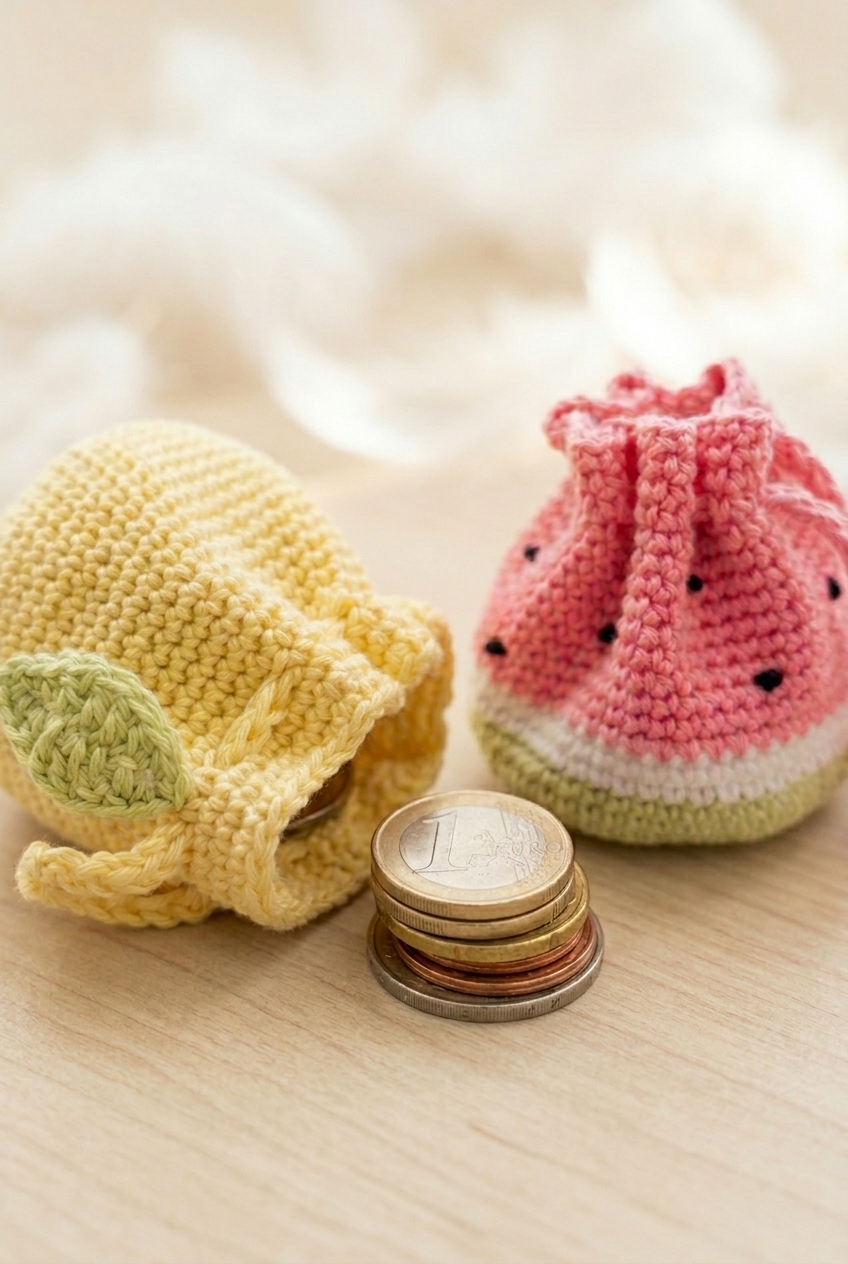
I made these little guys as a last-minute gift and honestly could not stop making them after that. This Fruit Coin Purse Crochet Pattern is one of those projects that's genuinely quick to finish, works up with minimal fuss, and ends up looking so much more impressive than the effort it took. It's a beginner-friendly bag pattern, so if you're newer to crochet, this is actually a really fun one to try.

Jump to:
The Inspiration
What got me about this design is how much personality fits into something so small. I love a project that has a little concept behind it, and the fruit theme here really delivers. There's something satisfying about making something functional that also just makes people smile when they see it.
I'd make these for kids, honestly. Or for a friend who collects cute little things. They'd be perfect tucked into a birthday gift, or as a party favor for the right crowd. The kind of thing someone picks up and immediately wants to show someone else.
Why You Need This on Your Hook
This little coin purse is the perfect quick make that actually gets used.
- Beginner friendly: No complicated stitches here, so you can focus on the fun parts without getting tripped up.
- Fast finish: Small projects mean you're done before you lose momentum, which is always a win.
- Great for gifting: These are the kind of handmade gifts people actually keep and use, not just admire once.
- Scrap yarn potential: The small size means you can dig into your stash and use up those little bits you've been holding onto.
- Makes multiples easily: Once you've made one, the next one goes even faster, so batch-making a set is no trouble at all.
Gather Your Supplies
Five colors total, but the actual yardage per color is pretty small, so scraps work fine here.
- Sport Weight Yarn (Weight 2 Fine), 5 Colors: Sport weight is the right call for a small purse like this. It gives you enough stitch definition to see the colorwork cleanly without the fabric getting too stiff or too floppy. You'll need green, white, pink, yellow, and black. The yardage isn't specified in the pattern, but given the size of these pieces, somewhere in the range of 50 to 100 yards per main color (pink and yellow especially) and considerably less for the accent colors should cover you. Check your yarn label for fiber content since the pattern doesn't specify. A cotton or cotton blend tends to hold its shape well for structured bags, but a smooth acrylic works fine too.
- 3.00 mm Crochet Hook: A 3.00 mm pairs well with sport weight to produce a firm, tight fabric. For a little purse, you want the stitches close enough together that the bag holds its shape and doesn't stretch out under use.
- Also needed: yarn needle, scissors
Color Sequence & Yarn Changes
Both purses follow a clear color sequence by round, so it helps to have all five colors wound and ready before you start. For the watermelon version, you'll work green through rounds 1 to 7, switch to white for rounds 8 to 10, then carry on in pink from round 11 through 26. The lemon purse starts in yellow from round 1 and then mirrors the watermelon structure from round 5 onward. Black is listed in the materials and most likely comes in for seed details, so keep it close even if the instructions don't call it out by name until you get there.
The Quick Stats
A small, round coin purse worked up fast in sport weight yarn.
| Skill Level | Beginner |
| Pattern Gauge | Gauge is not critical for this project. Use a hook size that creates a firm fabric suitable for a coin purse. |
| Finished Size | Approx. 4.5 in (11.5 cm) diameter coin purse (estimated from 49-st circumference with sport yarn and 3.00 mm hook). |
| Yarn Weight | 2 Fine / Sport |
| Fiber | Not specified — check the yarn label |
| Terminology | US |
Abbreviations & Stitches Used
Short list, all standard stitches you've likely used before.
- ch = chain
- st(s) = stitch(es)
- sl st = slip stitch
- sc = single crochet
- hdc = half double crochet
- dc = double crochet
- mc = magic circle
- ch-sp = chain space
Before You Begin
Two things to keep in mind as you work through this pattern. First, always start your first stitch in the same stitch as your previous slip stitch. Second, ch 1 does not count as a stitch here or anywhere else in the pattern. Both of these apply throughout, so it's worth noting before you get going rather than mid-round.
The purse is worked in rounds from a magic circle outward. Because gauge isn't critical here, your hook size just needs to produce a fabric that feels firm enough to hold its shape as a bag. Too loose and it'll be floppy; a slightly tighter tension is your friend with this one.
Crochet Instructions
Here's how I work through each piece of this fruit coin purse crochet pattern, from the main bag body to the finishing details.
Watermelon Purse
This is the main bag body, worked in the round from the center out. The color changes build the classic watermelon layers — green rind, white pith, and pink flesh — before the drawstring eyelets and final rounds close everything up.
Round 1: With green yarn, 7 sc in mc or ch 4 loop, sl st in first sc to join. [7 sc] Ch 1.
Round 2: 2 sc in each st around, sl st in first sc to join. [14 sc] Ch 1.
Round 3: *1 sc in next st, 2 sc in next st* repeat around, sl st in first sc to join. [21 sc] Ch 1.
Round 4: *1 sc in next 2 sts, 2 sc in next st* repeat around, sl st in first sc to join. [28 sc] Ch 1.
Round 5: *1 sc in next 3 sts, 2 sc in next st* repeat around, sl st in first sc to join. [35 sc] Ch 1.
Round 6: *1 sc in next 4 sts, 2 sc in next st* repeat around, sl st in first sc to join. [42 sc] Ch 1.
Round 7: *1 sc in next 5 sts, 2 sc in next st* repeat around, sl st in first sc to join. [49 sc] Ch 1. The shaping is done — the base is now 49 stitches and stays that way for the rest of the bag.
Rounds 8–10: 1 sc in each st around, sl st in first sc to join. [49 sc] Ch 1, join white yarn. Have your white yarn ready at the end of Round 10 — the color change happens on the joining slip stitch of that last round.
Rounds 11–12: 1 sc in each st around, sl st in first sc to join. [49 sc] Ch 1, join pink yarn. Same idea here: switch to pink on the slip stitch joining Round 12.
Rounds 13–22: 1 sc in each st around, sl st in first sc to join. [49 sc] Ch 1. Ten plain rounds in pink — this is the body of the purse.
Round 23: *1 sc in next 2 sts, ch 2, skip 2 sts* repeat around until last st, 1 sc in last st, sl st in first sc to join. [49 sc] Ch 1. These ch-2 spaces are the drawstring eyelets, so keep your tension consistent here — too tight and the rope won't thread through easily.
Round 24: *1 sc in next 2 sts, 2 sc in 2-ch sp* repeat around until last st, 1 sc in last st, sl st in first sc to join. [49 sc] Ch 1. Working into the chain spaces restores the stitch count back to 49.
Rounds 25–26: 1 sc in each st around, sl st in first sc to join. [49 sc] Ch 1. Fasten off on last round and sew in all ends.
Fasten off on last round and sew in all ends.
Lemon Purse
The lemon version follows nearly the same construction as the watermelon, with a slightly different start before picking up the shared shaping sequence. The tip rounds give it that characteristic pointed lemon end.
Round 1: With yellow yarn, 7 sc in mc or ch 4 loop, sl st in first sc to join. [7 sc] Ch 1.
Round 2: 1 sc in each st around, sl st in first sc to join. [7 sc] Ch 1. Notice this round holds at 7 rather than doubling — that's what gives the lemon its pointed tip shape before the increases begin.
Round 3: 2 sc in each st around, sl st in first sc to join. [14 sc] Ch 1.
Round 4: 1 sc in each st around, sl st in first sc to join. [14 sc] Ch 1.
Rounds 5–28: Repeat Rounds 3–26 of Watermelon Purse. From here the construction is identical to the watermelon — same increases, same even rounds, same eyelet round, same finish. Follow those steps using yellow yarn throughout in place of the color sections.
Leaf
The leaf is a small flat piece worked along a foundation chain and back again — it goes quickly and gets sewn onto the finished bag.
Step 1: With green yarn, ch 10.
Step 2: Sl st in second ch from hook, 1 sc in next ch, 1 hdc in next ch, 1 dc in next 3 chs, 1 hdc in next ch, 1 sc in next ch, 3 sl st in last ch. The stitch progression from slip stitch up to double crochet and back down creates the curved leaf outline — the 3 slip stitches at the tip form the pointed end before you turn and work back.
Step 3: Working back into chains again in opposite direction, 1 sc in next ch along from sl sts, 1 hdc in next ch, 1 dc in next 3 chs, 1 hdc in next ch, 1 sc in next ch, sl st in last ch. You're mirroring the first side along the opposite edge of the foundation chain.
Step 4: Fasten off and sew onto bag.
Fasten off and sew onto bag.
Rope Ties
There are two options for the drawstring rope — a quicker chain-only version and a slightly sturdier worked version. Both thread through the eyelets on Round 23 and tie to close the bag.
Option 1, Step 1: Ch 37 sc foundation sts.
Option 1, Step 2: Fasten off, weave through bag and sew ends together.
Option 2, Step 1: Ch 38.
Option 2, Step 2: Sc in second ch from hook and in each ch along. [37 sc] This gives you a slightly more structured rope with a little more body to it.
Putting It All Together
Once all the pieces are finished, I sew the leaf onto the bag — positioning it wherever looks right near the top — and weave the rope tie through the eyelet round. For Option 1, I sew the ends of the rope together after threading so it forms a continuous loop. For Option 2, you can do the same or leave the ends loose to tie. The leaf just gets tacked down with a few stitches through its base using the yarn tail.
Care Instructions
Spot-cleaning is your best friend with a coin purse like this. Because the zipper or rope tie sits right at the opening, submerging the whole thing in water can stress those woven-in ends and loosen the drawstring channel you worked in Round 23. If it needs more than a spot clean, hand wash it gently in cool water and press out the excess moisture with a towel rather than wringing it. Lay it flat to dry so it holds its round shape.
Frequently Asked Questions
What is the drawstring channel in Round 23, and how does it work?
Round 23 is where you create the eyelets for the rope tie by working a *sc, sc, ch 2, skip 2* repeat around. Those ch-2 spaces are the gaps your rope tie threads through. Round 24 fills the gaps back in so the opening stays structured. It looks fiddly written out, but once you're in it, the repeat is very consistent.
What are the two rope tie options and is one easier than the other?
Option 1 is a foundation chain of 37 stitches, which you then weave through the bag and sew the ends together into a loop. Option 2 chains 38 and works a row of single crochet back along it, giving you a slightly sturdier cord. I'd go with Option 2 if you want the tie to feel more substantial, but Option 1 is faster.
Does the lemon purse use the same construction as the watermelon?
Mostly yes. The lemon starts differently: Round 1 is 7 sc into a magic circle, then Round 2 works one sc in each stitch without increasing, and Rounds 3 and 4 repeat that increase-then-plain pattern before picking up the watermelon's Rounds 3 through 26. It's the same final shape, just with a slightly different center start.
Is the leaf sewn on or crocheted directly onto the bag?
It's worked separately and sewn on. You chain 10, work along both sides of the chain to build the leaf shape, fasten off, and then sew it onto the bag. The sewing step is pretty quick since the leaf is small, but make sure you secure it well so it doesn't flop around with use.
What does 'ch 1 does not count as a stitch' mean for this pattern?
It means the ch 1 at the end of each round is just a turning chain to position your hook, not an actual stitch you work into. Your stitch count stays the same. When the pattern says to start your first stitch in the same stitch as your slip stitch join, that's the stitch directly below where your hook is sitting after that ch 1.
Final Thoughts
These little coin purses are one of those projects that look far more involved than they actually are, and I love that about them. The color striping on the watermelon does all the heavy lifting visually, and the lemon is just as satisfying to work up. If you make one (or both), I'd love to see how yours turned out. Tag me on Instagram or drop a photo in the comments below. And if you want to save this for later, pinning it to your crochet projects board is always a good call.


Leave a Reply