
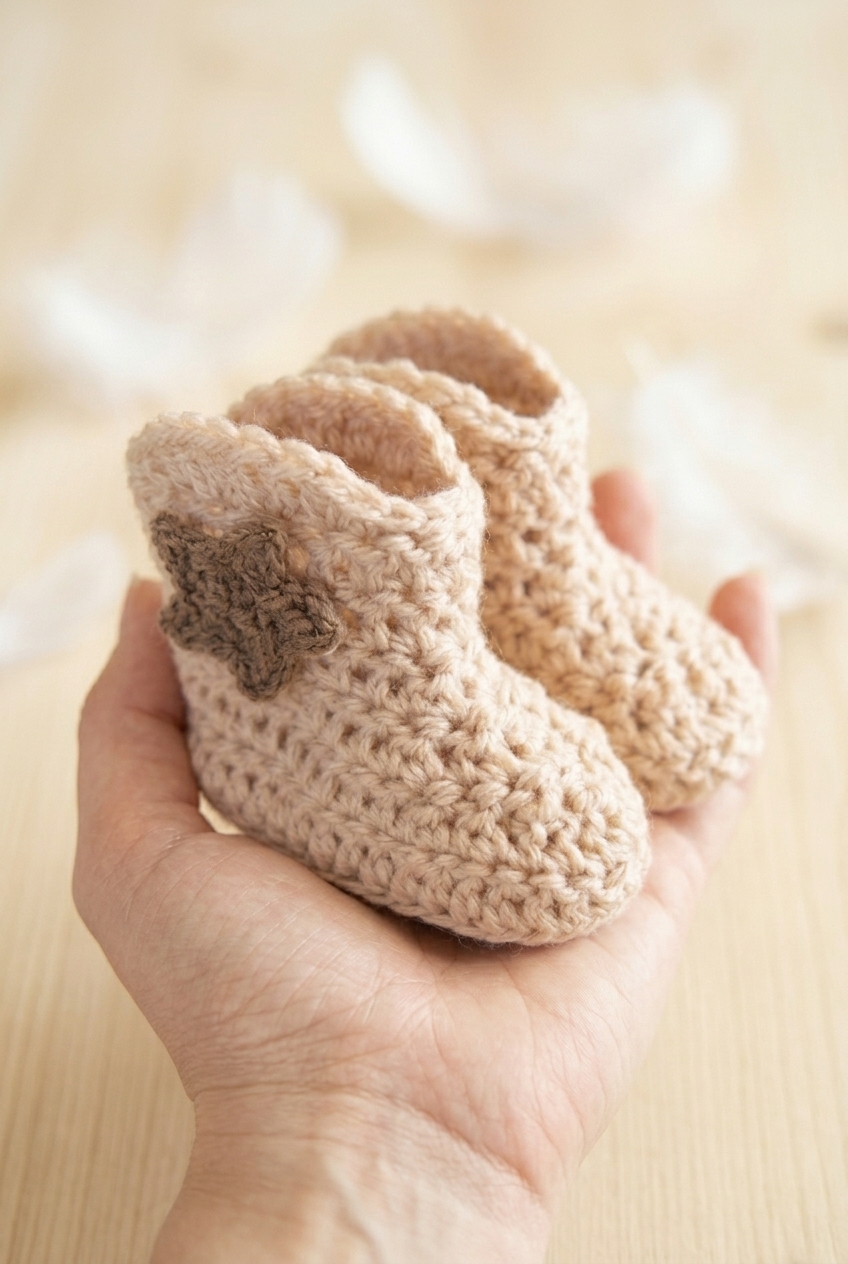
Okay, so baby boots are always a good idea, but a Cowboy Baby Boots Crochet Pattern? That's a WHOLE other level of adorable. I made these for a friend's baby shower and honestly could not stop smiling the entire time I was working on them. They come together really fast, they're beginner-friendly, and they make the kind of gift that gets passed around the room for everyone to ooh and ahh over.

Jump to:
Behind the Pattern
What I love about this one is that it actually looks way more complicated than it is. There's something about the construction that feels really satisfying. You build up from the sole, work around the toe, and the ankle comes together in a way that just clicks. It's one of those projects where you finish and think, "wait, I made that?" Which is a pretty great feeling.
These are sized for newborns up to about 6 months, so they're perfect for a baby shower gift or even just something sweet to have on hand. Any baby with even a hint of a Western-themed nursery or a country-loving family is going to be SO well dressed in these little things.
Why This Pattern Stands Out
These tiny cowboy boots are the most charming baby shower gift you can crochet.
- Beginner Friendly: No complicated techniques here. If you know your basic stitches, you can make these without any trouble at all.
- Quick to Make: Small project, fast finish. You can knock out a pair in one sitting, which makes them great for last-minute gifting.
- Gifting Potential: Baby shower, gender reveal, new baby visit. these are the kind of handmade gift people actually keep.
- Great Stash Buster: You don't need much yarn at all, so this is a pretty perfect way to use up what you already have sitting around.
- Technique Value: Working in the round and shaping a sole are skills that carry over into tons of other patterns, so this one actually teaches you something useful.
Gather Your Supplies
The supply list here is refreshingly short, which suits a tiny baby boot pattern just fine.
- Bulky Weight Yarn (Weight 5): For something this small, a bulky weight yarn builds up the fabric fast and gives the boots a nice, cozy structure without a lot of extra stitches. The fiber isn't specified in this pattern, so check your label and go with whatever feels soft against baby skin. You're making two boots and two small stars, so the yardage is minimal. A rough estimate of 50 to 80 meters should cover you comfortably, possibly less depending on how tightly you work.
- 5.5 mm Crochet Hook: This size pairs well with a bulky weight yarn and keeps the fabric firm enough that the boots hold their shape. Too large a hook and the stitches open up, which you don't want for a structured little shoe.
- Also needed: yarn needle, scissors
Project Summary
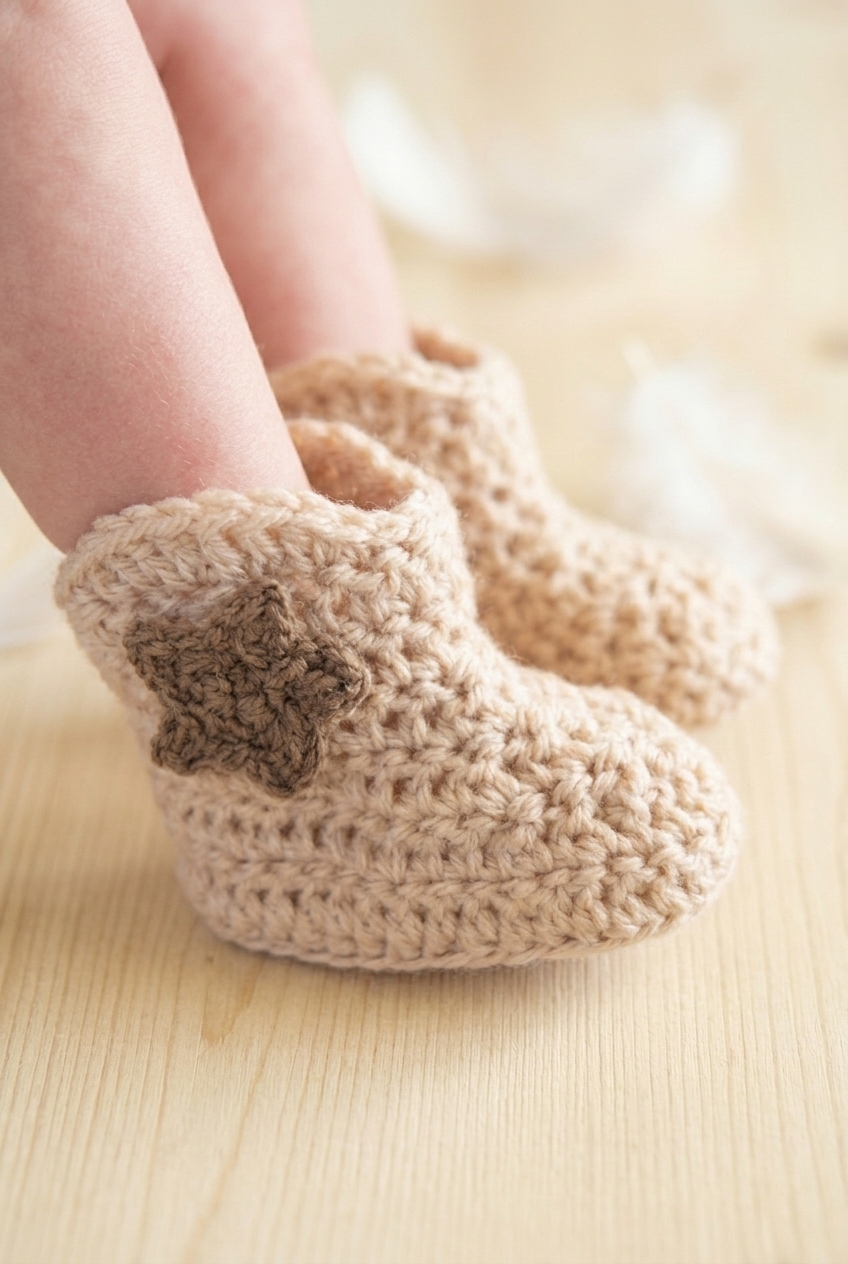
Tiny bulky-weight baby booties with a star embellishment on each one — a fast make that works up in an evening.
| Skill Level | Beginner |
| Pattern Gauge | Gauge is not critical for this project. Use a hook size that creates a firm fabric and adjust hook size if needed to achieve the stated sizing. |
| Finished Size | Size: 0–6 months (up to 10 cm) |
| Yarn Weight | 5 Bulky |
| Terminology | US |
Stitch Guide & Abbreviations
Most of these are standard stitches, plus three decrease variations used to shape the booties and stars.
- ch = chain
- dc = double crochet
- dc2tog = double crochet 2 together (decrease): yo, insert hook in next st, yo, pull up a loop, yo, pull through 2 loops; yo, insert hook in next st, yo, pull up a loop, yo, pull through 2 loops; yo, pull through all 3 loops on hook
- hdc = half double crochet
- sc = single crochet
- sl st = slip stitch
- st(s) = stitch(es)
- tr2tog = treble crochet 2 together (decrease): yo twice, insert hook in next st, yo, pull up a loop, (yo, pull through 2 loops) twice; yo twice, insert hook in next st, yo, pull up a loop, (yo, pull through 2 loops) twice; yo, pull through all 3 loops on hook
- tr3tog = treble crochet 3 together (decrease): yo twice, insert hook in next st, yo, pull up a loop, (yo, pull through 2 loops) twice; yo twice, insert hook in next st, yo, pull up a loop, (yo, pull through 2 loops) twice; yo twice, insert hook in next st, yo, pull up a loop, (yo, pull through 2 loops) twice; yo, pull through all 4 loops on hook
- yo = yarn over
Special Stitches
- dc2tog: yo, insert hook in next st, yo, pull up a loop, yo, pull through 2 loops; yo, insert hook in next st, yo, pull up a loop, yo, pull through 2 loops; yo, pull through all 3 loops on hook
- tr2tog: yo twice, insert hook in next st, yo, pull up a loop, (yo, pull through 2 loops) twice; yo twice, insert hook in next st, yo, pull up a loop, (yo, pull through 2 loops) twice; yo, pull through all 3 loops on hook
- tr3tog: yo twice, insert hook in next st, yo, pull up a loop, (yo, pull through 2 loops) twice; yo twice, insert hook in next st, yo, pull up a loop, (yo, pull through 2 loops) twice; yo twice, insert hook in next st, yo, pull up a loop, (yo, pull through 2 loops) twice; yo, pull through all 4 loops on hook
Helpful Tips
You'll make two of each piece: BOOT (MAKE 2) and STAR (MAKE 2). The stars are worked as separate pieces from the boots. Check your yarn label for fiber content and care instructions since no specific fiber is called for here — any bulky weight will work, but something with a bit of stretch tends to be easier to work at this scale.
A 5.5 mm hook is recommended. Because gauge isn't critical, the main thing you're after is a fabric that feels firm rather than floppy. If your stitches are loose and the boot looks like it'll stretch out of shape, go down a hook size. The finished boot fits feet up to 10 cm, so it's worth checking your swatch against that before you commit to both boots.
The Cowboy Baby Boots Crochet Pattern Steps
Here's how to work through each piece, from the sole of the boot up to the decorative star.
Boot
Make 2. The boot starts flat, worked in rows across a foundation chain to build the sole, then joins into rounds for the foot and shaft. It's a bit of an unusual construction, but once you see how the sole takes shape in those first two rows, the rest clicks into place.
Row 1: Ch 11, 2 hdc in 2nd ch from hook, 1 hdc in next 8 ch, 2 hdc in last ch. [12 hdc]
Row 2: Work back into the same chains with 2 hdc in 1st ch, 1 hdc in next 8 ch, 2 hdc in last ch. [24 sts total from Rows 1 & 2] You're working into the opposite side of the foundation chain here, so the two rows together form an oval sole.
Round 3: 1 sc in next st, 2 sc in next st, 1 sc in next 4 sts, 1 hdc in next 5 sts, 3 hdc in next st, 1 hdc in next st, 3 hdc in next st, 1 hdc in next 5 sts, 1 sc in next 4 sts, 2 sc in last st. [30 sts] The mix of sc and hdc here starts shaping the toe end of the sole.
Round 4: 1 sc in next 2 sts, 2 sc in next st, 1 sc in next 10 sts, 1 hdc in next st, 3 hdc in next st, 1 hdc in next 2 sts, 3 hdc in next st, 1 hdc in next st, 1 sc in next 10 sts, 2 sc in last st. [36 sts] Sl st in next 2 sts.
Round 5: Ch 2 (counts as st), working in front loops only, dc in next st and in each st around, sl st in top of ch 2 to join. [36 dc] Working in front loops only here creates a ridge that separates the sole from the upper, giving the boot that defined edge along the bottom.
Round 6: Ch 2, 1 dc in next 10 sts, dc2tog twice, tr2tog four times, dc2tog twice, 1 dc in next 9 sts, sl st in top of ch 2 to join. [28 sts] This is where the toe starts to close in. The tr2tog stitches pull in more aggressively than the dc2tog, so the shaping is concentrated at the front of the toe.
Round 7: Ch 2, 1 dc in next 9 sts, dc2tog twice, tr3tog, dc2tog twice, 1 dc in next 7 sts, sl st in top of ch 2 to join. [22 sts] The tr3tog here takes three stitches down to one right at the tip of the toe.
Round 8: Ch 2, 1 dc in next 9 sts, dc2tog twice, 1 dc in next 8 sts, sl st in top of ch 2 to join. [20 sts]
Round 9: Ch 2, 1 dc in next st and in each st around, sl st in top of ch 2 to join. [20 sts]
Round 10: Ch 2, 1 dc in next st and in each st around, sl st in top of ch 2 to join. [20 sts] Rounds 9 and 10 are plain even rounds that build the shaft of the boot.
Round 11: Ch 1, turn, 1 sc in next st, [1 hdc, 1 dc] in next st, 2 dc in next 2 sts, [1 dc, 1 hdc] in next st, 1 sc in next st, sl st in next 4 sts, 1 sc in next st, [1 hdc, 1 dc] in next st, 2 dc in next 2 sts, [1 dc, 1 hdc] in next st, 1 sc in next st, sl st in next 3 sts, sl st in ch 1 to join. [28 sts] Note the turn at the start of this round. You're flipping your work before the ch 1, so the decorative scalloped edge at the top of the boot faces outward correctly. The sl st sections between the scallops keep the top edge neat and flat.
Fasten off and tie in all tails.
Star
Make 2. These little five-pointed stars are worked in rounds from a center ring and sewn onto the finished boots as decoration. They work up very quickly.
Round 1: 5 sc into a magic circle, pull to tighten, sl st in 1st sc to join. [5 sc]
Round 1 (Alternative): Ch 4, sl st in 1st ch to form a loop, 5 sc into the loop, sl st in 1st sc to join. [5 sc] Use this version if you prefer not to work a magic circle. Both give you the same 5-stitch starting ring.
Round 2: *Ch 2, 1 sc in 2nd ch from hook, sl st in next st on main circle* repeat from * to * until end and you have 5 points. Fasten off and use remaining yarn to sew the star onto the boot. Each repeat of the sequence creates one point of the star, so you'll work all the way around until all 5 stitches from Round 1 have a point attached. Leave a long enough tail before fastening off so you have plenty of yarn to sew it in place.
Finishing
Once both stars are complete, I use the remaining yarn tail from each star to sew it onto the corresponding boot. I position the star on the outer side of the shaft and stitch it down securely, working through both layers so it sits flat and doesn't shift with wear. A yarn needle and a few passes around the edges of each point is enough to hold it.
Care Instructions
Since these are baby boots, I'd wash them by hand in cool water and lay them flat to dry. The shape holds better that way, and you won't end up with a sad, stretched-out boot after the first wash. Once dry, you can gently reshape the shaft if it's gone a little floppy. Store them flat or stuff the inside loosely with tissue paper if you're gifting them, just to keep that little boot shape looking tidy in the box.
Baby & Child Safety Notes
The star is sewn onto the boot with yarn, so the main thing to check is that it's secured really well before putting these on a baby. Go over your stitches a second time when attaching it. Babies are surprisingly good at working things loose, and a small crocheted star that comes free is a choking hazard. Give the star a firm tug after sewing it down. If it moves, reinforce it.
Frequently Asked Questions
How does the sole of the boot get formed?
The sole is built from a foundation chain worked in two passes. Row 1 works into the chain from one direction, and Row 2 works back into those same chains from the other side, giving you an oval base of 24 stitches total. From there, the pattern transitions into rounds to build up the sides and toe of the boot.
What does the front loop only round do in this pattern?
Round 5 is worked in front loops only, and that's what creates the visual ridge separating the sole from the upper part of the boot. It gives the boot that defined, structured look around the foot. If you skip it or forget to work in front loops only, the boot will still come together but you'll lose that clean line.
How is the star made and attached?
Each star is crocheted separately, starting with 5 single crochets into a magic circle, then working 5 points off that circle in Round 2. Once it's done, you use the yarn tail left from fastening off to sew it directly onto the boot. There's no separate embellishment or button involved.
What stitches do I need to know before starting?
You'll need to be comfortable with single crochet, half double crochet, double crochet, treble crochet, dc2tog, tr2tog, tr3tog, and working in both rows and rounds. The decreases in Rounds 6 and 7 are what shape the toe, so if you haven't worked tr2tog or tr3tog before, it's worth practicing those on a swatch first.
What is Round 11 doing at the top of the boot shaft?
Round 11 creates the decorative scalloped edge at the top of the boot. It turns the work, then alternates between single crochets, half doubles, and doubles to form two small fan shapes, with slip stitches between them. It's what gives the boot that finished, Western-style cuff look rather than just a plain open edge.
Happy Crocheting
These little boots are one of those projects that come together fast and look SO much more impressive than the effort involved, which makes them one of my favorite things to make for a baby shower. If you make a pair, I'd love to see them. Tag me on Instagram or drop a photo in the comments below. And if you're saving this for later, pin it to your baby crochet board so it doesn't get lost in the scroll.


Leave a Reply