
This Chunky Round Basket Crochet Pattern has honestly been one of my favorite things to come out of it. It's the kind of project that feels purposeful from the very first stitch, and when you're done, you actually have something you'll use every single day. Blankets are great, but there's something really satisfying about making a functional piece that earns a permanent spot in your home.

Jump to:
Behind the Pattern
I designed this one because I kept buying storage baskets and never loving them. They were either too flimsy, too expensive, or just kind of boring. So I figured I'd just make exactly what I wanted. The construction here is what I find most interesting about it. You're working in the round from the base up, and the way the sides build is really clean and satisfying. It holds its shape well, which isn't always a given with crochet storage.
This is a great make for anyone who wants to actually use what they create. I've made a few of these now, for my own shelves and as gifts. They work for a bathroom, a living room, a kid's room. Pretty much anywhere you need a spot to corral the stuff that tends to pile up.
Why This Pattern Stands Out
A sturdy, structured basket you'll actually want to display, not just stash away.
- Skill Level Reality: Intermediate is accurate here, but if you're comfortable crocheting in the round, you'll have no trouble at all.
- Practical Gift Option: This makes a genuinely useful handmade gift that works for almost any age or occasion.
- Technique Learning Value: Working a flat base that transitions cleanly into structured sides is a skill that carries over into a lot of other patterns.
- Customization Potential: Swap the yarn color or add handles to make it feel completely different each time you make one.
- Time Investment: This is a solid weekend project, not a quick afternoon make, so plan accordingly.
Your Supply List
Two hook sizes are in play here, so grab both before you sit down.
- Super Bulky Weight Yarn (80% Acrylic, 20% Wool): A super bulky weight with a wool blend is the right call for a structured basket like this. The wool content gives the fabric just enough memory to hold its shape, while the acrylic keeps it washable and easy to work with. You'll need 3 skeins total, holding two strands together throughout the entire project. The third skein gets divided into two equal balls, so plan for that before you cast on.
- 8 mm Clover Amour Hook (base and body): With two strands of super bulky held together, you need a hook big enough to move through the stitches without a fight. The 8 mm is the right size for the base and body rounds.
- 7 mm Clover Amour Hook (edging): The last round is worked in the opposite direction with a slightly smaller hook. Dropping down to 7 mm tightens the edging just enough to give the rim a clean, finished look.
- Clover Felting Needle Tool and Foam Mat (optional): This is for joining yarn ends rather than weaving them in. Not required, but it does give a neater finish on a project with this much texture.
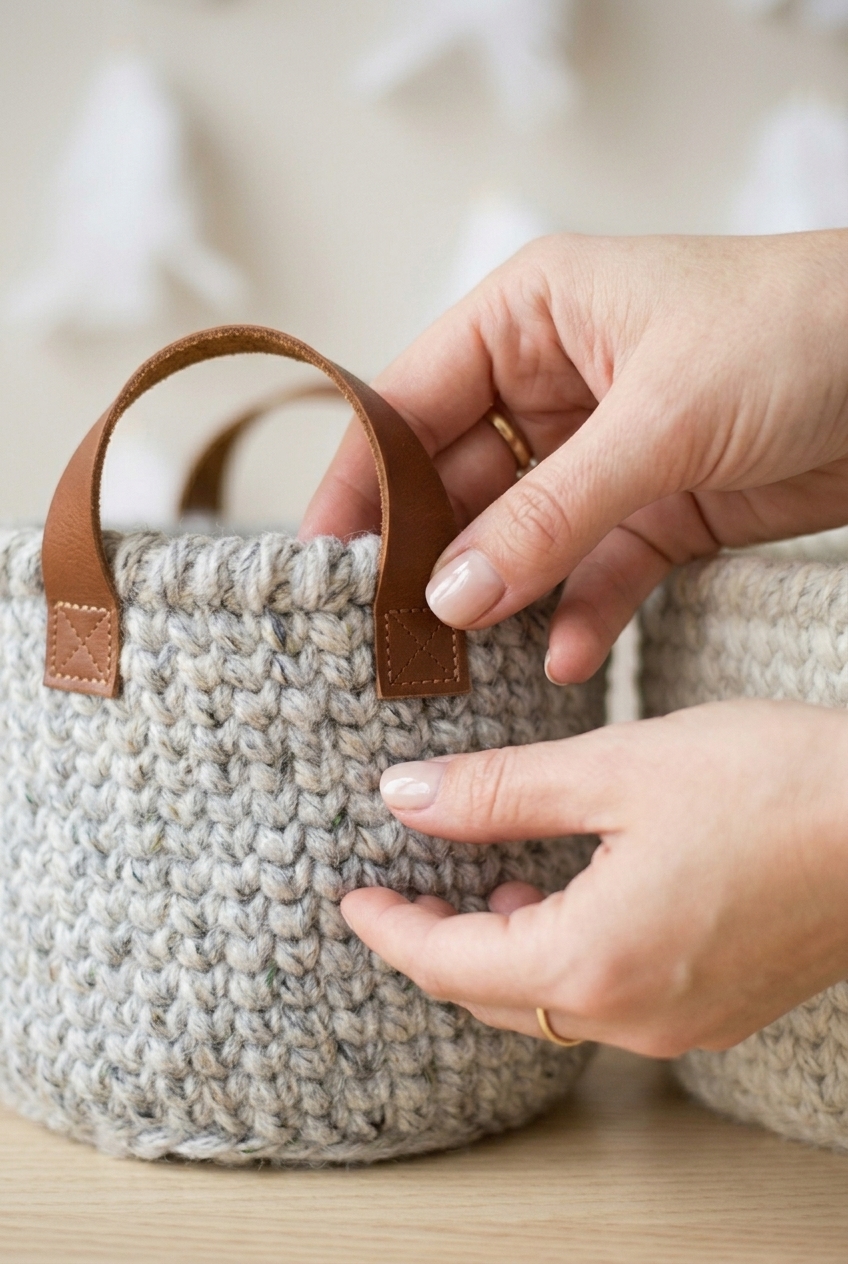
- Leather handles kit (optional): If you want to add leather handles, you'll need leather handles, waxed braided cord, a diamond punch, and a rubber mallet. These are all sold separately, so it's worth sourcing them ahead of time if you know you want that look.
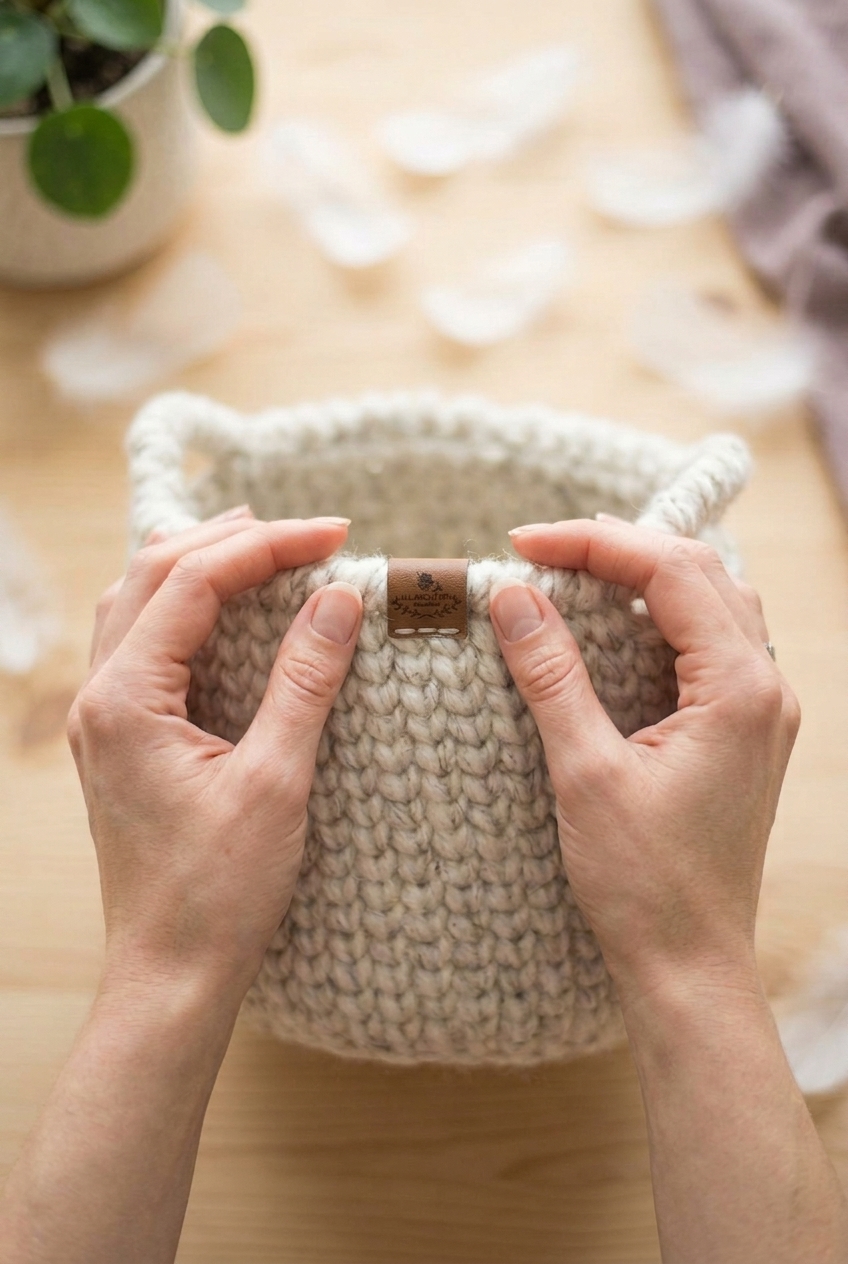
- Garment tag (optional): A small finishing touch if you're gifting the basket or just like that kind of detail.
- Also needed: scissors, tapestry needle, stitch markers
Color Sequence & Yarn Changes
This pattern comes in two colorway options: Wheat and Grey Marble. Both use the same construction from base to edging, so there are no color changes mid-project. Pick your colorway, stick with it, and work the whole basket in one color from start to finish.
The Quick Stats
This basket works up fast with two strands held together and a chunky hook, and the waistcoat stitch body is what gives it that tight, woven look.
| Skill Level | Intermediate |
| Pattern Gauge | Using 8 mm hook: first 3 rounds = 4.75″ / 12 cm across |
| Finished Size | 7″ tall × 8.5″ diameter × 27″ circumference |
| Yarn Weight | 6 Super Bulky |
| Fiber | 80% Acrylic, 20% Wool |
| Terminology | US |
Stitches & Abbreviations
Two stitches here are worth reading before you start; the rest you likely already know.
- ch = chain
- csc = center single crochet (waistcoat stitch)
- hdc = half double crochet
- inc = increase (2 hdc in next st)
- rep = repeat
- rsc = reverse single crochet (crab stitch)
- sc = single crochet
- sk = skip
- sl st = slip stitch
- st(s) = stitch(es)
- yo = yarn over
Special Stitches
- csc (center single crochet / waistcoat stitch): Insert hook into the center of the V of the stitch from the previous round (not front or back loop), yo, pull up a loop, yo, pull through 2 loops.
- rsc (reverse single crochet / crab stitch): Working right to left, insert hook from front to back in the stitch to the right, yo, pull up a loop, yo, pull through 2 loops.
Helpful Tips
Hold two strands of yarn together for the entire project. If you're working from three skeins, divide the third into two equal balls so you always have a pair to pull from.
The base is worked in joined rounds using hdc. At the end of each base round, sl st to the first hdc, not the ch-2. After you chain 2 to begin a round, work your first stitch into that same stitch where you just sl st and chained. That keeps the stitch count clean.
Once the base is done, the body switches to continuous, unjoined rounds with no seam. The transition matters: when you start the body, insert into the third loops of the hdc round below, the ones sitting behind both the front and back loops. That creates a visible ridge between the base and the body, and it's worth doing carefully.
For the final round, switch down to a 7 mm hook and work in the opposite direction, counter-clockwise. This tightens the top edge and gives the rsc border a cleaner finish.
If you'd rather skip crocheted handles entirely, leather, rope, or fabric handles all work well here. For leather handles: cut two strips 26 cm × 3 cm, punch holes in a square pattern at the base of each strap using a 2 mm diamond punch and rubber mallet, then sew them onto the basket with waxed braided cord. Position the bottoms of the straps between Rounds 19 and 20, roughly 6 stitches apart. Trim the cord ends and melt to secure.
The Pattern
Here's how I work this chunky round basket crochet pattern from the flat base up through the handles.
Base (Joined Rounds, 8 mm Hook)
The base is worked flat in joined rounds of hdc, building out from a magic ring. Hold two strands of yarn together throughout the entire project. A few things to keep in mind for this section: always slip stitch to the first hdc of the round, not the ch-2, and after the ch-2 at the beginning of any base round, work your first stitch in the same stitch where you did your sl st and ch-2.
Round 1: Ch 2, 10 hdc in magic ring. Sl st to first hdc. [10 hdc]
Round 2: Ch 2. Inc rep 10 times. Sl st to first hdc. [20 hdc]
Round 3: Ch 2. (Hdc 1, inc) rep 10 times. Sl st to first hdc. [30 hdc]
Round 4: Ch 2. (Hdc 2, inc) rep 10 times. Sl st to first hdc. [40 hdc]
Round 5: Ch 2. (Hdc 3, inc) rep 10 times. Sl st to first hdc. [50 hdc] After this round the base is complete and you'll transition into the body.
Body (Continuous Unjoined Rounds, 8 mm Hook)
The body is worked in continuous, unjoined rounds using the waistcoat stitch (csc), so there's no seam. You're still holding two strands together. Round 6 is the transition row that picks up the third loop of each hdc from the base and sets you up for the waistcoat stitch rounds that follow.
Round 6: Ch 1, sc in third loop of each hdc around. [50 sc] (ignore ch-1 in next round) The third loop sits at the back of each hdc and gives the body a clean visual break from the base.
Rounds 7–20: Csc around. [50 csc] This is 14 rounds of straight waistcoat stitch with no shaping. Keep your tension consistent throughout — the csc can tighten up if you pull too firmly when inserting the hook between the two legs of each stitch.
Handles
The handles are formed over two rounds: one that creates the chain gaps, and a final round worked in reverse (counter-clockwise) with a smaller hook. For that last round, switch to the 7 mm hook and work in the opposite, counter-clockwise direction.
Round 21: Csc 10, ch 8, sk 6, csc 19, ch 8, sk 6, csc 9. [54 csc] The two ch-8 gaps are where the handles will sit. Skipping 6 stitches at each gap keeps the opening proportional.
Round 22: Switch to 7 mm hook and reverse crocheting direction (counter-clockwise). Starting in the stitch just finished, rsc 9, rsc 10 in chain gap, rsc 19, rsc 10 in chain gap, rsc 10. [58 rsc] Working counter-clockwise for the reverse slip stitch round is what gives the top edge that neat, corded finish.
Fasten off. Slip ends through top of first rsc. Wrap yarn ends around edge to mimic rsc. Weave in end.
Modification: No Crocheted Handles
If you'd rather skip the crocheted handles entirely, maybe to add leather handles or bag straps later, these two rounds replace the handle rounds above. The final round still switches to the 7 mm hook and works counter-clockwise.
Round 21: Csc around. [50 csc]
Round 22: Switch to 7 mm hook and reverse direction. Starting in stitch just finished, rsc around. [50 rsc]
Fasten off. Slip ends through top of first rsc. Wrap yarn ends around edge to mimic rsc. Weave in end.
Care Instructions
This basket holds up well to regular use, but because it's an 80/20 acrylic-wool blend, I'd skip the washing machine entirely. Spot clean it with a damp cloth if something spills inside, and let it air dry fully before putting anything back in it. If you added the optional leather handles, keep them away from prolonged moisture since it can dry out and crack the leather over time. To keep the basket's shape between uses, just leave something inside it. An empty basket tends to slump a little, especially after the yarn has relaxed.
Frequently Asked Questions
Why do you switch to a smaller hook for the last round?
The 7 mm hook on Round 22 tightens up the reverse single crochet edging so it sits firm and neat at the top of the basket. If you use the 8 mm for that round too, the edge can flare out slightly and lose that clean, structured look. It's a small change that makes a noticeable difference in how the finished rim looks and holds its shape.
What is the waistcoat stitch and why is it used for the body?
The waistcoat stitch (also called the center single crochet) is worked by inserting your hook through the two vertical legs of the stitch below instead of under the top two loops. It creates a dense, woven-looking fabric that's sturdy enough to hold the basket's shape without any stiffener. That's exactly what you want for the sides of a basket that's meant to actually hold things.
How many strands of yarn do I hold together, and how do I manage the third skein?
Hold two strands together throughout the entire pattern. You'll use three skeins total, but since you're always working with two strands at once, I split the third skein into two equal balls before starting. That way I can pull from both ends of it alongside the first two skeins without any awkward tangling mid-project.
What's the purpose of crocheting into the third loop when starting the body?
Round 6 has you sc into the third loop of the hdc round below, which is the loop sitting at the back of each stitch. Working into it creates a raised ridge that visually separates the flat base from the body of the basket. It's a clean detail that gives the finished piece a more intentional, structured look rather than one section just bleeding into the next.
Can I skip the crocheted handles and add leather handles instead?
Yes, the pattern includes a full no-handle modification for exactly this reason. Work Rounds 21 and 22 straight through without the chain gaps, fasten off, and then attach leather handles using the waxed braided cord, a diamond punch, and a rubber mallet. The leather handle option gives the basket more of a tote-style look and is completely doable even if you've never worked with leather hardware before.
The base rounds say to sl st to the first hdc, not the ch-2. Why does that matter?
Slip stitching to the ch-2 instead of the first hdc is one of the most common mistakes with this type of base construction. When you do it correctly and join to the actual first hdc, your stitch count stays accurate and the round closes cleanly. Joining to the ch-2 throws off the count and can create a visible jog or gap as the rounds build up.
Now It's Your Turn!
I'd love to see which colorway you go with. Wheat has that warm, natural look that works in just about any room, but Grey Marble is SO good if you want something a little more modern. If you make one, tag me on Instagram or drop a photo in the comments. And if you're saving this for later, pin it to your home decor crochet board so it doesn't get lost in your browser tabs. I always want to know what people end up using their baskets for, so tell me below.


Leave a Reply