
Okay so I made these on a whim for a friend's baby shower and now I cannot stop making them. The Bumblebee Baby Booties Crochet Pattern is honestly one of those projects that feels a little extra but comes together so much faster than you'd expect. It's beginner-friendly, it's adorable, and it makes a gift that people actually react to.

Jump to:
About the Design
What I love about this one is that it has personality built right into the construction. You're not just making a plain little slipper and slapping a sticker on it. The design details are crocheted in, which means the finished pair looks intentional and polished even though the process is pretty simple. There's something really satisfying about that.
I'd make these for any new baby gift, honestly. Baby shower, newborn visit, a "just because I saw yarn on sale" situation. They're the kind of thing that photographs well, travels well in a gift bag, and takes up almost no yarn from your stash. A total win.
Why This Pattern Stands Out
These booties pack serious charm into a beginner-level project that actually finishes fast.
- Beginner Friendly: No advanced techniques here, so if you're newer to crochet this is a really good one to try.
- Quick to Finish: Small scale means you can knock out a pair in one sitting, which is great when you need a last-minute gift.
- Gifting Power: These land differently than a basic bootie. They're the kind of handmade gift people actually keep and talk about.
- Stash Friendly: You only need small amounts of a few colors, so this is a perfect project for using up leftover yarn.
- Technique Value: The added detail pieces give beginners a low-stakes way to practice working small separate components and attaching them cleanly.
Materials You'll Need
Three colors, one hook, and a small pile of scraps — that is the whole list for these little booties.
- Worsted Weight Yarn (Color A: Yellow, Color B: Black, Color C: White): Worsted weight is the right call here. It works up quickly and gives the booties enough body to hold their shape without any internal structure. For a 0–6 month size, you won't need much of any color: Yellow and White are your main color draws, and you're probably looking at 20–40 meters each at most. Black is barely a supporting role — just a short length for the stripe detail and the knotted eyes, so a leftover scrap is more than enough.
- 4.0 mm Crochet Hook: A 4.0 mm pairs well with worsted weight and keeps the fabric tight enough that the bootie structure stays firm. Loose stitches on something this small would make the whole thing look floppy.
- Also needed: yarn needle, scissors
Color Sequence & Yarn Changes
The main bootie body uses Yellow and Black together for the stripe detail, with White reserved entirely for the wings. Black gets joined partway through at Round 13, and from that point the chain no longer counts as a stitch, so it's worth keeping that in mind when you pull it in. The eyes are worked separately in Yellow with a Black knot added after, so you won't be switching mid-round on those.
Quick Details
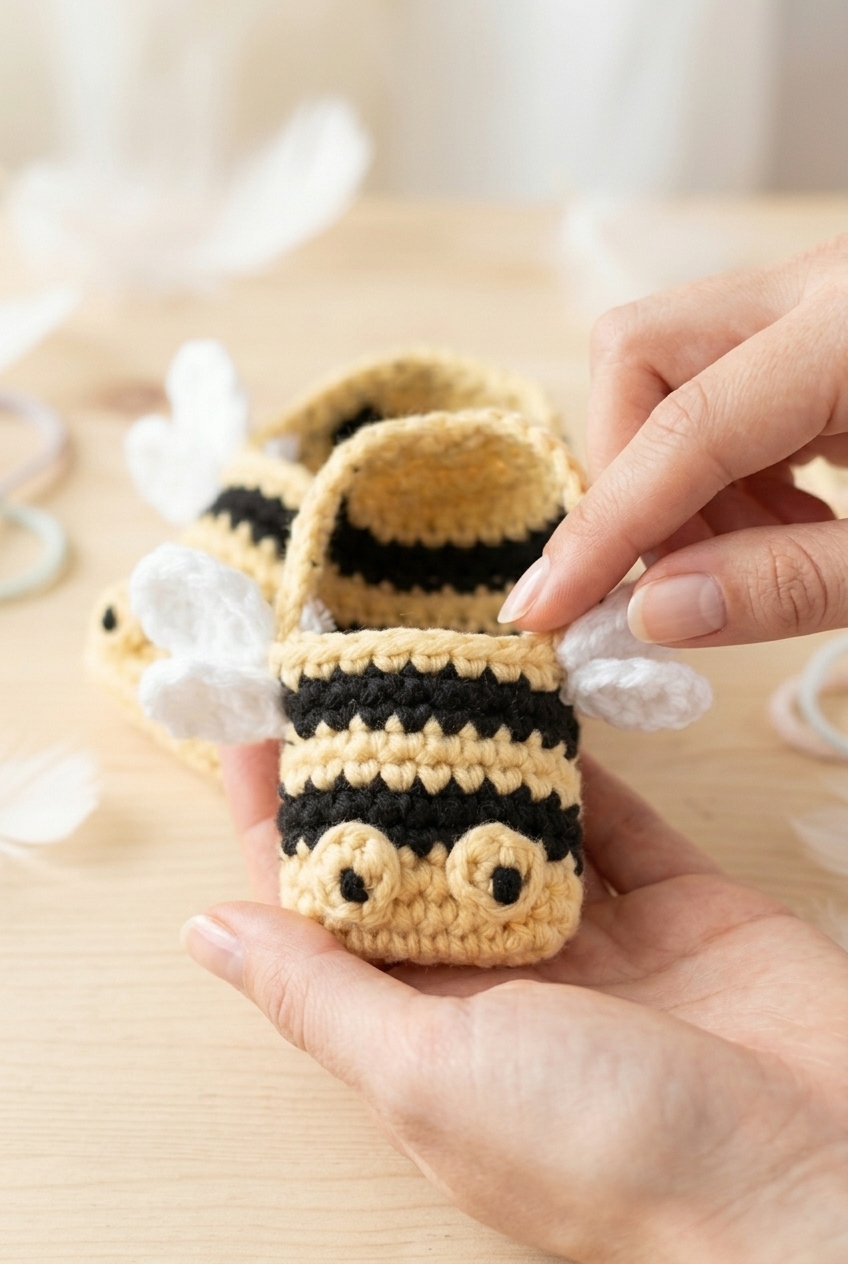
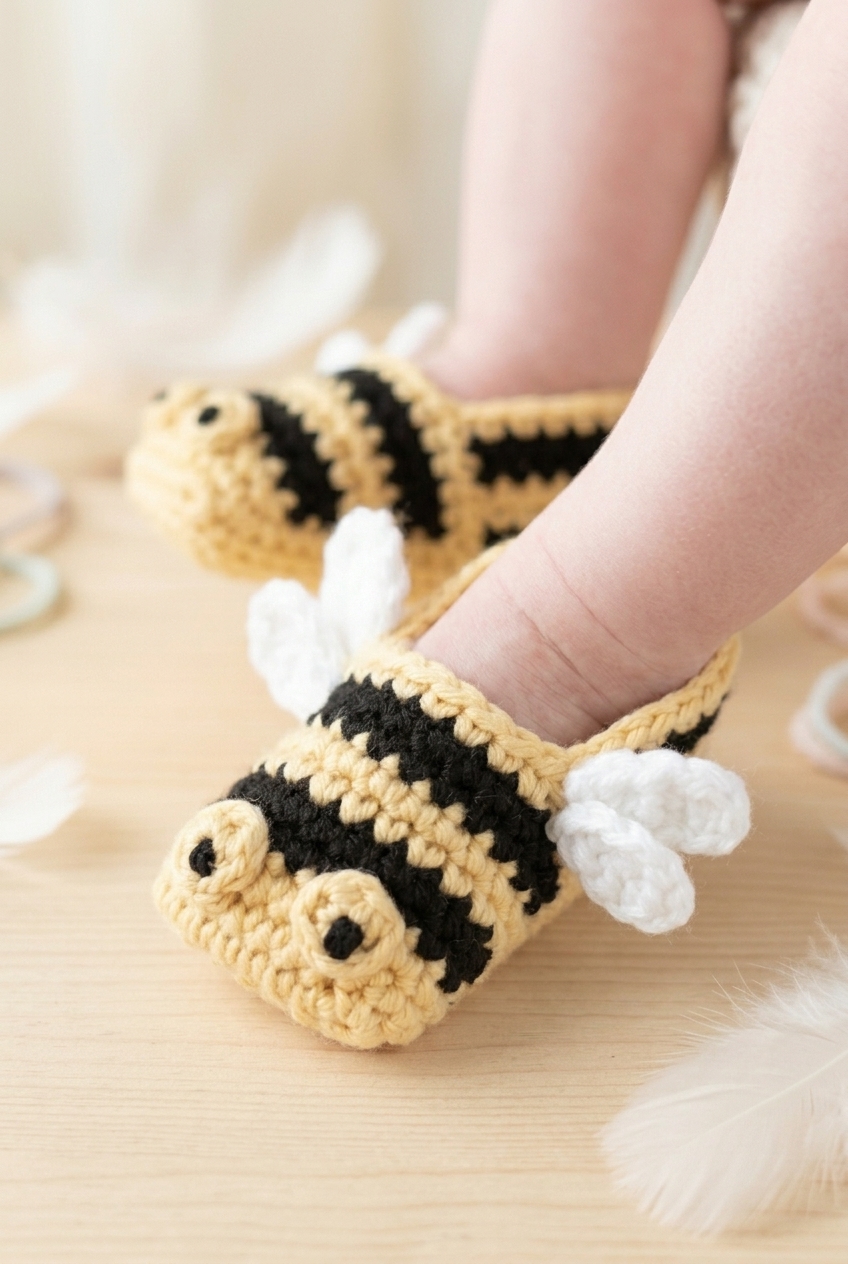
These little bee booties are worked in three colors across several separate pieces: the main bootie, tiny wings, and eyes.
| Skill Level | Beginner |
| Pattern Gauge | Gauge is not critical for this project. Use a hook size that creates a comfortable fabric for baby booties and matches the intended size (0–6 months, up to 10 cm). |
| Finished Size | Size: 0–6 months (up to 10 cm) |
| Yarn Weight | 4 Medium / Worsted |
| Fiber | Not specified — check the yarn label |
| Terminology | US |
Abbreviations & Stitches Used
Short list, mostly standard stitches you've likely used before.
- B = Black
- Y = Yellow
- W = White
- ch = chain
- sc = single crochet
- hdc = half double crochet
- dc = double crochet
- sl st = slip stitch
- st(s) = stitch(es)
- sc2tog = single crochet 2 together (insert hook into next st, yarn over, pull up a loop; insert hook into next st, yarn over, pull up a loop; yarn over, pull through all loops on hook)
- sc3tog = single crochet 3 together (insert hook into next st, yarn over, pull up a loop; insert hook into next st, yarn over, pull up a loop; insert hook into next st, yarn over, pull up a loop; yarn over, pull through all loops on hook)
- magic circle = adjustable ring (wrap yarn to form a ring; ch 1; work stitches into ring; pull tail to tighten)
Special Stitches
- sc2tog: Insert hook into next st, yarn over, pull up a loop; insert hook into next st, yarn over, pull up a loop; yarn over, pull through all loops on hook.
- sc3tog: Insert hook into next st, yarn over, pull up a loop; insert hook into next st, yarn over, pull up a loop; insert hook into next st, yarn over, pull up a loop; yarn over, pull through all loops on hook.
- magic circle: Wrap yarn to form a ring; ch 1; work stitches into ring; pull tail to tighten.
Pattern Notes
You'll make several pieces for each bootie: the main bootie (make 2), two eyes, and four wings. The main bootie begins worked flat, then transitions to working in the round at Round 3. That round starts with a sl st and ch 1, and that ch 1 counts as a stitch from that point forward until the pattern states otherwise. At Round 13, you'll join Black with a ch 1, but that ch 1 does NOT count as a stitch from there on. Worth reading those round notes carefully before you start so the stitch counts make sense as you go.
Row 2 of the flat section is worked back into your starting chains. The hook size isn't critical here. A 4.0 mm hook with worsted weight yarn in Yellow, Black, and White is what this pattern is designed around, but what matters most is that your fabric feels right for a baby item: not too stiff, not so loose it loses its shape. The finished bootie should measure up to 10 cm, fitting a 0–6 month size. If your tension runs tight or loose, adjust your hook accordingly.
All terminology is US standard. Yarn fiber isn't specified, so check your label. For baby items, a lot of people reach for a soft acrylic or a cotton blend, but that's your call.
Step-by-Step Instructions
Here's how I work through each piece of these bumblebee baby booties, from the sole up to the little wings and eyes.
Main Bootie
Make 2. This is the main body of the bootie, and it's a clever construction: you start with a foundation chain, work rows along both sides of it to build the sole, then transition into rounds for the sides and ankle. The color striping through the middle rounds is what gives these booties that bumblebee look.
Row 1: Using Y, ch 9, 2 sc in 2nd ch from hook, 1 sc in next 6 ch, 2 sc in last ch. [10 sc]
Row 2: Crocheting back into your chains, 2 sc in 1st ch (same ch as last st), 1 sc in next 6 ch, 2 sc in last ch. [20 total sts from Rows 1 & 2] You're working into the underside of that same foundation chain, so the two rows together form an oval sole.
Round 3 (now working in the round): Sl st in next st, ch 1 (counts as st here and onwards until stated otherwise), 1 sc in next st and in each st around, sl st in ch-1 to join. [20 sc] This is where the flat sole becomes a 3D bootie — you're now working in continuous joined rounds around the oval.
Round 4: Ch 1, 1 sc in next st and in each st around, join B with sl st in ch-1 to join. [20 sc] Drop Y here but don't cut it — you'll be picking it back up for the stripe sequence.
Rounds 5–6: Repeat Round 4, but join Y with sl st in ch-1 to join at end of last round. [20 sc]
Rounds 7–8: Repeat Round 4, but join B with sl st in ch-1 to join at end of last round. [20 sc]
Rounds 9–10: Repeat Round 4, but join Y with sl st in ch-1 to join at end of last round. [20 sc]
Round 11: Ch 1, 1 sc in next st and in each st around, sl st in ch-1 to join. [20 sc]
Round 12: Ch 1, 1 sc in next st and in next 12 sts. [14 sc] You're not working all the way around here — this partial round positions you to start shaping the toe flap.
Round 13: Join B with ch 1 (does NOT count as st from here onwards), turn, 1 sc in 1st st and in next 12 sts, 1 sc in previous ch-1. [14 sc] Note the change: from this round on, the ch 1 no longer counts as a stitch. You're also turning now, so the toe section works back and forth in rows rather than in the round.
Round 14: Ch 1, turn, 1 sc in next st and in each st along. [14 sc]
Round 15: Join Y with ch 1, turn, 1 sc in 1st st and in each st along. [14 sc]
Round 16: Ch 1, turn, 1 sc in 1st st and in each st along. [14 sc]
Round 17: Join B with ch 1, turn, 1 sc in 1st st and in each st along. [14 sc]
Round 18: Ch 1, turn, 1 sc in 1st st and in each st along. [14 sc]
Round 19: Join Y with ch 1, turn, 1 sc in 1st st and in each st along. [14 sc]
Round 20: Ch 1, turn, 1 sc in 1st st and in each st along. [14 sc]
Round 21: Ch 1, turn, *sc2tog* repeat from * to * until end. [7 sc] This is where the toe starts closing up — just work sc2tog across the whole row.
Round 22: Ch 1, turn, sc2tog, sc3tog, sc2tog. [3 sc]
Round 23: Sc3tog. [1 sc]
Round 24: Without fastening off, ch 1 and crochet 1 sc neatly around top edge, sl st in ch-1 to join. Fasten off and tie in all tails. Repeat for second bootie.
Fasten off and tie in all tails.
Eyes
Make 2. These little eyes are worked in two parts: a knotted length of dark yarn for the pupil, set inside a small crocheted circle. They're tiny and quick to make.
Step 1: Take a short length of B and tie two knots into the center of the yarn, one on top of the other.
Step 2: Using Y, crochet 6 sc into a magic circle, sl st in first sc to join. [6 sc] Fasten off leaving enough yarn for sewing.
Step 2 (Alternative): Ch 4, sl st in ch 1 to form a loop, then crochet 6 sc into the loop. [6 sc]
Wings
Make 4. Each bootie gets two wings, one on each side. They work up very fast — just two rounds each — and the mix of sc, hdc, and dc in round 2 naturally shapes each wing into a little point.
Round 1: Using W, crochet 5 sc into a magic circle, sl st in first sc to join. [5 sc]
Round 1 (Alternative): Ch 4, sl st in ch 1 to form a loop, then crochet 5 sc into the loop. [5 sc]
Round 2: Without chaining, 2 sc in next st, 2 hdc in next st, 3 dc in next st, 2 hdc in next st, 2 sc in last st. [11 sts] Fasten off and sew wing onto the side of the bootie. Repeat three more times for remaining wings.
Fasten off and sew wing onto the side of the bootie.
Finishing
Once both booties and all the small pieces are done, it's time to put everything together. For the eyes: sew each end of your black knotted length into the yellow circle, tie off on the back, and use the remaining Y yarn to sew the eye onto the front of the bootie. Repeat for the second eye. For the wings: sew one wing onto each side of both booties, positioning them where you'd like them to sit. I find it helps to pin them in place first so both booties end up matching before you commit to sewing.
Care Instructions
Since these are baby booties, they're going to need washing more often than you'd think. Check your yarn label before anything else, because the care method really depends on the fiber you chose. Most worsted-weight acrylics handle a gentle machine wash just fine, but if you went with a wool or wool blend, hand wash in cool water and lay them flat to dry so they keep their shape. The yellow circles and wings are sewn on, so turn them inside out or pop them in a mesh laundry bag to protect those seams and keep everything intact.
Baby & Child Safety Notes
The eyes on these booties are crocheted yellow circles with a knotted length of black yarn tied through the center. Make sure those knot ends are sewn in securely on the back of the circle and that the whole eye is fastened firmly to the bootie before putting them on a baby. Same goes for the wings. Pull on them after sewing to check they're not going anywhere. No small hard parts here, but loose yarn ends can work free over time, so check the seams after each wash.
Frequently Asked Questions
How do the color stripes work on the booties? Do I cut the yarn between each one?
The stripes are worked by joining the new color at the end of the round with a slip stitch, so you're not cutting between every stripe. You carry the unused color up as you go, which keeps the inside tidy and saves you from weaving in a mountain of ends. The pattern alternates yellow and black in two-round stripes up the body of the bootie.
How are the wings shaped? I've never crocheted a wing piece before.
Each wing starts with 5 single crochets into a magic circle, then the second round builds the shape by mixing single crochets, half double crochets, and double crochets without any chaining at the start. That mix of stitch heights is what creates the curved, petal-like shape. You make four wings total, two per bootie, and sew them onto the sides once they're done.
What if I can't do a magic circle? Is there another way to start the eyes and wings?
There's a chain loop alternative built right into the pattern for both the eyes and the wings. For the eyes, chain 4 and slip stitch into the first chain to form a loop, then crochet your 6 single crochets into that loop. For the wings, same idea but chain 4 and work 5 single crochets into the loop. It works well and is much less fiddly if magic circles aren't your thing yet.
The pattern switches from rows to working in the round partway through. How does that work?
The bootie sole is worked flat in two rows first, which builds the base shape. Then Round 3 joins everything and you start working in the round from that point. The pattern notes flag this transition clearly, so watch for the instruction that says 'now working in the round' and make sure your slip stitch joins are snug so there's no gap where the flat section meets the round.
The ch-1 stops counting as a stitch partway through. When does that change happen?
It changes at Round 13, when you join black with a ch-1 that does NOT count as a stitch from that point on. Before that, the ch-1 at the start of rounds does count as a stitch. The pattern calls this out directly, but it's worth flagging a sticky note or stitch marker at that round so you don't accidentally add an extra stitch to your count.
Now It's Your Turn!
I'd love to see how your bumblebee booties turn out, so if you make a pair, come back and leave a comment below or tag me on social media. These are the kind of thing that photograph BEAUTIFULLY next to a little flower pot or on a wooden surface if you want a shot worth saving to Pinterest. And if you're making them as a gift, I'm a little envious of whoever is on the receiving end of these tiny striped things.


Leave a Reply