
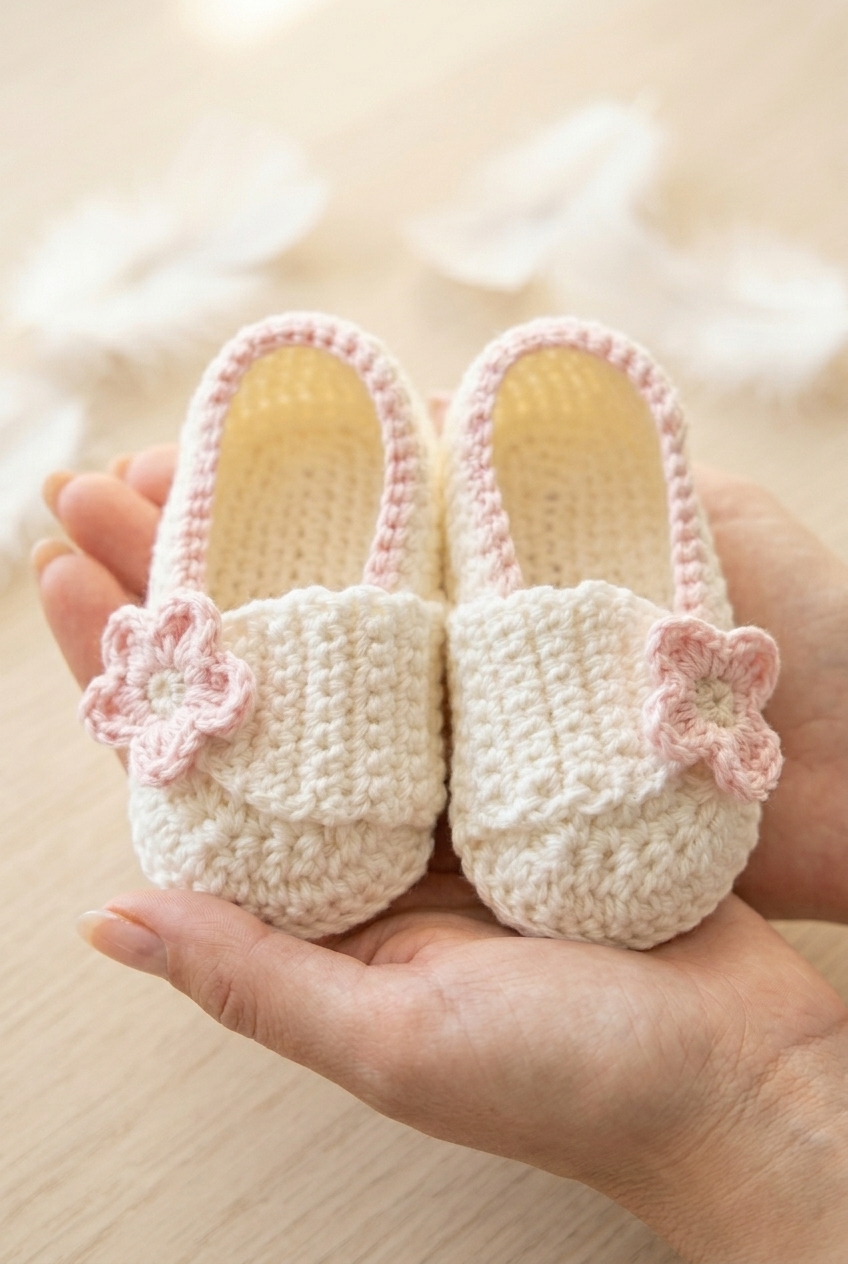
Baby feet are honestly one of the best excuses to pick up a hook, and this Baby Strapped Crochet Slippers Pattern is actually one of my favorite little projects to pull out when I need something that feels special without being a huge commitment. It works up in multiple sizes to take babies from newborn all the way through toddlerhood, so it's the kind of pattern you'll come back to again and again.

Jump to:
Behind the Pattern
I designed these with gifting in mind, honestly. There's something about a tiny pair of handmade shoes that feels so much more thoughtful than anything you'd grab off a shelf, and these really do deliver that. The construction is interesting enough to keep you engaged, with a clustered stitch section that gives the front of the shoe real dimension and a satisfying rhythm once you get going.
These are perfect for baby showers, new sibling gifts, or just because you spotted some yarn that was too sweet to pass up. The sizing range is genuinely useful too. Being able to make one pattern work from the tiniest newborns all the way through a two-year-old means you're not hunting for a new pattern every few months.
Why You'll Want to Make This
These slippers make the most adorable handmade baby gift you can crochet in an afternoon.
- Skill level: Intermediate, so you'll want some basic shaping experience, but nothing here is overly complicated once you get into the flow.
- Sizing flexibility: Four sizes in one pattern takes you from newborn through toddler, which makes this a pattern worth bookmarking for the long haul.
- Gifting potential: Pretty hard to beat a handmade pair of baby shoes for a shower gift. These always land well.
- Technique value: The clustered stitch section is a genuinely fun technique to practice, and it looks impressive on the finished shoe.
- Time investment: Small project, fast results. You can realistically finish a pair in one sitting if you've got a free evening.
Your Supply List
Two colors, one hook, and enough yarn to fit in your palm — baby shoes really do have the shortest supply lists.
- DK Weight Yarn (Weight 3 Light), White and Pink: DK weight is the right call for baby shoes. It's substantial enough to hold the shape of the sole and upper without being stiff, and light enough that the finished shoe won't feel heavy on a tiny foot. For a project this small across four sizes (0–3 months up to 18 months–2 years), you won't need much of either color. A rough estimate is around 50–80 yards of white and maybe 15–25 yards of pink, though buying one small ball of each is more than enough. The fiber content isn't specified in the pattern, so check your label. A smooth DK with a little give works best here since tight, splitty yarn makes the small stitch counts harder to work into cleanly.
- E/4 (3.5 mm) Crochet Hook: A 3.5 mm hook pairs well with DK weight to give you a firm, even fabric. Baby shoes need a bit of structure so they don't flop around, and going up in hook size would make the stitches too loose for that.
- Also needed: tapestry needle, scissors
Color Sequence & Yarn Changes
The white carries most of the work: the shoe body, the strap, and the first round of the flower. Pink comes in for the flower join and second round, then again at the very end for the finishing trim along the shoe edge. It's worth keeping both colors accessible as you go rather than tucking one away, since the pink shows up in a few separate places. One thing worth knowing: when you join for the finishing trim, the pattern has you join underneath the strap to keep things tidy on the right side.
Quick Details
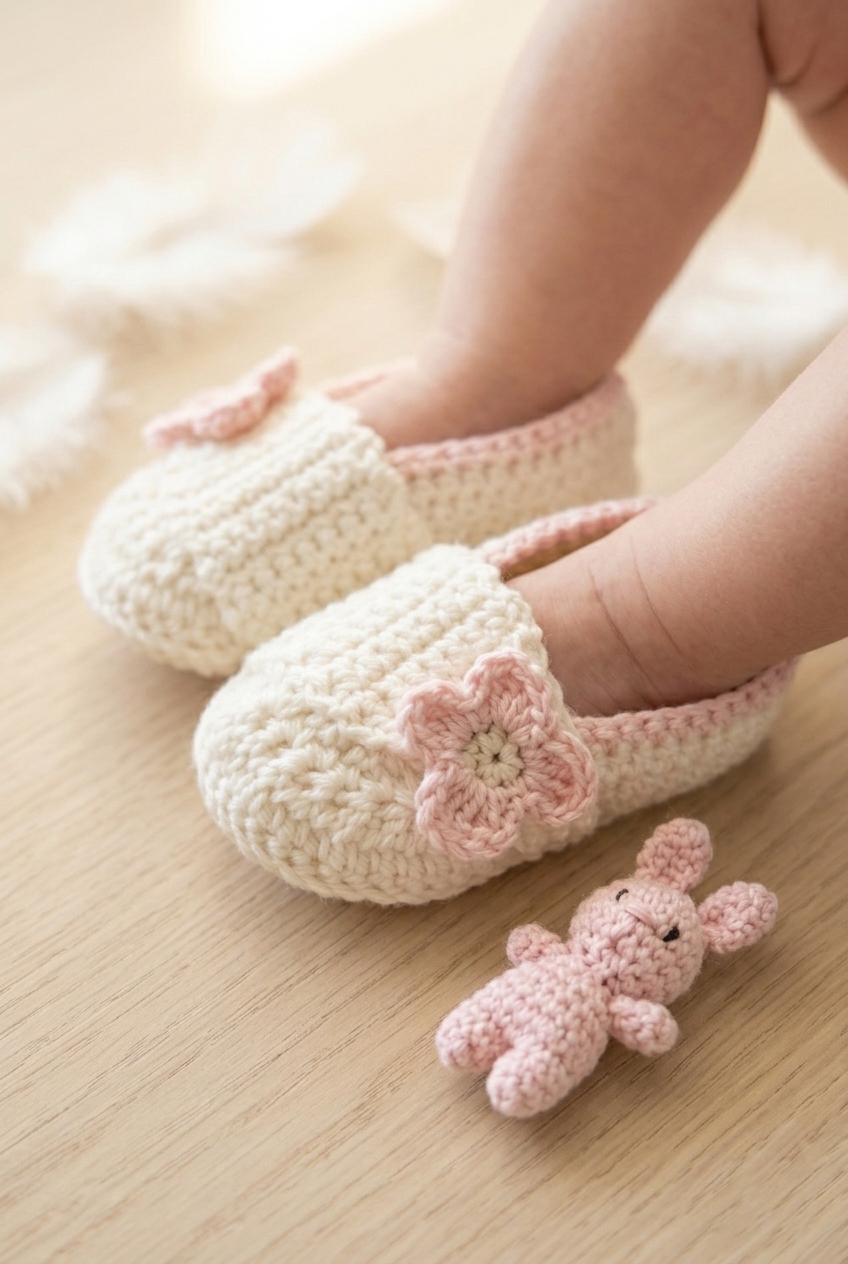
These baby slippers come in four sizes, from newborn through toddler, with a little ankle strap and button closure.
| Skill Level | Intermediate |
| Pattern Gauge | Gauge is not critical for this project. Use a hook size that creates a firm fabric suitable for baby slippers. |
| Finished Size | Sizes: 0–3 Months (3–6 Months, 6–18 Months, 18 Months–2 Years) |
| Yarn Weight | 3 Light / DK |
| Fiber | Not specified — check the yarn label |
| Terminology | US |
Customizing the Size
Four sizes are built into this pattern: 0–3 Months, 3–6 Months, 6–18 Months, and 18 Months–2 Years. The first number given in any instruction is always 0–3 Months. Numbers for the larger sizes follow in parentheses in this order: (3–6 Months, 6–18 Months, 18 Months–2 Years). Pick your size at the start and follow that number consistently throughout. Because gauge isn't critical here, you can also nudge the fit slightly by going up or down a hook size — a larger hook gives a roomier slipper, a smaller one pulls it in a bit.
Stitches & Abbreviations
Standard stitches throughout — nothing unusual on this list.
- ch = chain
- sl st = slip stitch
- sc = single crochet
- hdc = half double crochet
- dc = double crochet
- tr = treble crochet
- sc2tog = single crochet 2 stitches together (decrease)
- dc2tog = double crochet 2 stitches together (decrease)
- FLO = front loop only
- RS = right side
- sk = skip
- st(s) = stitch(es)
- * * = repeat between asterisks
- ( ) = larger sizes / total stitches
Special Stitches
- Magic circle: Work the specified stitches into a magic circle, then pull the tail to tighten the ring closed.
Important Notes
A few things worth reading before you start. The slippers are worked in two colors — a main color (White) and a contrast color — using DK weight yarn and a size E/4 (3.5 mm) hook. The sole begins with a magic circle and is worked in rounds. Row 2 of the upper is worked with the right side facing; turn your work clockwise and crochet into the foundation row stitches.
The strap is joined directly onto the slipper in one of the back loops from Round 8, positioned toward the front on whichever side corresponds to the shoe you're making — right side for one, left for the other. Starting from strap Rows 2–9 (11, 13, 15), the turning chain does not count as a stitch. When you get to the finishing trim, join your yarn underneath the strap to keep things tidy on the right side.
One last thing on sizing: pick your size at the very beginning and track that number through every section. Mixing sizes mid-pattern is an easy mistake to make, especially when the numbers are close together.
The Pattern
Here's everything you need to crochet these baby strapped slippers crochet pattern from sole to strap, one piece at a time.
Shoe (Make 2)
You'll make two of these, so it's worth getting comfortable with the construction before you start the second one. The shoe begins flat, building the sole across two rows before joining into rounds to shape the upper and heel.
Row 1: Using W, ch 16 (19, 22, 25). 2 sc in 2nd ch from hook, 1 sc in next 13 (16, 19, 22) sts, 2 sc in last ch. [17 (20, 23, 26) sc]
Row 2: With RS facing, turn work clockwise and crochet into foundation row sts: 2 sc in 1st st, 1 sc in next 13 (16, 19, 22) sts, 2 sc in last st. [34 (40, 46, 52) total sts from Rows 1 & 2] This row works along the opposite side of the foundation chain, completing the oval sole shape and setting you up to work in rounds from here.
Round 3: 1 sc in next st, 2 sc in next st, 1 sc in next 14 (17, 20, 23) sts, 2 sc in next st, 1 sc in next st, 2 sc in next st, 1 sc in next 14 (17, 20, 23) sts, 2 sc in last st. [38 (44, 50, 56) sc]
Round 4: 1 sc in next 2 sts, 2 sc in next st, 1 sc in next 15 (18, 21, 24) sts, 2 sc in next st, 1 sc in next 2 sts, 2 sc in next st, 1 sc in next 15 (18, 21, 24) sts, 2 sc in last st. [42 (48, 54, 60) sc]
Round 5: 1 sc in next 3 sts, 2 sc in next st, 1 sc in next 16 (19, 22, 25) sts, 2 sc in next st, 1 sc in next 3 sts, 2 sc in next st, 1 sc in next 16 (19, 22, 25) sts, 2 sc in last st. [46 (52, 58, 64) sc]
Round 6: 1 sc in next 4 sts, 2 sc in next st, 1 sc in next 5 (6, 7, 8) sts, 1 hdc in next 12 (14, 16, 18) sts, 2 hdc in next st, 1 hdc in next 4 sts, 2 hdc in next st, 1 hdc in next 12 (14, 16, 18) sts, 1 sc in next 5 (6, 7, 8) sts, 2 sc in last st. [50 (56, 62, 68) sts] The switch to hdc across the toe area starts rounding the upper into a shoe shape rather than a flat sole.
Round 7: 1 sc in next 5 sts, 2 sc in next st, 1 sc in next 7 (8, 9, 10) sts, 1 hdc in next 11 (13, 15, 17) sts, 2 sc in next st, 1 sc in next 5 sts, 2 sc in next st, 1 hdc in next 11 (13, 15, 17) sts, 1 sc in next 7 (8, 9, 10) sts, 2 sc in last st. [54 (60, 66, 72) sts]
Round 8: FLO, 1 sc in each st around. [54 (60, 66, 72) sc] Working through the front loops only here creates a visible ridge on the outside of the shoe and leaves the back loops free — the strap will attach into those back loops later, so don't skip this detail.
Round 9: 1 sc in next 5 sts, sc2tog, 1 sc in next 13 (16, 19, 22) sts, *dc2tog* repeat 9 more times, 1 sc in last 12 (15, 18, 21) sts, sc2tog. [42 (48, 54, 60) sts] The dc2tog cluster across the toe draws the fabric inward to shape the front of the shoe.
Round 10: 1 sc in next 17 (20, 23, 26) sts, *dc2tog* repeat 6 more times, 1 sc in last 11 (14, 17, 20) sts. [35 (41, 47, 53) sts]
Row 11 — Finishing (Heel): 1 sc in next 10 sts, sl st in next st, ch 1, turn, sk sl st, sl st in next st, 1 sc in next 12 sts, sl st in next st, ch 1, turn, sk sl st, sl st in next st, 1 sc in next 10 sts, sl st in next st. This short-row sequence shapes the heel by working back and forth over a section of the round rather than continuing all the way around.
Fasten off and tie in all tails.
Strap
The strap is worked directly into the back loops left from Round 8, so make sure you're picking up from the correct side depending on which shoe you're making — the join point differs for left and right.
Row 1: Using W, join yarn on the right or left side of your shoe towards the front (depending on which shoe you're making), in one of the back loops from Round 8. Ch 1, 1 sc in next 7 sts. [8 sc]
Rows 2–9 (11, 13, 15): Ch 1 (does not count as st here or onwards), turn, 1 sc in 1st st from hook and in each st along. [8 sc] Work this section for the number of rows that matches your size. These plain rows build the length of the strap before the shaping begins.
Next Row: Ch 1, turn, sl st in next st, 1 sc in next 6 sts, sl st in next st. [8 sts]
Next Row: Ch 1, turn, sk sl st, 1 sc in next 5 sts, sc2tog. [6 sts]
Next Row: Ch 1, turn, sk 1st st, 1 sc in next 4 sts, sl st in next st. [5 sts]
Next Row: Ch 1, turn, sk 1st st, 1 sc in next st, ch 6, sk 2 sts, 1 sc in next st. [8 sts] The ch 6 space here forms the buttonhole loop that will fasten over the flower.
Fasten off and tie in all tails.
Flower (Make 2)
Make two of these. They're small and quick, and each one doubles as the button for the strap closure, so they need to sit flat and firm against the side of the shoe.
Round 1: Using W, 10 sc into a magic circle, pull to tighten, join P with sl st to join. [10 sc] The color join happens right at the end of this round, so have your P yarn ready before you close the circle.
Round 2: Continuing in P, *[1 sc, 1 dc, 1 tr] in next st, [1 tr, 1 dc, 1 sc] in next st* repeat around. You will have 5 petals. Fasten off and tie in all tails.
Finishing Trim
This trim round tidies up the edge of the shoe and gives it a neat, finished look in the contrast color.
Round 1: Using P, join yarn underneath your strap to keep the work tidy. Ch 1 and work 1 sc neatly around the edge of the main shoe, sl st in ch 1 to join. Joining under the strap keeps the yarn tail hidden without any extra weaving.
Fasten off and tie in all tails.
Finishing
Once both shoes are complete with their straps and trim, sew the flower buttons onto the sides of your shoes (right or left side depending on which shoe you're making). The flower acts as the button for the strap loop, so position it so the strap reaches comfortably and the ch 6 loop sits over it without pulling.
Care Instructions
Hand wash these slippers in cool water and lay them flat to dry. The sole construction is worked in rows and rounds that give it a nice structured shape, and tossing them in the machine can distort that pretty quickly. If you used a cotton or cotton-blend DK, they hold up well to gentle washing and bounce back into shape once dry. Store them flat rather than stuffed into a drawer, especially the smaller newborn size, since the strap can get bent out of position if they're crammed in with other things.
Baby & Child Safety Notes
The flower on these slippers is crocheted, not a hard button, which is a nice safety plus for baby items. That said, the flower is sewn on with a tapestry needle and yarn, so check the attachment periodically, especially once a baby starts grabbing at things. Make sure your finishing knots are secure and tails are woven in well so nothing can be pulled loose. The strap fastens through a button loop, so double-check that the flower is firmly attached each time before putting the slippers on.
Frequently Asked Questions
Why does Round 8 use front loops only, and does it matter?
Round 8 is worked in front loops only, and it DOES matter. Working FLO creates a visible ridge around the shoe that separates the sole from the upper, and those leftover back loops from Round 8 are exactly where you join the strap later. If you accidentally work through both loops, you lose the attachment point for the strap.
How does the strap actually fasten? I don't see a traditional button.
The crocheted flower sewn onto the side of the shoe acts as the button. The strap ends with a ch-6 loop, and that loop slips over the flower to close. It's a clever little detail. Just make sure the flower is sewn on securely, since it's doing real functional work, not just decoration.
Which side does the strap attach to, and does it differ between the two shoes?
Yes, the strap placement is mirrored between the two shoes. You join the strap on the right side of one shoe and the left side of the other, towards the front, into one of the back loops from Round 8. The pattern notes this specifically, so keep track of which shoe you're working on before you join.
The pattern starts with rows before switching to rounds. Is that normal for a slipper sole?
It's how this sole is constructed, and once you do it, it makes sense. Rows 1 and 2 build the foundation of the sole from both sides of the starting chain, then the work joins into rounds from Round 3 onward. The stitch count at the end of Row 2 already accounts for both sides, so don't be surprised when the numbers jump.
Can I make just one flower color, or do I need both white and pink?
You need both. Round 1 of the flower is worked in white, then pink is joined with a slip stitch at the end of Round 1 and used for all of Round 2 and the finishing trim on the shoe. The two-color detail is what gives the flower its look, so skipping one color would change the result significantly.
The strap row count changes by size. How do I know when to stop?
Rows 2 through 9 apply to the 0-3 month size, but the larger sizes go up to Row 11, 13, or 15. Those extra rows just make the strap longer to wrap around a bigger ankle. All those rows are the same: ch 1, turn, sc across 8 stitches. You're just doing more of them depending on the size you're making.
Now It's Your Turn!
I'd love to see which size you make first, and whether you stick with white and pink or swap in your own color combo. Drop a photo in the comments or tag me on social so I can see your finished pair. If you're saving this for a baby shower gift or just keeping it for later, pin it to your crochet board so you can find it when you need it.


Leave a Reply