
Baby shower season hit and I needed something small, quick, and genuinely cute to make — and this Baby Loafer Shoes Crochet Pattern ended up being exactly that. It's a beginner-friendly project that actually looks like you put in way more effort than you did, and it fits babies in that tiny newborn-to-six-month stage when everything is just impossibly small and sweet.

Jump to:
About This Project
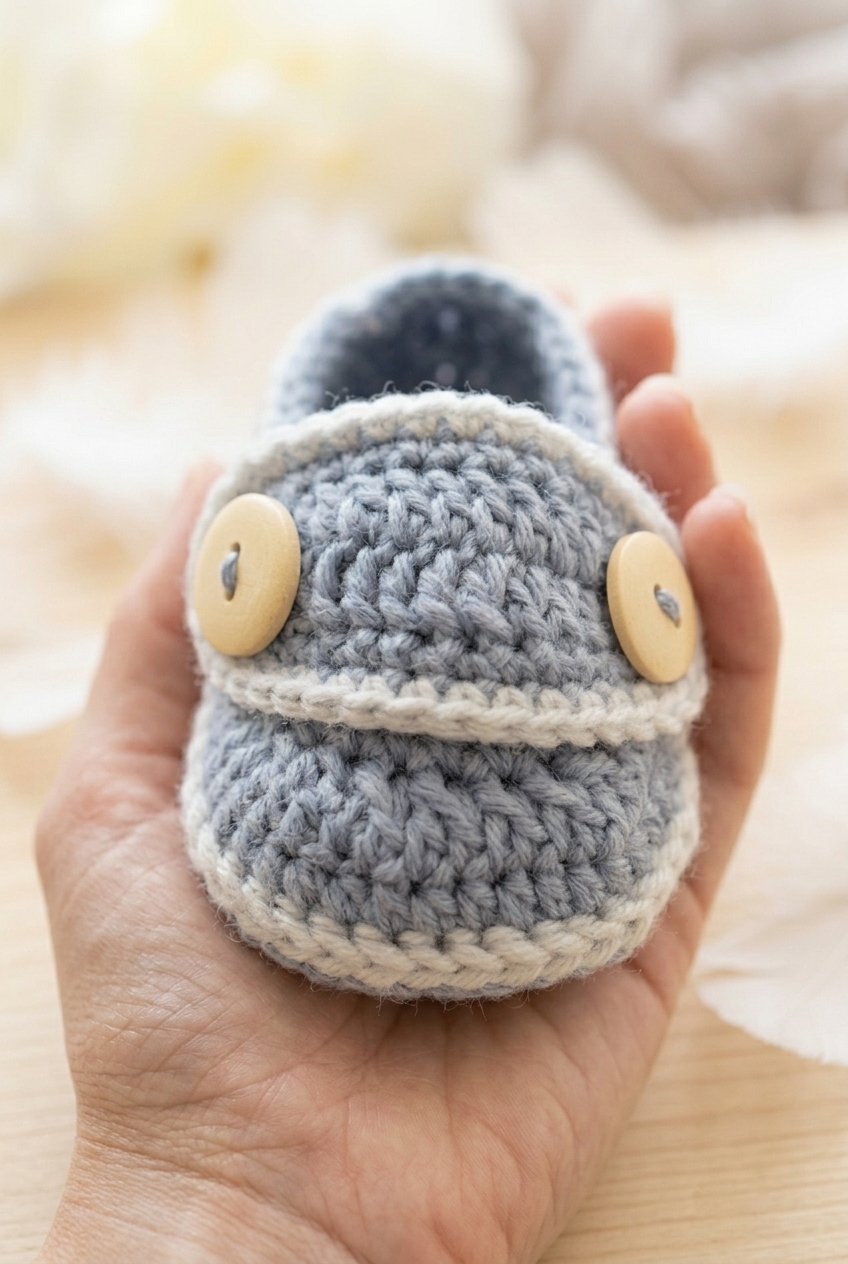
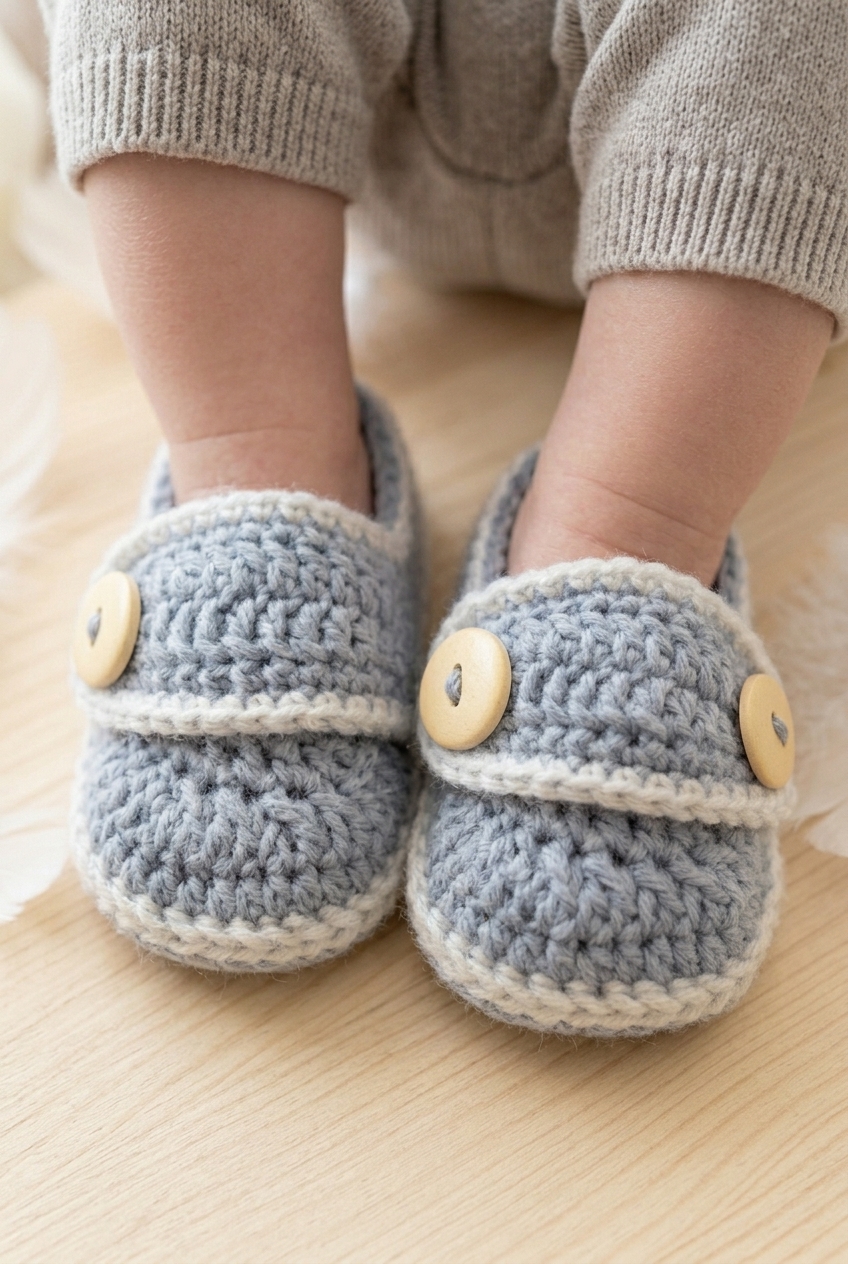
What I really like about this one is the construction. It's a little shoe with an actual strap and button closure, so it feels like a real tiny loafer rather than just a basic bootie. That detail makes it feel so much more finished, and honestly it's what makes people pick it up and go "wait, you made this?" when they see it at a gift table.
I'd make these for any new baby in my life, honestly. They work for a shower gift, a newborn photo session, or just because you have a few hours and some leftover yarn sitting around. The size is small enough that it doesn't feel like a big commitment, which is pretty much my favorite kind of project.
Why You Need This on Your Hook
These tiny loafers are the baby gift you'll want to make again and again.
- Beginner Friendly: No advanced techniques here — if you've got basic stitches down, you can make these with no trouble at all.
- Quick to Finish: They're small, so you're not committing to a long project — great for a last-minute gift.
- Gifting Gold: Baby shoes are one of those gifts that people genuinely get excited about, especially when they look this polished.
- Great Stash Buster: The small size means you can knock these out with yarn you probably already have sitting around.
- Technique Builder: The strap and button closure is a really satisfying little detail to work through, and it's a nice skill to add to your toolkit.
What You'll Need
Two colors of DK yarn, a handful of buttons, and you're basically set.
- DK Weight Yarn, Light Blue and Dark Blue: DK weight is the right call for a small shoe like this. It gives you enough stitch definition to see the construction clearly without the fabric getting too stiff or too floppy. You're working a fairly small project, so you won't need a lot of either color. A rough estimate would be somewhere around 30 to 50 meters per color, but winding off a small amount from a larger skein works fine since yardage isn't specified in the pattern.
- 4.0 mm Crochet Hook: This size pairs well with DK weight and gives you a fabric that holds its shape without being so tight it's a pain to work into.
- 4 Buttons (2 per shoe): These are decorative only. There are no button loops in this pattern. Instead, the strap gets sewn to the shoe using the dark blue yarn threaded through the button itself, so the button is doing double duty as both decoration and the attachment point.
- Also needed: yarn needle, scissors
Color Sequence & Yarn Changes
Dark blue starts the project and handles the sole and the first two rows of the strap. Light blue comes in partway through for the upper rounds of the shoe and the finishing work. It's worth keeping both colors accessible as you go rather than tucking them away, because you'll be switching back to dark blue strands at the end to sew the straps into place via the buttons.
Quick Details
These little Mary Jane booties are sized for newborns up to six months, worked in DK weight with a flat sole and decorative button strap.
| Skill Level | Beginner |
| Pattern Gauge | 5 hdc = 1 inch |
| Finished Size | Size: 0–6 months (up to 10 cm) |
| Yarn Weight | 3 Light / DK |
| Terminology | US |
Stitches & Abbreviations
Nothing unusual here — just the standard stitches you've probably already got down.
- ch = chain
- sl st = slip stitch
- sc = single crochet
- hdc = half double crochet
- dc = double crochet
- hdc2tog = half double crochet 2 stitches together (decrease)
- dc2tog = double crochet 2 stitches together (decrease)
- * * = repeat between asterisks
- ( ) = total stitches
Before You Begin
Both shoes are identical, so you'll make the same pattern twice. No mirror image, no left-specific shaping. The sole is worked in rows. After the final sole row (Row 16), don't fasten off. You'll continue directly into the following rounds without cutting the yarn.
One note on the chain at the start of Row 2: that ch 1 does not count as a stitch, and that rule carries through the rest of the pattern from that point on.
The buttons are decorative only. There are no button loops worked into the shoe itself. Instead, the strap gets sewn to the main shoe through the button, so the button is doing double duty as both fastener and decoration. You'll need 4 total, 2 per shoe. Check your yarn label for fiber content and care instructions, as the fiber isn't specified in this pattern.
The Pattern
Each shoe is worked in three parts: a flat sole, a top worked up from the sole's edge, and a small buttoned strap sewn on at the end.
Sole
The sole is worked flat in rows using DB, starting from a short foundation chain and shaping out to the widest part of the foot before tapering back down toward the toe. You'll work this piece twice, once for each shoe.
Row 1: Using DB, ch 7. 2 hdc in 2nd ch from hook, 1 hdc in next 4 ch, 2 hdc in last ch. [8 hdc]
Row 2: Ch 1 (does not count as a st here or onwards), turn, 2 hdc in 1st st, 1 hdc in next 6 st, 2 hdc in last st. [10 hdc]
Row 3: Ch 1, turn, 1 hdc in 1st st and in each st across. [10 hdc]
Row 4: Ch 1, turn, 1 hdc in 1st st and in each st across. [10 hdc]
Row 5: Ch 1, turn, 1 hdc in 1st st and in each st across. [10 hdc]
Row 6: Ch 1, turn, 1 hdc in 1st st and in each st across. [10 hdc]
Row 7: Ch 1, turn, 1 hdc in 1st st and in each st across. [10 hdc]
Row 8: Ch 1, turn, hdc2tog, 1 hdc in next 6 st, hdc2tog. [8 hdc]
Row 9: Ch 1, turn, 1 hdc in 1st st and in each st across. [8 hdc]
Row 10: Ch 1, turn, hdc2tog, 1 hdc in next 4 st, hdc2tog. [6 hdc]
Row 11: Ch 1, turn, 1 hdc in 1st st and in each st across. [6 hdc]
Row 12: Ch 1, turn, 1 hdc in 1st st and in each st across. [6 hdc]
Row 13: Ch 1, turn, 1 hdc in 1st st and in each st across. [6 hdc]
Row 14: Ch 1, turn, 1 hdc in 1st st and in each st across. [6 hdc]
Row 15: Ch 1, turn, 1 hdc in 1st st and in each st across. [6 hdc]
Row 16: Ch 1, turn, hdc2tog, 1 hdc in next 2 st, hdc2tog. [4 hdc]
Without fastening off, continue to the following rounds.
Top of Shoe
With the sole complete and yarn still attached, you'll now work up and around the sole's perimeter to build the upper part of the shoe. The shaping in rounds 3 and 4 pulls in the toe area to give the shoe its loafer silhouette, and round 4 is also where you bring in the LB color for the trim.
Round 1: Work 54 sc neatly around the edge of the sole, sl st in 1st sc to join. [54 sc] You should end at the corner of your sole at the thinnest end.
Round 2: Ch 2 (counts as a st here and onwards), turn, 1 hdc in next st and in each st around, sl st in top of ch 2 to join. [54 hdc]
Round 3: Ch 2, 1 hdc in next 4 st, hdc2tog, 1 hdc in next 12 st, *dc2tog* repeat 10 more times, 1 hdc in next 11 st, hdc2tog, sl st in top of ch 2 to join. [41 sts] The dc2tog cluster across the toe draws in the fabric significantly — keep an eye on your stitch count here, as it's easy to lose track mid-repeat.
Round 4: Ch 2, 1 hdc in next 18 st, *dc2tog* repeat 4 more times, 1 hdc in next 12 st, join LB with sl st in top of ch 2 to join. [36 sts] This is where you switch to LB for the contrast trim. Have it ready before you reach the join.
Round 5: Sl st in next st and in each st around, sl st to join round and color at end. Fasten off and tie in all tails. [36 sts]
Buttoned Strap
Make 2. The strap starts as a flat foundation and transitions into working in the round partway through, so the construction shifts from rows to rounds at round 3. These small pieces are what give the shoe its classic Mary Jane or loafer look, and they're sewn on with buttons rather than crocheted directly to the shoe.
Row 1: Using DB, ch 13. 2 sc in 2nd ch from hook, 1 hdc in next ch, 1 dc in next 8 ch, 1 hdc in next ch, 2 sc in last ch. [14 sts]
Row 2: Crochet back into your chains in the opposite direction, starting in your first ch (same st as last st worked): 2 sc in 1st ch, 1 sc in next 10 ch, 2 sc in last ch. [28 total sts from Rows 1 & 2] You're working into the underside of the foundation chain here, which closes the piece into an oval shape and sets you up for the rounds that follow.
Round 3 (now working in the round): *1 sc in next st, 2 sc in next st, 1 sc in next 11 st, 2 sc in next st* repeat once more, join LB in last sc. [32 sc]
Round 4: Continuing with LB, *1 sc in next 2 st, 2 sc in next st, 1 sc in next 12 st, 2 sc in next st* repeat once more. [36 sc] Fasten off.
Finishing
These final steps pull the shoe together and add the optional edging detail around the sole join.
Step 1: Re-join LB at the back of the shoe in one of the 54 sts from Round 1 of the Top of Shoe and sl st around each of those 54 sts. Fasten off and tie in all tails. (This round is optional but adds a neat finish.)
Step 2: Using strands of DB, use 2 buttons per shoe to sew your straps into place on each shoe. There are no button loops; the strap is sewn to the main shoe via the button.
Step 3: Repeat all steps for the second shoe.
Fasten off and tie in all tails.
Final Touches
The straps are the last thing to go on. I position each strap across the top of the shoe and use two buttons per shoe to sew it down, stitching through both the strap and the shoe upper with strands of DB. There are no button loops in this pattern — the button does the work of holding the strap flat against the shoe, so placement matters. Pin or hold the strap in place before committing to the button position, and make sure both shoes match before you finish off the thread.
Care Instructions
Hand wash these little shoes in cool water and lay them flat to dry. The hdc construction holds its shape well, but the toe area can stretch out if you wring them or toss them in a machine wash. Once dry, the buttons stay put since they're sewn through the strap rather than sitting in a loop, but it's worth checking the thread after a few washes just to be sure. Store them somewhere flat if you're making them ahead as a gift.
Baby & Child Safety Notes
The buttons on these shoes are decorative only and are sewn directly to the strap, not threaded through a loop, so they're not designed to be removed. That said, buttons are a choking hazard for babies and young children, and you should check the button thread regularly to make sure nothing is working loose. If you're making these for a very young baby who might be unsupervised, consider skipping the buttons entirely or using a flat embroidered detail instead. The shoes themselves are not intended for walking, only for wear as a decorative accessory.
Frequently Asked Questions
Do I make a left shoe and a right shoe separately?
Both shoes are identical, so there's no left or right to keep track of. Make the same pattern twice and you're done. The strap placement looks the same on both shoes, which keeps things simple.
How does the strap actually attach to the shoe?
The strap is sewn onto the shoe using the dark blue yarn and the two buttons per shoe. There are no button loops at all. The button goes through the strap and into the shoe body, and the yarn tail from sewing is what holds everything together. It's a bit different from what you might expect, but it works well and keeps the strap flat and tidy.
Where does the sole end and the top of the shoe begin?
The sole is worked flat in rows and ends at Row 16 with 4 hdc. You don't fasten off at that point. Instead, you continue directly from there and work 54 sc around the entire edge of the sole to start Round 1 of the top of the shoe. You should end up back at the thinnest end of the sole when that round is complete.
Is the slip stitch round at the back of the shoe required?
No, it's optional. Re-joining the light blue yarn to work a slip stitch round around the back of the shoe is a finishing step that gives the edge a cleaner look, but the shoe holds together fine without it. If your edge already looks neat, you can skip it.
The stitch count drops a lot in Round 3 of the top of the shoe. Is that normal?
Yes, that's intentional. Round 3 shapes the toe area by using a run of dc2tog decreases across the front of the shoe, which brings the count down from 54 to 41 stitches. The decreases are concentrated in the middle section of the round, not spread evenly, so it can look a bit dramatic but it's what gives the shoe its shape.
Happy Crocheting
These little loafers are one of those projects that look far more involved than they actually are, and I love that about them. If you make a pair, I'd really love to see how they turn out. Tag me on Instagram or drop a photo in the comments below. And if you're saving patterns for future baby gifts, this one pins really well on Pinterest for coming back to later.


Leave a Reply