
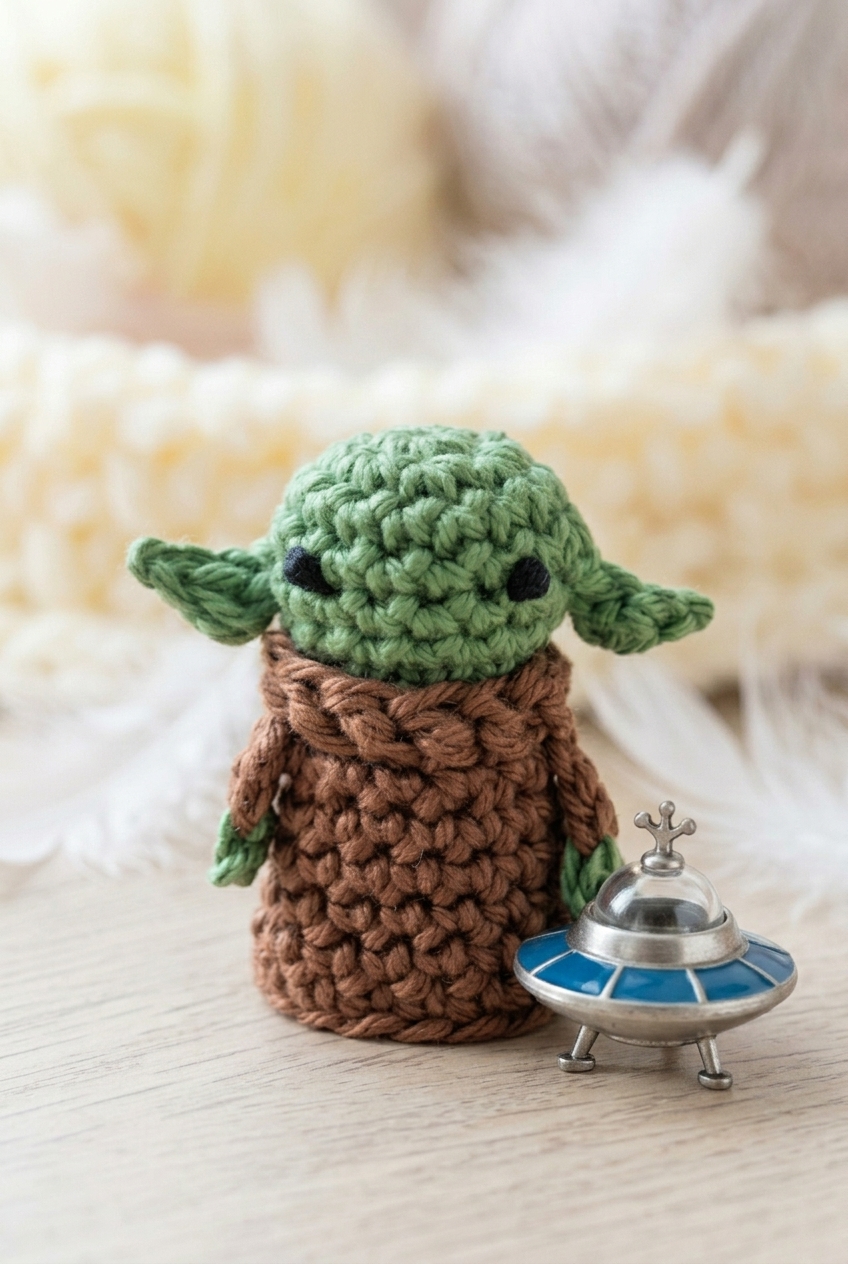
Okay so this little guy has genuinely been one of my favorite makes in a while. I put together this Baby Alien Crochet Pattern after falling completely down a rabbit hole of tiny amigurumi characters, and I have zero regrets. It's a quick, satisfying project that comes together faster than you'd expect, and the result is honestly SO cute it's a little ridiculous.

Jump to:
About the Design
What I really love about this one is how much personality it packs into such a small project. The robe construction is what makes it interesting to work up. Instead of just crocheting a plain body, you get a little layering situation going on, which keeps things from feeling repetitive. It's the kind of detail that makes the finished piece feel intentional and special, not just like a blob with eyes.
I'd make this for literally anyone. Kids obviously go wild for it, but honestly? Adults who are into sci-fi or pop culture stuff are just as delighted. It's a great desk companion, a fun gift, or just something to make because you want a tiny alien sitting on your shelf. No further justification needed.
Why This Pattern Stands Out
This pattern delivers a wildly charming, giftable amigurumi with construction details that actually keep it interesting.
- Skill Level: Rated easy, so it's no trouble at all if you're fairly new to amigurumi but already comfortable with basic crochet in the round.
- Time Investment: It's a pretty small finished size, which means you can realistically knock this out in a single sitting or a couple of short sessions.
- Gifting Potential: This is genuinely one of those makes that lands well as a gift. It's quirky and specific enough to feel thoughtful.
- Technique Value: The robe and collar construction gives you a chance to practice working separate pieces and assembling them, which is a really useful amigurumi skill to have.
Your Supply List
Three colors and a short notions list — that is really all you are working with here.
- Sport Weight Yarn (Weight 2 Fine), Green, Brown, and Black: Sport weight is the right call for a small amigurumi like this. It gives you good stitch definition at a tight gauge, so the finished piece holds its shape without looking lumpy or loose. Since yardage isn't listed in the pattern, a rough estimate for a small amigurumi figure is somewhere in the range of 50 to 100 yards total across all three colors, with green taking the largest share for the head and body, brown a close second for the coat and arms, and black just a small amount for the eyes. Check your yarn label for fiber content since the pattern doesn't specify one, but a smooth, tightly spun sport weight in any fiber will work well here.
- 3.00 mm Crochet Hook: A 3.00 mm hook paired with sport weight yarn gives you a firm, dense fabric. That matters for amigurumi because you want the stuffing to stay put inside and not peek through the stitches.
- Polyfil Stuffing: You won't need a lot, but have it within reach as you go. With small amigurumi it's easier to stuff as you work rather than trying to push filling in at the end once the opening is almost closed.
- Also needed: yarn needle, scissors
Color Sequence & Yarn Changes
The green works the head and body first, then brown takes over for the coat and arms as separate pieces. Black comes in only at the finishing stage for the eyes, so you won't be switching colors mid-round at any point.
Quick Details
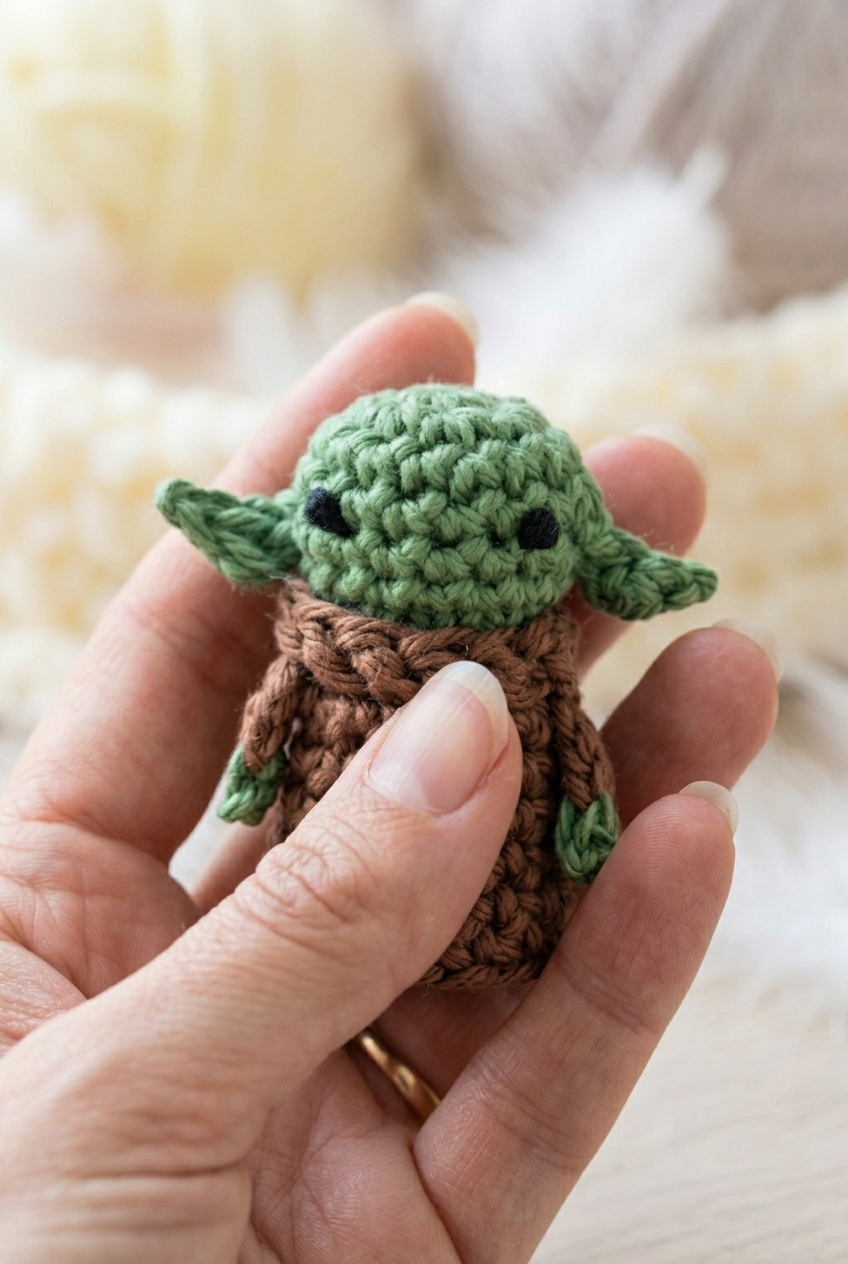
A small sci-fi amigurumi worked in sport weight yarn, coming in at about 4 inches tall.
| Skill Level | Easy |
| Pattern Gauge | Gauge is not critical for this project. Use a hook size that creates a tight, firm fabric so stuffing does not show through |
| Finished Size | Approx. 4 in (10 cm) tall |
| Yarn Weight | 2 Fine / Sport |
| Fiber | Not specified — check the yarn label |
| Terminology | US |
Abbreviations & Stitches Used
Short list — mostly basics, with one post stitch in the mix.
- ch = chain
- st(s) = stitch(es)
- sl st = slip stitch
- sc = single crochet
- dc = double crochet
- sc2tog = single crochet 2 stitches together (decrease)
- fpdc = front post double crochet (yo, insert hook from front to back to front around post of indicated stitch, yo, pull up loop, yo, pull through 2 loops, yo, pull through 2 loops)
Special Stitches
- fpdc (front post double crochet): yo, insert hook from front to back to front around post of indicated stitch, yo, pull up loop, yo, pull through 2 loops, yo, pull through 2 loops
Important Notes
This is a beginner friendly project — a good one for any sci-fi fan who's just getting into amigurumi. Gauge isn't something you need to measure here, but do work tightly enough that the stuffing won't peek through the stitches. If you can see daylight through your fabric, go down a hook size.
One thing to keep in mind throughout: always start your first stitch in the same stitch as your previous slip stitch. It's easy to skip past it by habit, so worth watching for.
The Baby Alien Crochet Pattern Steps
Here's how I work through each piece of this little guy, from the head down to the finishing details.
Head & Body
This section builds the entire head and body as one continuous tube, starting with a tight magic ring at the top and narrowing back down into the body stem. The ears are worked right into round 4, so you don't need to attach them separately later.
Round 1: In green yarn, 7 sc into a magic ring or ch 4 and join into a ring, sl st in first sc to join. [7 sc] Ch 1 (does not count as a st here or throughout)
Round 2: 2 sc in each st around, sl st in first sc to join. [14 sc] Ch 1
Round 3: 1 sc in each st around, sl st in first sc to join. [14 sc] Ch 1
Round 4: 1 sc in first 5 sts, ch 4, sl st in 2nd ch from hook, 1 dc in next ch, sl st in last ch (ear made), 1 sc in next 8 sts on main body, ch 4, sl st in 2nd ch from hook, 1 dc in next ch, sl st in last ch (ear made), 1 sc in next st on main body, sl st in first sc to join. [14 sc (not incl. ears)] Ch 1 — the ears are worked off the main chain and don't count toward your stitch total, so keep tracking only the 14 body stitches.
Round 5: 1 sc in first 5 sts, skip ear, 1 sc in next 8 sts, skip ear, 1 sc in last st, sl st in first sc to join. [14 sc] Ch 1 — skipping the ears here brings you back to working cleanly around the body only.
Round 6: 1 sc in each st around, sl st in first sc to join. [14 sc] Ch 1
Round 7: sc2tog until end, sl st in first sc to join. [7 sc] Ch 1 — this is a good point to add any stuffing to the head before the opening gets too small.
Rounds 8–13: 1 sc in each st around, sl st in first sc to join. [7 sc] Ch 1 — these six rounds form the body tube. Keep your tension consistent through all of them.
The Coat
The coat is worked as a separate tube in brown yarn that slips over the body. It starts with a foundation chain joined into a ring, then works straight before shaping and finishing with a decorative stitch round at the hem.
Round 1: In brown yarn, ch 14, sl st in first ch to form a large loop. [14 ch] Ch 1
Rounds 2–6: 1 sc in each st around, sl st in first sc to join. [14 sc] Ch 1 — work these five rounds straight with no shaping.
Round 7: 1 sc in next 2 sts, sc2tog repeat from * to * until last 2 sts, 1 sc in last 2 sts, sl st in first sc to join. [11 sc] Ch 1
Round 8: 1 fpdc around each previous sc to end, sl st in first dc to join. [11 dc] — front post double crochet worked around the post of each stitch creates a ribbed hem effect. Insert your hook from front to back to front around the post of the stitch below, not through the top loops.
Round 9: Beginners (alternative): 1 dc in each st around, sl st in first dc to join. [11 dc] — if front post stitches are new to you, this straightforward dc round gives a clean finish without the post work.
Arms
Make 2. The arms are tiny and quick — just a few foundation stitches with a color change for the hands. There's a beginner-friendly alternative here too if you'd rather keep things simple.
Step 1: In brown yarn, ch 2 sc foundation sts, join green yarn and crochet 1 more sc foundation st, fasten off, knot ends together, and sew onto body. — the color change on the last foundation stitch creates the green hand at the end of the brown arm.
Step 2: Beginners (alternative): In brown yarn, ch 3, 1 sc in 2nd ch from hook and in next ch, fasten off, sew on a small hand with green yarn using knots.
Finishing Details
Just one small detail left to add before the alien is complete.
Step 1: Use black yarn to make eyes using knots. — placement is up to you. I put mine just below the ears, spaced a few stitches apart.
Fasten off, weave in ends.
Finishing & Assembly
Once all the pieces are done, it's time to put the alien together. I slide the coat tube over the body so the hem sits near the bottom of the body section, then sew the arms onto either side of the body. I position them somewhere around rounds 8 and 9, roughly where the body narrows, but you can shift them up or down depending on how you want the finished look. Use the yarn tails from the arms to sew them in place, and weave everything in securely once you're happy with the positioning.
Care Instructions
Because this little alien is stuffed, the main thing to watch is keeping the stuffing from clumping. Hand wash in cool water and squeeze gently rather than wringing, then reshape the body while it's still damp so the stuffing sits evenly inside. Lay it flat to dry. The tiny size means it dries pretty fast, but don't rush it with a dryer or the stuffing can bunch up and the shape goes a bit lumpy.
Baby & Child Safety Notes
The eyes on this pattern are made with knotted black yarn rather than plastic safety eyes, which is actually the safer choice if this alien is going to a young child. That said, always check the knots before handing it over. Give the eye knots a firm tug to make sure they're secure, and check the seams where the arms and coat attach to the body. Stuffed toys take a beating, so a quick once-over every now and then is worth doing.
Frequently Asked Questions
How are the ears made? Are they crocheted separately and sewn on?
The ears are worked directly into Round 4 of the head, so there's nothing to sew on. You chain 4, slip stitch and dc back along the chain to form the ear shape, then continue crocheting around the body as normal. Round 5 skips past each ear so you're back on track with the main stitch count.
What's the front post double crochet in the coat for, and do I have to use it?
Round 8 of the coat uses front post double crochet to create a ribbed or textured edge at the top. If you're not comfortable with post stitches yet, the pattern gives you a straightforward alternative: just work a regular dc in each stitch around instead. The finished look is slightly different but the coat still fits and sits well on the body.
When do I stuff the head and body?
Stuff before you close the body section. The head and body are worked in one continuous piece, and the stitch count drops down to 7 from Round 7 onward. I'd start adding stuffing after Round 7 while the opening is still workable, then add a little more as you go through Rounds 8 to 13 before fastening off and closing up.
How are the arms made? The sc foundation stitch is a bit unfamiliar to me.
The arms use a foundation single crochet method, which creates the base chain and the stitch in one step. If that's new to you, the pattern includes a beginner alternative: chain 3, then sc in the 2nd and 3rd chains from the hook. You get the same two-stitch arm either way. The green hand detail is added with a small knot of green yarn at the end.
The coat is started with a chain loop rather than a magic ring. Why does it work that way?
The coat is essentially a small tube that slides over the body, so it starts with a chain of 14 joined into a loop rather than working from a central point. From there you just work in rounds like any other section. It's a neat construction because the coat stays separate from the body and gives that layered look without any complicated shaping.
Happy Crocheting
I had so much fun putting this little guy together, and I love how much personality fits into just 4 inches of crochet. If you make one, I'd genuinely love to see it. Tag me on Instagram or drop a photo in the comments below. And if you want to save this for later, pinning it to your amigurumi board on Pinterest is a great way to keep it handy for the next time you need a quick, satisfying make.


Leave a Reply