
The Flower Pixie Doll Crochet Pattern is a beginner-friendly amigurumi project that comes together into the most charming little figure, and honestly, once you start it's pretty hard to put down. It's the kind of project that feels special without being complicated, which is really the best kind.

Jump to:
About the Design
What I love about this one is how much personality it has for a beginner pattern. There are a few small decorative details built into the design that really do elevate the whole thing, and putting those finishing touches on felt so satisfying. It's the kind of doll you actually want to display, not just tuck in a toy bin.
I'd make this for a little kid who's into whimsical, storybook-type toys, but honestly it works just as well as a shelf piece for someone who collects handmade things. It's also a genuinely great gift for a birthday or holiday when you want to give something that feels thoughtful and one-of-a-kind.
Why You'll Love This Pattern
This whimsical doll is a beginner project that actually looks like you tried really hard.
- Beginner Friendly: No advanced techniques here, so it's a no-trouble project even if you're fairly new to amigurumi.
- Great Gift Potential: It finishes up into something that genuinely looks handcrafted and special, which makes it a really solid gift option.
- Good Size: At around 13 inches tall, it's substantial enough to feel like a real keepsake rather than a tiny trinket.
- Technique Practice: If you want to get more comfortable with doll construction and small decorative appliques, this pattern is actually a fun one to learn on.
What You'll Need
Three colors cover the whole doll, and the optional trims are the only thing that might require a quick shop run.
- DK Weight Yarn (Weight 3 Light), White, Green, Black, and Pink: DK weight is the right call for a project this small and detailed. It's light enough to keep the fabric from going stiff and bulky around the tight amigurumi shaping, but it has enough body that the doll holds its form once stuffed. Check your yarn label for fiber content since the pattern doesn't specify. A smooth DK acrylic or cotton blend both work well here. Yardage isn't listed in the pattern, but for a small stuffed doll this size you're probably looking at roughly 50–100 yards of white as the main color, with much smaller amounts of green, and just a short length each of black and pink.
- 3.50 mm (E/4) Crochet Hook: This size pairs well with DK weight to give you a firm, tight fabric. That matters for amigurumi because you don't want gaps the stuffing can show through.
- Toy Stuffing or Yarn Scraps: Either works. Stuff as you go on the head and body since the dress is worked continuously downward and the opening closes up before you expect it. The base attaches using the back loops from Round 49, so you'll want the body fully stuffed and shaped before you get there.
- Standard or Felting Needle: You'll need this for attaching the knotted yarn eyes and the blushies. A felting needle is useful if you're working the pink blush detail into the surface of the face.
- Lace Trim (optional, approx. 21 inches / 53 cm): This is purely decorative. It goes along the hem or collar area and gives the doll a more finished, delicate look.
- Ribbon Roses, approx. 6 (optional): Small premade ribbon roses you can sew on as embellishment. Craft stores usually carry these near the ribbon section.
- Small Button, 1 (optional): Just one, used as a decorative accent.
- Also needed: yarn needle, scissors
Color Sequence & Yarn Changes
White handles the skin areas: the head, arms, and the base. Green takes over for the dress and hat, with the legs worked in alternating green and white bands to suggest striped stockings or boots. Black is just a short length for the knotted eyes, and pink is similarly small — a brief length for the flower and blush details. If you're working the striped legs, it's worth keeping your green and white lengths nearby rather than cutting and rejoining each time, since the bands repeat and carrying the yarn loosely up the inside of the leg is less fuss than weaving in a dozen extra ends.
At a Glance
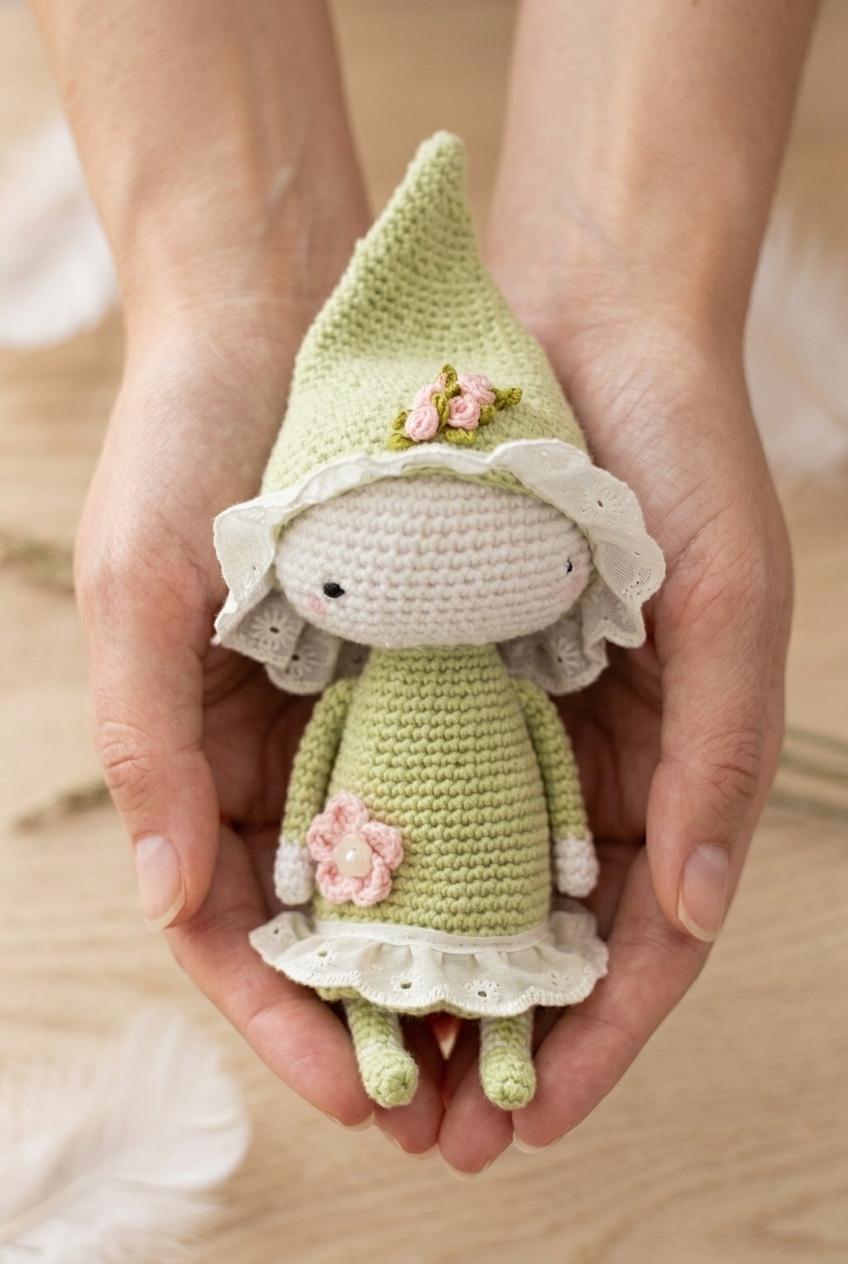
A sweet little witch doll worked in DK weight, from the top of her pointed hat all the way down to her striped boots.
| Skill Level | Beginner |
| Pattern Gauge | Gauge is not critical for this project. Use a hook size that creates a tight, firm fabric so stuffing does not show through |
| Finished Size | Approx. 13 inches (33 cm) tall when standing |
| Yarn Weight | 3 Light / DK |
| Terminology | US |
Stitch Guide & Abbreviations
Most of this is standard stuff you've probably worked before.
- B = Black
- G = Green
- P = Pink
- W = White
- ch = chain
- sl st = slip stitch
- sc = single crochet
- hdc = half double crochet
- dc = double crochet
- sc2tog = single crochet 2 together (decrease)
- FLO = front loop only
- BLO = back loop only
- * * = repeat between asterisks as stated
- ( ) = total stitch count (as given in pattern)
Special Stitches
- sc2tog (single crochet 2 together): Insert hook in next st, yarn over, pull up a loop; insert hook in next st, yarn over, pull up a loop; yarn over, pull through all 3 loops on hook.
The Critical Details
The ch 1 at the start of each round does not count as a stitch anywhere in this pattern. Keep that in mind especially during the decrease rounds — it trips people up.
The doll is worked in continuous rounds throughout. The head flows directly into the dress body with no seaming between them. Round 26 creates the decorative collar using FLO stitches, and then Round 27 picks back up in those skipped back loops to carry on with the dress. It's a tidy little trick and the collar sits cleanly because of it.
Round 49 is worked in front loops only. Those free back loops are used afterward to attach the flat base, which is what lets the doll stand on her own without tipping.
The hat is its own separate piece, worked from the brim upward and decreased gradually to a narrow pointed tip. The legs are worked with color-striped bands in G/W/G to suggest boots or stockings.
A few optional finishing touches are listed in the materials: about 21 inches of lace trim, six ribbon roses, and a small button. None of them are required, but the lace trim in particular adds a lot to the finished look with very little effort.
Let's Make the Flower Pixie Doll Crochet Pattern
Work through each piece in order and the whole doll comes together more naturally than it might look at first glance.
Head
The head is worked in the round from the top down, expanding out to the widest point and then decreasing back in to form the neck. It's the foundation everything else builds from, so take your time getting the shaping even.
Round 1: In W, ch 4, sl st in first ch to form a loop, ch 1, 8 sc in center of loop, sl st in first sc to join. [8 sc] (Magic ring can be used instead.)
Round 2: Ch 1, 2 sc in same st as previous sl st, 2 sc in each st around, sl st in first sc to join. [16 sc]
Round 3: Ch 1, 1 sc in same st, 2 sc in next st, 1 sc in next st, 2 sc in next st repeat to end, sl st to join. [24 sc]
Round 4: Ch 1, 1 sc in same st, 1 sc in next st, 2 sc in next st, 1 sc in next 2 sts, 2 sc in next st repeat to end, sl st to join. [32 sc]
Round 5: Ch 1, 1 sc in same st, 1 sc in next 2 sts, 2 sc in next st, 1 sc in next 3 sts, 2 sc in next st repeat to end, sl st to join. [40 sc]
Round 6: Ch 1, 1 sc in same st, 1 sc in next 3 sts, 2 sc in next st, 1 sc in next 4 sts, 2 sc in next st repeat to end, sl st to join. [48 sc]
Round 7: Ch 1, 1 sc in same st, 1 sc in next 4 sts, 2 sc in next st, 1 sc in next 5 sts, 2 sc in next st repeat to end, sl st to join. [56 sc]
Rounds 8–17: Ch 1, 1 sc in same st, 1 sc in each st around, sl st to join. [56 sc]
Round 18: Ch 1, 1 sc in same st, 1 sc in next 4 sts, sc2tog, 1 sc in next 5 sts, sc2tog repeat to end, sl st to join. [48 sc]
Round 19: Ch 1, 1 sc in same st, 1 sc in next 3 sts, sc2tog, 1 sc in next 4 sts, sc2tog repeat to end, sl st to join. [40 sc]
Round 20: Ch 1, 1 sc in same st, 1 sc in next 2 sts, sc2tog, 1 sc in next 3 sts, sc2tog repeat to end, sl st to join. [32 sc]
Round 21: Ch 1, 1 sc in same st, 1 sc in next st, sc2tog, 1 sc in next 2 sts, sc2tog repeat to end, sl st to join. [24 sc]
Round 22: Ch 1, 1 sc in same st, sc2tog, 1 sc in next st, sc2tog repeat to end, sl st to join. [16 sc]
Rounds 23–24: Ch 1, 1 sc in same st, 1 sc in each st around, sl st to join. [16 sc] These two even rounds form the neck before the dress begins.
Round 25: Ch 1, 1 sc in same st, 2 sc in next st, 1 sc in next st, 2 sc in next st repeat to end, sl st joining G in first sc to join. [24 sc] Stuff head now if desired.
Stuff head now if desired.
Dress
The dress continues directly from the head — you're picking up where Round 25 left off, now working in G. The collar detail in Round 26 is worked in FLO, and Round 27 picks up the skipped back loops to carry the body downward, so pay attention to which loops you're working into at each transition.
Round 26: Continuing in G, working in FLO, ch 1, sl st in next 12 sts, [1 sc, 1 hdc] in next st, 2 dc in next st, [1 hdc, 1 sc] in next st, sl st in next 2 sts repeat once more, sl st to end, sl st in first sl st to join. The collar shaping here uses a mix of slip stitches and taller stitches to create the neckline detail. Working in FLO leaves the back loops free for Round 27.
Round 27: Working in skipped BLO of Round 26, ch 1, 1 sc in same st, 1 sc in each st around, sl st to join. [24 sc] Make sure you're going back to pick up those unworked back loops from Round 26 — this is what closes the collar and continues the body cleanly.
Round 28: Ch 1, 1 sc in same st, 1 sc in each st around, sl st to join. [24 sc]
Round 29: Ch 1, 1 sc in same st, 1 sc in next st, 2 sc in next st, 1 sc in next 2 sts, 2 sc in next st repeat to end, sl st to join. [32 sc]
Rounds 30–34: Ch 1, 1 sc in same st, 1 sc in each st around, sl st to join. [32 sc]
Round 35: Ch 1, 1 sc in same st, 1 sc in next 2 sts, 2 sc in next st, 1 sc in next 3 sts, 2 sc in next st repeat to end, sl st to join. [40 sc]
Rounds 36–42: Ch 1, 1 sc in same st, 1 sc in each st around, sl st to join. [40 sc]
Round 43: Ch 1, 1 sc in same st, 1 sc in next 3 sts, 2 sc in next st, 1 sc in next 4 sts, 2 sc in next st repeat to end, sl st to join. [48 sc]
Rounds 44–48: Ch 1, 1 sc in same st, 1 sc in each st around, sl st to join. [48 sc]
Round 49: Working in FLO, ch 1, 1 sc in same st, 1 sc in each st around, sl st to join. [48 sc] Like Round 26, working in FLO here leaves the back loops open — the base will be joined to those skipped loops later.
Round 50: Ch 1, 1 sc in same st, 1 sc in each st around, sl st to join. [48 sc]
Round 51: Ch 1, starting in same st 1 sc in next st, [1 hdc, 1 dc] in next st, [1 dc, 1 hdc] in next st, 1 sc in next st repeat to end, sl st to join. Fasten off and tie in all tails. The alternating stitch heights in this round create the scalloped hem of the dress.
Fasten off and tie in all tails.
Legs (Make 2)
Make two legs. They're worked in the round from the foot up, with a color stripe near the base before switching to white for the stocking portion.
Round 1: In G, ch 4, sl st in first ch to form a loop, ch 1, 6 sc in center, sl st to join. [6 sc]
Rounds 2–4: Ch 1, 1 sc in same st, 1 sc in each st around, sl st to join, joining W on last round. [6 sc] Carry the color change at the end of Round 4 by joining W on the final pull-through of the last sl st.
Round 5: In W, ch 1, 1 sc in same st, 1 sc in each st around, sl st to join, joining G on last round. [6 sc]
Round 6: In G, ch 1, 1 sc in same st, 1 sc in each st around, sl st to join, joining W on last round. [6 sc]
Rounds 7–14: In W, ch 1, 1 sc in same st, 1 sc in each st around, sl st to join. [6 sc] Fasten off. Repeat for second leg.
Fasten off. Repeat for second leg.
Arms (Make 2)
Make two arms. Like the legs, they start at the hand end and work upward, with a short color transition before the main length of the arm.
Round 1: In W, ch 4, sl st in first ch to form a loop, ch 1, 6 sc in center, sl st to join. [6 sc]
Rounds 2–3: Ch 1, 1 sc in same st, 1 sc in each st around, sl st to join, joining G on last round. [6 sc]
Rounds 4–14: In W, ch 1, 1 sc in same st, 1 sc in each st around, sl st to join, joining G on last round. [6 sc] Fasten off. Repeat for second arm. Sew arms to body, hide tails inside, and stuff body now.
Sew arms to body, hide tails inside, and stuff body now.
Fasten off. Repeat for second arm.
Base
The base is a flat circle that closes off the bottom of the dress and anchors the legs. It mirrors the increase rounds from the head, so the construction will feel familiar.
Rounds 1–6: In W, repeat Rounds 1–6 of Head. [48 sc] Fasten off. Sew feet to base. Sew or crochet base to the skipped BLO of Round 49 of body, matching stitch count (48 sts on base, 48 sts on body).
Fasten off. Sew feet to base. Sew or crochet base to the skipped BLO of Round 49 of body, matching stitch count (48 sts on base, 48 sts on body).
Fasten off.
Hat
The hat is worked from the brim upward, decreasing in stages to form a tall pointed crown. It starts with a large foundation round and gradually narrows over several decrease rounds separated by even sections.
Round 1: In G, crochet 56 sc foundation sts, sl st in first sc to form a large loop. [56 sc] (Alternatively: ch 57, 1 sc in second ch from hook and each ch along. [56 sc] Sl st in first sc to join.) The foundation sc method gives a neater, stretchier brim edge than a standard chain start, but either works fine.
Rounds 2–4: Ch 1, 1 sc in same st, 1 sc in each st around, sl st to join. [56 sc]
Round 5: Ch 1, 1 sc in same st, 1 sc in next 4 sts, sc2tog, 1 sc in next 5 sts, sc2tog repeat to end, sl st to join. [48 sc]
Rounds 6–9: Ch 1, 1 sc in same st, 1 sc in each st around, sl st to join. [48 sc]
Round 10: Ch 1, 1 sc in same st, 1 sc in next 3 sts, sc2tog, 1 sc in next 4 sts, sc2tog repeat to end, sl st to join. [40 sc]
Rounds 11–14: Ch 1, 1 sc in same st, 1 sc in each st around, sl st to join. [40 sc]
Round 15: Ch 1, 1 sc in same st, 1 sc in next 2 sts, sc2tog, 1 sc in next 3 sts, sc2tog repeat to end, sl st to join. [32 sc]
Rounds 16–19: Ch 1, 1 sc in same st, 1 sc in each st around, sl st to join. [32 sc]
Round 20: Ch 1, 1 sc in same st, 1 sc in next st, sc2tog, 1 sc in next 2 sts, sc2tog repeat to end, sl st to join. [24 sc]
Rounds 21–24: Ch 1, 1 sc in same st, 1 sc in each st around, sl st to join. [24 sc]
Round 25: Ch 1, 1 sc in same st, sc2tog, 1 sc in next st, sc2tog repeat to end, sl st to join. [16 sc]
Rounds 26–29: Ch 1, 1 sc in same st, 1 sc in each st around, sl st to join. [16 sc]
Round 30: Ch 1, sc2tog, sc2tog repeat to end, sl st to join. [8 sc]
Rounds 31–34: Ch 1, 1 sc in same st, 1 sc in each st around, sl st to join. [8 sc] Fasten off and sew remaining hole closed. Hide tails inside.
Fasten off and sew remaining hole closed. Hide tails inside.
Flower
A small five-petal flower worked in P that gets sewn to the dress. It's quick and the petal shaping happens all in Round 2.
Round 1: In P, ch 4, sl st in first ch to form a loop, ch 1, 5 sc in center, sl st in first sc to join. [5 sc]
Round 2: Starting in same st as previous sl st, ch 3, [1 hdc, 1 dc, 1 hdc] in next st, ch 3, sl st in same st, sl st in next st repeat until you have 5 petals. Fasten off. Sew button on top if desired. Sew flower to dress. Each petal is formed by the ch-3 arch, the three stitches into the next sc, and the closing ch-3 and sl st — work through the repeat until all 5 petals are complete.
Fasten off.
Finishing Details
These final steps add the face and any decorative touches. Take your time with the eyes especially — getting them placed symmetrically makes a real difference to the finished doll.
Step 1: Blushies: Take a small length of P yarn and fluff it up in your hand. Using a standard or felting needle, stab the fluffed pink yarn into each cheek until attached.
Step 2: Eyes: Take a long length of B. Tie 2–3 knots on top of each other in the center. Sew each end onto the face, catching the knots for one eye, then bring both ends out for the second eye and tie 2–3 more knots. Hide tails inside. Pin the eye placement before committing — it's much easier to adjust now than after the yarn is sewn through.
Step 3: Hat decorations: Sew ribbon flowers and/or lace trim to hat if desired. Sew lace trim to dress if desired.
Step 4: Hiding yarn ends: Sew tail end to another spot on the body, sew back into the same stitch, come out again elsewhere, and repeat once more. Push the project down, hold the yarn end taut, cut, and release; the end disappears inside into the stuffing.
Finishing & Assembly
With all the pieces made, here's how I put the doll together. The arms get sewn to the body first — I hide the tails inside the dress before stuffing the body fully, so do that before closing anything off. The legs attach to the base: sew each foot to the flat base circle, then sew or crochet the base to the skipped back loops of Round 49 on the dress, matching the 48-stitch count all the way around. That join closes the bottom of the doll completely. The flower goes onto the dress wherever it looks right to you, with an optional button sewn on top. The hat sits on the head and can have ribbon flowers or lace trim added before or after placing it. I usually position everything loosely first, then sew once I'm happy with the arrangement.
Baby & Child Safety Notes
This doll is a decorative toy, and a few things are worth thinking about if it's going to end up in a child's hands. The knotted yarn eyes are a safer choice than plastic safety eyes for very young children, but the optional button on top of the flower and the ribbon roses are small parts that could come loose over time. If you're making this for a toddler or young child, I'd skip the button entirely and either leave off the ribbon roses or secure them with several extra stitches so they can't be pulled free. Check the seams on the arms and legs before gifting, and give them a tug now and then as the doll gets played with. The stuffing stays well inside the body once the base is sewn on, but it's worth checking that join periodically too.
Frequently Asked Questions
When do I stuff the doll, and does it matter?
Timing matters more than you'd think with this one. The pattern prompts you to stuff the head at Round 25, before you continue into the dress. Once you sew the arms on and hide the tails inside, that's when you stuff the body. The base gets sewn on last, closing everything up. Stuffing in stages like this makes it much easier to get an even shape without fighting the piece.
What's the purpose of working Round 49 in front loops only?
Round 49 is worked in front loops only so the back loops stay free. Those skipped back loops are what you sew (or crochet) the base onto, which gives you a clean, flat join at the bottom. That flat base is what lets the doll stand on her own. It's a small detail in the instructions but it makes a real difference to the finished look.
How do the knotted yarn eyes work exactly?
Take a long length of black yarn and tie two or three knots on top of each other right in the center of the strand. Thread both ends onto your yarn needle and sew into the face, positioning the knot cluster as one eye. Bring both ends back out through the head, tie another cluster of knots for the second eye, then hide the tails inside. The knots sit on the surface as simple, secure eyes with no plastic parts needed.
What does Round 26 actually do, and why does it look different from the other rounds?
Round 26 creates a little decorative collar detail at the neckline using front loops only, with some hdc and dc stitches mixed in to give it a ruffled shape. Then Round 27 picks up the skipped back loops of Round 26 and carries on with the dress body. It looks a bit odd while you're working it, but the result is a neat raised collar between the head and the dress without any extra sewing.
Do I have to use the optional lace trim and ribbon roses?
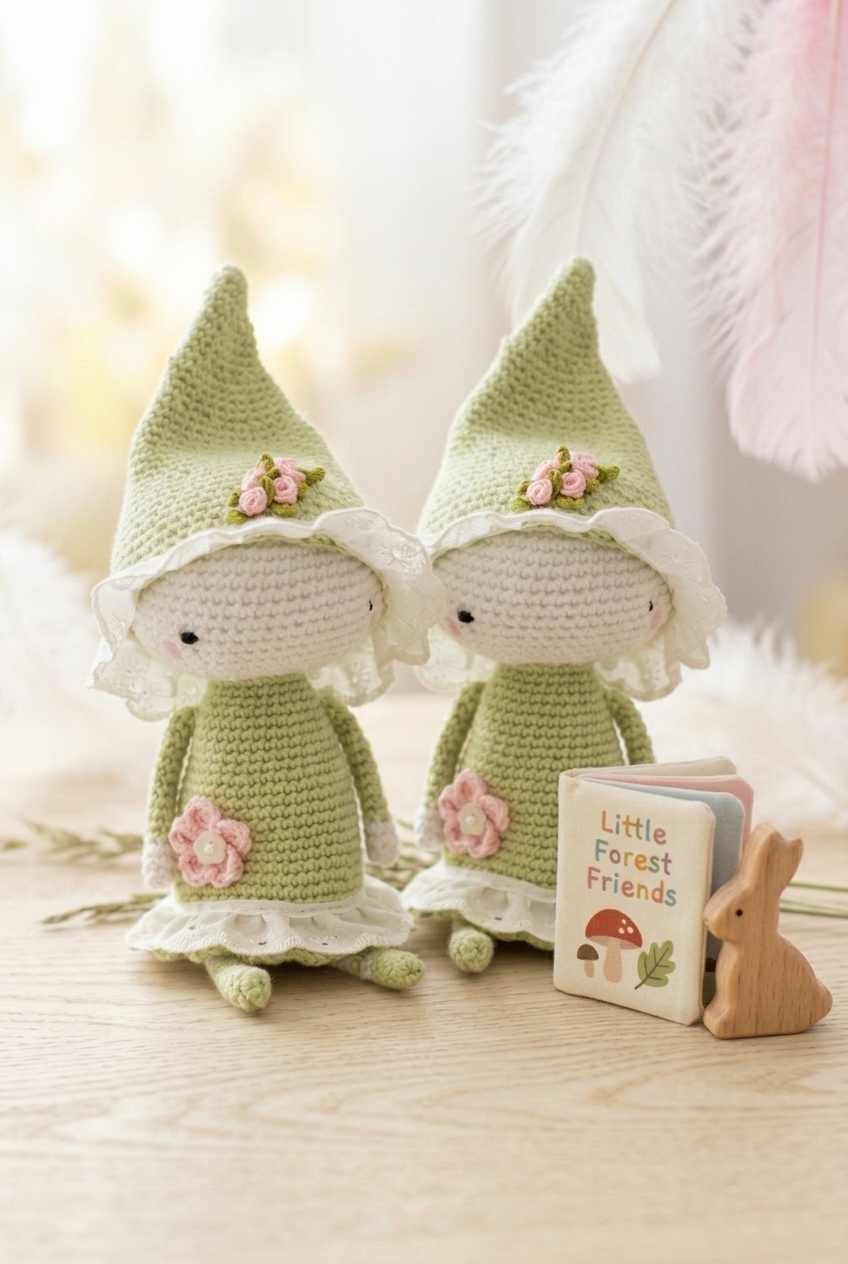
Not at all. The doll is complete without them. The lace trim along the hem and hat brim adds a delicate, finished look, and the ribbon roses give the hat a bit of character, but they're genuinely optional. If you're making this for a child who'll be playing with it rather than displaying it, skipping the embellishments is probably the more practical call anyway.
How do I attach the blushies so they actually stay on?
Take a small length of pink yarn, fluff it between your fingers until it spreads out a bit, then use a standard sewing needle or a felting needle to stab it into the cheek area repeatedly. The felting needle works better because it tangles the fibers into the crochet fabric as you poke. Keep working at it until it feels secure and isn't lifting at the edges.
Final Thoughts
This little pixie doll is one of those projects that looks impressive once it's done but is really just a matter of working through the rounds one at a time. The construction is clever, the collar and base details are satisfying to pull off, and there's enough room to make her your own with the trim and embellishment options. If you make one, I'd love to see her: tag me on Instagram or drop a photo in the comments below. And if you're saving patterns for later, this one pins well on Pinterest for when the mood strikes.



Leave a Reply