
This Yeti Amigurumi Crochet Pattern is such a fun little project, and it comes together way faster than you'd expect. Perfect for gifting, keeping on your desk, or just making because you wanted to crochet something with actual personality.

Jump to:
Behind the Pattern
I designed this one because I wanted something that felt a little whimsical but wasn't fussy to put together. Amigurumi can sometimes feel like a puzzle of a hundred tiny pieces, but this yeti keeps things manageable without losing any of the charm. The construction is satisfying in that way where each part clicks into place and you can actually see it becoming something.
This is the kind of thing I'd make for a kid who loves monsters, a friend who collects quirky plushies, or honestly just myself. It has that "I made this" energy where people pick it up and immediately want one. No special occasion needed.
Why You'll Love This Pattern
This beginner-friendly yeti is a quick, rewarding make with serious gift-worthy results.
- Beginner Friendly: If you know how to crochet in the round and do basic increases and decreases, you have everything you need for this pattern.
- Quick Project: This is a great one to pick up when you want a finished object without a multi-week commitment.
- Great for Gifting: Compact, cute, and totally handmade-feeling, this yeti works as a gift for pretty much any age.
- Technique Builder: You'll practice assembly and surface embroidery details, which are skills that carry over into every amigurumi you make after this.
- Two-Color Construction: Working with a main color and an accent color is a gentle intro to managing multiple yarns without anything complicated like colorwork rows.
What You'll Need
This is a great excuse to use up those DK scraps sitting in your basket.
- DK Weight Cotton or Bamboo Yarn (White, Turquoise, and Black): DK weight cotton or bamboo is the right call here because the stitches need to hold their shape cleanly, especially on the face oval and the little horns. A softer, stretchier yarn would let the stuffing show through and blur all those small details. You only need small amounts of each color, so this is genuinely a scraps project.
- 3.50–4.00 mm Crochet Hook: This size range keeps your tension tight enough that stuffing won't poke through, which matters a lot on a small amigurumi. A 3.75 mm is a solid middle-ground if you tend to crochet loosely.
- Toy Stuffing or Yarn Scraps: You'll be stuffing the body, horns, and arms as you go, before the openings close up. Yarn scraps work fine here since the pieces are small and the shape doesn't need to be perfectly round.
- Also needed: yarn needle, scissors, stitch marker
Color Sequence & Yarn Changes
There are a few color changes worth knowing about before you start. The arms switch from turquoise to white at Round 3, so have both colors ready when you get there. The face is worked entirely in turquoise as a flat oval and sewn on afterward, so you won't be doing any mid-round changes on that piece. Black is only used for embroidery at the very end.
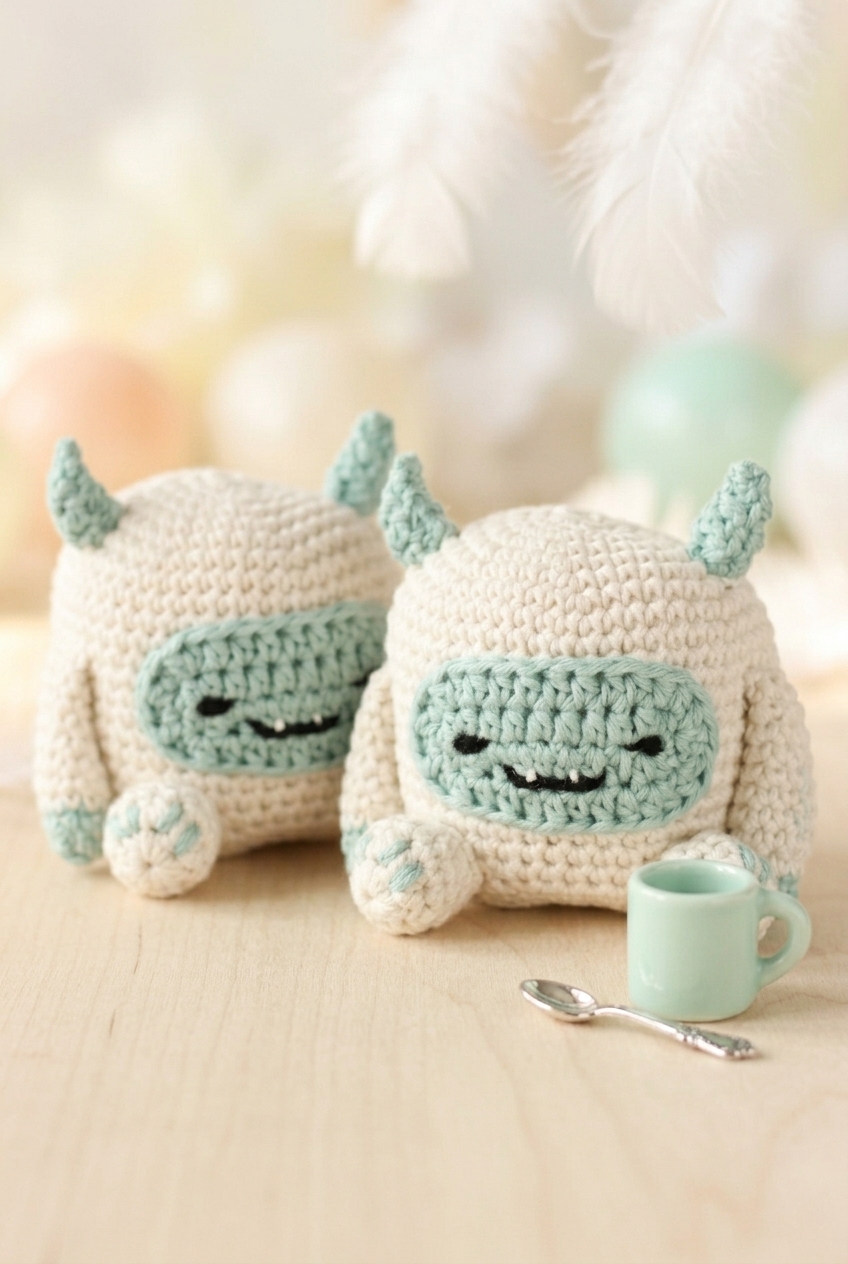
Quick Details
A little monster amigurumi with separate face panel, cone horns, and color-change arms.
| Skill Level | Beginner |
| Pattern Gauge | Gauge is not critical for this project. Use a hook size that creates a tight, firm fabric so stuffing does not show through |
| Finished Size | Approx. 6 in (15 cm) tall |
| Yarn Weight | 3 Light / DK |
| Fiber | Cotton or bamboo |
| Terminology | US |
Stitch Guide & Abbreviations
All standard stitches, nothing unusual here.
- ch = chain
- sl st = slip stitch
- st(s) = stitch(es)
- sc = single crochet
- hdc = half double crochet
- dc = double crochet
- sc2tog = single crochet 2 together (decrease)
- BLO = back loop only
- * * = repeat between asterisks as stated
Before You Begin
Rounds are worked continuously throughout. Don't join at the end of each round and don't close with a slip stitch unless the instructions specifically say so. A stitch marker in the first stitch of each round will save you a lot of counting headaches.
The face is a separate flat oval piece crocheted in turquoise, then sewn onto the white body. When you attach it, sew along the edge rather than whip stitching around it. Whip stitching tends to pull the oval in and distort the shape.
The arms have a color change at Round 3, going from turquoise (the hands and claws) to white for the rest of the arm. Make sure your yarn carry is tidy on the inside so it doesn't peek through the fabric.
The horns are worked flat across three rows, then folded and seamed into a cone before stuffing and attaching to the head. It's a small piece but the fold-and-seam method gives them a lot more dimension than a standard worked-in-the-round cone would.
In Round 3 of the feet, the BLO instruction creates a visible ridge across the top of the foot. That ridge is intentional. It's what defines the foot from the leg, so don't skip it.
If you prefer a magic ring over the ch-4 loop method, you can swap it in at any point. Either works fine with DK weight cotton or bamboo. Both fibers give you a firm, tight fabric that holds the stuffing in well without needing to go down a hook size.
The Yeti Amigurumi Crochet Pattern Steps
Here's how I make this yeti from the ground up, section by section.
Body
The body is worked in white, in continuous rounds without joining. It forms the main piece everything else attaches to, so I take a little extra care keeping my tension consistent through those long even rounds in the middle.
Round 1: In white, ch 4, sl st in first ch to form a loop, 7 sc in center of loop. [7 sc] Do not join rounds.
Round 2: 2 sc in each st around. [14 sc]
Round 3: 1 sc in next st, 2 sc in next st repeat to end. [21 sc]
Round 4: 1 sc in next 2 sts, 2 sc in next st repeat to end. [28 sc]
Round 5: 1 sc in next 3 sts, 2 sc in next st repeat to end. [35 sc]
Round 6: 1 sc in next 4 sts, 2 sc in next st repeat to end. [42 sc]
Round 7: 1 sc in next 5 sts, 2 sc in next st repeat to end. [49 sc]
Rounds 8–22: 1 sc in each st around. [49 sc]
Round 23: 1 sc in next 5 sts, sc2tog repeat to end. [42 sc]
Round 24: 1 sc in next 4 sts, sc2tog repeat to end. [35 sc]
Round 25: 1 sc in next 3 sts, sc2tog repeat to end. [28 sc]
Round 26: 1 sc in next 2 sts, sc2tog repeat to end. [21 sc]
Round 27: 1 sc in next st, sc2tog repeat to end. [14 sc] Stuff now.
Stuff now. This is the point to add your fiberfill before the opening gets too small to work with comfortably.
Round 28: sc2tog until end. [7 sc] Drawstring to close hole. Fasten off and weave in all tails.
Drawstring to close hole. Fasten off and weave in all tails.
Face
The face is worked in turquoise and shaped from a foundation chain to create an oval. It's joined at the end of each round, so this section works differently from the body.
Round 1: In turquoise, ch 9, 2 hdc in 2nd ch from hook, 1 hdc in next 6 ch, 5 hdc in last ch. Now crochet back along chains in the opposite direction: 1 hdc in next 6 ch (skipping first one just used), 3 hdc in last ch, sl st in 1st hdc to join. [22 hdc] Working back along the opposite side of the foundation chain is what gives this piece its oval shape. The 5 hdc at one end and 3 hdc at the other create the rounded tips.
Round 2: Ch 1 (does not count as st), 2 hdc in next 2 sts, 1 hdc in next 7 sts, 2 hdc in next 4 sts, 1 hdc in next 7 sts, 2 hdc in last 2 sts, sl st in 1st hdc to join. [30 hdc] Fasten off leaving a long tail for sewing.
Fasten off leaving a long tail for sewing.
Finishing the Face
This is where the yeti's expression comes together. I do the embroidery before sewing the face onto the body so I have a flat surface to work on.
Step 1: Finishing the face: In black, sew on two eyes and a mouth (small knots work well for eyes). In white, sew two tiny teeth just above the mouth. Sew face onto body by stitching along the face edge rather than whip stitching over it. Stitching along the edge rather than over it keeps the face sitting flat against the body without the edge pulling up.
Arms
Make 2. The arms start in turquoise for the hand area, then switch to white for the main length. They're worked in continuous rounds without joining.
Round 1: In turquoise, 5 sc in a ch-4 loop. [5 sc] Do not join rounds.
Round 2: 1 sc in each st around. [5 sc]
Round 3: Join white yarn, 2 sc in each st around. [10 sc] The color change here also doubles the stitch count, so the arm widens at the wrist as you transition to the body of the arm.
Rounds 4–11: 1 sc in each st around. [10 sc] Fasten off and sew onto body. Stuffing is optional.
Fasten off and sew onto body. Stuffing is optional.
Feet
Make 2. The feet are worked in white in continuous rounds. The mix of hdc and sc in the early rounds shapes the toe end, and the BLO round creates a defined ridge at the base of the foot.
Round 1: In white, 8 hdc in a ch-4 loop. [8 hdc] Do not join rounds.
Round 2: 2 sc in next st, 2 hdc in next 2 sts, 2 sc in next st, 1 sc in last 4 sts. [12 sts]
Round 3: In BLO, 1 sc in each st around. [12 sc] Working in the back loop only here leaves the front loops free, which creates a visible ridge that marks the bottom edge of the foot.
Round 4: sc2tog 4 times, 1 sc in last 4 sts. [8 sts]
Round 5: 1 sc in each st around. [8 sc] Fasten off and sew onto body, stuffing slightly at base of foot. In turquoise, sew on toes using 2 loops per toe.
Fasten off and sew onto body, stuffing slightly at base of foot. In turquoise, sew on toes using 2 loops per toe.
Horns
Make 2. The horns are worked in turquoise in short rows using a mix of stitch heights to create a tapered shape, then folded and sewn into a three-dimensional point.
Row 1: In turquoise, ch 6, sl st in 2nd ch from hook, 1 sc in next ch, 1 hdc in next ch, 1 dc in last 2 ch. [5 sts] The staggered stitch heights — from slip stitch up to double crochet — are what create the taper along the row.
Row 2: Turn, 1 dc in first 2 sts, 1 hdc in next st, 1 sc in next st, sl st in last st. [5 sts]
Row 3: Turn, sl st in first st, 1 sc in next st, 1 hdc in next st, 1 dc in last 2 sts. [5 sts]
Step 4: Fold in half and sew along edge to form a horn shape. Stuff slightly and sew onto head.
Finishing
Once all the pieces are complete, it's time to put the yeti together. I sew the face onto the body first, stitching along the face edge rather than whip stitching over it so it lies flat. Then I position and sew the arms onto either side of the body, adding stuffing inside them at this point if I want a little more shape. The feet go on at the base, stuffed slightly, and I sew on the toes in turquoise using 2 loops per toe. Last, I fold each horn in half, sew along the edge to close the shape, stuff them slightly, and sew them onto the top of the head. Step back and check the placement of everything before securing the final stitches.
Care Instructions
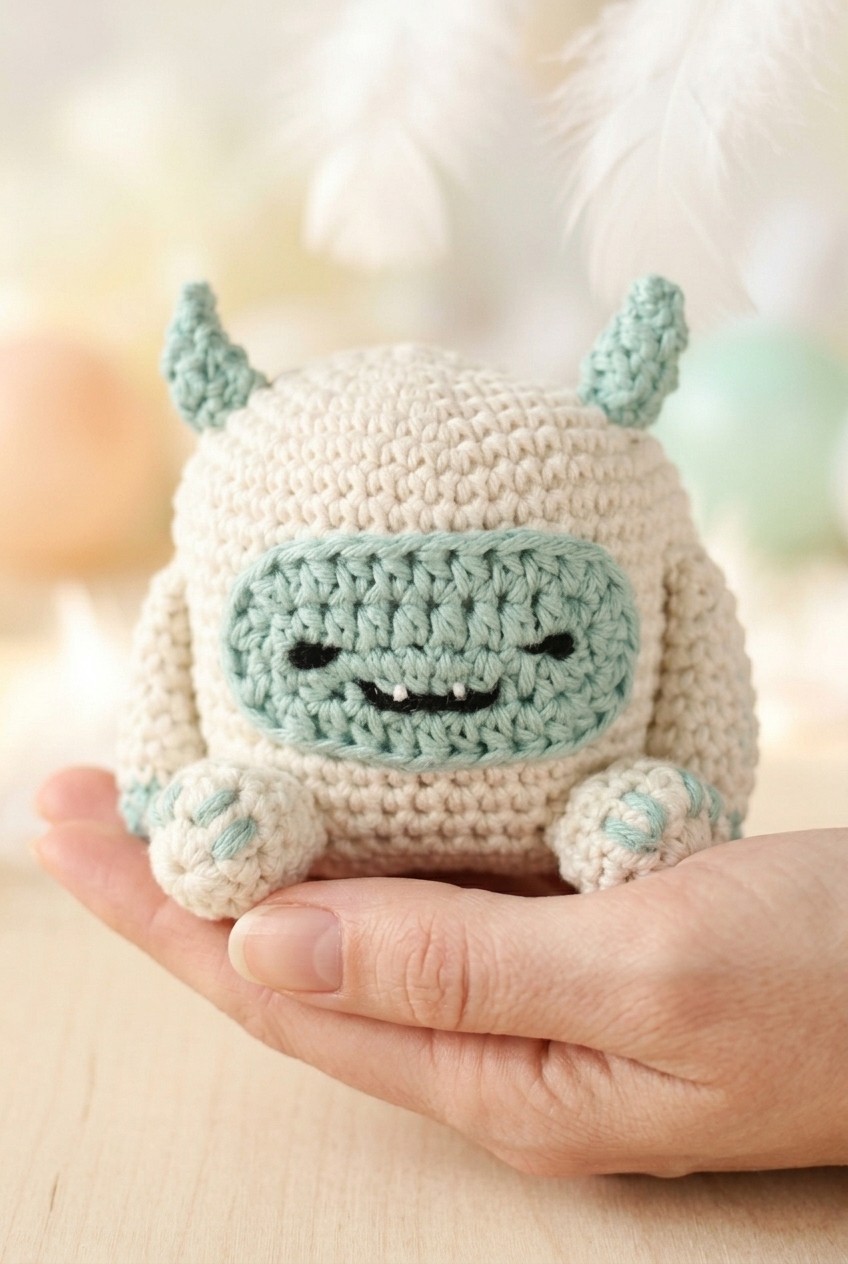
Because this yeti is stuffed with toy stuffing and embroidered rather than using plastic safety eyes, he can actually handle a gentle machine wash on cold, but I'd still recommend laying him flat to dry. Stuffed pieces can go lumpy if the filling shifts while wet, and laying him flat lets everything dry in shape. If he gets a small spot of dirt, spot-cleaning with a damp cloth is usually enough and keeps the stuffing from getting waterlogged in the first place.
Baby & Child Safety Notes
The eyes and mouth on this yeti are embroidered directly onto the face piece using black yarn, so there are no plastic parts to come loose. That said, if you're giving this to a very young child, go over your seams before handing it over. The face is sewn onto the body, the arms and feet are attached separately, and the horns are stuffed and sewn on. Any of those attachment points can work loose with rough play, so a quick tug test on each piece is worth doing. The teeth are also small white yarn stitches, so just make sure those are secured well before it goes to a little one.
Frequently Asked Questions
How are the horns actually constructed? They look three-dimensional.
The horns are worked flat in three rows using a mix of slip stitches, single crochets, half double crochets, and double crochets, which gives each row a natural slope. Once you've got your three rows done, you fold the whole piece in half and sew along the open edge to form a cone shape. A small amount of stuffing at the base before you sew them onto the head is what keeps them standing upright.
When do I stuff the body? I don't want to miss the window.
Stuff after Round 27, right before the final decrease round. The pattern tells you to stuff at that point specifically, and it's the last real opportunity before the opening gets too small to work with. I stuff mine pretty firmly so the body holds its shape and sits upright on its own.
Why does the face get sewn on rather than crocheted directly onto the body?
The face is a separate flat oval piece worked in turquoise, and sewing it on is what gives the yeti that distinct two-toned look. Stitching along the edge of the face piece rather than whip stitching over it keeps the oval shape clean and flat against the body. If you whip stitch over the edge, you can end up with a lumpy or puckered outline.
What's the purpose of the back loop only stitch in the feet?
Working Round 3 of the feet in back loops only creates a visible ridge that defines where the top of the foot starts. It's a small detail, but it gives the foot a more structured shape instead of just being a smooth rounded blob. You'll feel the difference when you're sewing them on.
Do the arms need to be stuffed?
Stuffing the arms is optional. I've made mine both ways and honestly prefer leaving them unstuffed. They stay a bit floppy and poseable that way, and at only 10 rounds of single crochet they're narrow enough that stuffing can make them stiffer than they look good being.
Can I use a magic ring instead of the chain-4 loop method?
A magic ring works fine anywhere this pattern uses the ch-4 loop start. The ch-4 loop is just an alternative that some people find easier to manage, especially with slippery or fine yarn. Either method gets you the same result.
Before You Go
This little yeti has a way of turning out even cuter than expected, and I'd love to see how yours comes together. If you make one, tag me on Instagram or drop a photo in the comments below. I'm especially curious what color combinations people try, because white and turquoise is the classic, but I keep thinking about what this guy would look like in a deep teal or even a soft lavender. Pin this pattern to your amigurumi board so you can find it again, and if you run into any snags along the way, leave a comment and I'll do my best to help you sort it out.



Leave a Reply