
Spring is basically begging for a handmade touch, and this Easter Basket Crochet Pattern is exactly the kind of project I love pulling out this time of year. It's a proper basket, sturdy enough to actually use, and it comes together faster than you'd expect for something that looks this put-together. I've made a few of these now and they've become one of my go-to Easter makes.

Jump to:
About This Project
What I really like about this one is the construction. The basket builds up in a way that feels satisfying at every stage, and working the handles into the structure gives it that finished, intentional look that sets it apart from a basic bowl shape. It's not a beginner pattern, but if you've got some intermediate projects under your belt, you'll be totally fine.
I'd make this for a kid's Easter basket in a heartbeat, but honestly it works just as well as a little decorative piece on a shelf or a table. It's the kind of thing that gets noticed. People always ask if you bought it.
Why You Need This on Your Hook
This basket is a genuinely useful Easter make that looks way more impressive than the effort it takes.
- Skill level fit: Rated intermediate, so it's a good stretch project if you're moving past the basics.
- Quick seasonal make: Totally doable in a weekend, which means you can actually finish it before Easter arrives.
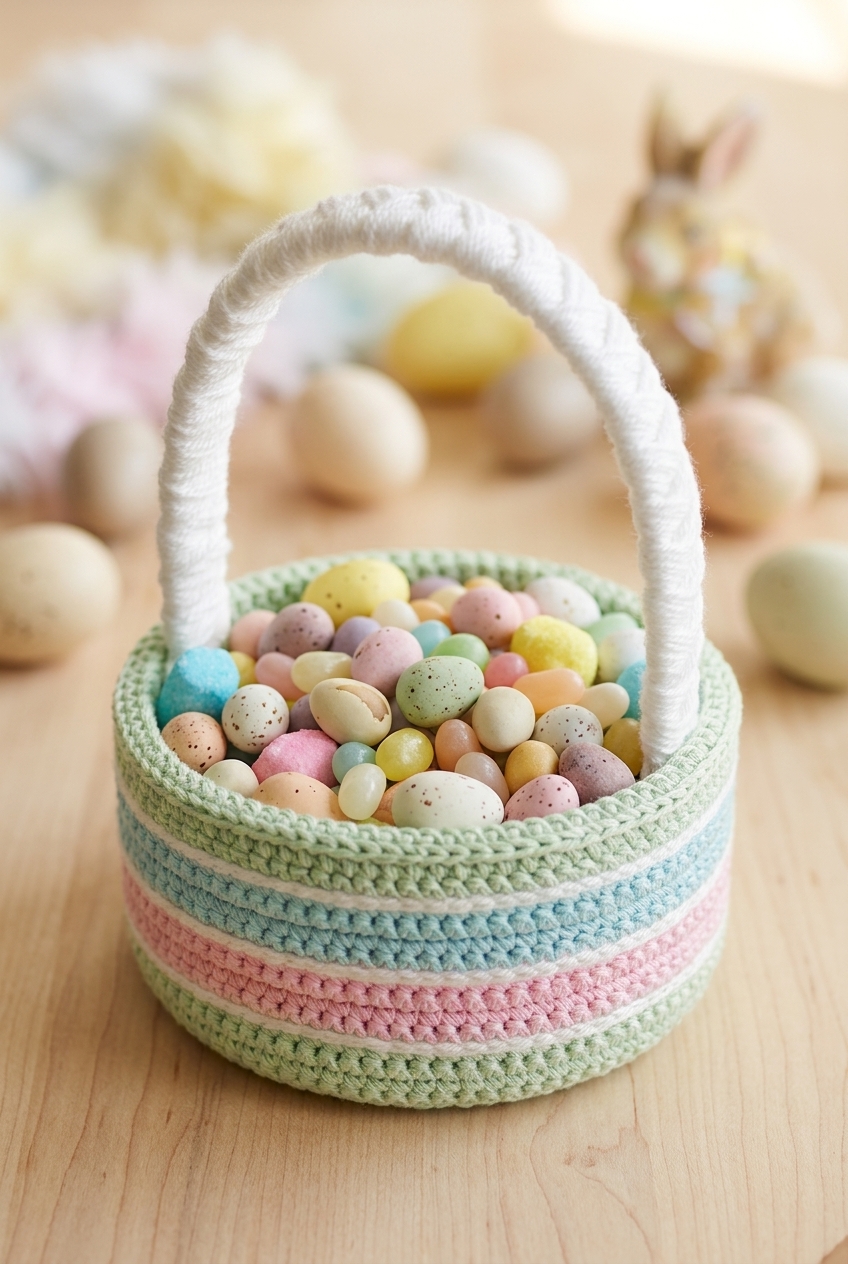
- Gifting potential: Makes a really sweet handmade gift, especially filled with a little candy or a few small treats.
- Technique value: Working the handles teaches you a construction method you'll want to use again on future projects.
- Reusable every year: Sturdy enough to pull back out season after season, not just a one-time craft.
What You'll Need
Two hook sizes are in play here, so grab both before you sit down.
- DK Weight Cotton Blend Yarn (Colors A, B, and C): This basket is worked double-stranded throughout, so a DK weight cotton blend is the move. Cotton holds its shape well under the tension of double-stranding, and the slight stiffness you get from a cotton blend really does help the basket keep its structure once it's finished. You'll need about 225 yards of Color A (jade frost), 100 yards of Color B (dusk sky), and 225 yards of Color C (petal).
- Worsted Weight (Aran) Yarn in White: A small amount of white aran weight yarn is used for the optional surface crochet stripes, plus about 30 yards if you want to wrap the handle. The fiber isn't specified for this one, so check your label and match the weight. Any standard worsted or aran will work here.
- Hook H / 5.0mm: This is the main hook for the base and body. Working double-stranded DK at this size gives you a firm, dense fabric without fighting the yarn the whole time.
- Hook G/7 / 4.25–4.50mm: Drop down to this size for the inner lining. The tighter gauge on the lining helps it sit neatly inside the basket without bunching.
- Heavy duty plastic canvas: This gets hidden inside the double-layered sides to give the basket its structure. It's what keeps the walls upright instead of flopping over, so don't skip it. You'll cut it to size before assembly.
- Superglue: Used to secure the handle. A small amount is all you need, just enough to hold it in place while everything sets.
- Also needed: scissors, yarn needle
Color Sequence & Yarn Changes
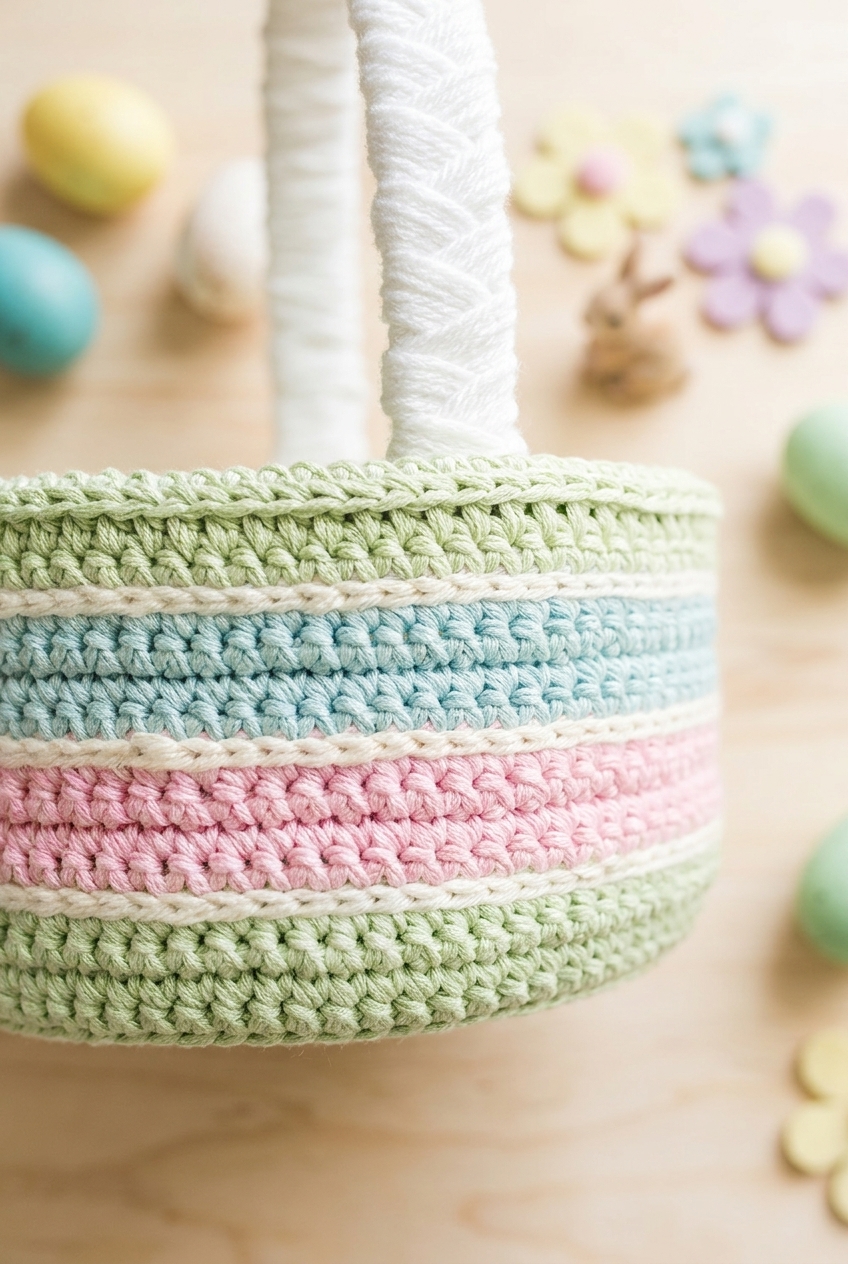
The colors rotate across the outer layer of the basket sides and carry into the inner lining as well, so it helps to know the order before you start. Color A (jade frost) runs the longest stretch: the entire base through Round 16, then picks back up for a couple of rounds on the outer sides and again at the start of the inner lining. Color B (dusk sky) takes the middle band on the outer layer and does most of the work on the lining. Color C (petal) fills in Rounds 25–28 on the outer sides. Wind your double-stranded balls ahead of time so you're not stopping mid-round to untangle.
Project Summary
A structured double-layered basket with plastic canvas hidden inside the walls for that satisfying stiff shape.
| Skill Level | Intermediate |
| Pattern Gauge | First 6 rounds = 2.75″ across |
| Finished Size | 8″ wide x 3.75″ tall (excluding handle) |
| Yarn Weight | 3 Light (DK) + 4 Medium / Worsted (Aran) |
| Fiber | Bernat Softee Baby Cotton (cotton blend); White #4 aran weight yarn fiber not specified — check the yarn label |
| Terminology | US |
Abbreviations & Stitches Used
Short list, mostly familiar stitches with two exceptions worth reading before you start.
- ch = chain
- CSC = crossed single crochet (see Special Stitches)
- hdc = half double crochet
- MC = magic circle
- sl st = slip stitch
- st = stitch
- sts = stitches
- 3rd loop = special hdc loop (see Special Stitches)
Special Stitches
- CSC (crossed single crochet): Insert hook into stitch, yarn under, pull up a loop (2 loops on hook), yarn over, pull through both loops. Note: if you'd rather not work this stitch, a standard sc can be substituted throughout.
- 3rd loop: The loop found just below the front loop on the side of the work facing you. When instructed to work in "3rd loop only", insert hook into this loop from the bottom.
Helpful Tips
The basket is worked in joined rounds throughout. When the pattern says "join," that means joining with a sl st to the top of the first stitch of that round specifically, not to the chain or anywhere else.
The #3 DK weight yarn is used double-stranded for the majority of this pattern. The easiest way to handle that: wind both ends of one skein together into a single ball before you sit down to start. It takes a few minutes and saves a lot of frustration mid-project.
The sides of the basket use a double-layered construction with plastic canvas tucked inside for structure. That's what gives it the rigid walls. It's worth reading through the relevant rounds before you get there so you understand how the layers come together.
Gauge matters here more than it might for a softer project. The finished dimensions depend on it, so check yours against the first 6 rounds before committing to the full basket.
The Easter Basket Crochet Pattern Steps
Work through each section in order and the basket builds itself up from a flat base into a structured, lined piece ready for finishing.
Building the Base
I start with the larger H/5.0mm hook and Color A, held double-stranded, and make a magic circle with a ch 1 to begin. That ch 1 doesn't count as a stitch here — it's just a turning chain. The base grows outward in classic flat-circle increases, adding 6 stitches every round until it's wide enough to support the sides.
Round 1: 6 CSC in MC. Join. [6 CSC]
Round 2: Ch 1, turn. 2 CSC in each st around. Join. [12 CSC]
Round 3: Ch 1, turn. (2 CSC in next st, CSC in next st) around. Join. [18 CSC]
Round 4: Ch 1, turn. (2 CSC in next st, CSC in each of next 2 sts) around. Join. [24 CSC]
Round 5: Ch 1, turn. (2 CSC in next st, CSC in each of next 3 sts) around. Join. [30 CSC]
Round 6: Ch 1, turn. (2 CSC in next st, CSC in each of next 4 sts) around. Join. [36 CSC]
Round 7: Ch 1, turn. (2 CSC in next st, CSC in each of next 5 sts) around. Join. [42 CSC]
Round 8: Ch 1, turn. (2 CSC in next st, CSC in each of next 6 sts) around. Join. [48 CSC]
Round 9: Ch 1, turn. (2 CSC in next st, CSC in each of next 7 sts) around. Join. [54 CSC]
Round 10: Ch 1, turn. (2 CSC in next st, CSC in each of next 8 sts) around. Join. [60 CSC]
Round 11: Ch 1, turn. (2 CSC in next st, CSC in each of next 9 sts) around. Join. [66 CSC]
Round 12: Ch 1, turn. (2 CSC in next st, CSC in each of next 10 sts) around. Join. [72 CSC]
Round 13: Ch 1, turn. (2 CSC in next st, CSC in each of next 11 sts) around. Join. [78 CSC]
Round 14: Ch 1, turn. (2 CSC in next st, CSC in each of next 12 sts) around. Join. [84 CSC]
Round 15: Ch 1, turn. (2 CSC in next st, CSC in each of next 13 sts) around. Join. [90 CSC]
Round 16: Ch 1, turn. (2 CSC in next st, CSC in each of next 14 sts) around. Join. [96 CSC]
Working the Outer Sides
From here the basket stops expanding and starts going straight up. I keep the same double-stranded setup and larger hook for this section, working even rounds in the color stripe sequence — four rounds each of Color A, then B, then C, then back to A for one final round before the rim.
Rounds 17–20: Ch 1, turn. CSC in each st around. Join. [96 CSC] (Color A)
Round 21: Attach Color B, double-stranded. Fasten off Color A.
Rounds 21–24: Ch 1, turn. CSC in each st around. Join. [96 CSC] (Color B)
Round 25: Attach Color C, double-stranded. Fasten off Color B.
Rounds 25–28: Ch 1, turn. CSC in each st around. Join. [96 CSC] (Color C)
Round 29: Attach Color A, double-stranded. Fasten off Color C.
Round 29: Ch 1, turn. CSC in each st around. Join. [96 CSC] (Color A)
Round 30: Ch 1, turn. Hdc in each st around. Join. [96 hdc] (Color A) — Switch to smaller hook (G/7 / 4.25–4.50mm).
Switch to the smaller hook before working this round. The hdc rim creates a slight ridge that helps the lining fold over cleanly.
Crocheting the Inner Lining
The lining is worked back down the inside of the basket, starting by picking up the third loop of the hdc round — that's the horizontal bar sitting at the back of each stitch. This anchors the lining neatly at the rim and keeps it from pulling. I work down with Color A first, then switch to Color B for the bulk of the lining. The round count is adjustable: keep going until the last round reaches the bottom of the basket when the lining is folded down inside.
Round 31: Ch 1, turn. CSC in 3rd loop only of each st around. Join. [96 CSC]
Round 32: Ch 1, turn. CSC in each st around. Join. [96 CSC]
Round 33: Attach Color B, double-stranded. Fasten off Color A.
Rounds 33–46 (or until the last round reaches the bottom of the basket when folded down inside): Ch 1, turn. CSC in each st around. Join. [96 CSC]
Fasten off. Weave in all ends.
Adding White Stripes (Optional)
This is a purely decorative step, and it's optional — but I think it really sharpens the look of the color bands. I switch to a single strand of white #4 aran weight yarn and the larger hook for this.
Step 1: With larger hook and white #4 aran weight yarn, single-stranded, use the surface crochet technique to sl st 4 white lines around the outside of the basket, running along the color-change seams where two colors meet.
Fasten off and weave in ends.
Adding Plastic Canvas for Structure
The plastic canvas is what gives this basket its shape and keeps the sides standing upright. I do this step before folding the lining down, so the canvas ends up sandwiched between the outer layer and the lining.
Step 1: Cut strips of plastic canvas the same height as the inner lining layer.
Step 2: Set the basket fully unfolded.
Step 3: Roll up a strip and insert it into the bottom of the basket, allowing it to expand up against the walls.
Step 4: Add more layers as desired for extra stiffness.
Step 5: Fold the inner lining layer down over the canvas.
Step 6: Smooth the fabric until everything lays neat and flat.
Making and Attaching a Handle (Optional)
The handle is built separately from plastic canvas strips and wrapped with yarn before being glued in place. I use white aran weight yarn here to match the stripe detail, but any color works.
Step 1: Cut two long strips of plastic canvas, each about 6 squares wide.
Step 2: Hold them together (layered) and cover them with your white aran weight yarn — either a simple wrap-around or a woven pattern.
Step 3: To create a woven look: attach 6 very long strands of yarn to the top row of squares (giving 12 working strands).
Step 4: Divide in half and layer them over the canvas alternately, smoothing flat as you go to create even coverage down the length of the strip.
Step 5: When you reach the ends, superglue everything in place and trim excess yarn.
Step 6: Superglue the completed handle to the inside of the basket at both ends.
Care Instructions
Because this basket has plastic canvas tucked inside, you can't just toss it in the wash. Spot-clean the outside with a damp cloth and a little mild soap if it picks up dirt, then let it air dry completely before putting anything back inside. The cotton blend holds up well to light cleaning, but getting the canvas wet and leaving it trapped between layers is asking for trouble. If you need to store the basket off-season, keep it somewhere it won't get crushed, since the canvas can crease if something heavy sits on it for a long time.
Frequently Asked Questions
Why does this pattern use two different hook sizes?
The larger H (5.0mm) hook is for the base and outer body, where you want a firm, dense fabric. Once you switch to the inner lining, I drop down to the G/7 (4.25–4.50mm) hook. The lining needs to sit snugly inside and fold down neatly over the plastic canvas, so a slightly tighter fabric helps it behave. It's a small change but it makes a real difference in how the finished basket looks once everything is folded into place.
What does double-stranded mean, and how do I manage it without tangling everything?
Double-stranded just means you work with two strands of yarn held together as one. The easiest way I've found to handle it: wind both ends of a single skein into one ball before you start. You pull from both the inside and outside of the original skein, wind them together, and then work from that combined ball. It keeps things from turning into a knotted mess about three rounds in.
Do I have to add the plastic canvas, or can I skip it?
You can skip it, but the basket will be noticeably floppy without it. The double-layered construction gives the sides some structure, but the canvas is what makes it actually hold its shape when you put things inside. If you want a decorative basket that just sits there looking pretty and empty, you might get away without it. For actual Easter basket use, I'd keep the canvas in.
Can I substitute regular single crochet for the CSC stitch?
Yes, the pattern says you can swap in standard sc wherever CSC appears. The CSC (center single crochet) gives the fabric a slightly different texture and a tighter, more defined look, but the construction works either way. Your stitch count and shaping stay exactly the same, so it's a straightforward swap if CSC is new to you.
How much white yarn do I actually need for the handle and stripes?
Not much at all. The surface crochet stripes on the outside use a small amount, and wrapping the handle takes about 30 yards. I'd say a leftover partial skein or even a single ball is more than enough to cover both. The white is worked single-stranded, so it goes a lot further than the main colors do.
How is the handle attached, and is superglue really secure enough?
The handle gets superglued to the inside of the basket at both ends. I was skeptical the first time too, but as long as you press it firmly and let it cure fully before loading the basket up, it holds well. The handle itself is two strips of plastic canvas layered together and wrapped in yarn, so there's a solid base for the glue to bond to. Just don't rush the drying time.
Happy Crocheting
I hope this basket brings a little extra something to your Easter this year, whether you fill it with chocolate eggs, fake grass and peeps, or just leave it out as a little spring decoration. If you make one, I'd love to see it: tag me on Instagram or drop a photo in the comments below. And if you're saving this for later, pin it to your Easter or home decor board so you can find it again when the season rolls around.


Leave a Reply