
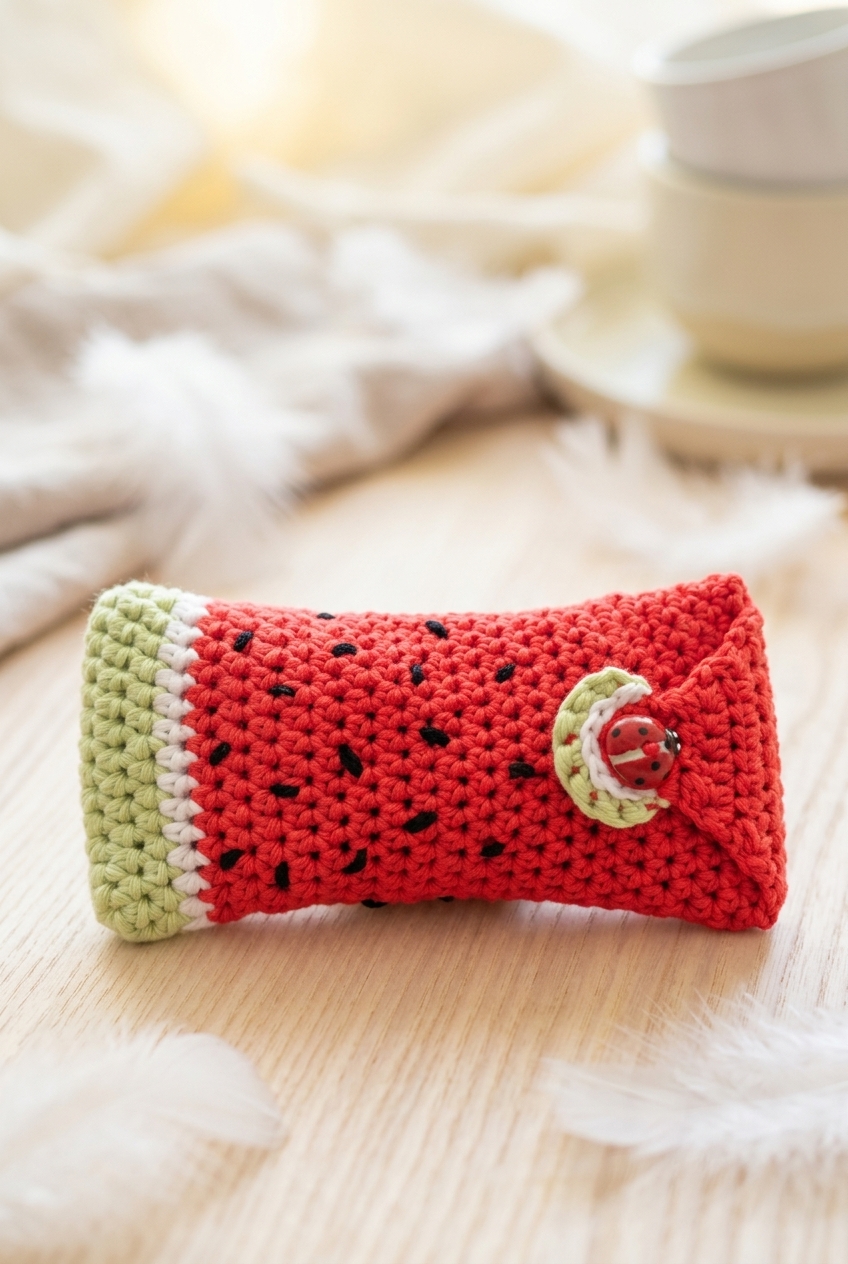
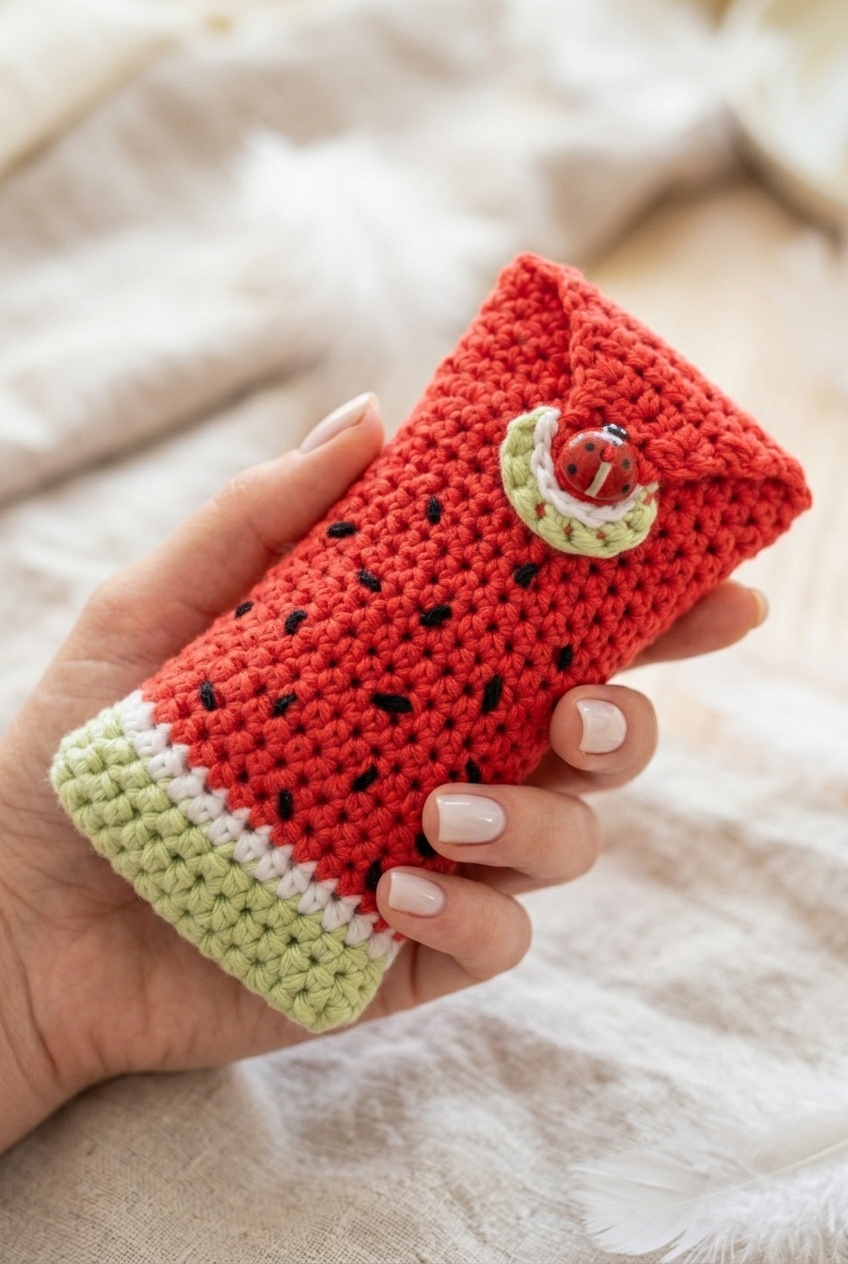
This Watermelon Glasses Case Crochet Pattern is genuinely one of those projects I finished and immediately wanted to make again for someone else. It's cheerful, it's a little unexpected, and it's the kind of thing that makes people stop and ask where you got it.

Jump to:
About This Project
What I love about this one is how much personality is packed into something so practical. It's a glasses case, which sounds pretty mundane, but the design details make it actually fun to work on. The construction has a few different elements going on at once, and figuring out how they all come together is honestly a satisfying process. I made mine as a gift for a friend who is OBSESSED with anything fruit-themed, and she lost her mind over it.
It also works really well as a summer make. Something to bring to a craft night, knock out over a weekend, and have something genuinely cute to show for it by Monday.
Why You Need This on Your Hook
This case is the cutest practical gift you'll crochet all summer.
- Skill level: Listed as intermediate, so you'll want some basic construction experience, but nothing here is going to stop you in your tracks.
- Time investment: Small enough to finish in a weekend sitting, which makes it great for last-minute gifting.
- Gifting potential: Pretty much anyone who wears glasses or sunglasses is a candidate, and the design reads as a real handmade keepsake rather than just a pouch.
- Technique value: You'll work through color changes and a drawstring closure, both of which are genuinely useful skills to have in your back pocket.
- Seasonal appeal: This one is MADE for summer markets, beach bags, and warm-weather gifting seasons.
Gather Your Supplies
Four colors, one hook, and a single small button — that is the whole list.
- DK Weight Yarn (4 colors: green, white, red, and black): DK weight is the right call here because it gives you enough stitch definition to see the color changes cleanly without the fabric getting too stiff or too floppy. A smooth DK acrylic works well, especially for the red and green sections where you want the color to read clearly. Yardage isn't specified in the original pattern, but for a small project like this, somewhere in the range of 20 to 50 meters per color should cover you, with red needing the most since it carries the bulk of the rounds.
- 3.5 mm Crochet Hook: This size pairs naturally with DK weight and keeps the fabric tight enough that the finished piece holds its shape without gaps.
- 1 button (approx. 1 cm): The button is part of a button hole detail, so size does matter here. Stick close to 1 cm so it actually fits the hole without being loose or forcing it.
- Also needed: yarn needle, scissors
Color Sequence & Yarn Changes
The colors follow a pretty specific order: green starts things off in Round 1, white comes in at the end of Round 2 and carries through Rounds 3 and 4, red joins at the end of Round 4 and takes over from Round 5 all the way through Round 25, and green and white each make a return appearance during the button hole steps. Worth reading through the color change points before you start so you know when to have each color ready to go.
Pattern Overview
A slim crocheted case worked in the round with a shaped top and a decrease closure — sized to fit most standard pencil cases or small pouches.
| Skill Level | Intermediate |
| Pattern Gauge | Gauge is not critical for this project. Use a hook size that creates a firm fabric so the case holds its shape and stitches are not too loose. |
| Finished Size | Approx. 7 in (18 cm) tall x 3.5 in (9 cm) wide |
| Yarn Weight | 3 Light / DK |
| Terminology | US |
Stitches & Abbreviations
Short list — mostly stitches you've probably worked a hundred times.
- ch = chain
- sl st = slip stitch
- sc = single crochet
- hdc = half double crochet
- st(s) = stitch(es)
- hdc2tog = half double crochet 2 stitches together (decrease): yo, insert hook in next st, yo, pull up a loop (3 loops on hook); yo, insert hook in next st, yo, pull up a loop (5 loops on hook); yo, pull through all 5 loops.
Special Stitches
- hdc2tog (half double crochet 2 stitches together): yo, insert hook in next st, yo, pull up a loop (3 loops on hook); yo, insert hook in next st, yo, pull up a loop (5 loops on hook); yo, pull through all 5 loops.
Before You Begin
Round 1 is not joined. After that, I work in continuous rounds, so it's worth placing a stitch marker at the start of each round and moving it up as you go. Gauge isn't something to stress over here, but fabric density does matter. Too loose and the case won't hold its shape. Work at a tension that feels firm and structured rather than drapey. DK weight is the sweet spot for this one. Check your yarn label for fiber content and care instructions since the pattern doesn't specify a particular fiber. This pattern falls into the intermediate category mainly because of the hdc2tog shaping at the top. If you've worked decreases before, you'll be fine.
How to Make the Watermelon Glasses Case Crochet Pattern
Follow the sections below in order to build the case from the bottom up, shape the flap, and finish with the button loop.
Case Body
This is the main tube of the case, worked in the round starting from a foundation chain. You'll build the watermelon stripe effect by switching colors as you go, so have your green, white, and red yarn ready before you start.
Round 1: In green, ch 13, 2 hdc in 2nd ch from hook, 1 hdc in next 10 ch, 2 hdc in last ch; rotate work and crochet back into same ch again, starting with 2 hdc in same last ch as previous 2 hdc, 1 hdc in next 10 ch, 2 hdc in last ch. [28 hdc] Do not join round. This is an oval foundation — you're working into both sides of the starting chain to create the flat bottom of the case. The "do not join" means you'll be working in a continuous spiral from here.
Rounds 2–3: 1 hdc in each st around, join white in end of last st. [28 hdc] These two rounds finish the green rind section. Join white at the very end of Round 3 by pulling the new color through on the final pull-through of your last hdc.
Round 4: Continuing in white, 1 hdc in each st around, join red in end of last st. [28 hdc] This single white round is the thin rind stripe. Join red the same way you joined white — on the last pull-through of the round.
Rounds 5–25: Continuing in red, 1 hdc in each st around. [28 hdc] This is the long red flesh of the watermelon. Twenty-one rounds of even hdc builds the depth needed to hold a glasses frame comfortably. No shaping, no color changes — just work steadily through to Round 25.
Top Flap Shaping
At this point you'll stop working in the round and switch to rows to shape the curved flap that folds over the top of the case. The decreases on each end of every row pull the flap into a rounded point.
Row 26: 1 hdc in next 15 sts to edge of case, ch 1, turn, hdc2tog, 1 hdc in next 10 sts, hdc2tog. [12 hdc from turning] Ch 1, turn. You're only working across half the opening here — 15 stitches gets you to the edge, then you turn and immediately begin decreasing. The ch 1 at the start and end of this row is your turning chain throughout this section.
Row 27: hdc2tog, 1 hdc in next 8 sts, hdc2tog. [10 hdc] Ch 1, turn.
Row 28: hdc2tog, 1 hdc in next 6 sts, hdc2tog. [8 hdc] Ch 1, turn.
Row 29: hdc2tog, 1 hdc in next 4 sts, hdc2tog. [6 hdc] Ch 1, turn.
Row 30: hdc2tog, 1 hdc in next 2 sts, hdc2tog. [4 hdc] Ch 1, turn.
Row 31: hdc2tog twice. [2 hdc] This is the tip of the flap. Don't fasten off yet — you'll continue directly into the button hole section.
Button Hole
The button loop is worked right off the tip of the flap, then reinforced with layers of stitches in each of the three colors to match the watermelon stripe sequence. Have your green and white yarn close by for the color joins in Steps 2 and 3.
Step 1: Ch 6, turn, sl st in second hdc decrease, ch 1, turn. This chain-6 forms the loop your button will pass through. The slip stitch anchors it to the flap tip before you fill the loop in the next step.
Step 2: 8 hdc in ch-6 sp, join green with a ch 1, turn. You're filling the chain-6 loop with 8 hdc, then immediately joining green to begin the color layering.
Step 3: 1 sc in next 8 sts, sl st in same st as previous sc and join white, turn. Work across all 8 stitches in green, then join white on the slip stitch at the end.
Step 4: Sl st in next same 8 sts as previous sts used, fasten off and tie in all ends. This final white layer of slip stitches completes the button loop. Fasten off securely and weave in all ends from the color joins.
Step 5: Sew on button between Rounds 19 and 20 (or Rounds 6 and 7 from the top). Centering the button on the front of the case at this position means the flap will close snugly without pulling. Use a yarn needle and a length of matching yarn or thread to attach it firmly.
Care Instructions
Hand wash this case gently in cool water and lay it flat to dry. Because it's structured and worked in rounds, it holds its shape pretty well, but tossing it in the dryer could distort the body or cause the button loop to stretch out. The button is sewn on, so check that thread periodically if you're using the case daily. A gentle spot clean works fine for minor dirt without having to wet the whole thing.
Frequently Asked Questions
How does the button loop actually work? It looks complicated.
The loop is made by chaining 6 after the final two decreases at the top of the flap, then working 8 hdc back into that chain space. Green and white are added in the next two steps to match the watermelon rind edge. It sounds fiddly but it comes together quickly once you're at that point in the flap.
Where exactly does the button get sewn on?
Between Rounds 19 and 20, which is also Rounds 6 and 7 counting down from the top of the red section. That placement lines it up with the button loop on the flap when the case is closed. I'd recommend pinning it in place and testing the fit before sewing it down.
What size button should I use?
The pattern calls for a button around 1 cm. Anything much larger and it won't sit right against the case, and anything smaller might slip through the loop too easily. A flat button works fine. A shank button also works and gives a slightly more polished look if you want to dress it up.
The color changes happen at the end of rounds. How do I keep them tidy?
Join the new color in the last pull-through of the final hdc in that round. So when you're finishing Round 3 in white, pull the new color through on that last stitch rather than after. It keeps the join clean and avoids a visible color blip at the start of the next round.
Will this fit a standard glasses case? My frames are on the larger side.
The finished case measures approximately 7 in tall by 3.5 in wide. That fits most standard frames comfortably. If your glasses are wider or bulkier, you could add a few extra stitches to the foundation chain to widen the base, which would carry through the whole body.
Happy Crocheting
This little case is one of those projects that looks so much more involved than it actually is, and I love that about it. If you make one, come back and leave a comment below telling me what button you used. I'm always curious what people find. You can also tag me on social media so I can see your finished case, and if you want to save this for later, pinning it to your crochet accessories board on Pinterest is always a good idea.


Leave a Reply