
This Basic Basket Crochet Pattern has honestly been one of my favorite things to work up. It's the kind of project that feels productive and satisfying all at once. You end up with something genuinely useful, and it comes together so much faster than you'd expect.

Jump to:
About the Design
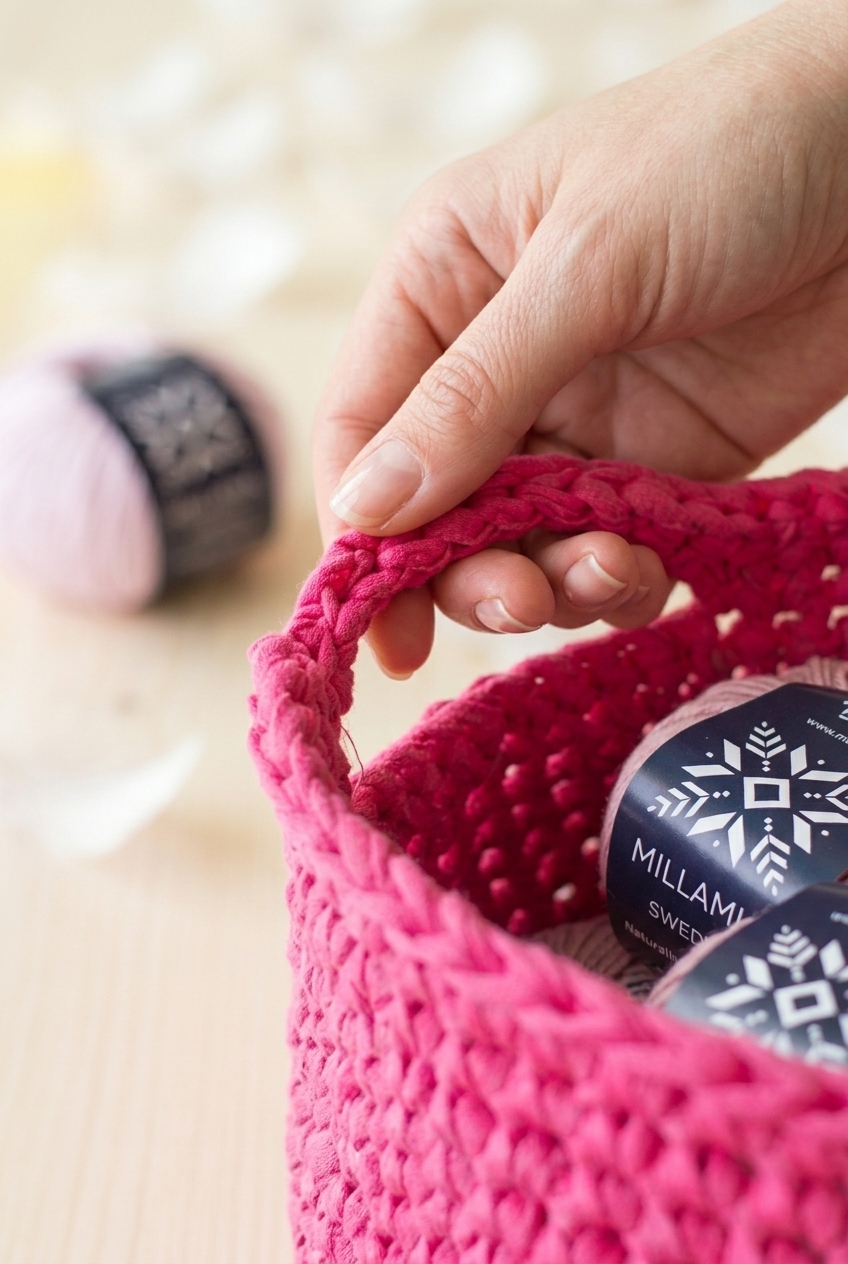
What I really like about this one is how practical the construction is. There's a handle worked right into the design, which sounds like a small thing but it's actually what makes this basket so much more useful than a basic open-top bowl. I've made a few baskets over the years that just sat in one spot forever. This one actually gets picked up and moved around.
It's a genuinely good make for gifting too. Pretty much anyone can use a little basket. I'd make one for a friend who just moved, tuck some goodies inside, and call it done.
Why You'll Want to Make This
A sturdy, handled basket you'll actually reach for every single day.
- Beginner-friendly build: This is an easy-level pattern, so you don't need a lot of experience to get a great result.
- Quick to finish: Chunky yarn means this works up fast. Totally doable in a single sitting if you're in the zone.
- That handle detail: The attached handle is what sets this apart from a basic bowl shape and makes it actually functional around the house.
- Great for gifting: A finished basket is one of those gifts that works for almost anyone, any occasion, any time of year.
- Technique practice: If you want to get comfortable with working in the round and adding structural elements, this pattern is a really solid one to learn from.
Your Supply List
The supply list here is refreshingly short. One color, one hook, and a couple of basic finishing tools.
- Super Bulky (Weight 6) Yarn: For a basket, super bulky is really the right call. It works up fast, holds its structure without any internal support, and gives you those thick, satisfying walls that actually stand up on their own. Since the pattern doesn't specify yardage, a rough estimate for a small-to-medium basket crocheted continuously in the round is somewhere around 100 to 150 yards, but grab a little extra if you plan to repeat rounds 8 through 16 for extra height. The fiber content isn't specified, so check your label: a wool or wool-blend will give you a firmer, more structured result, while acrylic tends to be a bit softer and more flexible.
- 10 mm Crochet Hook: A 10 mm hook is standard pairing for super bulky yarn. It keeps the stitches tight enough that the basket holds its shape without being a struggle to work through.
- Also needed: yarn needle, scissors
Essential Info
A sturdy little basket worked in super bulky yarn — it comes together fast and stands up on its own once you're done.
| Skill Level | Easy |
| Pattern Gauge | Gauge is not critical for this project. Use a hook size that creates a firm fabric so the basket holds its shape. |
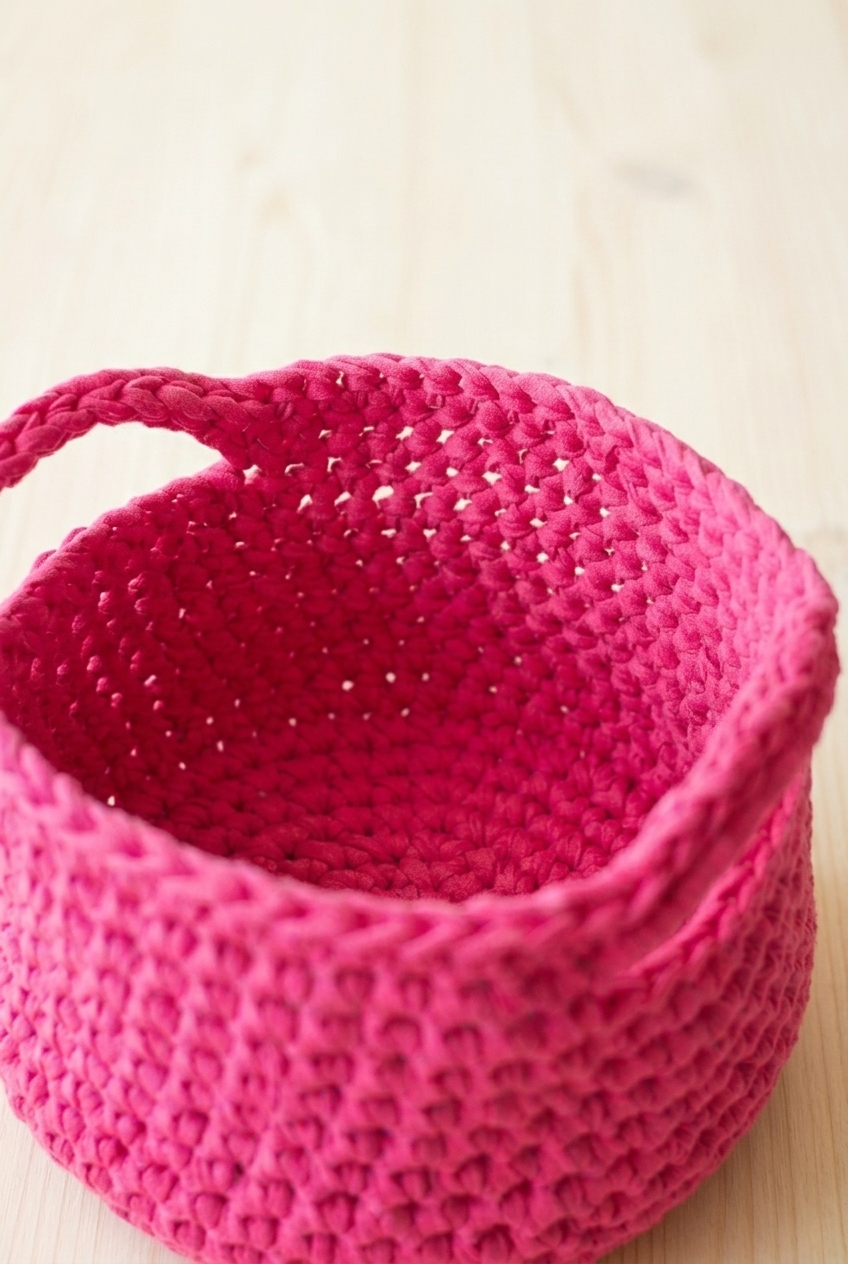
| Finished Size | Approx. 7 in (18 cm) diameter x 6 in (15 cm) tall |
| Yarn Weight | 6 Super Bulky |
| Fiber | Not specified — check the yarn label |
| Terminology | US |
Customizing the Size
The height is easy to adjust. Rounds 8 through 16 form the walls of the basket, and you can repeat that range as many times as you like to make it taller. For a wider base, you'd need to add more increase rounds at the bottom — just keep adding stitches evenly until the circle is the diameter you want, then work straight up from there.
Stitches & Abbreviations
Short list — mostly single crochet with a few basics alongside it.
- ch = chain
- sc = single crochet
- sl st = slip stitch
- sp = space
- st(s) = stitch(es)
- sk = skip
- rep = repeat
Read Before Starting
This basket is worked continuously in the round — no joining at the end of each round, no turning. It's a good idea to use a stitch marker to keep track of where each round begins, since there's no slip stitch to signal the transition. The dimensions listed above are estimates; your finished size will depend on your hook and how tightly you work. A firmer tension is better here. If the fabric feels floppy, go down a hook size. The basket needs enough structure to hold its shape on its own once it's done.
How to Make the Basic Basket Crochet Pattern
Here's how I work through this basket from the flat base up to the finished handles.
Building the Basket
This section is worked continuously in the round without joining at the end of each round, so I keep a stitch marker in the first stitch of each round to track where I am. The even rounds from 8 through 16 can be repeated as many times as you need to reach your desired height before moving on to the handle round.
Round 1: Ch 4, 8 sc in ch-4 loop. [8 sc]
Round 2: 2 sc in each st around. [16 sc]
Round 3: *1 sc in next st, 2 sc in next st* repeat around. [24 sc]
Round 4: *1 sc in next 2 sts, 2 sc in next st* repeat around. [32 sc]
Round 5: *1 sc in next 3 sts, 2 sc in next st* repeat around. [40 sc]
Round 6: *1 sc in next 4 sts, 2 sc in next st* repeat around. [48 sc]
Round 7: *1 sc in next 5 sts, 2 sc in next st* repeat around. [56 sc] This is the last increase round. From here the stitch count stays at 56 for the rest of the basket.
Rounds 8–16 (or more): 1 sc in each st around. [56 sc] Work these rounds straight, no shaping. If you want a taller basket, just keep repeating this round until you reach the height you're after before moving to Round 17.
Round 17: Ch 10, sk 10 sts, *1 sc in next 18 sts* repeat 2 more times. [56 sc] This is the handle round. The chain-10 bridge spans the 10 skipped stitches and will form one side of the handle opening. Make sure you're skipping exactly 10 stitches before working the chain, or the handle won't sit evenly.
Round 18: 10 sc in ch-10 sp, *1 sc in next 18 sts* repeat 2 more times. [56 sc] Working 10 sc into the chain space closes the handle loop and keeps the stitch count consistent around the rim.
Round 19: *1 sl st in next 10 sts, 1 sc in next 18 sts* repeat 2 more times, sl st, fasten off, and sew in all ends. [57 sc] The slip stitches across the handle opening give that edge a tighter, neater finish than a regular single crochet would.
Fasten off, and sew in all ends.
Care Instructions
Because this basket is meant to hold things, it's going to collect dust and lint over time. A quick shake-out usually does the trick for everyday upkeep. If it needs a proper clean, check your yarn label first, since the fiber isn't specified here and washing instructions vary a lot with super bulky yarns. Most of them don't love a machine wash, so hand-washing in cool water and reshaping it while wet is usually the safer call. Let it dry upright so the sides hold their shape instead of collapsing flat.
Frequently Asked Questions
What are the handles made from, and do they hold up under weight?
The handles are crocheted directly into the basket using a chain-10 space in Round 17, then filled in with 10 single crochets in Round 18. They're part of the same piece, not sewn on separately. Mine held up fine for lightweight items like yarn balls or small toys, but I wouldn't use this basket to haul anything heavy.
Can I make the basket taller or shorter than the pattern shows?
Yes, and the pattern actually tells you to do exactly that. Rounds 8 through 16 are the straight sides of the basket, and you can repeat those rounds as many times as you want before moving on to the handles. Skip a few rounds for something shallow, or add more for a deeper basket. The stitch count stays at 56 the whole time, so it's a straightforward adjustment.
Why does the pattern say not to join rounds?
Working continuously in the round, without joining, keeps the fabric smooth and avoids the little jog you get when you join each round with a slip stitch. For a basket this size, it makes almost no visible difference in the finished look, but it does make the crocheting itself faster. Just use a stitch marker to track the start of each round.
How does the basket start? I've never worked into a chain loop before.
Round 1 starts with a ch-4, and you work 8 single crochets directly into that loop, not into individual chain stitches. Pull the tail end to close the center before you move on. It's a little different from a magic ring, but it works the same way and gives you a flat, tight base to build from.
What finished size should I expect?
The basket works out to approximately 7 inches (18 cm) in diameter and 6 inches (15 cm) tall, based on the rounds as written. If you add extra rounds to the sides, the height will increase accordingly. Gauge isn't specified in this pattern, so your exact dimensions may vary a bit depending on your tension and the specific yarn you use.
Before You Go
I hope this basket ends up somewhere useful in your home, whether that's corralling yarn on a shelf, holding remotes on the coffee table, or just sitting there looking good. If you make one, I'd love to see it. Tag me on Instagram or drop a photo in the comments below. And if you want to save this for later, pinning it to your crochet board on Pinterest is always a good call. Happy crocheting!


Leave a Reply