
Fall is honestly my favorite time to start stacking up little seasonal makes, and this Mini Pumpkin Crochet Pattern has become one of my go-to projects every single year. It's a beginner-friendly amigurumi that works up fast and is genuinely fun to make, whether you're new to crocheting in the round or just looking for something satisfying to stitch up between bigger projects.

Jump to:
About This Project
What I really love about this little guy is how much personality it has for such a small project. The construction is pretty clever for a beginner pattern. You're working through a few simple techniques that come together to give it that classic pumpkin look, and the moment it all clicks into place is actually SO satisfying. I've made a whole basket of these and handed them out as gifts, used them as bowl fillers, tucked them into fall wreaths. They're just endlessly useful.
This is the kind of project I'd recommend to anyone who wants to dip their toes into amigurumi without the overwhelm of a big, complex pattern. And honestly, experienced makers will find it a nice, low-pressure stitch session for an evening on the couch.
Why You'll Love This Pattern
These mini pumpkins are the perfect quick fall make you'll want to stitch by the dozen.
- Beginner Friendly: This pattern is a genuinely great starting point for anyone new to crocheting in the round or trying amigurumi for the first time.
- Quick to Finish: Each pumpkin works up in a single sitting, so you can make several in one cozy afternoon.
- Great for Gifting: Their small size makes them ideal as handmade gifts, party favors, or sweet little add-ons to a fall gift basket.
- Seasonal Versatility: These work for Halloween, Thanksgiving, or really any fall decorating moment from September straight through November.
- Stash Friendly: They use a small amount of yarn, so this is a no-trouble-at-all way to use up scraps you already have on hand.
What You'll Need
Two colors of sport weight yarn and a small handful of stuffing — that is really the whole list.
- Sport Weight Yarn (Weight 2 Fine), Orange and Green/Brown: Sport weight is the right call for a small amigurumi pumpkin. It gives you good stitch definition at a tighter gauge, so the fabric holds its shape without a lot of gaps showing the stuffing underneath. You'll need two colors: orange for the pumpkin body and a green or brown for the stem. Yardage isn't specified in the pattern, but for a small toy this size you're likely looking at somewhere around 30 to 50 meters of orange and just a few meters of green or brown for the stem.
- 3.00 mm Crochet Hook: A 3.00 mm pairs well with sport weight yarn for amigurumi work specifically. Going smaller than the yarn's standard recommendation tightens up the fabric so the stuffing doesn't poke through between stitches.
- Toy Stuffing or Yarn Scraps: Either works fine here. If you go the yarn scraps route, chop them up small so the pumpkin fills out evenly. Stuff as you go once the body starts to close up — it's much harder to add more after the last few rounds.
- Also needed: yarn needle, scissors
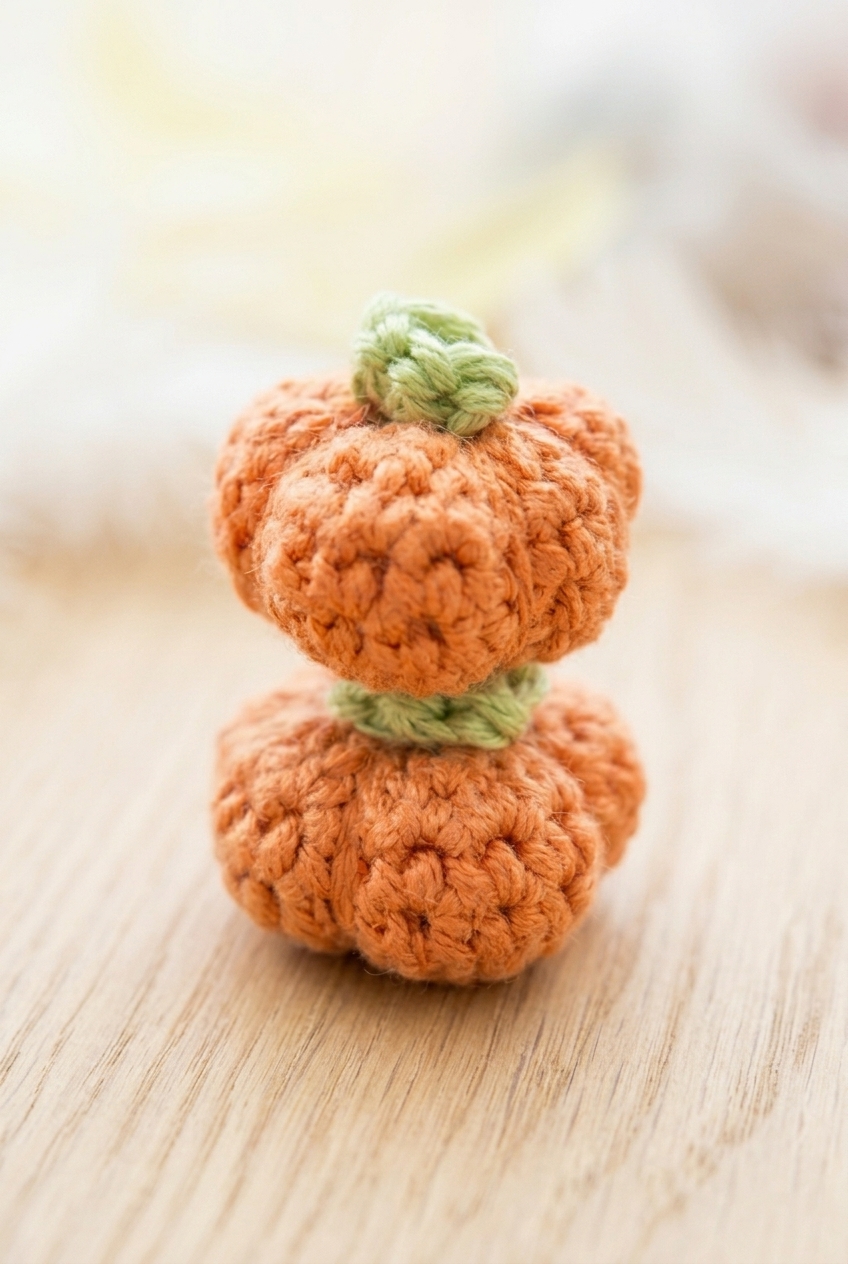
Project Info
A tiny stuffed carrot worked in sport weight, small enough to finish in a single sitting.
| Skill Level | Beginner |
| Pattern Gauge | Gauge is not critical for this project. Use a hook size that creates a tight, firm fabric so stuffing does not show through |
| Finished Size | Approx. 2.5 in (6.5 cm) tall and 3 in (7.5 cm) wide (estimated) |
| Yarn Weight | 2 Fine / Sport |
| Terminology | US |
Stitch Guide & Abbreviations
Just a handful of basics here, nothing unfamiliar.
- ch = chain
- sc = single crochet
- sc2tog = single crochet 2 stitches together (insert hook into next st, yarn over, pull up a loop; insert hook into next st, yarn over, pull up a loop; yarn over, pull through all 3 loops on hook)
- sl st = slip stitch
- st(s) = stitch(es)
- MC = magic circle (optional)
Helpful Tips
The ch 1 at the start of a round does not count as a stitch here or anywhere else in this pattern. Don't work into it at the end of the round.
Gauge really doesn't matter for a project this small, but hook size does. If your fabric has gaps, go down a hook size. Stuffing showing through is the main thing to avoid, so work snugly. The 3.00 mm hook listed in the materials is a reasonable starting point for sport weight, but trust your swatch over the number.
The magic circle is listed as optional. If you prefer to start with a ch 2 and work your first round into the second chain from the hook, that works fine too. Just pull the tail tight before you continue.
Orange yarn works the carrot body and green or brown handles the leafy top. Keep both yarns nearby from the start since you'll need to switch colors as you go. Toy stuffing or yarn scraps both work for filling. Add stuffing gradually as you decrease rather than trying to push it all in at the end.
How to Make the Mini Pumpkin Crochet Pattern
Follow the steps below to crochet your mini pumpkin from the body all the way through to the stem.
Crocheting the Pumpkin Body
This section builds the entire pumpkin shape in one small piece worked in joined rounds. You'll be using orange throughout, so no color changes to worry about here.
Round 1: Using orange, work 8 sc into a 4 ch loop or MC, sl st in first sc to join. [8 sc]
Round 2: Ch 1 (does not count as a st here or throughout), 2 sc in each st around, sl st in first sc to join. [16 sc] That ch 1 note applies to every round in this pattern, so keep it in mind as you go.
Rounds 3–6: Ch 1, 1 sc in each st around, sl st in first sc to join. [16 sc] Four even rounds here with no shaping — just work steadily to build the height of the body.
Round 7: Ch 1, sc2tog until end, sl st in first sc to join. [8 sc] Fasten off leaving a long tail and sew remaining hole closed. Keep that tail long — you'll need it for shaping in the finishing steps.
Finishing and Shaping
This is where the pumpkin really comes together. The stitching and the little green stem turn a plain oval into something that actually reads as a pumpkin.
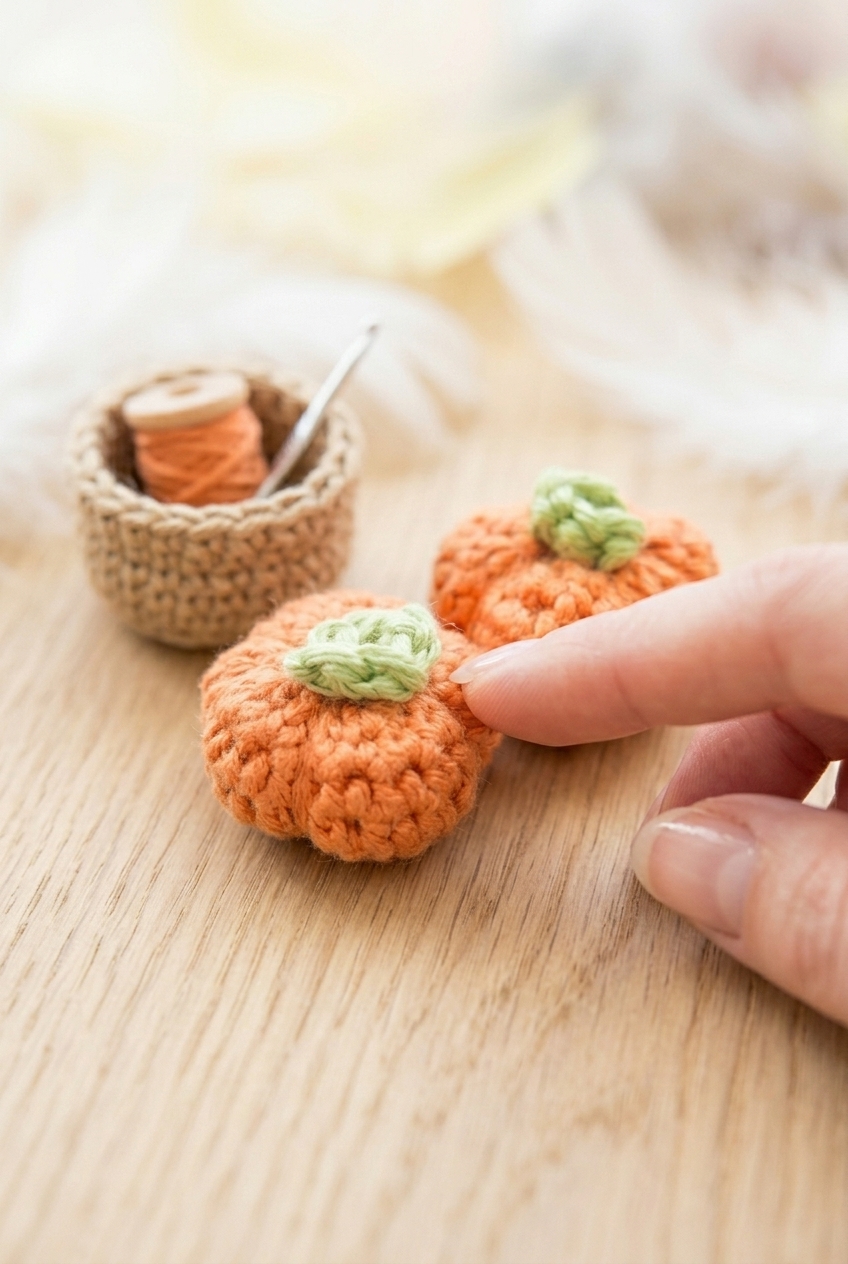
Step 1: Using the remaining tail yarn, sew from top to bottom catching yarn on the outside of the pumpkin, and pull tight to create the shape. Repeat this about 4 more times. Each pass creates one of the pumpkin's ridges, so take your time pulling to an even tension on each one.
Step 2: Using green, ch 4, 2 sc in second ch from hook and in all remaining chains to end. [6 sc] This short chain makes the stem — it works up in just a few stitches.
Step 3: Sew onto top of pumpkin.
Fasten off, weave in ends.
Care Instructions
Because this pumpkin is stuffed with toy stuffing or yarn scraps, hand washing is the safest option if it ever needs a clean. Press out the water gently and reshape the pumpkin by hand before laying it flat to dry. Squeezing or wringing it can shift the stuffing around and flatten those ridges you worked to create. Once dry, it holds its shape well on a shelf or in a bowl as decor.
Frequently Asked Questions
How do I get those ridges on the pumpkin body?
The ridges come from the finishing step, not the crochet rounds themselves. After fastening off, you use the long tail to sew from the top of the pumpkin down to the bottom, catching the yarn on the outside and pulling tight. Doing this about five times around the body is what creates that segmented pumpkin shape.
What is a magic circle and can I use a chain loop instead?
A magic circle (also called an MC) is an adjustable loop you start your rounds from so there's no hole at the center. This pattern gives you the option to use a 4-chain loop instead if you find the magic circle fiddly. Both work fine here. The chain loop leaves a slightly more visible center, but at this size it's barely noticeable once the pumpkin is stuffed and shaped.
When do I add the stuffing?
Stuff the pumpkin before you close Round 7. Once you've worked the sc2tog decreases all the way around, the opening gets small fast. Get your stuffing in before you fasten off and sew the hole shut. I like to stuff mine pretty firmly so the body holds a nice round shape after you pull in the ridges.
How is the stem made?
The stem is a small crocheted piece worked separately in green or brown yarn. You chain 4, then work 2 single crochets into the second chain from the hook and into each remaining chain, giving you 6 stitches total. It's quick, maybe a minute or two, and then you just sew it onto the top of the finished pumpkin.
Can I use yarn scraps for the stuffing instead of polyfill?
Yarn scraps work perfectly here. The pumpkin is small enough that you don't need a lot of fill, and scraps from the project itself are a great use of leftovers. Just make sure you pack them in evenly so you don't end up with lumpy spots when you pull in the ridge stitches.
Now It's Your Turn!
These little pumpkins are so fast to make that you might find yourself crocheting a whole bowlful before the week is out. I'd love to see what colors you reach for, whether you go classic orange or try something unexpected like cream or deep burgundy. Drop a photo in the comments or tag me on social so I can see yours. And if you're saving this for later, pin it to your fall crochet board so it doesn't get lost in the shuffle.


Leave a Reply