
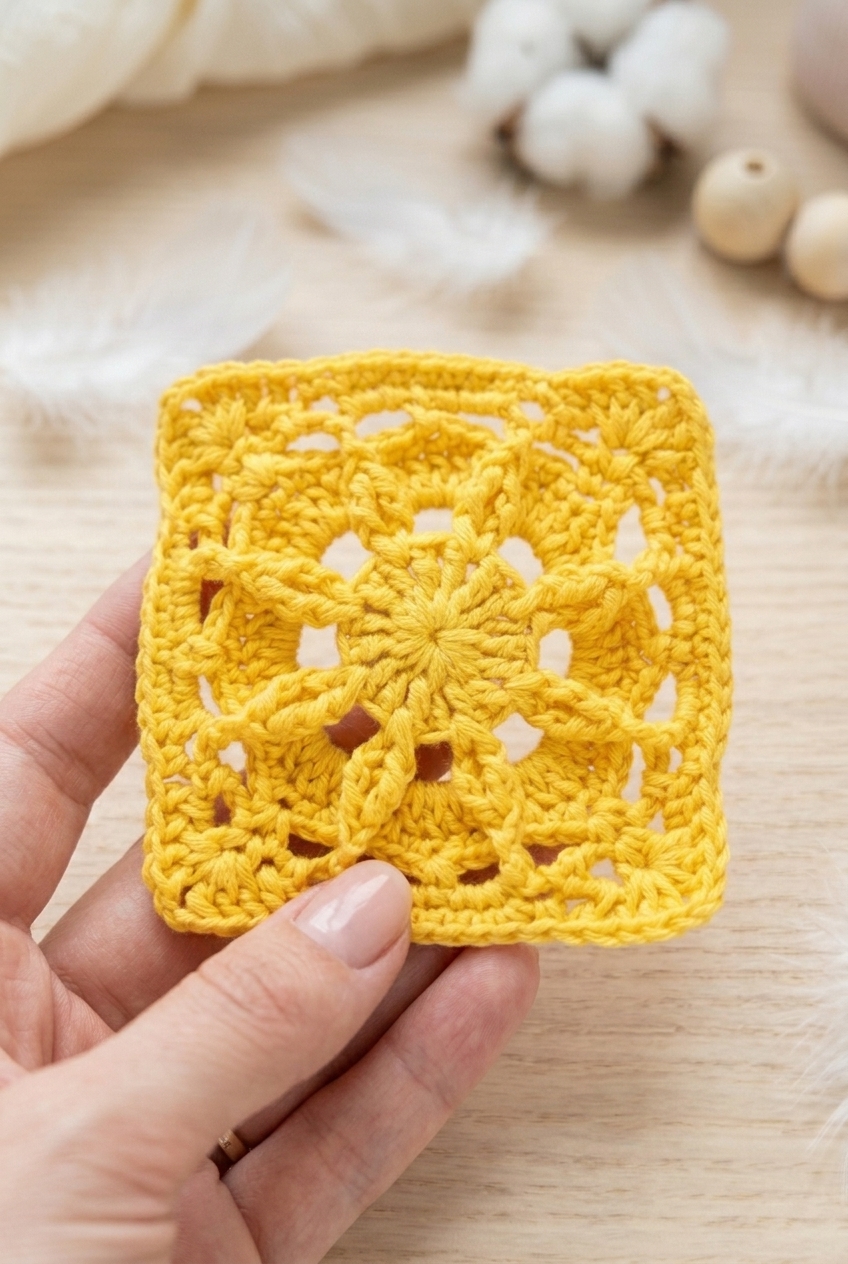
Granny squares are one of those things I keep coming back to, and this Sun Star Granny Square Crochet Pattern is a really satisfying one to work through. It's a compact little motif, so it works up quickly, but the construction is interesting enough that it doesn't feel like a mindless repeat. If you've been looking for a square with a bit more personality than the classic version, this is a good one to try.

Jump to:
About This Project
What I really like about this one is how the center builds outward in a way that feels almost architectural. There's a starburst construction at the heart of it, and the way the stitches radiate out before settling into a clean border is just genuinely pleasing to make. It's the kind of motif where you're actually curious to see how each round develops, which makes the process feel more engaging than your average square.
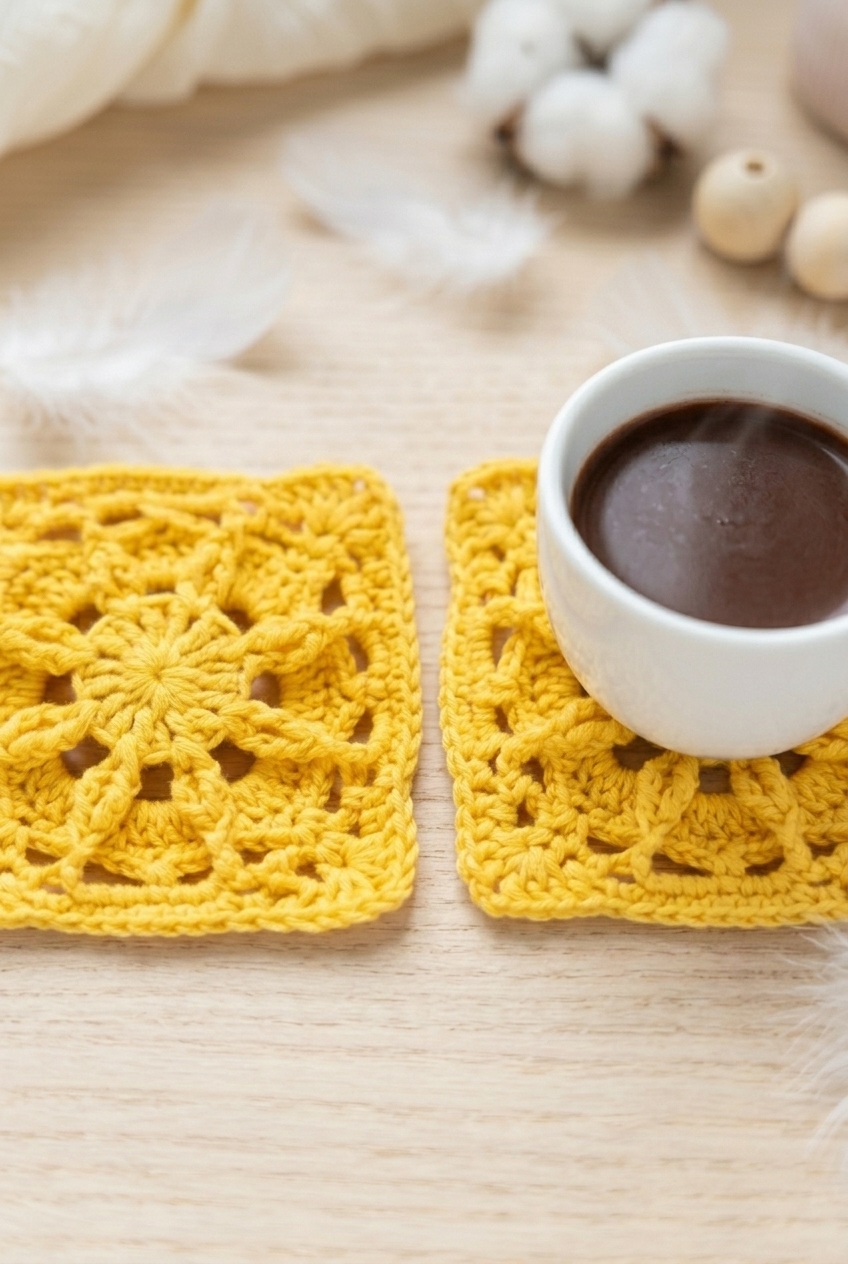
I'd make this for home decor without hesitation. It's the kind of piece that works as a standalone coaster, a building block for a larger blanket, or a decorative panel stitched onto a pillow cover. Pretty flexible for something so small.
Why You'll Want to Make This
A classic motif format with a starburst construction that actually keeps you interested round by round.
- Skill level fit: Intermediate stitchers will find this comfortable without it feeling like a repeat of something they've done a hundred times.
- Quick to finish: It's a small motif, so you can realistically complete one in a single sitting.
- Mix and match: These squares are easy to join into larger projects, so one pattern goes a long way if you want to scale up.
- Technique building: The starburst center uses a construction that's genuinely worth learning and carries over into other motif work.
- Gifting potential: A set of these stitched into coasters or a small table runner makes a thoughtful, handmade home gift.
Gather Your Supplies
This is a great excuse to dig into those DK scraps sitting in your basket.
- DK Weight Yarn: Any DK weight yarn works here, which is part of what makes this square so flexible. The pattern notes confirm you can use whatever you have on hand, so fiber content is really your call. For a granny square, you're probably looking at somewhere in the range of 50 to 100 yards depending on your finished size, but grab a bit extra if you're planning to make multiples.
- 2.5 mm Crochet Hook: A 2.5 mm hook keeps your stitches tight and even, which matters for a granny square since loose tension can make the corners curl and the whole thing lose its shape.
- Also needed: yarn needle, scissors
Essential Info
This granny square uses front post stitches and clusters to build up a textured surface, so there's a bit more going on than a standard granny.
| Skill Level | Intermediate |
| Pattern Gauge | Gauge is not critical for this project. Works with any hook and any yarn; choose a hook/yarn combination that gives you a fabric you like for a granny square. |
| Finished Size | Approx. 5.5 in (14 cm) square (estimated with DK yarn and 2.5 mm hook) |
| Yarn Weight | 3 Light / DK |
| Fiber | Not specified — check the yarn label |
| Terminology | US |
Stitch Guide & Abbreviations
A few of these stitches have their own full definitions below in Special Stitches.
- ch = chain
- ch sp = chain space
- dc = double crochet
- dccl = double crochet cluster (2-dc cluster): Yo, insert hook in indicated st/sp, yo and pull up a loop, yo and pull through 2 loops (2 loops on hook). Yo, insert hook in same st/sp, yo and pull up a loop, yo and pull through 2 loops (3 loops on hook). Yo and pull through all loops on hook.
- dcfps = double crochet front post stitch: Yo, insert hook from front to back to front around the indicated post(s), yo and pull up a loop, yo and pull through 2 loops, yo and pull through 2 loops.
- hdc = half double crochet
- sc = single crochet
- sl st = slip stitch
- st(s) = stitch(es)
- st sp = stitch space (gap below stitch)
- tr = treble crochet
- tr2tog = treble crochet 2 together: Yo twice, insert hook around first indicated post, yo and pull up a loop, (yo and pull through 2 loops) twice (2 loops on hook). Yo twice, insert hook around second indicated post, yo and pull up a loop, (yo and pull through 2 loops) twice (3 loops on hook). Yo and pull through all loops on hook.
Special Stitches
- Double crochet cluster (2-dc cluster) (dccl): Yo, insert hook in indicated st/sp, yo and pull up a loop, yo and pull through 2 loops (2 loops on hook). Yo, insert hook in same st/sp, yo and pull up a loop, yo and pull through 2 loops (3 loops on hook). Yo and pull through all loops on hook.
- Double crochet front post stitch (dcfps): Yo, insert hook from front to back to front around the indicated post(s), yo and pull up a loop, yo and pull through 2 loops, yo and pull through 2 loops.
- Treble crochet 2 together (tr2tog): Yo twice, insert hook around first indicated post, yo and pull up a loop, (yo and pull through 2 loops) twice (2 loops on hook). Yo twice, insert hook around second indicated post, yo and pull up a loop, (yo and pull through 2 loops) twice (3 loops on hook). Yo and pull through all loops on hook.
Helpful Tips
Hook and yarn choice are genuinely flexible here. Any weight, any fiber, any hook size. The size listed in the card above is just an estimate based on DK yarn with a 2.5 mm hook. Your square will come out smaller or larger depending on what you use, and that's fine. Pick a combination that gives you a fabric you like for a granny square and go from there.
The front post stitches and the tr2tog both work around posts from previous rounds, so it helps to keep your tension fairly consistent as you go. Loose stitches can make the post work a little sloppy. Nothing unfixable, just worth keeping in mind.
Let's Make the Sun Star Granny Square Crochet Pattern
Work through each round in order and the square builds itself up from the center out, one layer at a time.
Building the Granny Square
This square is worked in rounds from a starting loop, with each round adding a new layer of texture and structure. It's a more involved construction than a basic granny square, so take it one round at a time and you'll be fine.
Round 1: Ch 4 and join to form a loop. Ch 3 (counts as tr), work 15 tr into the loop, sl st in first tr to join. [16 tr] The starting ch 4 loop gives you a tight, clean center to work all 16 trebles into — pull the tail snug before joining.
Round 2: Ch 3, 1 dc in st sp below, *skip next 2 dc posts, ch 5, 1 dccl in next st sp* repeat from * to * until end, ch 5, sl st in 1st dc to join. The stitch spaces between posts are where you're working here, not into the tops of the trebles themselves — keep that distinction in mind as you move around the round.
Round 3: *Sl st over to next ch 5 sp, [ch 3, 4 dc, ch 3, sl st] in same ch 5 sp, sl st in previous dccl* repeat from * to * until end. Each ch-5 space from Round 2 gets its own little petal cluster here. The sl st into the previous dccl anchors each petal before you move to the next.
Round 4: *1 sc in next ch 3 sp, 1 sc in next 2 sts, ch 2, 1 sc in next 2 sts, 1 sc in next ch 3 sp, tr2tog over previous 2 dccl* repeat from * to * until end, sl st in first sc to join. The tr2tog is worked over the two dccl posts from Round 2, pulling those earlier stitches into the current round. Make sure you're reaching back to the correct posts before closing the decrease.
Round 5: Sl st up to ch 2 sp, *[1 sc, ch 2, 1 sc] in ch 2 sp, ch 5, 1 dcfps around previous tr2tog, ch 5, 1 sc in next ch 2 sp, ch 5, 1 dcfps around previous tr2tog, ch 5* repeat from * to * until end, sl st in same beginning ch 2 sp to join. The front post double crochets wrap around the tr2tog posts from Round 4, so you're working around the post rather than into the top. The ch-5 chains on either side of each dcfps create the open framework that Round 6 will fill in.
Round 6: *2 dccl in next ch 2 sp (for the first repeat this will be the same ch 2 sp as your previous sl st), ch 3, 1 sc in next ch 5 sp, ch 3, 3 sc in next ch 5 sp, 1 sc in previous sc, 3 sc in next ch 5 sp, ch 3, 1 sc in next ch 5 sp, ch 3* repeat from * to * until end, sl st in previous dccl to join. The note about the first repeat using the same ch 2 sp as your sl st is easy to miss — don't skip ahead to the next sp or your stitch count will be off for the rest of the round.
Round 7: [ch 3, 2 dc, ch 2, 3 dc] in same previous dccl, *1 dc in next ch 3 sp, 1 sc in next ch 3 sp, 1 sc in next 7 sts, 1 sc in next ch 3 sp, 1 dc in next ch 3 sp, [3 dc, ch 2, 3 dc] in previous dccl* repeat from * to * until end, ending on 1 dc in last ch 3 sp, sl st in top of ch 3 to join. The [3 dc, ch 2, 3 dc] clusters form the four corners of the square, and the sc sections along each side fill in the edges between them. Count your 7 sc across each side carefully before working the next corner cluster.
Fasten off and tie in all tails.
Frequently Asked Questions
What does dccl mean in this pattern?
A dccl is a double crochet cluster. You work multiple double crochets into the same space and pull through all loops at once to create a gathered, raised stitch. In this square, the dccl stitches are load-bearing — the star points and corner structure both depend on them sitting correctly, so it's worth practicing one before you start Round 2.
Can I use a different hook size or yarn weight?
Yes, and the pattern is actually designed with that flexibility in mind. You can work this with any hook and any yarn. The finished size will just shift depending on what you use. I made mine with a 2.5 mm hook and DK weight, which came out to about 5.5 inches square, but going up to a 4 mm hook with a chunkier yarn would give you a noticeably larger motif.
What is a dcfps and where does it show up?
Dcfps stands for double crochet front post stitch. You insert your hook around the post of the stitch below rather than through the top loops. It comes up in Round 5, worked around the tr2tog stitches from Round 4. Those front post stitches are what give the star its raised, dimensional look, so don't skip them or substitute a regular dc.
The center ring feels loose after Round 1. Is that normal?
It is at that stage, yes. Round 1 is just 16 treble crochets worked into a starting loop, and the ring can look a bit open before you close it with the slip stitch. Once you pull the tail to tighten the initial loop and work into Round 2, it firms up considerably. I'd leave the tail end a little long so you have something to pull on.
How many squares do I need to make a full blanket?
The pattern doesn't specify a project count since it's written as a single motif. At roughly 5.5 inches per square with DK yarn, you'd need about 48 squares for a throw-sized blanket around 33 by 44 inches. That's just a rough calculation though. Lay out a few finished squares to see how they join before committing to a number.
Happy Crocheting
I hope you love how this square turns out. The combination of those front post stitches and the cluster work in the later rounds is what makes it look SO much more complicated than it actually is once you get the rhythm, and there's something really satisfying about watching the star shape emerge by Round 6. If you make one, I'd love to see it: tag me on Instagram or drop a photo in the comments below. And if you're already planning a whole blanket's worth, save this to your Pinterest crochet board so you can find it again when you're ready for square number two.


Leave a Reply