
This Square in Circle Coaster Crochet Pattern is one I keep reaching for when I want something small and satisfying to work up. It's a quick project, beginner-friendly, and the construction is genuinely clever in a way that makes the finished result look way more complex than it actually is.

Jump to:
Behind the Pattern
What I really like about this one is how the two geometric elements play off each other. A square working within a circle sounds simple, but the way the construction actually comes together gives you something that feels intentional and a little unexpected. I find that satisfying. It's the kind of project where you finish and think, okay, that actually worked out really nicely.
These are genuinely great for gifting. Practical, handmade, and compact enough to whip up a whole set without losing your mind. I've made a few of these for housewarming gifts and they always land well. No trouble at all to make a stack of them over a weekend.
Why This Pattern Stands Out
A clever geometric design that looks impressive but works up fast for any skill level.
- Beginner Friendly: No advanced techniques needed, so it's a great confidence builder for newer crocheters.
- Quick to Make: Each coaster is small enough to finish in a single sitting, which makes it really satisfying.
- Great for Gifting: Easy to make in multiples, and practical enough that people actually use them.
- Technique Value: The square-in-circle construction is a genuinely useful skill that carries over into lots of other projects.
- Stash Friendly: These use a small amount of yarn, so they're a perfect way to use up what you already have on hand.
Gather Your Supplies
Two colors, one small hook, and you are basically ready to go.
- Sport Weight Yarn (Weight 2), Two Colors: Sport weight sits in a nice middle ground for a small project like this. It's fine enough to show the stitch detail in the granny square center but not so thin that it becomes fiddly to work with. The pattern doesn't give a specific yardage count, but for a mini square-in-circle piece you really won't use much. A small leftover ball of each color, somewhere in the range of 20 to 40 yards per color, should cover you without trouble.
- 3.00 mm Crochet Hook: A 3.00 mm pairs well with sport weight because it keeps the fabric firm without being stiff. For a small decorative piece, you want the stitches to hold their shape, and this size does that.
- Also needed: yarn needle, scissors
Color Sequence & Yarn Changes
The two colors trade off across the rounds in a pretty specific order, so it helps to know it upfront. Your first color starts Round 1, then your second color joins at the end of Round 1 and works through Round 2 before handing back to color one. The handoffs happen with a chain 1 join at the end of the specified rounds, so keep both colors loosely attached rather than cutting after each switch. You'll end up weaving in a few ends, but the color changes themselves are straightforward once you see the rhythm.
Quick Details
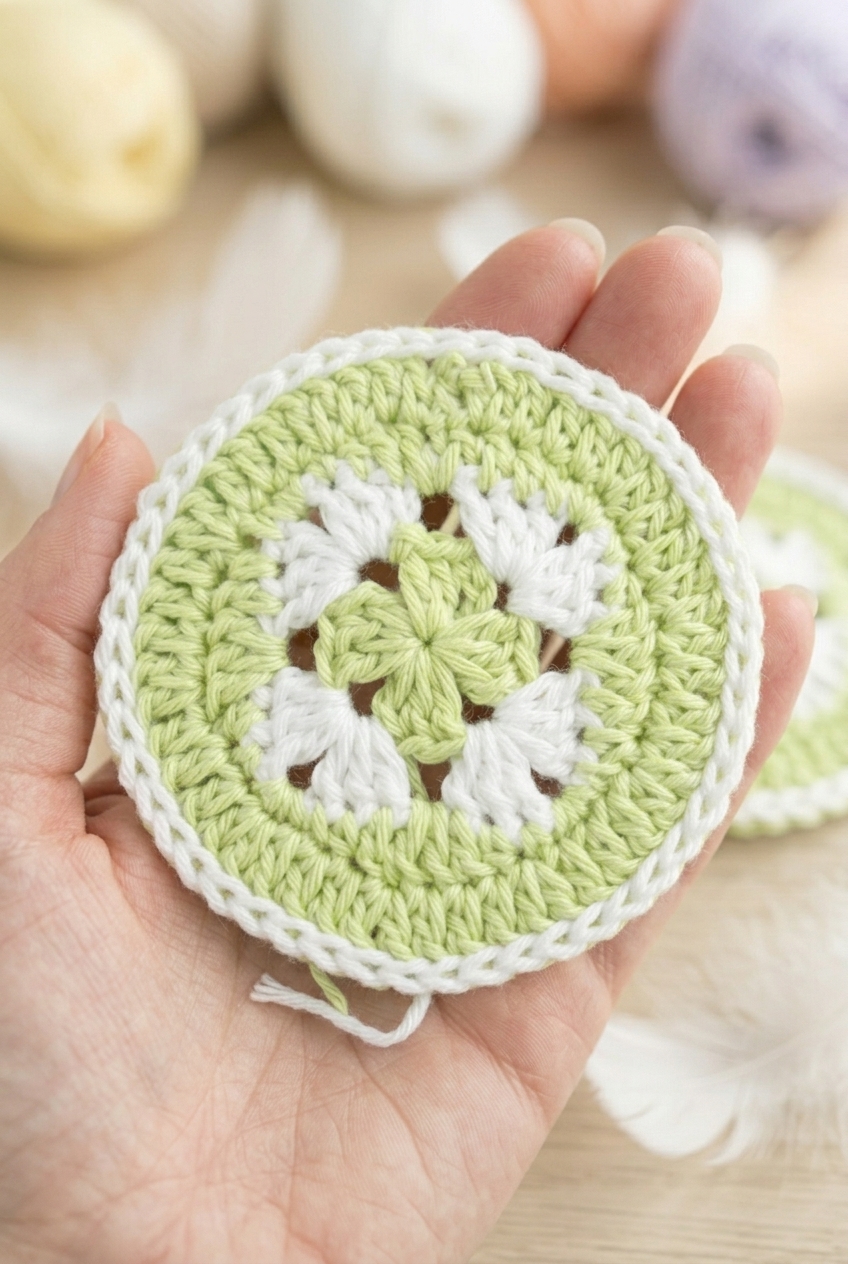
A little granny square nestled inside a circle, all crocheted in rounds from the center out.
| Skill Level | Beginner |
| Pattern Gauge | Gauge is not critical for this project. Use the stated hook size (or similar) and yarn to create an even fabric; adjust hook size if needed to get a coaster thickness and drape you like. |
| Finished Size | Approx. 4 in (10 cm) diameter coaster |
| Yarn Weight | 2 Fine / Sport |
| Fiber | Not specified — check the yarn label |
| Terminology | US |
Abbreviations & Stitches Used
All familiar basics here, nothing unusual.
- ch = chain
- ch-sp = chain space
- dc = double crochet
- hdc = half double crochet
- sc = single crochet
- sl st = slip stitch
- st(s) = stitch(es)
- * * = repeat instructions between * * as directed
Pattern Notes
This is a quick beginner project: a mini granny square worked inside a circle, all in rounds. I work in US terminology throughout.
Round 1 starts in the first color. You'll chain 4 and slip stitch to the first chain to form a ring, or substitute a magic ring if you prefer a tighter center. Either works fine here.
Color changes happen at the end of specified rounds. When the instructions say to join with "ch 1," that chain 1 is part of the color change, not a separate step — work it exactly as written. Weave in ends as you go or all at once at the end, whichever you prefer. There are a few color changes in a small project, so ends are manageable either way.
The Square in Circle Coaster Crochet Pattern Pattern Steps
Here's how I work through each round of this coaster, from the center loop out to the slip-stitch border.
Building the Coaster
This coaster works up in five rounds, starting from a small center loop and expanding outward through a granny-square-style structure before finishing with a rounded border. You'll be switching between two colors as you go, so have both ready before you start.
Round 1: In first color, ch 4, sl st in first ch to form a loop (or use a magic ring), ch 3, 2 dc in center of loop, ch 2, *3 dc in center of loop, ch 2* repeat 2 more times, sl st in top of ch 3, sl st to first ch-2 sp and join second color with ch 1. The ch 3 counts as your first dc here, so you're building four groups of 3 dc with ch-2 corner spaces between them. The sl st to the ch-2 sp at the end positions you perfectly to start Round 2 in the corner.
Round 2: Ch 3, [2 dc, ch 2, 3 dc] in same ch-2 sp, ch 1, *[3 dc, ch 2, 3 dc] in next ch-2 sp, ch 1* repeat 2 more times, sl st in top of ch 3, join first color with ch 1. This is the classic granny square corner round. Each ch-2 sp from Round 1 becomes a full corner cluster, and the ch-1 spaces between corners will be used in Round 3.
Round 3: 1 dc in first ch-1 sp (slightly working backwards), 1 dc in next st, 1 hdc in next st, 1 sc in next st, 2 sc in next ch-2 sp, *1 sc in next st, 1 hdc in next st, 1 dc in next st, 2 dc in next ch-1 sp, 1 dc in next st, 1 hdc in next st, 1 sc in next st, 2 sc in next ch-2 sp* repeat 2 more times, 1 sc in next st, 1 hdc in next st, 1 dc in next st, 1 dc in same first ch-1 sp as previous dc at the beginning, sl st in top of first dc to finish. This round is where the square shape starts transitioning toward a circle. The mix of dc, hdc, and sc heights around each side gradually curves the edges. The "slightly working backwards" note at the start just means you'll turn back into the ch-1 sp you're already sitting next to — don't overthink it, just place that first dc there and follow the stitch sequence.
Round 4: Ch 1, *1 dc in next 3 sts, 2 dc in next st* repeat around, sl st in first dc and join second color with ch 1. The evenly spaced increases in this round help push the shape toward a rounder silhouette. Make sure you're counting your repeats consistently all the way around before joining.
Round 5: Sl st in each st around. Fasten off and weave in all ends. The slip-stitch border gives the edge a clean, defined finish. Keep your tension relaxed here so the edge doesn't pucker or pull inward.
Care Instructions
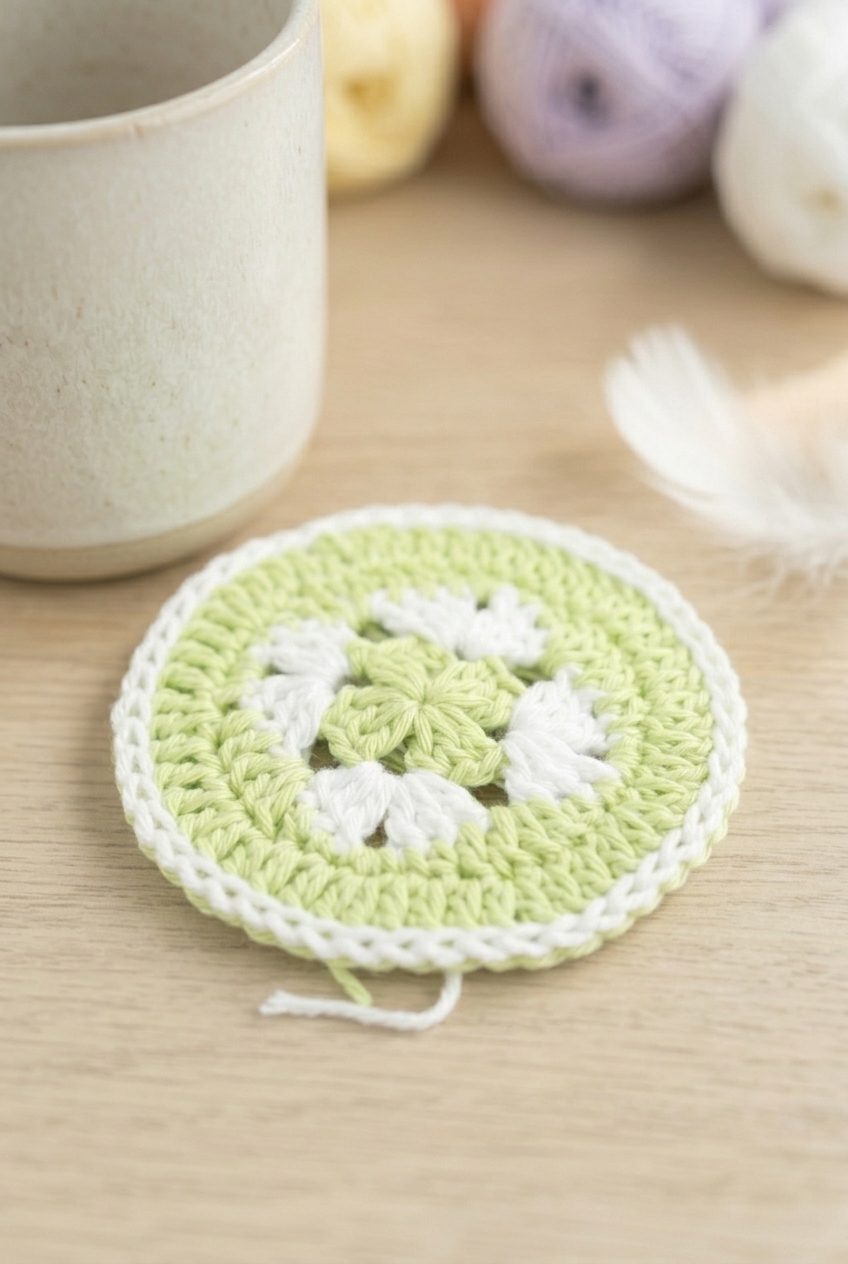
Lay the coaster flat to dry after washing so it keeps its shape. Coasters this size can curl at the edges if they dry bunched up or draped over something, and once the yarn sets that way it's a pain to fix. Since the fiber isn't specified here, check your yarn label before tossing it in the machine. Hand washing in cool water is usually the safe call for sport weight, and these dry fast anyway given how small they are.
Frequently Asked Questions
What is the square in a circle effect and how does it happen?
The square shape comes from Rounds 1 and 2, which are worked as a classic granny square with four corner ch-2 spaces. Round 3 then transitions the piece into a circle by filling in those corners with a mix of dc, hdc, and sc stitches that gradually curve the edge outward. You don't do anything special to make it happen — the stitch combination does the work.
How do the color changes work in this pattern?
There are two color changes, and both happen at the end of a round using a ch 1 join rather than a standard slip stitch join. At the end of Round 1 you drop the first color and join the second with ch 1. Then at the end of Round 4 you drop the second color and bring the first back in the same way. Round 3 runs entirely in the first color, so there's a stretch in the middle where you're not switching at all.
What does 'working slightly backwards' mean in Round 3?
Round 3 starts with a dc worked into the ch-1 space from the previous round, but the stitch sequence means you place that first dc slightly behind where you'd normally begin. It's a bit awkward the first time, but it's there to close the round cleanly so you don't end up with a visible gap at the join. Just place your hook into that ch-1 space and work the dc — it'll make sense once you're in it.
Can I use a different hook size?
The 3.00 mm hook is a starting point for sport weight yarn, but hook size here isn't critical the way it would be for a fitted garment. A slightly larger hook will give you a looser, slightly bigger coaster. A smaller one will tighten things up. The finished size is meant to be around 4 inches, so if that matters to you, swatch first and adjust from there.
What skills do I actually need to make this?
You need to know how to chain, slip stitch, and work dc, hdc, and sc. The color changes use a ch 1 join, which is a small technique to learn if you haven't done it before, but it's straightforward once you see it once. Round 3 is the most involved round because the stitch types shift as you go around, but there's nothing in here that requires advanced crochet experience.
Happy Crocheting
These coasters are one of those quick makes that somehow feel more satisfying than they have any right to. Five rounds, two colors, and you've got something that actually looks considered sitting on a coffee table. If you make a set, I'd love to see what color combinations you land on — drop a photo in the comments or tag me on social media. And if you're saving patterns for later, this one pins well on Pinterest for those "I need a fast gift idea" moments that always seem to come up at the worst time.


Leave a Reply