
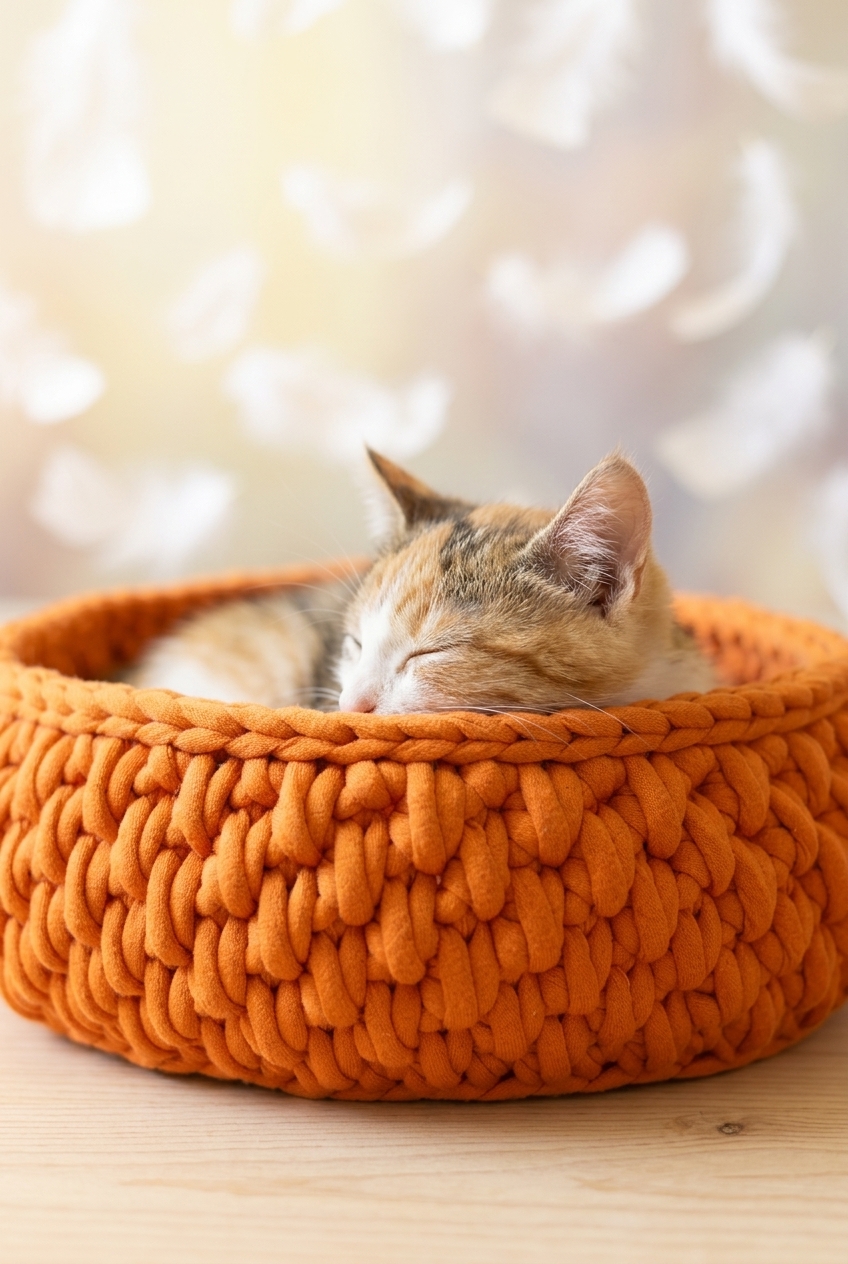
My cats have officially taken over every soft surface in my house, so I figured I might as well lean into it and make something just for them. This Round Cat Lounger Crochet Pattern is honestly one of those projects I kept putting off because I thought it would be complicated, but it really does come together faster than you'd expect. If you've got a cat who loves curling up in a cozy spot, this one's for them.

Jump to:
About the Design
What I like most about this design is how satisfying the construction feels from start to finish. You're building up from a flat base and working your way around in a way that just makes sense as you go. There's a real logic to it, and by the time you're finishing the rim, you kind of can't believe how solid and intentional the whole thing feels.
I'd make this for any cat person, honestly. It works as a gift, it works for your own home, and it's the kind of thing that looks like you put in way more effort than you actually did.
Why This Pattern Stands Out
A sturdy, satisfying make that your cat will actually use.
- Intermediate skill level: You'll need some experience with working in the round, but nothing here is going to stop you in your tracks.
- Great gifting project: Cat owners are easy to shop for, and a handmade lounger is genuinely something they'll keep and use.
- Technique building: The construction method here is really useful to know, and it carries over well to other basket and bowl-style projects.
- Practical finished size: At 12 inches wide, it's roomy enough for most cats without taking over your entire floor.
- Works up quickly: Chunky yarn and a straightforward stitch pattern mean you're not committing to weeks of work.
Your Supply List
Two balls of super bulky yarn and a handful of basic tools — that is genuinely the whole list.
- Super Bulky (Weight 6) Yarn: I use a weight 6 super bulky for this project because the thick fabric it produces is what gives the lounger its structure and squishiness. You want something with enough body to hold the bowl shape once the sides are worked up. Two full balls is what the sample uses, so plan for that and keep a little extra on hand in case your gauge runs loose.
- US Size N/15 (10 mm) Crochet Hook: Worth noting: the yarn's label will likely suggest a 15 mm hook, but this pattern intentionally drops down to a 10 mm. The tighter gauge makes the fabric denser and sturdier, which really does matter when a cat is going to sit in it and knead at the sides.
- Stitch marker: The base and sides are both worked in a continuous spiral, so a stitch marker isn't optional here. You'll be moving it up at the end of every round to keep track of where you are.
- Heavy books and an iron or garment steamer: These are for flattening the base if it starts to cup or curl as you work. Stack books on top after steaming and let it dry flat before continuing. Not every crafter will need this, but it's worth having both on hand before you start.
- Also needed: scissors, yarn needle
Alternative Yarn Suggestions
If you can't find a super bulky single-strand yarn in a color you like, there's a straightforward workaround. Holding two strands of a bulky weight yarn together gets you to roughly the same thickness and the fabric behaves similarly.
- Two strands of bulky (Weight 5) held together: This is the most practical substitute. Most crafters have at least one bulky yarn sitting around, and doubling up gives you a fabric that's close enough in weight and density. Just make sure both strands are the same fiber content so the finished piece washes consistently.
- Single-strand super bulky roving-style yarn: A roving or unspun style super bulky works fine here too. It tends to be softer and more textured, so the finished lounger will look a little different, but the construction holds up the same way.
At a Glance
A chunky crocheted cat bed worked in continuous spirals from the base up, sized for a small cat around 8 lbs.
| Skill Level | Intermediate |
| Pattern Gauge | Gauge is not critical for this project. Use a hook size that creates a sturdy, firm fabric that will hold its shape. |
| Finished Size | 12 in wide x 4 in tall |
| Yarn Weight | 6 Super Bulky |
| Fiber | Not specified — check the yarn label (Bernat Maker Big) |
| Terminology | US |
Customizing the Size
After Base Round 8, check your circle. It should measure approximately 12 inches across for a small cat around 8 lbs. If you're making this for a larger pet, keep going with the increase pattern: each round adds 8 stitches, so just continue until you hit the diameter you need. Add extra rounds to the sides as well to give the walls enough height. The math stays the same throughout.
Stitch Guide & Abbreviations
Mostly familiar stitches here, plus one spike stitch you'll want to read through before starting.
- ch = chain
- hdc = half double crochet
- inc = increase (2 hdc in same st)
- MR = magic ring
- sc = single crochet
- sl st = slip stitch
- spike = spike single crochet (insert hook into the base of the sc 1 round below, yo, pull up a loop to current round height, yo, pull through both loops)
- st(s) = stitch(es)
Special Stitches
- Spike Single Crochet: Insert hook into the base of the sc 1 round below the current working round, yo, pull up a loop to current round height, yo, pull through both loops. The key detail is pulling that loop all the way up to the height of your current round before completing the stitch — if you don't, it'll pull the fabric in.
Read Before Starting
Both the base and the sides are worked in a continuous spiral. Don't join at the end of rounds. Place a stitch marker in the last stitch of each round and move it up as you go — this is the only way to keep track of where rounds begin and end in a spiral.
The base has a tendency to cup as it grows. If that starts happening, don't push through it. Stop, steam the piece with an iron or garment steamer, lay a heavy book on top, and let it dry completely flat before picking it back up. It's easier to fix early than after the sides are done.
This pattern uses shorthand for consecutive stitches: "hdc 2" means hdc in each of the next 2 stitches, "hdc 3" means hdc in each of the next 3, and so on.
When you're running low on a ball of yarn, don't wait until the very end. Drop the current strand when about 4 inches remain and complete that stitch with the new ball. It keeps the join tidy and avoids the kind of knot that works its way to the surface later.
If Bernat Maker Big isn't available, holding two strands of a super bulky yarn like Wool-Ease Thick & Quick together works as a substitute. The hook size here is US N/15 (10 mm), which is smaller than the 15 mm recommended on the Bernat label. That's intentional. The tighter gauge gives the bed structure so it actually holds its shape under a cat's weight.
Crochet Instructions
This round cat lounger works up in two main pieces: a flat base and a textured side wall that rises up from it.
Building the Base
The base is worked flat in the round using half double crochet, expanding outward from a magic ring to form a wide, sturdy disc. This is the foundation everything else builds on, so it's worth taking a moment to check your stitch count at the end of each round.
Round 1: Hdc 8 in MR, pull tail to close ring. Continue working in a spiral. Place stitch marker in last st of round and move up at end of each round. [8 hdc]
Round 2: Inc in each st around. [16 hdc]
Round 3: (Hdc 1, inc) around. [24 hdc]
Round 4: (Hdc 2, inc) around. [32 hdc]
Round 5: (Inc, hdc 3) around. [40 hdc]
Round 6: (Hdc 4, inc) around. [48 hdc]
Round 7: (Inc, hdc 5) around. [56 hdc]
Round 8: (Hdc 6, inc) around. [64 hdc]
Working the Sides
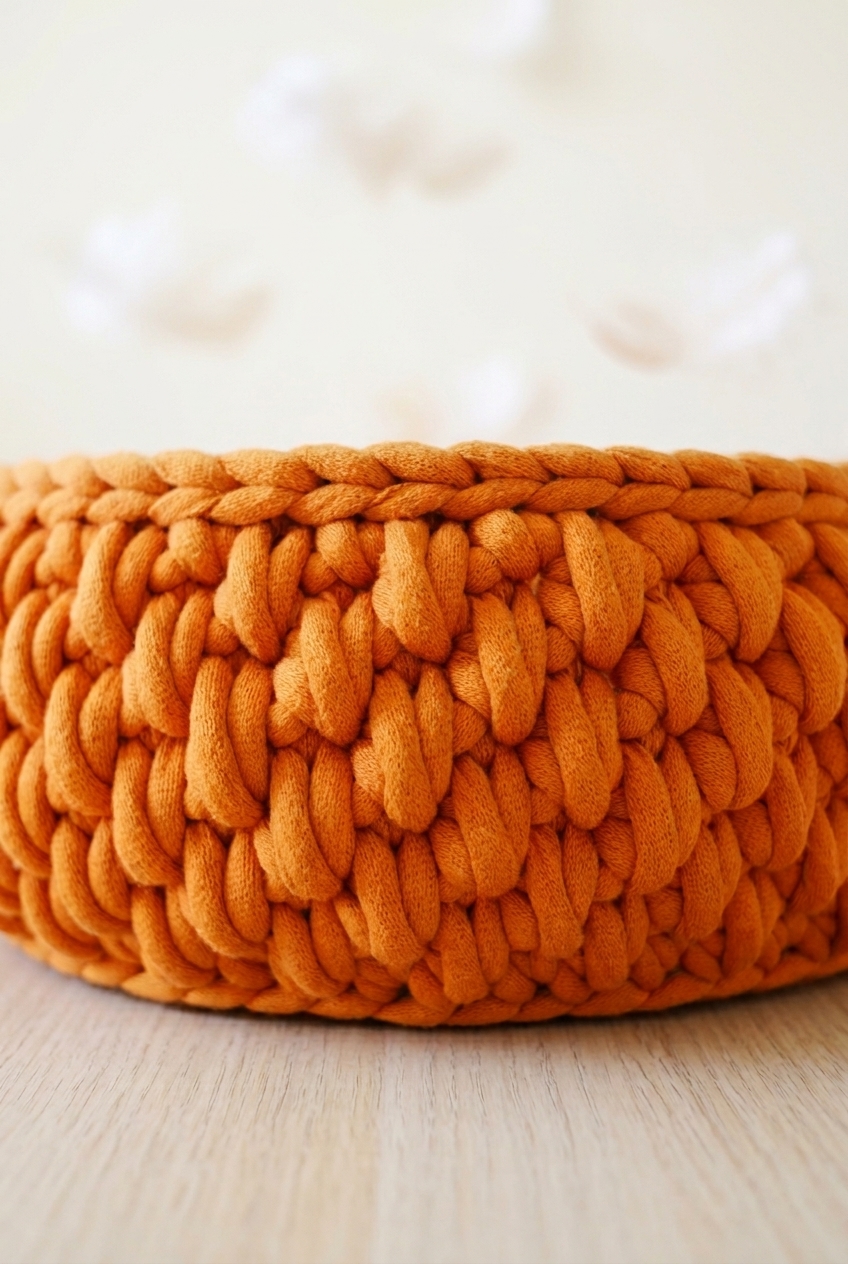
The sides rise up from the edge of the base using a combination of back loop, third loop, and spike stitches to create a textured, woven-looking wall. The transition in Round 1 is the key moment: working into the back loop and third loop simultaneously locks the side wall to the base at a clean right angle.
Round 1: Sc in back loop AND 3rd loop of the next 63 sts. Place 2 sc in the next st. Do not join—continue working in a spiral and move marker as needed. [65 sc] The third loop of a half double crochet sits behind the back loop — it's the horizontal bar you'll feel if you run your finger along the inside of the stitch. Working into both loops at once here is what gives the base-to-side join its structure.
Round 2: (Spike 1, sc 1) around for 64 sts, spike in last st. [65 sts] A spike stitch is worked by inserting your hook one or more rows below the current round rather than into the stitch directly above. It pulls the yarn up through that lower row, creating the textured, interlocked look across the sides.
Rounds 3–4: Continuing to work in a spiral, sc each spike st and spike each sc. [65 sts] The pattern here is simply alternating: wherever you worked a sc last round, you work a spike, and wherever you worked a spike, you work a sc. Keeping that alternation consistent is what builds the texture.
Round 5: Sl st loosely in each st around. Finish with an invisible join. [65 sl st] Keep your tension relaxed on this round — tight slip stitches can pull the top edge inward. The invisible join closes the round without a visible seam at the top.
Finishing
Just a quick cleanup step to close everything out.
Step 1: Weave in any remaining ends.
Fasten off, weave in ends.
Care Instructions
Since this lounger sits on the floor and gets actual cat use, spot cleaning is your best friend. Check your Bernat Maker Big label for specific washing guidance, but with a bulky cotton-blend construction like this, I'd avoid tossing it in the washing machine on a regular cycle. The base can lose its shape when it gets wet and heavy, so if you do wash it, lay it flat to dry and press it down while it's still damp. A heavy book on top while drying works just as well here as it does during construction.
Frequently Asked Questions
Steam it. Grab an iron or garment steamer, hit the base with steam, then stack a heavy book on top and let it dry completely flat before you keep going. I had to do this a couple of times during the base rounds, and it made a big difference. Don't try to push through with a curled base or the whole finished piece will sit unevenly.
Going down to a 10 mm hook on purpose creates a much denser, sturdier fabric. For a cat lounger, you want the base and sides to hold their shape under actual weight, and a 15 mm hook would give you something too open and floppy. The tighter tension is what makes this functional rather than decorative.
A spike stitch here works into the base of the single crochet one round below where you're currently working. So instead of inserting your hook into the stitch directly in front of you, you drop down a round. It creates a textured, woven look on the sides of the lounger. Rounds 2 through 4 of the sides alternate spike stitches and single crochets to build that pattern.
Yes, and the pattern actually tells you how. After Base Round 8, check your diameter. For a cat around 8 lbs, 12 inches across is about right. For a bigger cat, keep adding increase rounds to the base following the same pattern: each round adds 8 stitches. Then add extra rounds to the sides as needed to get the height you want.
Holding two strands of a super bulky yarn like Wool-Ease Thick and Quick together works as a substitute. You're essentially trying to match the weight and thickness of the original yarn so the stitch density stays consistent. Just keep your hook at 10 mm and check that your base is reaching roughly 12 inches across after Round 8.
Move your stitch marker as you go, same as the base. The first round of the sides does place 2 sc in one stitch to get to 65, which means your round start will be slightly offset from where the base rounds began. That's fine and intentional. Just keep moving the marker and don't worry about it looking perfectly symmetrical at the join point.
Before You Go
If your cat actually uses this thing, I want to see it. Tag me on Instagram or drop a photo in the comments because honestly, cats sitting in handmade things is one of my favorite corners of the internet. If you're saving this for later, pin it so you can find it again when you're ready to cast on. And if the spike stitch gave you any trouble or you sized yours up for a bigger cat, leave a comment below. I'm curious how it turned out.

Leave a Reply