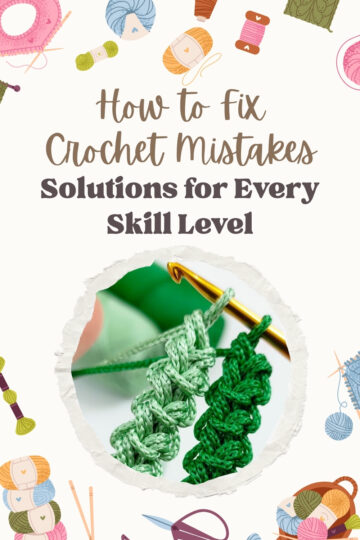
Learning to crochet starts with mastering one essential skill: the single crochet stitch. This fundamental technique forms the foundation of countless crochet projects, from cozy blankets and sturdy dishcloths to adorable amigurumi toys. The single crochet stitch is created by inserting your hook into a stitch, pulling up a loop, then pulling through both loops on your hook in one smooth motion.

You might be wondering what makes the single crochet stitch different from other stitches. Unlike taller stitches that create a looser fabric, single crochet produces a tight, dense texture that holds its shape well. This makes it perfect for projects that need structure and durability.
Throughout this guide, you'll learn everything from creating your first slip knot to working single crochet stitches in both rows and rounds. I'll walk you through common variations, show you how to avoid typical beginner mistakes, and answer the questions that come up most often when you're just starting out.
Jump to:
Getting Started: Making a Slip Knot and Foundation Chain
The slip knot is your anchor point for every crochet project, and the foundation chain forms the base where all your stitches will live. Mastering these two skills gives you the control and consistency needed for successful single crochet work.
How to Make a Slip Knot
Start by holding your yarn tail in your left hand, leaving about 6 inches free. Create a loop by crossing the working yarn over the tail, forming a circle.
Reach through the center of this circle and pull the working yarn through to create a new loop. Place this loop on your crochet hook and gently pull both the tail and working yarn to tighten the knot around the hook shaft.
The slip knot should slide easily along your hook when you tug the working yarn. If it feels stuck or too tight, loosen it slightly. This adjustable knot doesn't count as a stitch in your pattern.
Creating a Foundation Chain
Hold your hook in your dominant hand and the yarn in your other hand. Wrap the working yarn over your hook from back to front, which is called a yarn over.
Pull the wrapped yarn through the loop already on your hook. You've just made your first chain stitch (ch).
Repeat this process for each chain stitch your pattern requires. Each chain stitch creates a small "V" shape that you'll recognize as you work. The foundation chain forms the base row where you'll insert your hook for the first row of single crochet stitches.
When crocheting a chain, maintain consistent tension by keeping your hands in the same position. Move the completed chain down between your fingers as you work, always keeping the working area close to your hook.
Tips for Consistent Chains
Keep your chains loose enough to insert your hook comfortably in the next row. Tight chains are the most common beginner mistake and make working into the foundation chain frustrating.
Use a hook one size larger than your project requires specifically for the foundation chain, then switch to the correct size for your first row. This technique ensures your chain row has enough stretch and flexibility.
Count your chains as you make them, placing a stitch marker every 10 or 20 stitches for longer foundation chains. Check your tension by looking at the chain stitches side by side—they should all be roughly the same size.
If your chains vary wildly in size, practice making 20-30 chain stitches repeatedly until the motion becomes automatic. Consistent tension develops through muscle memory, not conscious effort.
Step-by-Step Guide to the Single Crochet Stitch
The single crochet stitch requires inserting your hook into the correct stitch, wrapping the yarn around your hook twice at specific points, and pulling loops through in a particular sequence. Understanding where your first and last stitches fall prevents accidentally adding or losing stitches as you work.
Inserting the Hook Correctly
Insert your hook into the second chain from your hook when working your first single crochet into a foundation chain. The skipped chain serves as your turning chain and doesn't count as a stitch.
Push your hook under both top loops of the chain stitch (the V-shape you see when looking at your chain). Your hook should go all the way through so the chain stitch sits on the shaft of your hook. If you only catch one loop instead of both, your stitch won't be secure.
For subsequent rows, insert your hook under both loops at the top of each stitch from the previous row. You'll see these loops form a V-shape on top of each stitch. Some patterns call for working in the front loop or back loop only, but standard single crochet uses both loops.
Mastering the Yarn Over
After inserting your hook into the stitch, wrap your yarn over the hook from back to front. This motion should be smooth and controlled, keeping your yarn tension consistent.
Catch the yarn with your hook and pull it back through the stitch. You now have two loops on your hook. This first yarn over brings up a loop through the stitch you're working into.
Next, yarn over again from back to front. Pull this new loop through both loops currently on your hook. Your hook should now have only one loop remaining. Each sc stitch requires two yarn overs at different stages, and both must be completed to finish the stitch properly.
Completing the Single Crochet Stitch
Your single crochet is complete when one loop remains on your hook. This final loop becomes the working loop for your next stitch.
The completed stitch should look like a small knot with a V-shape on top. If you see three or more loops on your hook at any point after the second yarn over, you've made an error and need to pull out the stitch and try again.
Continue making single crochet stitches in each chain or stitch across your row. Work each stitch using the same process: insert hook, yarn over and pull up a loop (2 loops on hook), yarn over and pull through both loops (1 loop on hook).
Identifying the First and Last Stitch
The first stitch of any row after Row 1 is the stitch closest to your hook after you've made your turning chain. Work your first sc directly into this stitch, not into the turning chain itself.
The last stitch of each row can be difficult to spot. It's the stitch at the very edge of your work, right before the turning chain from the previous row. This stitch often looks tighter or smaller than the others.
Do not work into the turning chain at the end of the row when working single crochet. The turning chain for sc doesn't count as a stitch. Count your stitches at the end of each row to verify you have the correct number—accidentally working into the turning chain is a common mistake that increases your stitch count unintentionally.
Working Single Crochet in Rows
Mastering single crochet in rows requires understanding three core mechanics: the turning chain that begins each row, the technique for turning your work between rows, and how to maintain an accurate stitch count as your practice swatch grows.
The Role of the Turning Chain
The turning chain for single crochet consists of one chain stitch worked at the start of each new row. This chain stitch brings your yarn up to the proper height for the upcoming row of stitches. Unlike taller stitches such as double crochet, the turning chain in single crochet does not count as a stitch.
You work your first actual single crochet into the very first stitch of the previous row. If you skip this stitch and move to the second one, your project will gradually narrow as you lose one stitch per row. At the end of each row, you should not crochet into the turning chain from the previous row since it doesn't count as a stitch. This distinction prevents accidental increases that would widen your fabric.
Turning Your Work Smoothly
Turning your work means flipping your crochet piece over to begin the next row. After completing the last stitch of a row, keep the loop on your hook and rotate your work from right to left, similar to turning a book page. The side that was facing away from you now faces you.
Make your chain 1 turning chain immediately after turning. Your hook should remain in the working loop throughout this process. The motion becomes automatic with practice, creating a rhythm: finish the row, turn the work, chain 1, begin the new row. This consistent sequence helps you avoid forgetting the turning chain or accidentally working into the wrong stitch.
Counting Stitches and Rows
Counting your stitches after completing each row prevents common beginner mistakes. Each single crochet creates a V-shaped loop at the top. Count these V shapes across your row to verify your stitch count matches your starting number. The turning chain creates a visible edge stitch but should not be included in your count.
To count crochet rows, examine the side edge of your fabric. Each row creates a horizontal ridge. You can count these ridges from bottom to top, though rows become harder to distinguish as your work grows. Using a stitch marker in the first stitch of each row helps you track both your starting point and total row count. A practice swatch of 10-15 stitches across and 10-15 rows tall gives you enough fabric to recognize patterns and errors in your tension and stitch placement.
Techniques for Crocheting in the Round
Single crochet in the round uses two distinct methods: joined rounds that create visible seams and continuous spirals that produce seamless results. Each technique serves different purposes and creates different appearances in your finished work.
Single Crochet in Joined Rounds
Joined rounds end each round with a slip stitch to the first stitch, creating a clear stopping point. You complete the round by inserting your hook into the first single crochet you made, yarn over, and pull through both loops on your hook.
Each new round typically starts with chain 1 before you work your single crochet stitches. The chain does not count as a stitch.
This technique creates a visible seam where your rounds connect. You can identify joined rounds in patterns when you see instructions like "join with sl st" at the end of each round.
When to use joined rounds:
- Color changes that need clean lines
- Projects where the seam faces inward
- Items requiring precise round counts
The seam makes joined rounds less suitable for amigurumi or items viewed from all sides. However, this method helps beginners track their progress more easily since each round has a definite beginning and end.
Single Crochet in Continuous Spirals
Continuous spirals eliminate the slip stitch connection and chain 1 start. You work round after round without stopping, creating a seamless spiral of stitches.
Place a stitch marker in the first stitch of each round to track your position. Move the marker up as you complete each round, relocating it to the new first stitch.
This technique produces no visible seam, making it the preferred method for amigurumi and three-dimensional projects. Your work flows continuously without interruption.
Essential for continuous rounds:
- Stitch markers to track round beginnings
- Careful stitch counting
- Understanding that rounds spiral slightly
The lack of a seam gives your work a professional, smooth appearance. You must stay vigilant about counting since missed stitches become harder to spot without the clear round divisions that joined rounds provide.
Common Variations and Special Techniques
Once you master the basic single crochet, you can manipulate where and how you insert your hook to create different textures and shapes. These techniques form the foundation for more complex stitch patterns and allow you to increase, decrease, and add visual interest to your work.
Front Loop and Back Loop Single Crochet
Each single crochet stitch creates a V-shape at the top with two strands. The strand closer to you is the front loop, and the strand farther away is the back loop. When you work into only one of these loops instead of both, you create a distinct ridge effect.
Front loop single crochet (abbreviated as FLsc or sc-fl) involves inserting your hook under only the front loop. This technique creates horizontal ridges on the back of your work and produces a stretchy, ribbed texture. You'll commonly see this used in garment cuffs and edges.
Back loop single crochet (abbreviated as BLsc or sc-bl) means you insert your hook under only the back loop. This creates visible horizontal ridges on the front of your work and gives you a different textured appearance than front loop work. Many projects alternate between front and back loop techniques to create patterns.
Both variations follow the same steps as regular single crochet after you insert your hook through the designated loop.
Single Crochet Increase and Decrease
Shaping your crochet work requires adding or removing stitches. A single crochet increase (often written as 2 sc in next st or sc2inc) means you work two complete single crochet stitches into the same stitch. This adds one stitch to your row or round and makes your fabric wider.
To increase, insert your hook into the designated stitch, yarn over, pull through (two loops on hook), yarn over, pull through both loops. Then insert your hook into the same stitch again and complete another full single crochet.
A single crochet decrease (written as sc2tog or dec) combines two stitches into one, reducing your stitch count. Insert your hook into the first stitch, yarn over and pull through. Insert your hook into the next stitch, yarn over and pull through. You now have three loops on your hook. Yarn over and pull through all three loops at once.
These techniques are essential for creating shaped items like amigurumi, garments, and hats.
Spike Stitches and Reverse Single Crochet
Spike stitches add vertical lines of color or texture to your work. Instead of inserting your hook into the stitch in the current row, you insert it into a row below (typically one or two rows down). Pull up a loop to the height of your current row, then complete the single crochet as normal. This creates a longer, "spiked" stitch that stands out from your fabric.
Reverse single crochet, also called the crab stitch, works from left to right instead of right to left (for right-handed crocheters). Insert your hook into the previous stitch, yarn over, pull through, yarn over again, and pull through both loops. This creates a rope-like twisted edge perfect for borders and finishing work.
The waistcoat stitch (also called knit stitch) involves inserting your hook between the V-shape and under the vertical post of the stitch below. This creates a fabric that resembles knitting and works well for tapestry crochet and colorwork projects.
Practical Tips and Avoiding Mistakes
Maintaining even tension and catching errors early will save you from frustration as you practice single crochet. Most beginners make similar mistakes that are easy to fix once you know what to watch for.
Managing Tension and Consistency
Your tension refers to how tightly or loosely you hold the yarn while crocheting. Consistent tension creates even stitches that are all the same size.
Hold your hook comfortably without gripping too hard. Your hand should feel relaxed, not tense or cramped. The yarn should flow smoothly through your fingers without being pinched.
If your stitches look uneven, check that you're wrapping the yarn around your fingers the same way for each stitch. Many crocheters wrap the working yarn around their pinky and index finger to control flow. Your stitches will naturally become more uniform as you practice and develop muscle memory.
Tight tension makes it difficult to insert your hook into stitches. Loose tension creates sloppy, stretched-out fabric with visible gaps. Aim for a middle ground where your hook slides through stitches easily but the fabric feels sturdy.
Using Stitch Markers Effectively
A stitch marker helps you track the first stitch of each row or round. This simple tool prevents you from losing your place or accidentally skipping stitches.
Place the stitch marker in the first stitch after your turning chain when working in rows. Move it up to the new first stitch at the start of each row. For rounds worked in a continuous spiral, mark the first stitch and shift the marker up as you complete each round.
Stitch markers also help you count stitches in longer rows. Place markers every 10 or 20 stitches to make counting easier. You can use dedicated crochet markers, safety pins, or even a scrap piece of contrasting yarn.
Fixing Common Single Crochet Mistakes
The most frequent crochet mistakes involve miscounting stitches or working into the wrong loop. Accidentally adding or dropping stitches changes the width of your project.
Count your stitches at the end of each row when starting out. If you have too many stitches, you likely crocheted into the turning chain from the previous row. If you have too few, you probably skipped the first or last stitch of the row.
Common single crochet mistakes include:
- Missing the first stitch of a row because it sits right below the turning chain
- Working into the turning chain at the end of a row (adding an extra stitch)
- Splitting the yarn instead of inserting your hook under both loops
- Twisting stitches by working under only one loop unintentionally
To fix a mistake, simply unravel your work back to the error by gently pulling the working yarn. Insert your hook back into the last correct stitch and continue from there.
Frequently Asked Questions
New crocheters often encounter similar challenges when learning single crochet. Understanding the right supplies, proper technique, and how to maintain consistent stitches will help you build confidence and avoid common mistakes.
You need a crochet hook, yarn, scissors, and a yarn needle for weaving in ends. For beginners, start with a 5mm or 5.5mm (size H-8 or I-9) crochet hook and worsted weight yarn in a light color.
Light-colored yarn makes it easier to see individual stitches as you learn. Avoid dark colors like black or navy when you're starting out.
A stitch marker is also helpful for keeping track of your place in the work. You can use a safety pin or buy purpose-made stitch markers at craft stores.
To make a slip knot, create a loop with your yarn and pull the working yarn through it, then tighten it on your hook. The slip knot should slide easily along the hook shaft without being too loose or tight.
For the foundation chain, yarn over your hook and pull through the loop. Repeat this motion to create as many chain stitches as your pattern requires.
Each chain stitch should be the same size and tension. If your chains are too tight, you'll struggle to insert your hook in the first row.
Insert your hook into the second chain from the hook for the first single crochet stitch. The skipped chain acts as your turning chain and doesn't count as a stitch.
You can insert the hook under one loop or two loops of the chain, though most beginners find it easier to go under both loops at first. Some crocheters prefer working into the back bump of the chain for a neater edge.
Count from your hook to find the correct chain. The loop on your hook is not counted as a chain stitch.
Consistent tension comes from holding your yarn and hook the same way for each stitch. Your yarn should flow smoothly through your fingers without gripping too tightly or letting it hang too loosely.
Practice is the most effective way to develop even tension. Your first few projects may look uneven, and that's normal as your hands learn the motions.
If your fabric is curling or bunching, your tension is likely too tight. If it's flaring out or looks loose and gappy, you need to hold the yarn more firmly.
Switching to a larger or smaller hook can help compensate for naturally tight or loose tension. Many patterns list a gauge to help you match the designer's tension.
Count your stitches at the end of each row when you're learning. Each V-shaped top of a stitch counts as one single crochet.
The turning chain at the beginning of single crochet rows does not count as a stitch. This means you should have the same number of stitches in each row.
Place a stitch marker in the first stitch of each row to help identify where the row begins and ends. Move the marker up as you complete each row.
For working in the round, especially in a spiral, place a marker in the first stitch of the round. This prevents losing your place since continuous rounds have no visible starting point.
The last stitch of the row sits at the edge of your work and can be easy to miss. It looks like all the other stitches with a V-shaped top.
Do not crochet into the turning chain from the previous row in single crochet. The turning chain doesn't count as a stitch, so you'll stop after the last visible V.
Your first stitch of the new row should be directly below the turning chain you just made. Using a stitch marker in the first stitch helps you identify exactly where to stop at the end of the next row.
If you keep gaining stitches, you're probably crocheting into the turning chain. If you keep losing stitches, you're missing that last edge stitch.


Leave a Reply