Learning to crochet starts with two fundamental skills: making a slip knot and creating a starting chain. The slip knot is the first loop you place on your crochet hook, and the chain stitches that follow create the foundation for nearly every crochet project. Once you master these basic techniques, you'll be ready to tackle any beginner-friendly crochet pattern.

Many people feel intimidated when they pick up a crochet hook for the first time, but these foundational steps are simpler than they appear. I'll walk you through each movement with clear instructions and practical tips to help you develop good habits from the start. You'll learn how to position your hands, control yarn tension, and create consistent stitches.
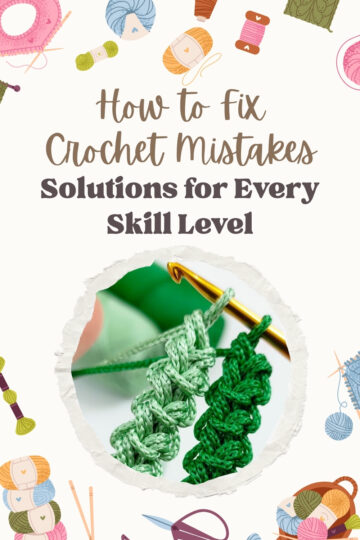
This beginner crochet tutorial covers everything you need to start a crochet project with confidence. From forming your first slip knot to building an even foundation chain, you'll gain the essential skills that every crocheter uses. By the end, you'll understand how to prepare for basic stitches and simple projects that put your new abilities into practice.
Jump to:
Making the Perfect Slip Knot
A slip knot anchors your yarn to the crochet hook and creates the first loop needed for making chain stitches. Getting this foundational step right ensures smooth tension and prevents frustration as you begin your crochet work.
What Is a Slip Knot and Why It Matters
A slip knot is an adjustable loop that secures yarn to your crochet hook at the start of nearly every project. This knot differs from regular knots because it can slide freely along your hook and tighten or loosen as needed.
The slip knot serves as your foundation for the starting chain. Without it, you cannot create the chain stitches that form the base of most crochet patterns.
A properly made slip knot sits comfortably on your hook without restricting movement. If tied too tight, you will struggle to work subsequent stitches. If too loose, the yarn may slip off your hook entirely.
This simple technique takes only seconds to master but impacts your entire project's success. The knot must allow smooth yarn flow while maintaining enough grip to stay in place during your first few chains.
Step-by-Step Guide to Make a Slip Knot
Hold your crochet hook in your dominant hand. Place the yarn over your hook with the tail end (the end not attached to the ball) in your non-dominant hand.
Create a loop by crossing the tail end over the working yarn (the strand connected to the ball). The tail should form an "X" shape over the working yarn.
Pinch where the yarn crosses between your thumb and index finger. Insert your hook under the working yarn from behind the loop.
Catch the working yarn with your hook and pull it through the original loop. You now have a new loop sitting on your hook.
Pull both the tail end and working yarn gently to tighten the knot around your hook shaft. The loop should slide easily up and down the hook when you tug the working yarn. Leave approximately 4-6 inches of tail yarn for weaving in later.
Alternate Methods for Creating a Slip Knot
The finger method allows you to create a slip knot without touching your hook initially. Wrap the yarn around your middle finger with the working yarn in your palm and the tail draped over your index finger.
Reach through the loop on your finger and grab the tail end. Pull this through to form a new loop, then slide it onto your hook and adjust the tension.
Some crocheters prefer the wrap-and-twist method. Hold the tail end and working yarn together, leaving about 6 inches of tail. Make a circle with the yarn, then twist it once to create a pretzel shape.
Pull the working yarn through the twisted section to form your adjustable loop. This method works well for those who find the standard approach confusing.
Each method produces the same result. Choose whichever technique feels most natural and gives you consistent results.
Common Mistakes and How to Fix Them
Making the knot too tight is the most frequent error beginners make. If you cannot slide the loop along your hook easily, loosen it by pulling gently on the working yarn while holding the knot.
Crossing the yarn the wrong way creates a knot that tightens instead of adjusting. The tail must cross over the working yarn, not under it. If your loop locks up when pulled, untie and start over with the correct crossing.
Leaving insufficient tail length causes problems when finishing your project. Always leave at least 4 inches of tail yarn for weaving in ends securely.
A loose slip knot that falls off your hook indicates you need to tighten the knot slightly. Pull both yarn ends simultaneously until the loop grips the hook without restricting movement. The sweet spot allows the loop to slide but not slip off unintentionally.
Forgetting which end is the working yarn disrupts your chain formation. Remember: the working yarn connects to your yarn ball and should be positioned for easy pulling during chain stitches.
Attaching the Slip Knot to the Crochet Hook
Once you make a crochet slip knot, the loop needs to sit properly on your hook with the right amount of tension. This ensures smooth crocheting and prevents the yarn from sliding off as you work.
Placing the Slip Knot on Your Hook
Insert your crochet hook through the center of the slip knot loop from front to back. The loop should rest on the shaft of the hook, not on the handle or the throat.
Position the loop about an inch from the hook's head. This gives you enough working room to manipulate the yarn without the knot slipping off. The tail end of the yarn should hang down in front while the working yarn (attached to the ball) extends behind your work.
Hold the base of the slip knot gently between your thumb and middle finger. This stabilizes the knot while you prepare to make your first chain stitch. Your hook should move freely within the loop when you rotate it slightly.
Keep the hook facing upward with the throat pointing toward you. This orientation allows you to catch the yarn properly when you begin chaining.
Adjusting Tension for a Secure Start
Pull gently on both the tail end and working yarn to tighten the slip knot around your hook. The knot should be snug but not tight enough to restrict the hook's movement.
Test the tension by sliding the loop up and down the hook shaft slightly. You should feel light resistance without the yarn gripping too firmly. If the loop slides too easily, tighten it by pulling the working yarn. If it feels stuck, loosen it by pulling the tail end.
Proper tension indicators:
- The hook rotates smoothly inside the loop
- The knot stays in place when you lift the hook
- You can slide the loop with gentle pressure
Avoid over-tightening, as this makes it difficult to work your first chain stitches. The loop should feel comfortable and controlled in your grip.
Forming the Starting Chain
The starting chain creates the foundation for your entire crochet project. Mastering the yarn over motion and understanding how to form consistent chain stitches will set you up for success with any pattern.
Learning the Yarn Over Motion
The yarn over is the core movement you'll use to create every chain stitch. Hold your hook with the slip knot positioned about 1 inch below the curved end, with the working yarn behind the hook.
Grasp the working yarn and bring it up and over the hook from back to front. The yarn should wrap smoothly over the hook's shaft while your slip knot stays in place below. Keep tension on the yarn by holding it between your fingers, tight enough to maintain control but loose enough to slide through easily.
Twist the hook slightly under the yarn and rotate it back toward you so the yarn nestles into the hook's curve. This catching motion ensures the yarn stays secure as you pull it through in the next step.
How to Crochet a Chain Stitch
With the yarn secured in your hook's curve, pull it through the loop already on your hook. This creates a new loop while the previous one slides off. Your first chain stitch is complete when you see a new loop on the hook and a small V-shape formed below it.
The new loop should be roughly the same size as your slip knot. If it's too tight, gently pull the loop with your hook to enlarge it. If it's too loose, tug the working yarn in the opposite direction to tighten it.
Hold the base of your work between your thumb and middle finger as you create each stitch. This stabilizes the chain and gives you better control over tension and stitch size.
Building Consistency With Multiple Chain Stitches
Continue the yarn over and pull-through motion to create additional chain stitches. Each repetition adds one more stitch to your foundation chain. Count as you go to ensure you have the correct number for your pattern.
Your chain stitches should look uniform in size and tension. Lay your chain flat to examine the V-shapes running down the front. Each V represents one chain stitch and should appear roughly the same size as the others.
Practice maintaining even tension throughout the entire chain. Beginners often start tight and gradually loosen up, creating an uneven foundation chain. If your first attempts look inconsistent, unravel them and try again until you achieve uniform stitches.
Tips for a Strong and Even Foundation Chain
A consistent foundation chain sets the stage for your entire crochet project. Proper tension control, accurate stitch counting, and recognizing common issues will help you create a sturdy base that keeps your work flat and even.
Managing Tension and Avoiding Tight Stitches
Your foundation chain should have enough give to insert your hook comfortably for the next row. When working chain stitches, hold the yarn loosely between your fingers rather than gripping it tightly. This prevents the chains from becoming too tight and difficult to work into.
If you notice your foundation chain is tighter than your regular stitches, switch to a hook one size larger for the starting chain only. Then return to your pattern-recommended hook size for subsequent rows. This beginner-friendly crochet technique solves the common problem of foundation chains that pull inward and cause fabric to curve or pucker.
Keep your working hand close to the hook as you create each chain stitch. Gentle, consistent motion produces uniform stitches that are neither too loose nor too tight. Each chain should slide easily along the hook shaft without binding.
How to Count Chain Stitches Correctly
Start counting from the first chain you made after the slip knot. The slip knot itself never counts as a stitch, and neither does the active loop currently on your hook.
Hold your foundation chain with the front facing you, showing the V-shaped stitches. Count each V as one chain stitch, moving from right to left if you're right-handed. For longer chains, place a stitch marker every 10 or 20 stitches to make recounting easier if you get interrupted.
What to count:
- Each V-shaped chain stitch after the slip knot
- Completed stitches only
What not to count:
- The initial slip knot
- The loop on your hook
Troubleshooting Crooked or Twisted Chains
A twisted foundation chain happens when you flip or rotate your work while creating chain stitches. Keep the chain flat on your work surface or lap as you go, checking that all V-shapes face the same direction.
If your chain curves upward like a smile, your stitches are too loose. Practice maintaining firmer tension or use a hook one size smaller for the foundation chain. A downward curve indicates stitches that are too tight, requiring you to relax your grip or use a larger hook.
Lay your completed foundation chain on a flat surface before working into it. The chain should lie straight without twisting or curling. If it twists, unravel and restart while paying attention to keeping consistent orientation. With practice, your muscle memory will develop and these issues will resolve naturally.
Frequently Asked Questions
The slip knot and starting chain form the foundation of nearly every crochet project, but they often raise specific questions about technique, tension, and common errors that can affect your finished work.
A slip knot creates an adjustable loop that secures your yarn to the crochet hook. This loop serves as your first stitch and provides the anchor point from which all subsequent chain stitches are built.
Without a slip knot, you have no secure way to attach the yarn to your hook. The knot's adjustability allows you to tighten or loosen the loop as needed while you work your foundation chain.
While some crocheters use a twist start as an alternative, the slip knot remains the most common method for beginners. It creates a stable starting point that won't come undone as you crochet.
Create a loop with your yarn, ensuring the tail end sits behind the working yarn. Insert your hook through the loop, catch the working yarn, and pull it through to form a new loop on your hook.
Pull the tail end to tighten the knot around the hook's shaft. The loop should feel snug but still slide easily back and forth on the hook when you test it.
If the loop becomes too tight, you won't be able to work your first chain stitch smoothly. Loosen it by gently pulling on the working yarn until the loop moves freely along the hook's working area.
You should always bring the yarn over the hook from back to front. This movement, called a yarn over, ensures your stitches form correctly and maintain proper structure.
Hold the base of your slip knot between your thumb and index finger. Bring the working yarn behind the hook, then over the top from back to front, and catch it in the hook's curved section.
Wrapping the yarn in the opposite direction will create twisted or malformed stitches. Every chain stitch requires this same back-to-front yarn over motion.
Move your thumb and index finger up the chain after every stitch or two to stay close to your hook. This positioning gives you better control over each new stitch you create.
Pull each completed stitch up onto the hook's working area or shaft rather than letting it sit near the throat. Stitches that form too close to the hook's tip will be tight and difficult to work into later.
Practice maintaining steady but not excessive tension on your working yarn. Your yarn should have enough pressure to create defined stitches, but you shouldn't need to grip it tightly.
The number of chain stitches depends entirely on your pattern's instructions. Your pattern will specify the exact number needed for the foundation chain, which determines the width of your project.
Count each V-shaped loop as one chain stitch, starting from the stitch closest to your hook and moving toward the slip knot. The loop currently on your hook never counts as a chain stitch.
The slip knot itself also doesn't count in your total. If your pattern calls for 20 chains, you should have 20 visible V-shaped stitches between your hook and the slip knot.
Making chains too tight is the most frequent error beginners encounter. If you can't easily insert your hook into the chain stitches later, you're pulling them too snug. Relax your tension and pull each new stitch up onto the hook's shaft to give yourself more room.
Another common mistake is letting stitches form below the hook's working area near the throat. This creates inconsistent stitch sizes and makes counting difficult. Always ensure each new chain sits on the wider part of the hook.
Twisting the chain is also problematic for beginners. Keep your work flat and untwisted by holding the base of your chain firmly and letting the hook rotate naturally as you pull yarn through each loop. If your chain begins to spiral, you may be working your yarn overs in the wrong direction or rotating your hook inconsistently.


Leave a Reply