Safety eyes transform crocheted pieces from simple yarn shapes into expressive characters with personality. To attach safety eyes to crochet, you push the post through the fabric from the front at your chosen placement, then secure it from the inside by pressing a locking washer firmly onto the post until it clicks into place. This simple process creates a permanent, professional-looking finish that gives your amigurumi a polished appearance.

The challenge isn't in the mechanics of attaching safety eyes, but in making the right choices before you lock them in. You need to select the correct size for your project, determine the best placement for your desired expression, and understand when these eyes are appropriate for your finished piece. Getting these decisions right makes the difference between a cute creation and one that truly comes to life.
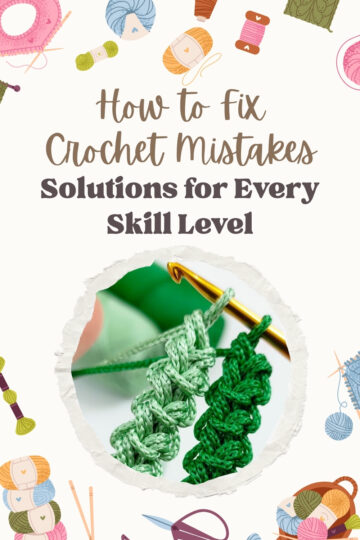
This guide walks you through everything you need to know about working with safety eyes in your crochet projects. You'll learn how to choose the right size and style, plan your placement carefully, attach them securely, and solve common problems that arise during installation.
Jump to:
Understanding Safety Eyes and Their Role in Amigurumi
Safety eyes are specialized plastic fasteners designed specifically for handmade toys, consisting of a post with a colored dome and a locking washer. They provide a secure, professional appearance that transforms crocheted shapes into characters with distinct personalities.
What Are Safety Eyes?
Safety eyes are small plastic components made up of two parts: a front piece with a ridged post and a flat locking washer. The front piece features a colored dome or pupil, while the post extends through your crochet fabric from the outside. The washer slides onto this post from the inside and locks into place over the ridges.
These fasteners come in various sizes, typically measured in millimeters. Common sizes range from 4mm for tiny projects to 40mm for large plushies. The locking mechanism creates a permanent bond once secured.
You can find safety eyes in multiple styles beyond basic black. Options include colored pupils, glitter finishes, and specialized designs like cat eyes with vertical pupils. The variety allows you to customize your amigurumi's appearance and expression.
Why Use Safety Eyes in Crochet Projects?
Safety eyes offer a clean, uniform finish that elevates your crochet work beyond sewn or glued alternatives. The locking washer system creates a secure attachment that withstands regular handling and play. This durability makes them ideal for toys that will be loved and used frequently.
The installation process is straightforward. You push the post through your chosen stitch, then press the washer onto the post from inside your project until it clicks into place. This simplicity allows even beginners to achieve professional-looking results.
Safety eyes also provide consistency across multiple projects. Unlike embroidered or sewn eyes, which can vary in appearance, plastic safety eyes maintain the same shape and size every time. This uniformity is particularly valuable when creating matching sets or following specific patterns.
Overview of Amigurumi and Eye Selection
Amigurumi refers to the Japanese art of crocheting small stuffed creatures and characters. In amigurumi, eyes serve as the focal point that brings personality to your creation. The size and placement of safety eyes directly impacts your finished piece's expression and character.
Your yarn weight determines the appropriate eye size. Fingering or sport weight yarns pair well with 4-7mm eyes, while worsted weight typically requires 8-12mm eyes. Bulky yarns work best with 13mm or larger eyes.
Eye placement affects more than aesthetics. Position them too close together and your character appears cross-eyed or intense. Space them too far apart and you create a sleepy or surprised expression. You should install safety eyes before stuffing your amigurumi, as the washer must be attached from inside the piece.
Selecting the Right Safety Eyes for Your Project
The right safety eyes depend on your project's recipient, desired expression, and overall aesthetic. Size, material, and color all affect how your finished amigurumi appears and whether it's safe for its intended user.
Choosing Size, Shape, and Color
Safety eye sizes typically range from 4mm to 30mm in diameter. Small eyes between 4-9mm work best for miniature amigurumi and tiny creatures. Medium eyes from 10-15mm suit most standard-sized projects like typical stuffed animals. Large eyes above 18mm create dramatic looks for oversized plushies or characters requiring bold features.
The size you select changes your project's entire personality. Eyes placed at 6mm give a delicate, refined appearance, while 12mm eyes on the same head create a cute, cartoon-like effect. Always test different sizes by holding them against your partially completed work before inserting them permanently.
Common Safety Eye Styles:
- Round glossy eyes (standard choice)
- Oval or cat-shaped eyes
- Sleepy or half-closed eyes
- Character eyes with painted details
Color selection extends beyond basic black. Colored eyes with painted pupils, irises, or reflective spots add realism and character. Clear or translucent eyes backed with colored washers offer another dimension. Black remains the most versatile choice for beginners since it works with any yarn color scheme.
When to Use Felt Eyes Instead
Felt eyes provide the safest option for items intended for children under three years old. Safety eyes with washers can still pose choking hazards if the washer isn't secured properly or if determined hands pull hard enough.
Choose felt or embroidered eyes for baby items, children's toys, or any amigurumi that will receive rough handling. These sewn-on alternatives eliminate choking risks entirely. Felt eyes also work better when you need to wash items frequently, as plastic safety eyes can crack or discolor over time.
The main drawback is time investment. Cutting and stitching felt pieces takes longer than clicking safety eyes into place. Embroidered eyes require basic embroidery skills but offer complete creative control over size, shape, and expression.
Where to Purchase Safety Eyes
Online craft retailers stock the widest variety of safety eye styles, sizes, and colors. Specialty crochet suppliers offer bulk packs that reduce cost per unit significantly when you plan multiple projects.
Local craft stores carry basic safety eye selections, typically limited to standard black rounds in common sizes. Shopping in person lets you see actual size and quality before purchasing, which helps beginners who struggle visualizing measurements.
Recommended pack sizes:
- Singles or small packs for testing new sizes
- Bulk packs of 50-100 pairs for your most-used sizes
- Variety packs when starting out
Check that safety eyes include proper washers sized correctly for the eye stem. Purchasing from reputable crochet suppliers ensures you receive quality products that meet safety standards rather than generic craft eyes with poorly fitting washers.
Planning and Marking Eye Placement
Eye placement determines whether your amigurumi looks friendly, mischievous, or even grumpy. The position affects the entire character of your finished piece, and a small shift of just one stitch can change the expression dramatically.
Determining the Ideal Spot
Most amigurumi patterns specify eye placement between particular rounds, typically positioning them in the middle third of the head. Count the rounds carefully from the top of the head downward to find the recommended placement row. Standard spacing places eyes 6-8 stitches apart for average-sized heads, though this varies based on your project size and desired look.
Consider the anatomy of your character when choosing placement. Eyes positioned lower on the head create a cute, baby-like appearance, while higher placement gives a more mature or alert expression. Side-to-side spacing matters equally—closer eyes appear younger and more innocent, while wider spacing suggests maturity or alertness.
The size of your safety eyes influences ideal placement too. Larger eyes need more space between them to avoid a crowded appearance. Always check that your chosen position allows the washer to fit comfortably on the wrong side without overlapping with the washer from the other eye.
Using Markers, Pins, or Stitch Guides
Insert stitch markers or pins through the fabric at your planned eye locations before committing to the placement. You can use standard locking stitch markers, safety pins, or even your crochet hook to mark the spot temporarily. Push the marker through the gap between stitches rather than splitting the yarn itself.
Some crocheters prefer using removable markers on the outside of their work, while others insert them from the inside to see exactly where the washer will sit. Both methods work well—choose whichever gives you the clearest view of the final placement.
Testing Expression and Balance
Step back and view your marked amigurumi from multiple angles before inserting the safety eyes. The front view shows symmetry, but checking from the sides and top reveals whether the eyes sit level on the head. Take a photo if needed—sometimes a picture makes placement issues more obvious than looking at the piece directly.
Try moving one or both markers by a single stitch in different directions to see how it affects the expression. One stitch up, down, left, or right can shift the mood from sleepy to surprised. Check that both eyes align on the same round and maintain equal spacing from the center line of your work.
Step-by-Step: Attaching Safety Eyes Securely
Proper installation ensures your safety eyes stay firmly in place while giving your amigurumi a polished look. The process involves preparing the fabric, positioning the eyes correctly, and securing them with washers using firm pressure.
Creating Openings in Crochet Fabric
Your crochet fabric needs adequate openings for the eye posts to pass through. If you work with tight tension, the natural gaps between stitches may be too small for the posts.
Use progressively larger crochet hooks to gently stretch the stitch where you want to place each eye. Insert a hook one size larger than your working hook, then repeat with an even larger hook until the opening accommodates the post comfortably. This method preserves the integrity of your yarn fibers.
Count stitches carefully to ensure symmetrical placement. Most patterns specify exact stitch and row counts for eye placement. Mark these positions with stitch markers or pins before inserting the posts. The opening should allow the post to slide through without forcing it, which could split your yarn or distort the surrounding stitches.
Inserting and Adjusting the Eyes
Push the eye post through from the right side of your work, inserting it between yarn strands rather than piercing through them. The ridged shaft should pass completely through so all ridges are visible from the inside.
Check placement before committing to the position. Place both eyes first without washers attached, then view your project from multiple angles. Adjust spacing by removing and reinserting as needed. Eyes positioned one stitch too high or too far apart can dramatically change your amigurumi's expression.
Leave your work unstuffed at this stage. You need clear access to the inside of the piece to attach washers properly. Once washers are locked on, repositioning becomes nearly impossible without cutting the posts.
How to Attach Safety Eyes With Washers
Turn your work inside out to access the protruding posts. Take a safety washer and identify which side is slightly domed and which is flat. The flat side should face your crochet fabric, with the domed side facing outward toward the post tip.
Slide the washer onto the post. Press down firmly with your thumbs until you feel and hear a click as the washer passes over the ridges. The washer must click past at least one ridge to stay secure.
For stubborn washers, place the eye face-down on a folded towel on a hard surface. Press the washer from inside using a thimble to protect your finger. You can also use an empty thread spool placed over the post, pressing down on the spool rim to distribute pressure evenly. The washer should sit flush against the fabric with no gap between them.
Pro Tips for Difficult Installations
Larger safety eyes (15mm and above) require significantly more pressure to attach washers. Use pliers with a protective cloth wrapped around the washer if hand pressure proves insufficient. Apply steady, even pressure rather than sudden force to avoid cracking the plastic washer.
For extra-tight crochet fabric made with thin yarn, consider inserting eyes before completing the piece. Attach safety eyes after crocheting the round where they belong but before continuing with subsequent rounds. This gives you better access and leverage.
If a washer won't click into place despite firm pressure, check that you're using the matching washer size. Washers and eye posts are not always interchangeable between brands. The post ridges must align with the washer's inner grip mechanism. Store your safety eyes with their original washers to avoid mismatches.
Troubleshooting and Ensuring Eye Security
Even experienced crafters encounter issues when working with safety eyes. Problems with washer fit, eye placement, and removal require specific techniques to resolve without damaging your work.
Dealing With Tight or Loose Washers
A tight washer that won't seat properly typically indicates you need to enlarge the stitch opening before insertion. Use progressively larger crochet hooks to gently work the hole wider without distorting the fabric. Insert each hook between the stitches where you plan to attach safety eyes, rotating it slightly to create space.
Loose washers fail to grip the backing stem securely and can pop off during handling or stuffing. This usually means the washer size doesn't match your safety eyes. Check that your washers correspond to the millimeter size of your eyes. If the fit remains loose, you may need to replace the entire eye-and-washer set with properly matched components.
For marginally loose washers, you can add a tiny drop of fabric glue to the stem before pushing the washer on. Apply the glue sparingly to avoid it seeping through to the right side of your work.
Correcting Misaligned or Misplaced Eyes
Misaligned eyes throw off the entire appearance of your amigurumi. Before you attach safety eyes with their washers, insert both eyes and view your piece from multiple angles. Count the stitch gaps between eyes to ensure symmetry. Most patterns specify the exact number of stitches between and above/below eyes.
If one eye sits higher than the other, count the rows from a reference point like the start of the round. The eyes should align horizontally unless your pattern deliberately creates an asymmetrical expression.
Mark the correct positions with stitch markers or pins before committing to the washer attachment. This extra step prevents the frustration of discovering alignment issues after the washers are secured.
Removing and Replacing Safety Eyes
Safety eyes earn their name from their resistance to removal, making extraction difficult once washers are attached. To remove them, you need to cut away the plastic washer. Use small scissors or wire cutters to carefully snip the washer's inner ring while protecting the fabric underneath.
Never pull the eye out forcefully as this enlarges the stitch hole permanently. Work the scissors between the washer and fabric, cutting the washer in sections until it releases from the stem.
After removal, the stretched stitches may leave a visible gap. You can gently work the surrounding stitches back into shape with your fingers or a crochet hook. In some cases, you may need to work a few reinforcing stitches from the inside to close the gap before inserting replacement eyes.
Testing for a Child-Safe Finish
Safety eyes pose choking hazards for children under three years old despite their secure-sounding name. After you attach safety eyes and complete your project, perform a pull test on each eye. Grip the eye firmly and pull with significant force. The eye should not budge or show any movement.
Check the washer from the inside to confirm it sits flush against the fabric with no gaps. A properly secured safety washer should be difficult to remove even with tools.
For toys intended for young children or pets, skip safety eyes entirely. Embroider eyes using yarn in a satin stitch or French knot technique instead. These stitched alternatives eliminate choking risks while still creating expressive faces for your amigurumi.
Best Practices for Projects for Children and Alternatives
When creating amigurumi for young children, standard safety eyes may pose choking hazards despite their name. Different age groups require different eye attachment methods, and several safer alternatives exist for toys intended for babies and toddlers.
Age-Appropriate Use of Safety Eyes
Safety eyes work well for children ages 3 and older who are past the stage of putting objects in their mouths. The locking washers must fit extremely tightly on the peg—if you can remove the washer by hand, it's too loose and presents a choking risk.
Always check that the safety washer clicks into place multiple times on the ridged peg. You should not be able to wiggle either the eye or the washer once properly secured. Test the attachment by pulling firmly on the eye from the outside of your amigurumi.
For projects destined as gifts, consider the child's developmental stage. Never use safety eyes for infants or toddlers under 3 years old. Include care labels on your finished pieces indicating the appropriate age range based on your eye attachment method.
Using Felt or Embroidered Eyes for Safety
Embroidered eyes eliminate all choking hazards and provide the safest option for infant toys. Use black embroidery floss or yarn to stitch simple circles, ovals, or more detailed eye designs directly onto your crocheted surface.
Felt eyes offer another completely safe alternative. Cut circles from black or colored felt and secure them with tight stitches around the perimeter. Layer different colored felt pieces to create pupils and highlights for more expressive faces.
Both methods allow you to add eyes after stuffing is complete. Embroider through both layers of fabric to ensure durability, keeping stitches small and tight to prevent any loose threads.
Securing Eyes for Maximum Durability
Position safety eyes before adding the final stuffing to your amigurumi. Insert the peg between stitches rather than piercing through yarn fibers to maintain the integrity of your crochet work.
Use a safety eye jig and soft mallet if the washer proves difficult to attach by hand. This tool holds the washer steady while you tap the eye peg through with controlled force. Avoid hitting too hard as this can crack plastic eyes.
For embroidered alternatives, secure your starting and ending threads by weaving them through multiple stitches inside the piece. Apply fabric glue sparingly to felt eyes before stitching them in place for added security on well-loved toys.


Leave a Reply